Paper Snow Globe Ornaments made with Cricut
How to make keepsake paper snow globe ornaments with Cricut!
Equipment
- Cricut Joy (or Maker, Explore)
Ingredients
- Child's Photo digital copy
- Printable Clear Sticker Paper
- Cardstock White and silver
- Black Permanent Vinyl
- Ribbon
- Tape
- Snowflake confetti
Instructions
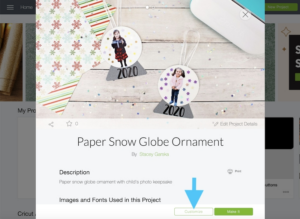
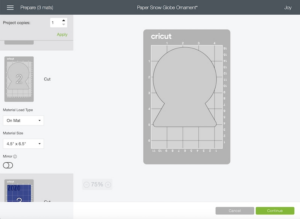
- Open project in Design Space by clicking "Customize"
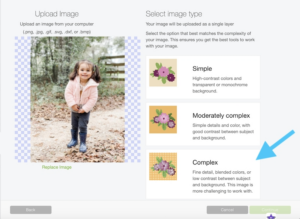
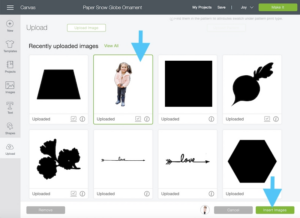
- Click "Upload" to add your child's photo.
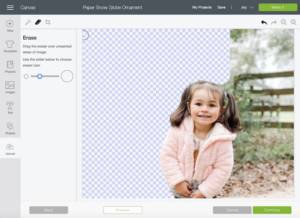
- If you have not already removed the background in a photo editor, you can do so in Cricut. Click "complex" image to get started.
- Use eraser tool to remove the photo background. Save.
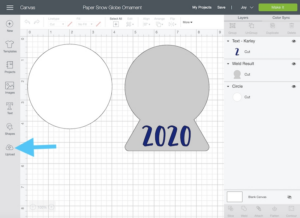
- Click on child's image and insert into your project.
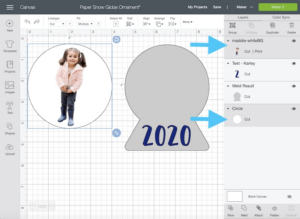
- Resize the child's image to fit within the white circle on the canvas.

- Command-Click on child’s image and circle and select “attach” and “flatten” in layer menu.
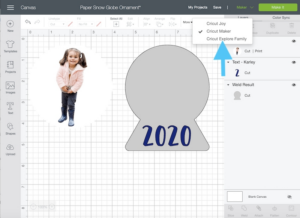
- For the print and cut portion of this project, if you have a Joy you will have to pretend you're using another machine to workaround the error message that says Joy is not compatible with print and cut projects. Set machine to either “Maker” or “Explore” but NOT Joy. We will switch to Joy later if that's what machine you're using.
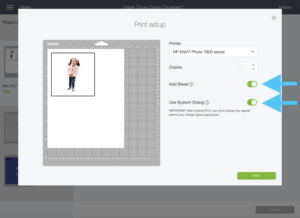
- Load clear sticker paper in your color printer and click "Make it" green button in top right ofthe screen.
- Click “Send to printer” and select “Use system dialogue” to make sure printer settings are correct. Make sure “add bleed” is checked so you’ll have the black box as your guide. Print.
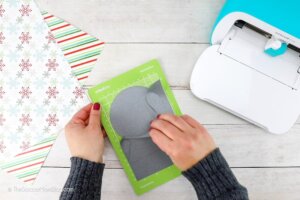
- After it prints and dries, use paper cutter and trim along the black box.

- Cancel the cut. This will take you back to the project canvas. Exit the design without saving.
- Open the project again by clicking "customize." Child’s image should be gone. That’s good!
- Switch your machine to Joy (if that's what you're using). If using another machine, make sure it is selected.
- Load the printed sticker paper onto your joy mat. Cheat it about 1/8-1/4” over the top line of the mat. This should align it perfectly within the circle that the Joy will cut. If using Maker or Explore, load normally.
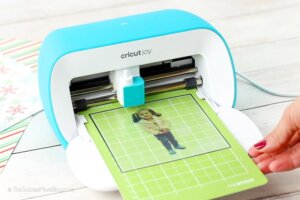
- If using Joy, set material as“deluxe paper” and switch pressure from “Default” to “More.” If using Maker or Explore, you can set material as clear printable sticker paper. Click GO to cut.
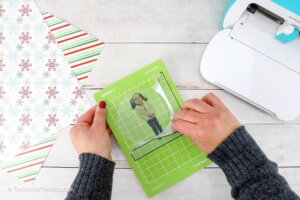
- Once cut is done, click “unload” in design space and remove the sticker paper from mat.
- Place white cardstock on mat (trimmed to fit if using Joy).
- Click on the circle (Mat 1) and choose “cardstock” as material. Set pressure to “more.”
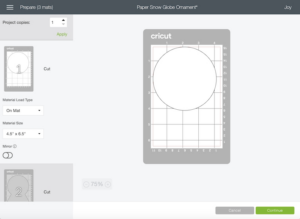
- Load mat into joy and press “Go” — this is cutting the same circle shape again, so it will match your sticker.
- When this is done, unload and make sure to click on Mat 2, which is the snow globe. Load silver cardstock on Joy mat. Make sure “cardstock” is material and pressure is “more.” Load in machine and click “go.”
- Unload and remove from mat.
- Load vinyl for numbers on mat. Click on Mat 3 and Select which material you’re using. Load mat in machine and click “Go.”
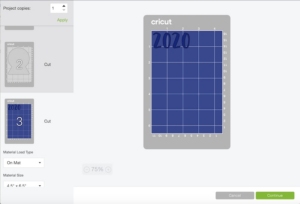
- Unload mat and remove numbers. You're done with the Design Space part of the project.

Assembling the Snow Globe
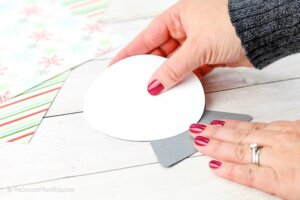
- Glue white cardstock circle on silver snow globe base.
- Apply snow flake confetti to the adhesive side of the sticker paper, around the child's photo.
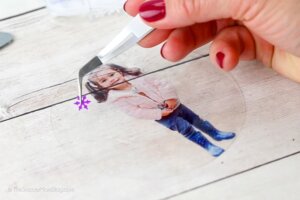
- Carefully place the clear sticker paper on top of the white cardstock circle.

- Remove backing from the numbers and stick to the snow globe base.

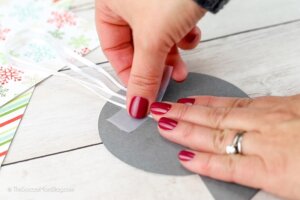
- Use tape to secure a ribbon loop to the back of ornament.