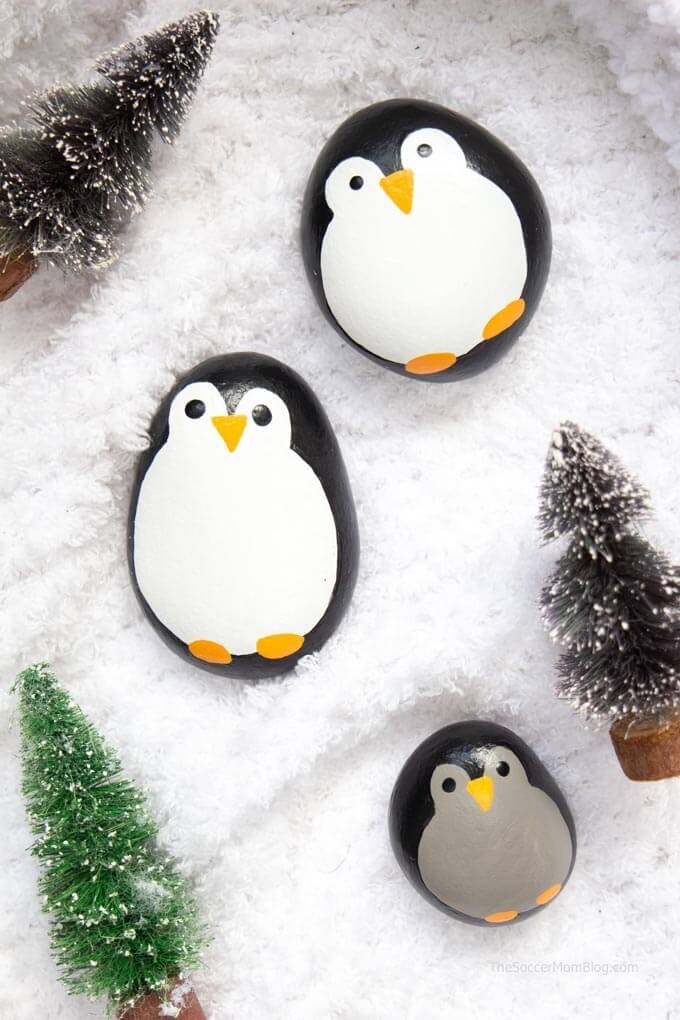
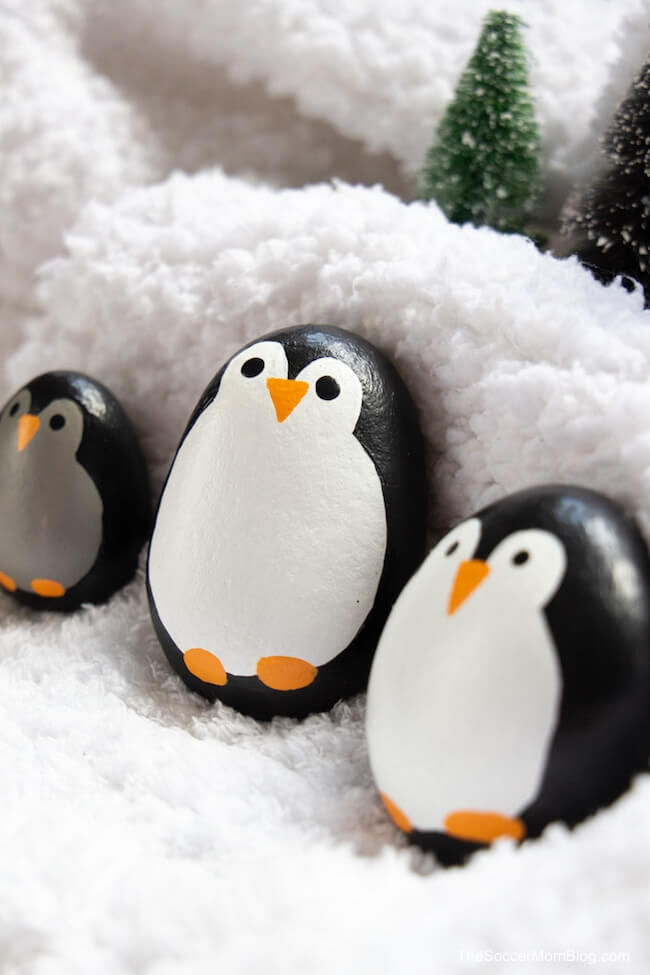
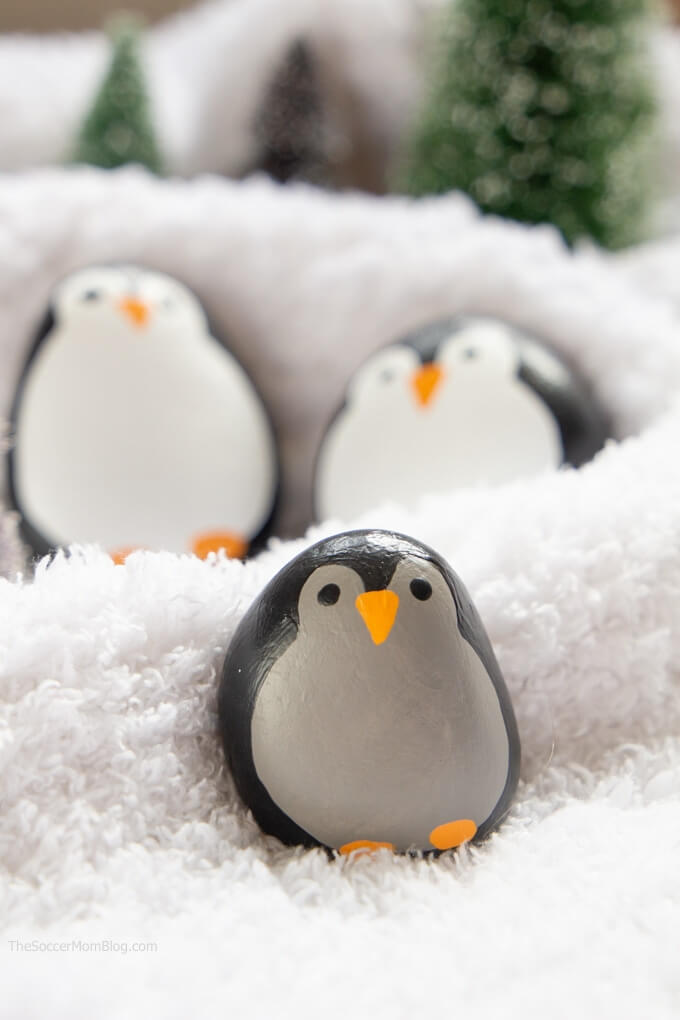
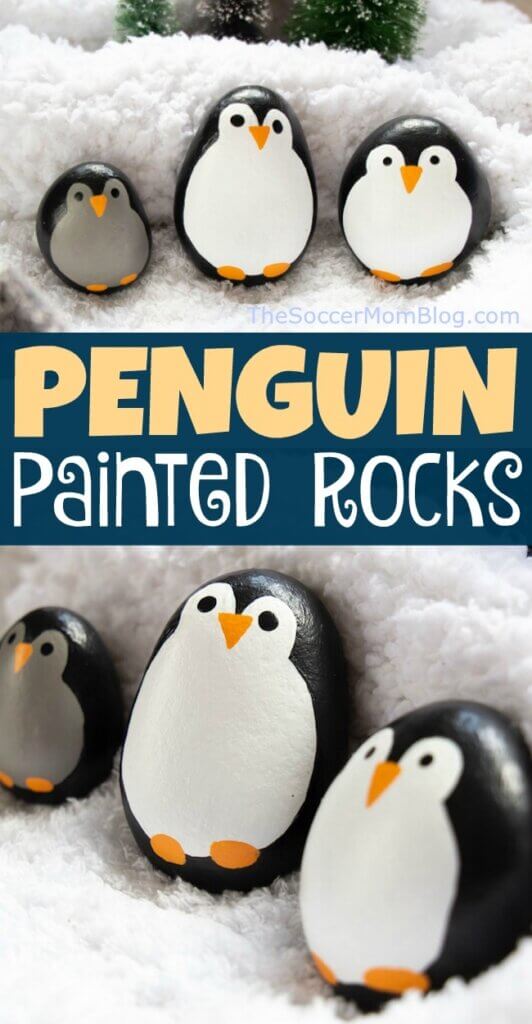
This adorable family of Penguin Painted Rocks are one of our favorite winter painted rock ideas and an easy kids craft for all ages! They make a uniquely cute Christmas painted rocks set too!
Penguin Rocks
We moved to a new house over the summer and there are two big rock gardens on the property, full of smooth flat stones. To make it our own, we’ve been painting some of the rocks and adding lots of color to the otherwise plain rock gardens.
These penguin painted rocks are one of my personal favorite winter rock painting ideas! Using rocks of different sizes, you can make an little family of penguin rocks. So cute and easy!
Painting rocks is a soothing activity and it’s a good craft to do with kids of multiple ages. I like this penguin design because it is simple enough for small kids and you only need a few different colors of paint.
Use these penguin painted rocks as part of a winter theme or as unique and easy Christmas painted rocks, if you’re looking for something different than the usual Santa or reindeer, etc.
Related: For another clever winter craft, check out our Christmas lights snow globes too!
What You Need to Make Winter Painted Rocks
Note: I’ve included affiliate links for your convenience in finding supplies used to make these easy Christmas painted rocks; disclosure policy available here.
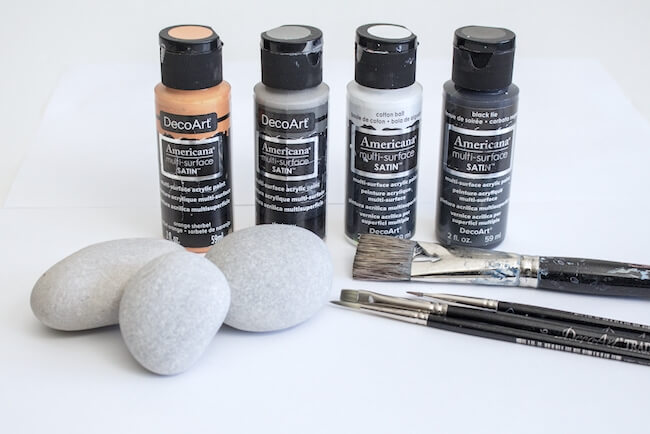
- Multi-Surface Satin Acrylic Paint in Black Tie
- Multi-Surface Satin Acrylic Paint in Steel Grey
- Multi-Surface Satin Acrylic Paint in Cotton Ball
- Multi-Surface Satin Acrylic Paint in Orange Sherbet
- Paintbrushes – ½” flat paintbrush and angled fine tip paintbrush
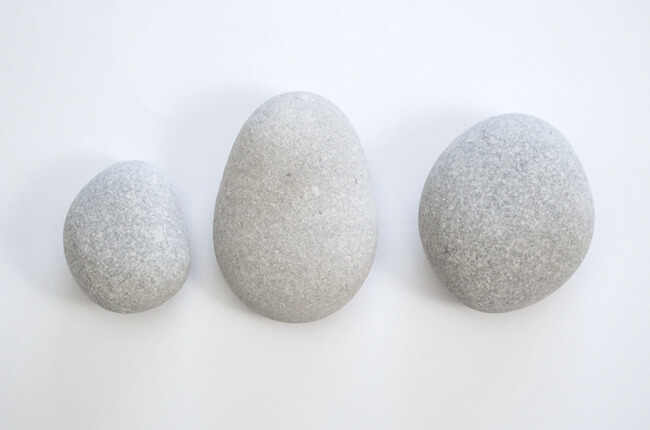
- Set of 3 rocks (largest rock to measure 3” long), all in differing shapes and sizes and all with a smooth surface
TIP: If you don’t have access to rocks that are ideal for painting, this set of river rocks available on Amazon are just the right size and a smooth shape.
What Can You Do With Painted Rocks?
Painted rocks make lovely garden decorations! We’ve made quite a few just to brighten up our own yard. Just be sure they are in a place that won’t be in the way of a lawnmower!
Another option is to hide your rocks around your neighborhood or at a local school, park, etc. for someone else to find. This has become quite the phenomenon, with people all around the world creating beautiful designs and hiding them about, simply to surprise and delight a stranger!
What to Do if You Find a Painted Rock
On the other hand, if you’re out and about and you find a painted rock, consider this your lucky day!
What I would suggest is to look on social media for a painted rock group or rock hunt group in your area. (If you’re not already a member of one). You might be surprised that even small towns often have such clubs!
Take a picture of the rock you found and post it to the group. That way if the person who hid the rock is a member, they’ll see that someone found it.
Now you can either keep the rock, or re-hide it for someone else to find. It’s up to you!
You can also swap the rock with one of your own creations.
Does Acrylic Paint Wash Off Rocks?
With the right prep work (don’t worry…it’s pretty simple!) and quality acrylic paint, your creations should last for a long time!
Here are a few tips for preparing your rocks for painting and ensuring that the work lasts:
- Wash and dry rocks completely before painting.
- If there are any rough spots, smooth with sandpaper. I rarely have to do this though.
- Allow the paint to fully dry between each step and anytime you switch paint colors.
- You may need to use a double or triple coat of paint to achieve desired coverage.
- Use a sealant for extra protection.
How to Paint Rocks to Look Like Penguins
Printable instructions are available at the bottom of the post, below the photo step-by-step guide.
Be sure to start with washed, dry rocks.
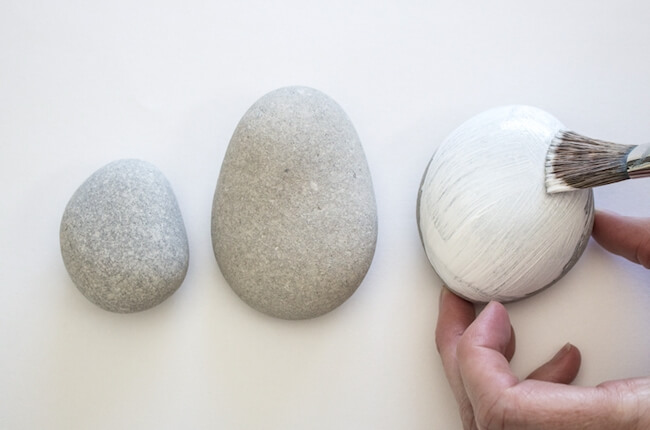
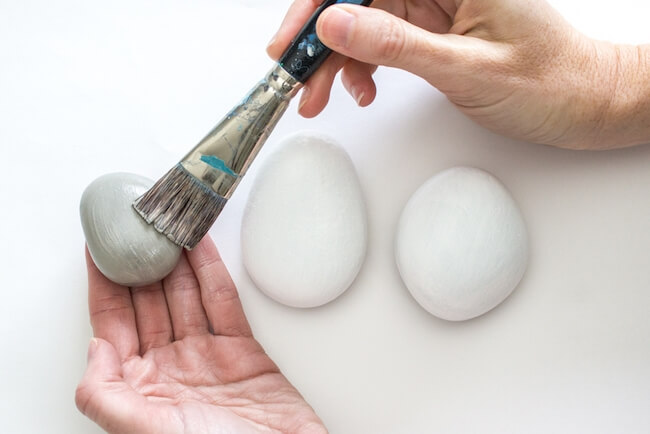
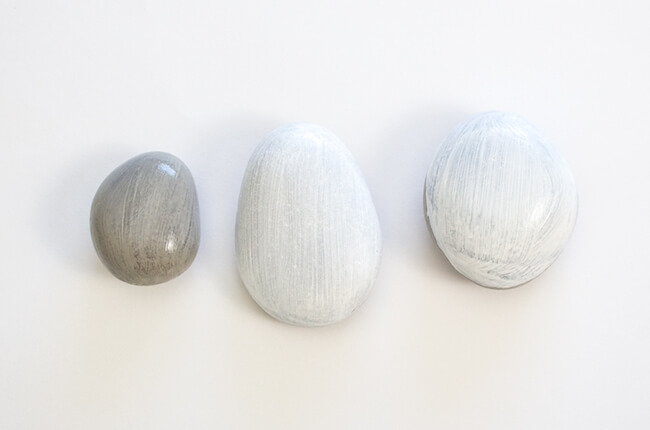
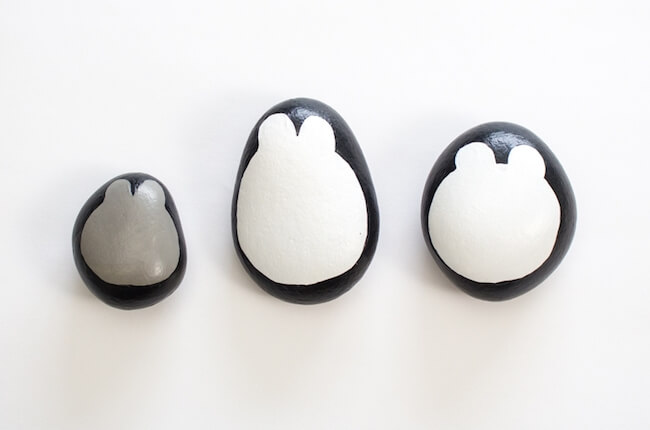
Using a flat paintbrush (1/2″ is my favorite size), paint the front side of your rocks in either white or gray. This will be the color of the penguin’s belly. You don’t need to paint the backside of the rock yet, as that will be a different color.
Using a fine-tip paintbrush, paint the outer shape of the penguin in dark black, as shown. Leave the belly white or gray.
When the outline is dry, paint the back side of the rock black too. Allow to dry before flipping the rock back over to paint the face.
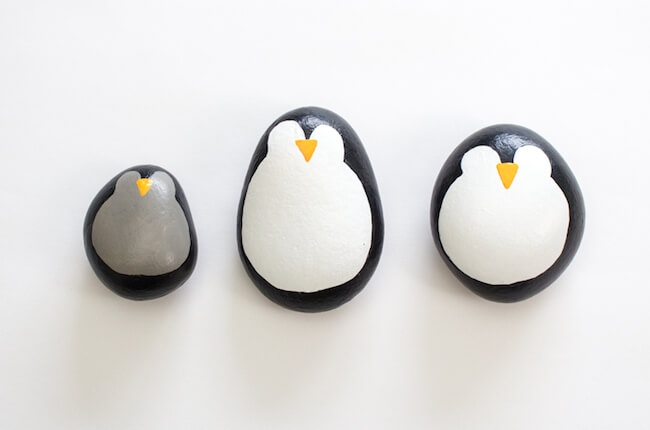
Using a fine-tip paintbrush and orange paint, make a small upside-down triangle for the beak.
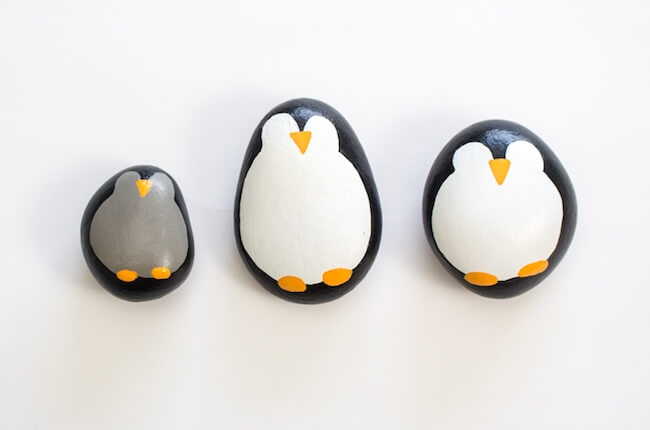
Paint two small oval shapes with orange paint to make the penguin’s feet.
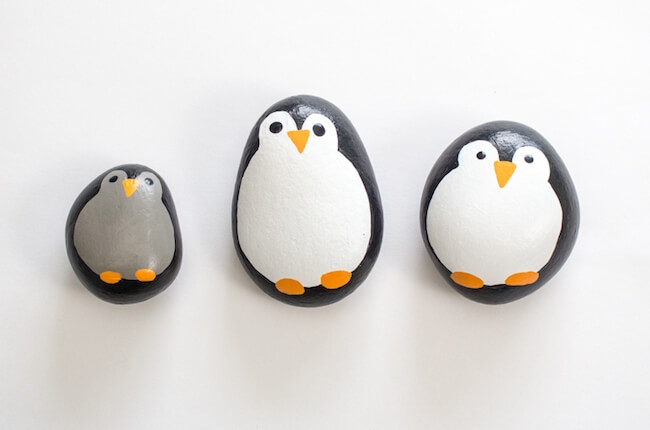
Finally, dip the back end of your fine tip paintbrush in the black paint and dab it onto the rocks to make little round eyes.
Ta-da! You now have a family of cute little penguin painted rocks! Allow paint to dry completely, then finish with sealant if desired.
Grab a free printable copy of our Penguin Painted Rocks craft!
Want to Save This Recipe?
Enter your email & I'll send it to your inbox. Plus, get great new recipes from me every week!
By submitting this form, you consent to receive emails from The Soccer Mom Blog
Penguin Painted Rocks
Equipment
- 1/2" Flat Paintbrush
- Angled Fine-Tip Paintbrush
Ingredients
- 3 Rocks differest sizes, with a smooth surface
- 1 bottle Multi-Surface Satin Paint in Black Tie
- 1 bottle Multi-Surface Satin Paint in Steel Grey
- 1 bottle Multi-Surface Satin Paint in Cotton Ball
- 1 bottle Multi-Surface Satin Paint in Orange Sherbert
Instructions
- Use a flat-tipped paintbrush to paint the top side of the two bigger rocks in Cotton Ball (white), and the one smaller rock in Steel Grey.
- Using an angled fine-tip paintbrush, paint the outline of the penguin, leaving the belly white (or grey in the smaller rock).
- When happy with the shape, cover the rest of the perimeter and backside of the rocks in black paint.
- Using a fine-tip paintbrush, paint a small upside-down triangle in orange to make the beak.
- Paint two small oblong shapes at the base of the penguin's belly to make the feet.
- Dip the back end of your fine tip paintbrush in black paint and dab it on to the rocks to make eyes.
Video
Notes
- Protect your work surface with a sheet of newspaper or parchment paper.
- Wash the rocks and let them dry completely before painting.
- Allow the paint to fully dry between steps and when changing to a new color.
- Repeat with as many coats as needed to achieve desired coverage.
Pin this Penguin Painted Rocks craft on Pinterest:
You might also like:
- Marshmallow Playdough - April 18, 2024
- Homemade Fruit Leather Recipe - April 17, 2024
- 7-Layer Dip Cups - April 16, 2024




Sheryl says
My first attempt at rock painting ever and it turned out super cute! ❤️ Thanks Stacey for your clear instructions and pictures – they helped so much!
Stacey aka the Soccer Mom says
I’m so glad you loved this craft! thank you for letting me know!