
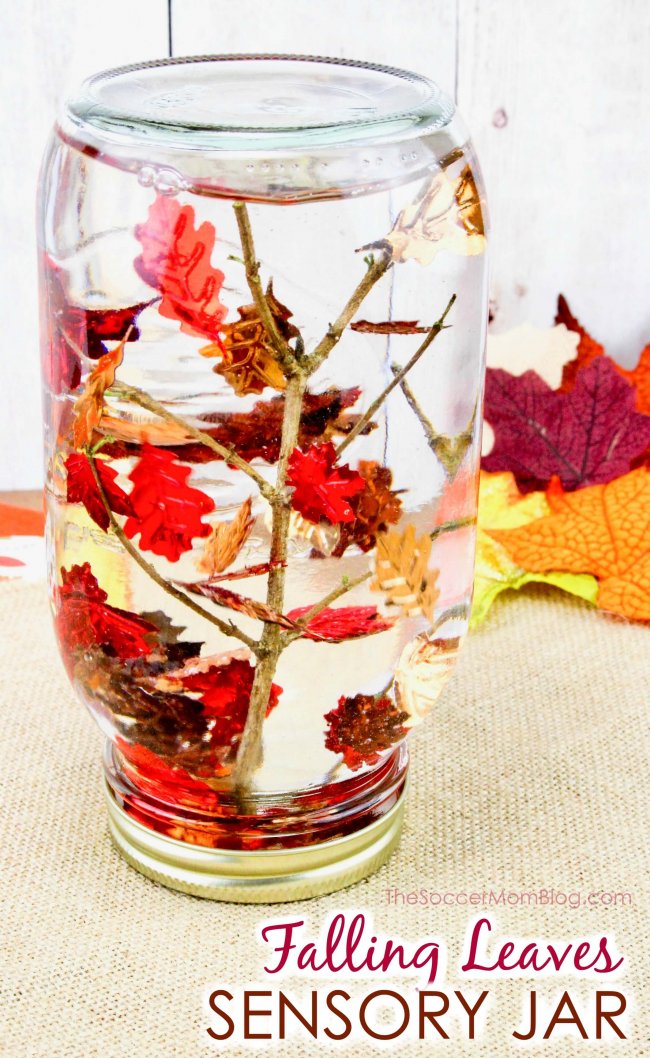
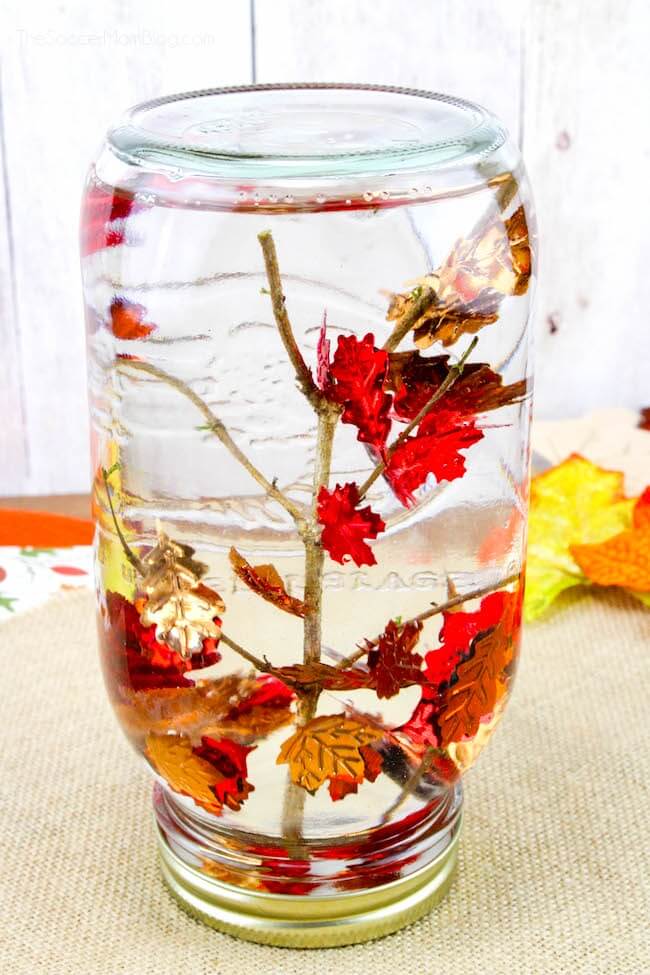
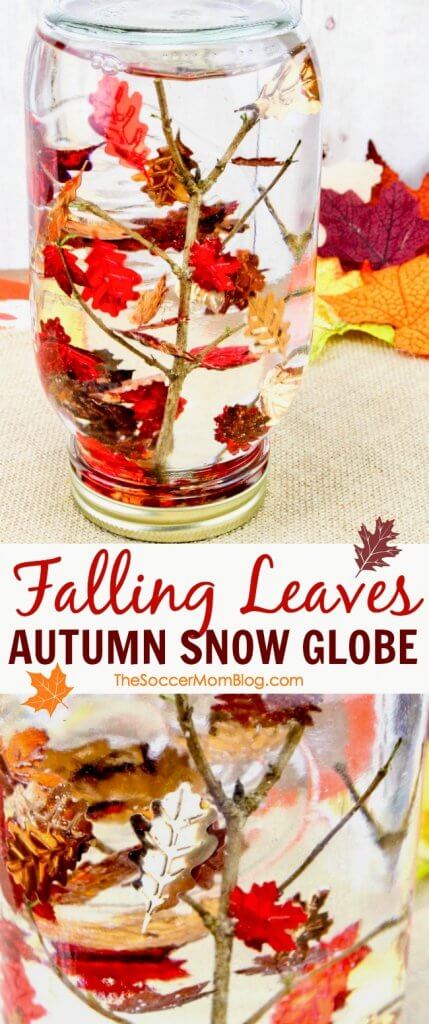
Fall Snow Globe
Shake up some autumn magic with a DIY Fall Snow Globe, with sparkling confetti that swirls like leaves on a breeze!
Fall Snow Globe Kids Craft
Who says snow globes are just for winter?
Actually, I wasn’t sure what to call this project at first – which is essentially a snow globe, but with falling leaves instead of snow.
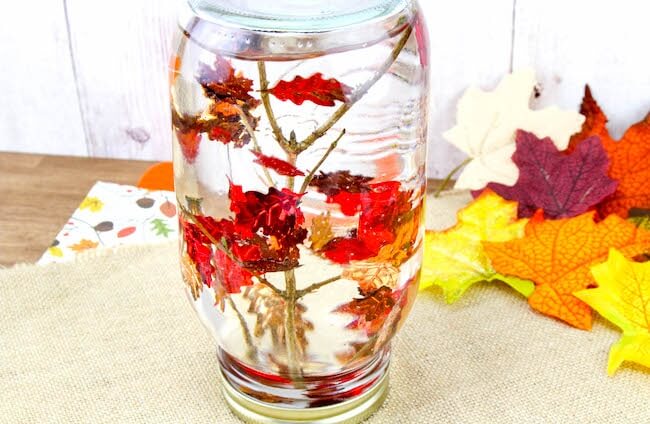
You can use it as a Fall Sensory Bottle (if making for little kids you may choose to use a plastic container for safety purposes). You can also use it as a cute seasonal decoration, a Fall Snow Globe.
No matter what you use it for or what you call it, this falling leaves jar is super cute! And it’s super easy to make!
We’ve made a couple different sensory bottles for Halloween:
However, I thought it would be fun to share a non-spooky sensory bottle that’s perfect for the entire Fall season! Just look at the gorgeous glittery foil leaves:
What is a Sensory Bottle?
My friend Nell, who blogs at Rhythms of Play, is known for her extensive collection of sensory bottle ideas. She explains that sensory bottles are a “calming tool for anxious children with sensory needs and sensitivities, and kids that need help with self-regulation skills.” (See more of Nell’s sensory bottle tips here!)
Sensory bottles and snow globes can be useful for both kids and adults alike! Here are just a few of the ways to use sensory bottles:
- Calm-down tool
- Meditation
- Mess-free play
- Kids craft idea
- Holiday or themed activity (like our Falling Leaves Sensory Bottle here)
I have to admit, there is something so soothing about watching a sensory bottle in action — like these shiny foil leaves swirling. They’re relaxing!
The best part is that anyone can make them with only basic crafting supplies!
Supply List
For your convenience in re-creating this craft, I’ve included shop-able ad links to some of the products used; full disclosure policy available here.
- Large Mason Jar
- Glycerin
- Fall Foil Leaf Confetti
- Tree Branch (from your backyard)
- Hot Glue Gun
- Water
Video Demo:
Instructions
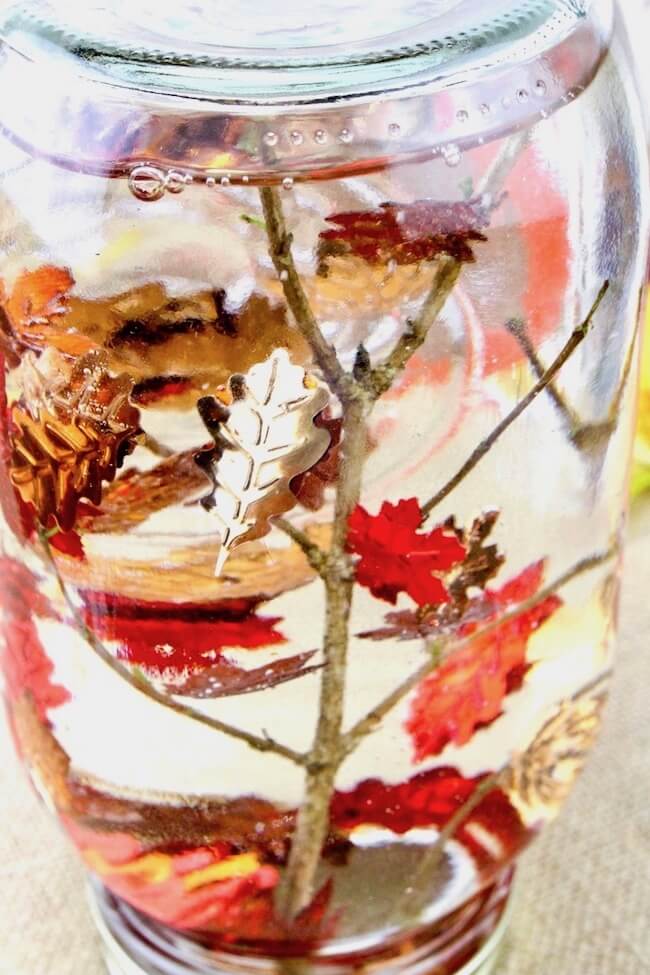
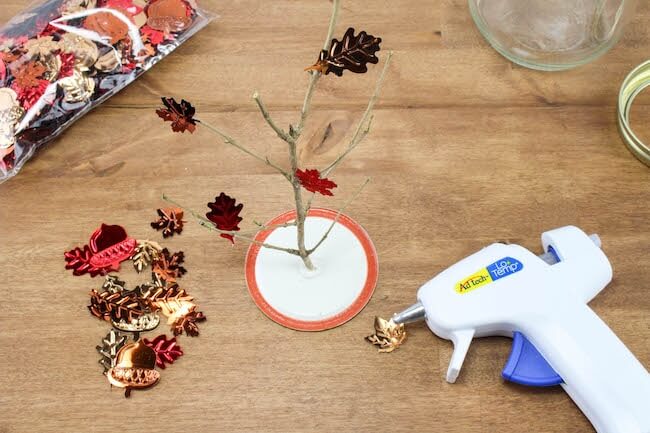
Collect a small tree branch from your yard. Make sure it’s clean, without peeling pieces of bark that might cloud up your bottle.
Trim the tree branch to fit inside your mason jar. Test to make sure that it fits (with the lid closed) before attaching with glue.
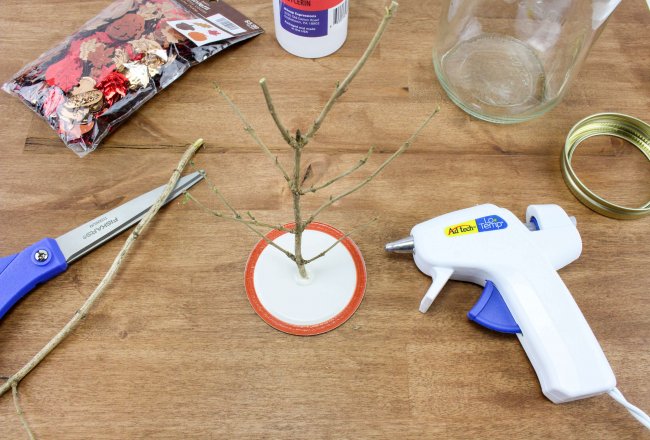
Once you have the size you need then add a generous drop of hot glue on the middle of the bottom side of your mason jar lid. Stand your tree branch in the middle of the glue and hold until it is set.
Glue a few leaves to the tree branches and allow to set until all the glue is completely dry.
Fill mason jar with water (if using a quart jar this will be about 4 cups), then add the glycerin (I used a little over ½ cup).
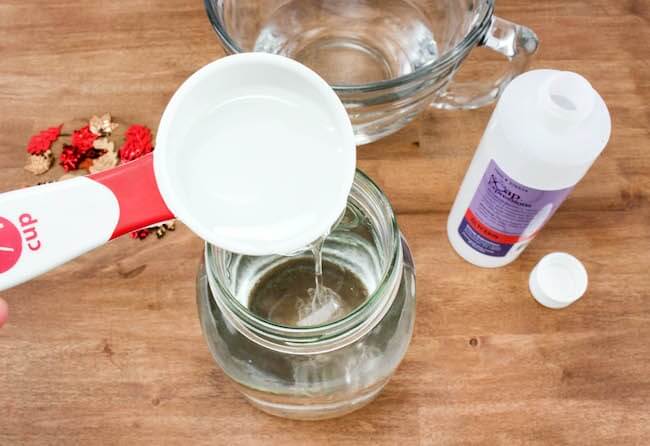
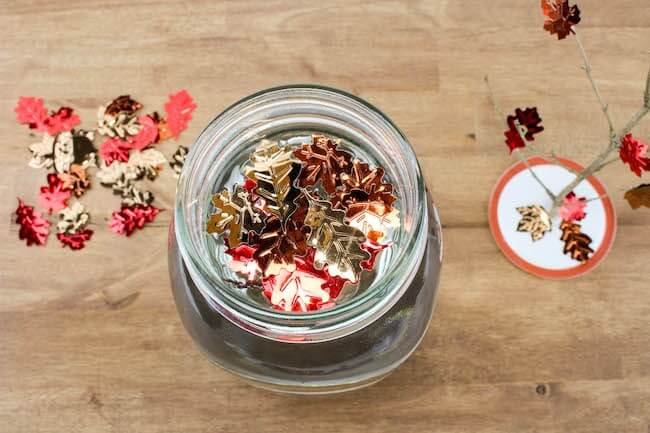
Mix with a spoon then add a bunch of the confetti to the jar. Swirl around with a spoon and if the confetti immediately sinks to the bottom then add a bit more glycerin. The glycerin is what makes the leaves fall slowly.
Place the tree branch carefully down into the water and twist the lid on very tight.
TIP: If you’re sure that you’ve got your Falling Leaves Snow Globe just right, you can glue the lid shut to prevent leaks.
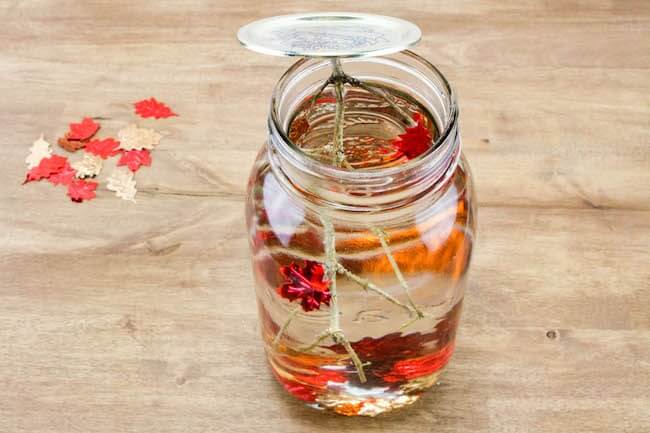
Have fun watching the leaves fall!
More Fall Crafts To Try
Fall Sensory Jar Printable Directions
Want to Save This Recipe?
Enter your email & I'll send it to your inbox. Plus, get great new recipes from me every week!
By submitting this form, you consent to receive emails from The Soccer Mom Blog
Fall Snow Globe Craft
Ingredients
- Large Mason Jar
- Glycerin
- Fall Foil Leaf Confetti
- Tree Branch from your backyard
- Hot Glue Gun
- Water
Instructions
- Collect a small tree branch or twig from your yard. Make sure it's clean, without peeling pieces of bark that might cloud up your bottle.
- Trim the tree branch to fit inside your mason jar. Test to make sure that it fits (with the lid closebefore attaching with glue.
- Once you have the size you need then add a generous drop of hot glue on the middle of the bottom side of your mason jar lid. Place your tree branch in the middle of the glue and hold until it is set.
- Glue leaves to the twig and allow to set until all the glue is completely dry.
- Fill mason jar about 3/4 of the way with water (if using a quart jar this will be around 3 cups), then add the glycerin (I used a little over ½ cup).
- Stir with a spoon then add a handful of the confetti to the jar. Swirl again with spoon and if the confetti immediately sinks to the bottom then add more glycerin.
- Place the twig carefully down into the water and twist on the lid tightly. You can glue it to make sure it stays in place.
Video
Be sure to pin our Autumn Leaves Sensory Bottle on Pinterest!
You might also like:

- Beach Day Rice Krispie Treats - June 23, 2026
- Pickled Jalapeños Recipe - June 15, 2026
- Homemade Nesquick Mix - June 11, 2026


Looks like lots of fun! Where did you find the glycerin?
Hi Ashley – there is a link to glycerine on Amazon in the supply list. It should also be available in most craft stores. Hope this helps!
Hi Ashley! Thanks for the recipe, it caught my eye on the internet because I have been trying to find an autumn welcome home present for a long time! Unfortunately, I don’t have fall foil leaves and I am looking for a more natural approach. I’ve been thinking about this─could I take outside leaves and easily laminate them instead, or could I just put some outside leaves straight in? I’m looking for a quick response because I am running out of time, ofc you are probably very busy so take your time. Thanks a bunch!
Oopsy daisy! I didn’t mean to write your name as Ashley, sorry Stacey!