
Pop-Up Pumpkin Card Craft
This kid-made pop-up photo pumpkin card makes a cute classroom craft that’s perfect Fall holidays! Free printable pumpkin template inside.

Pop-Up Photo Pumpkin Card for Kids
Let’s be real — nothing is sweeter than getting a card that kids make for you themselves!
Even better when there’s an adorable photo surprise inside!
We’ve started making pop-up cards for every occasion, like our Father’s Day baseball card. Fall is full of our favorite holidays, and this pop-up photo pumpkin card could be used for Halloween, Thanksgiving, or just to say “I love you!”
Paper crafts are one of our favorite types of crafts because they are easy and only require simple, inexpensive supplies. (It doesn’t get more basic than paper!)
You may already have the supplies needed for our Pumpkin Pop-Up Cards on hand, but just in case, I’ve included a full supply list below. There’s also a video tutorial too!
Related: You might also love our quilled paper pumpkin craft – click here for instructions!
Pumpkin Card Supplies
For your convenience in re-creating our pumpkin card, I’ve provided shop-able ad links to some of the products used; disclosure policy available here.
- Free pumpkin card pattern printable (see below)
- Orange & green card stock (8″ x 5.5″)
- Brown paint marker or crayon
- Jumbo wooden craft stick
- Kids photograph
- Scissors
- Pencil
To get access to my free printable library, enter your email address in the form below:

Instructions
First, download and print the free pumpkin card pattern available here.
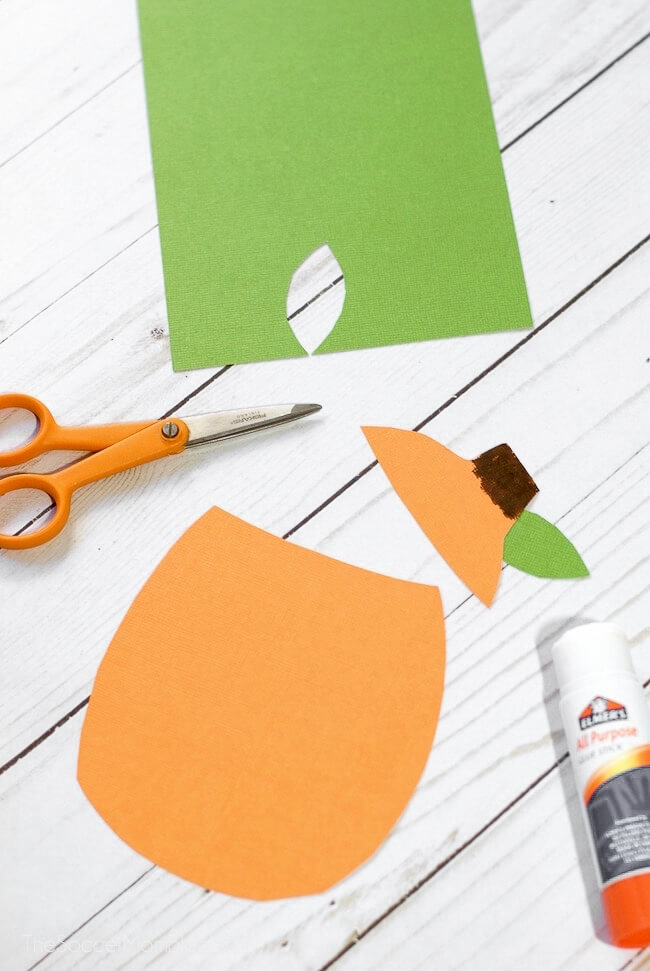
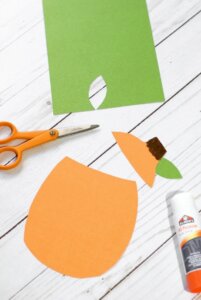
Cut out the pumpkin pattern and trace onto orange card stock. Cut out your pumpkin.
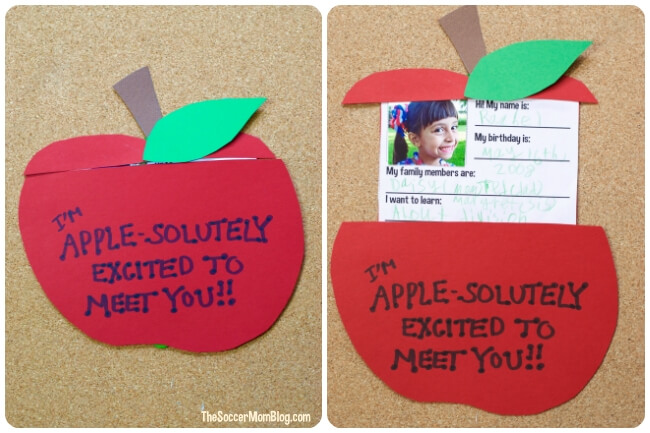
Cut off the top of the pumpkin, about 1 1/2″ down. (Just like you would a real pumpkin that you were going to carve). Cut a leaf shape from green card stock and glue to the lid. Color the stem with brown paint marker or crayon.
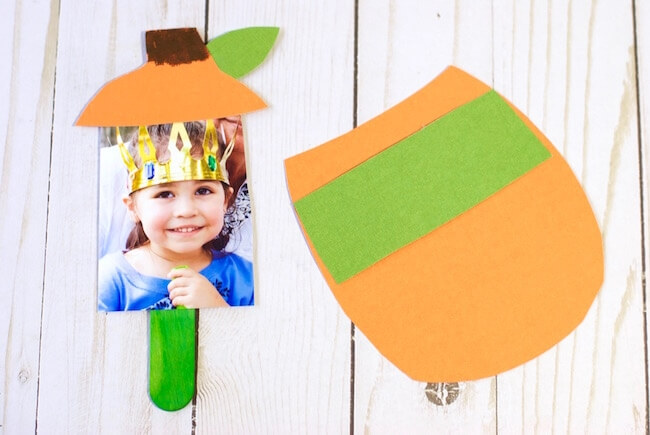
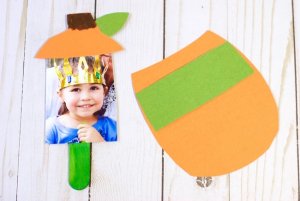
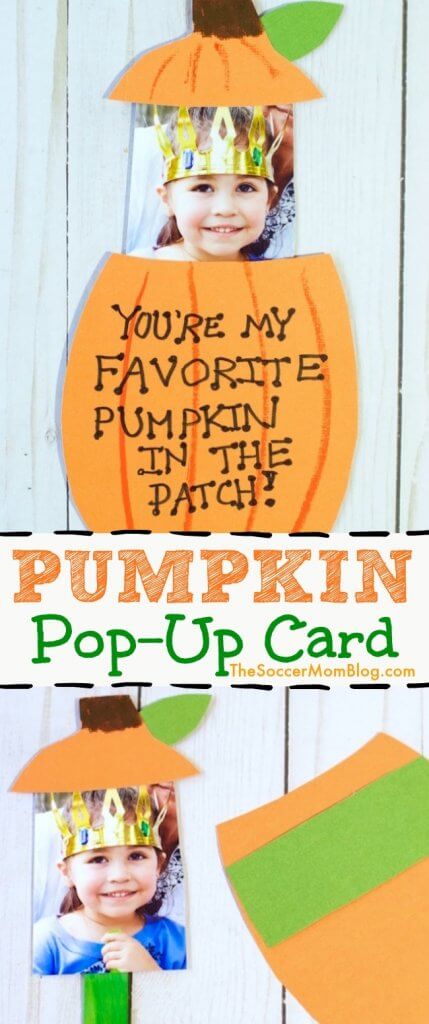
Glue a photograph of your child to the jumbo wooden craft stick, leaving about 1″ space at the top. Trim your photo so it is smaller in width than your pumpkin.
Glue the pumpkin “lid” to the top of your craft stick, just overlapping the top of the photo.
Cut a small strip of your leftover green card stock – as wide as your pumpkin and about 1″ thick. Glue the edges of this paper tab to the back of your pumpkin, about 1″ from the top (where you cut off the “lid”).
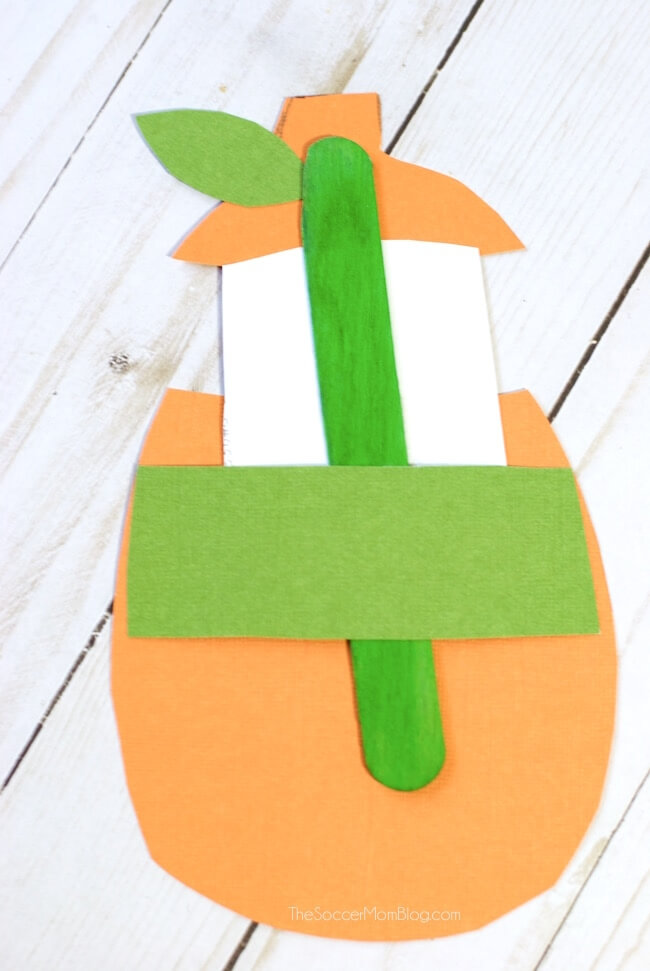
Slide your craft stick with photograph between the back of the pumpkin and this paper tab, so that the lid rests on top of the pumpkin. Trim your photo if necessary to ensure that it fits.
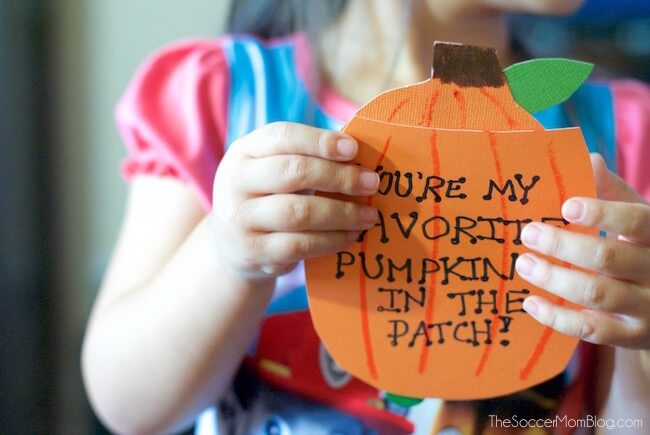
Decorate the front of your pumpkin with a special holiday message. You could even draw a face on the pumpkin to make it a Halloween jack-o-lantern!
Related: See ALL of our favorite Kids Pumpkin Crafts here (there’s more than 70!)
Printable Directions
Want to Save This Recipe?
Enter your email & I'll send it to your inbox. Plus, get great new recipes from me every week!
By submitting this form, you consent to receive emails from The Soccer Mom Blog

Pumpkin Pop-Up Card Craft for Kids
Equipment
- Brown paint marker or crayon
- Scissors
- Pencil
Ingredients
- Orange & green card stock (8" x 5.5")
- Jumbo wooden craft stick
- Kids photograph
Instructions
- First, download and print the free pumpkin card pattern. You can also freehand your own pumpkin.
- Cut out the pumpkin pattern and trace onto orange card stock. Cut out your pumpkin.
- Cut off the top of the pumpkin, about 1 1/2" down. (Just like you would a real pumpkin that you were going to carve). Cut a leaf shape from green card stock and glue to the lid. Color the stem with brown paint marker or crayon.

- Glue a photograph of your child to the jumbo wooden craft stick, leaving about 1" space at the top. Trim your photo so it is smaller in width than your pumpkin.
- Glue the pumpkin "lid" to the top of your craft stick, just overlapping the top of the photo.

- Cut a small strip of your leftover green card stock - as wide as your pumpkin and about 1" thick. Glue the edges of this paper tab to the back of your pumpkin, about 1" from the top (where you cut off the "lid").
- Slide your craft stick with photograph between the back of the pumpkin and this paper tab, so that the lid rests on top of the pumpkin. Trim your photo if necessary to ensure that it fits.
- Decorate the front of your pumpkin with a special holiday message. You could even draw a face on the pumpkin to make it a Halloween jack-o-lantern!

Pin our Pumpkin Card on Pinterest:
You Might Also Like:
Halloween Magnet Faces Activity
More of our favorite kid-made photo pop-up cards:
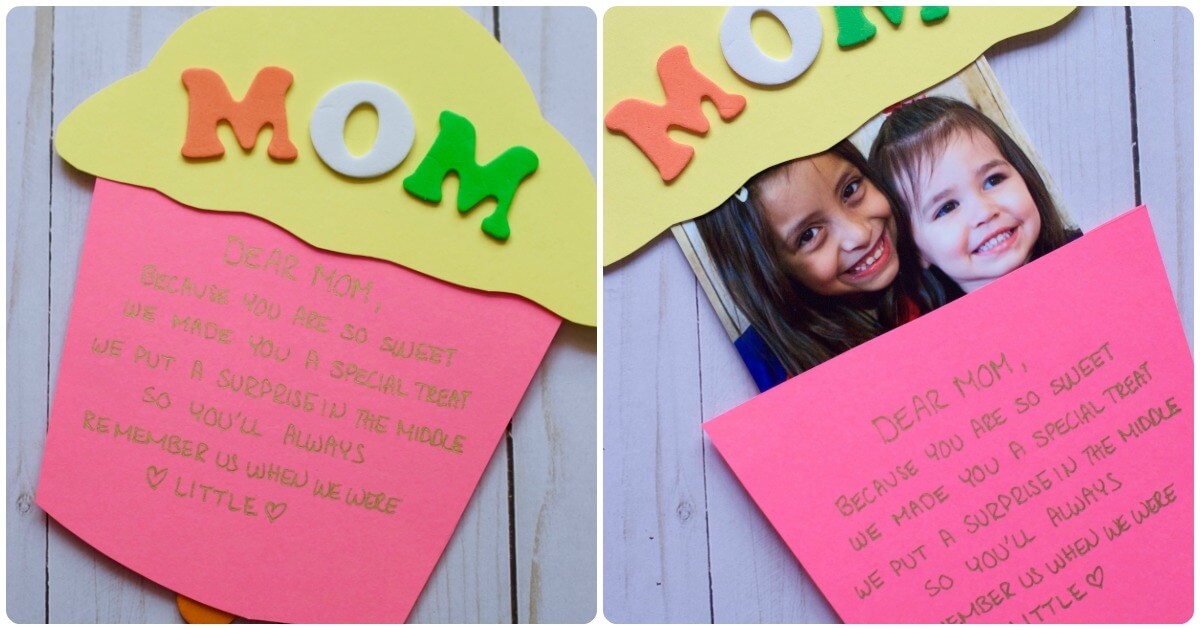
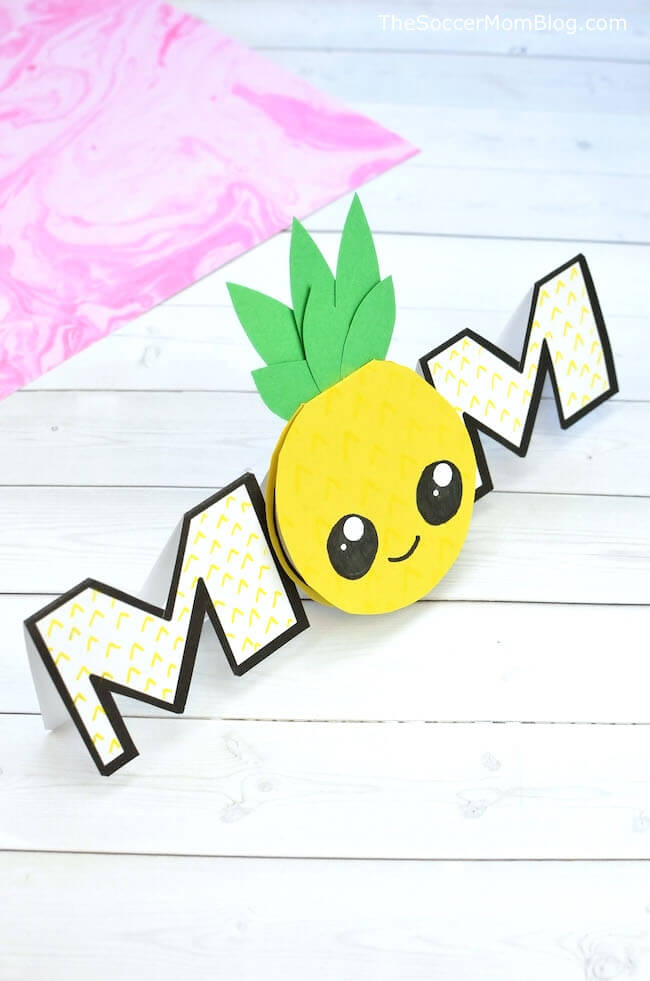
Mother’s Day Cupcake Pop-Up Card

- Beach Day Rice Krispie Treats - June 23, 2026
- Pickled Jalapeños Recipe - June 15, 2026
- Homemade Nesquick Mix - June 11, 2026


Love it.