
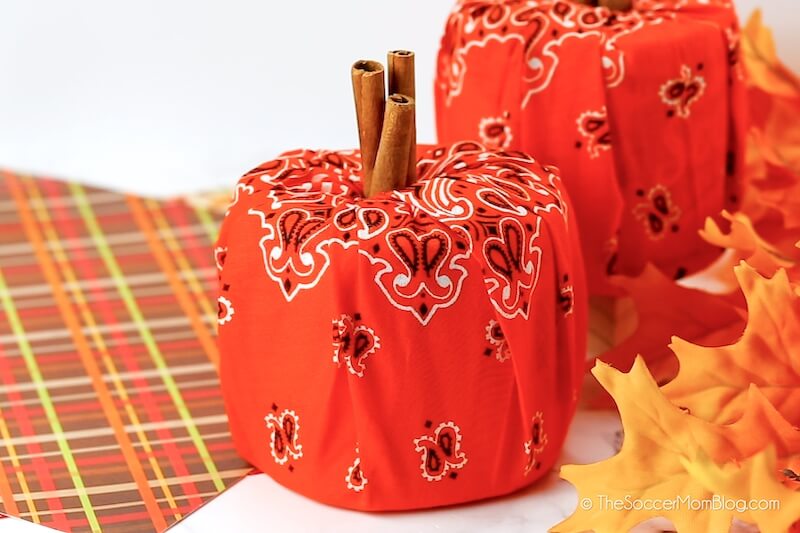
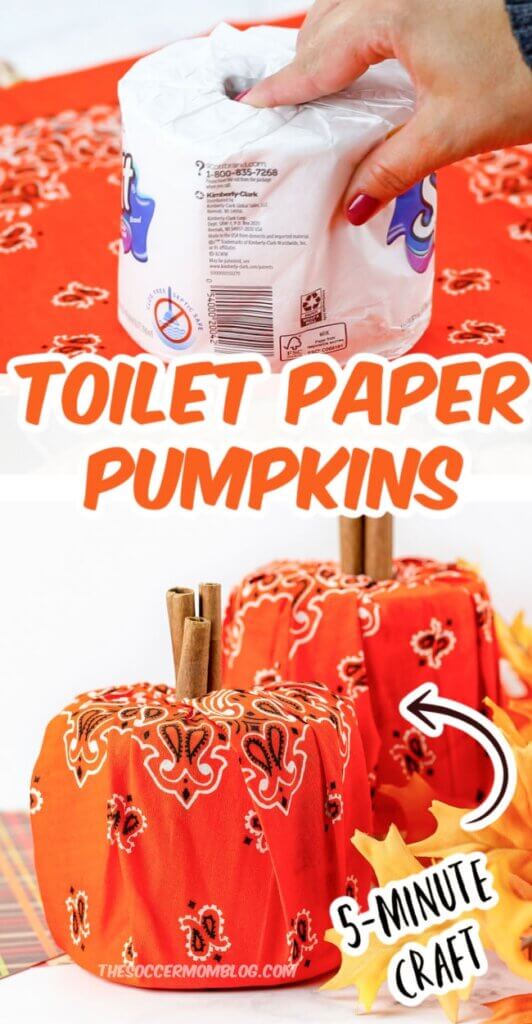
Toilet Paper Pumpkins
Add a touch of farmhouse your fall decor with these cute and easy toilet paper pumpkins! An easy 5-minute craft using a bandana and a roll of TP!
Easy Toilet Paper Pumpkins
We just celebrated one year in our new house in the country! It’s been a dream of mine since childhood to have a place with a few acres, just like my Granny and Grandad. It took a lot of dreaming, praying, working, and saving, but we finally made it happen!
I’ve always loved rustic country decor and it’s been a lot of fun decorating for fall this year. Fall is my favorite season!
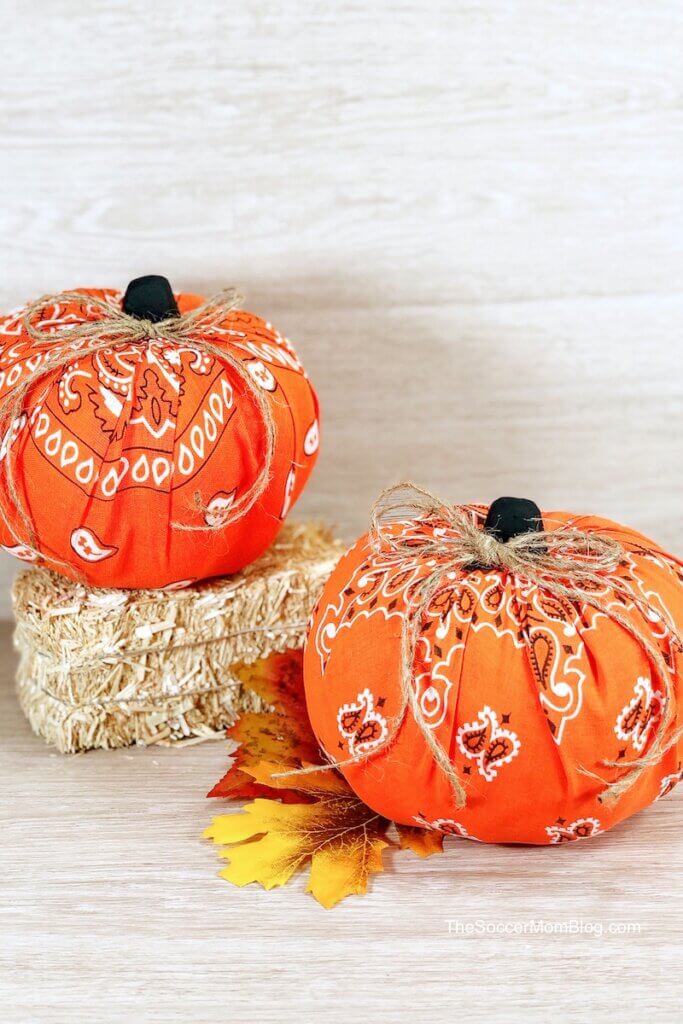
These bandana pumpkins fit in perfectly with our farmhouse front porch! I even found a little miniature straw bale to display with them on top of my Jack Daniels barrel end table.
The best part about this craft is that you can find everything you need to make these pumpkins at the Dollar Store! It’s thrifty and easy and so pretty!
My original version of this project used dollar store foam pumpkins as the base:
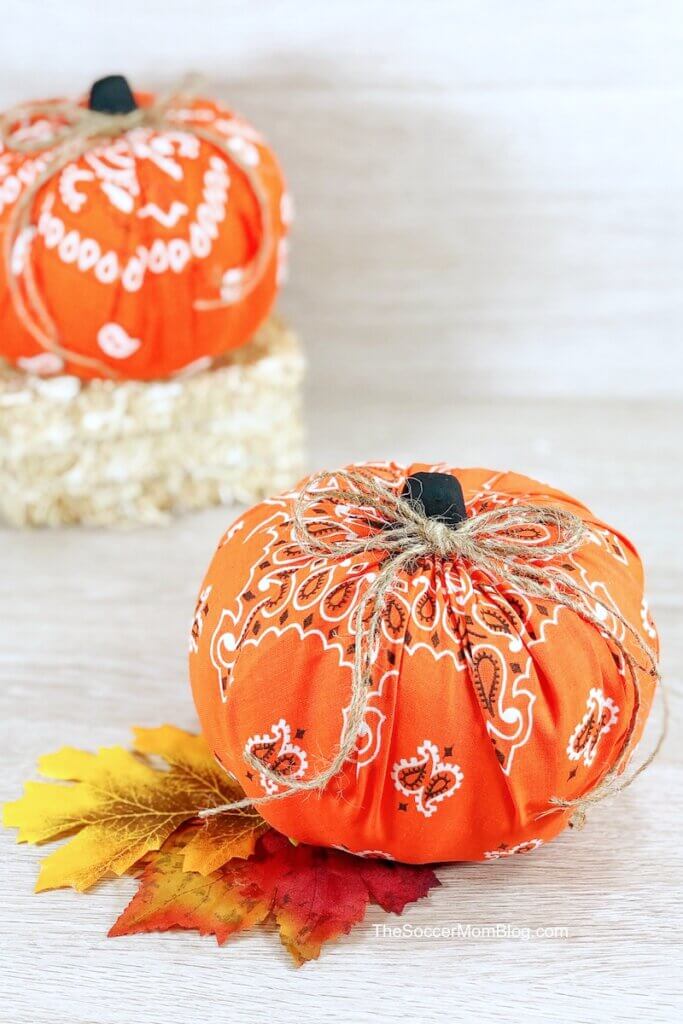
I love how they turned out! The craft foam pumpkins are pretty easy, but it is more of a grown-up craft since I used a paring knife in the process.
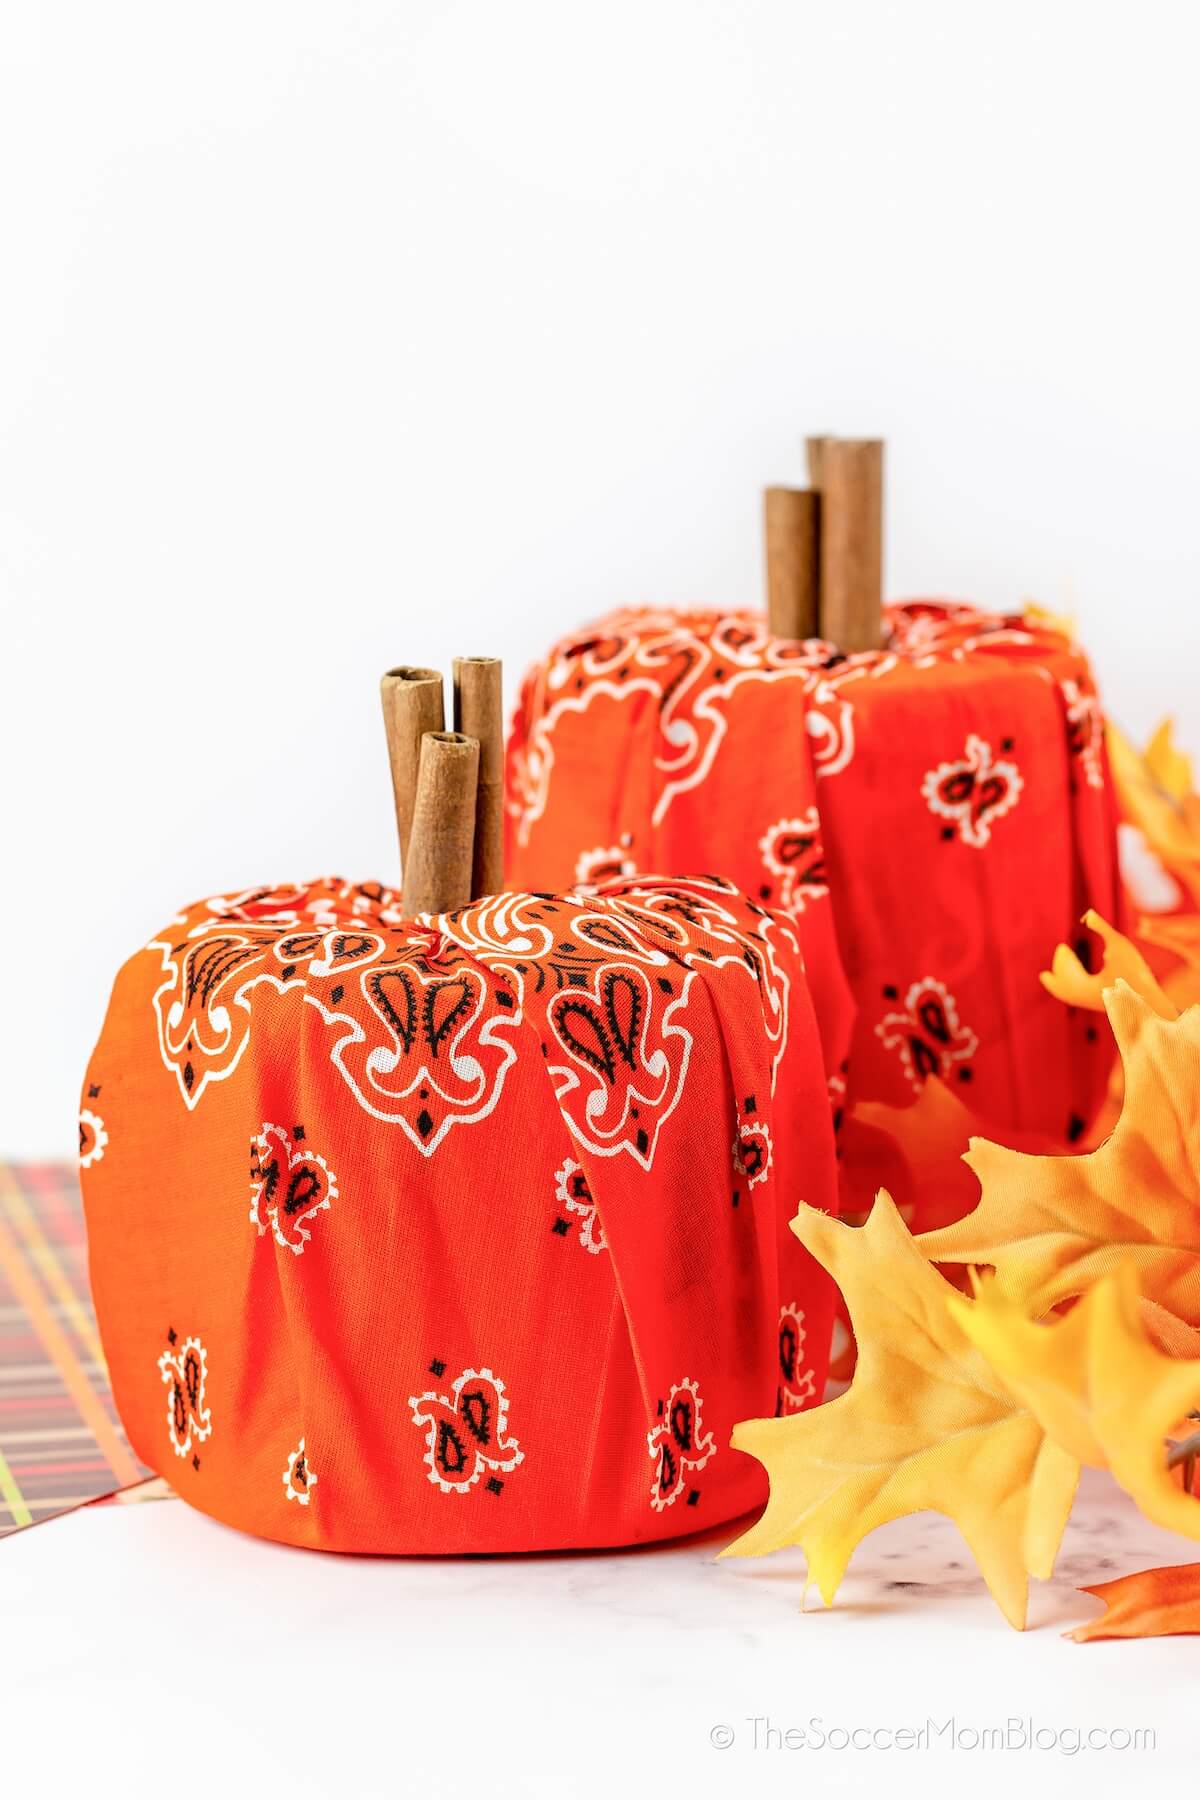
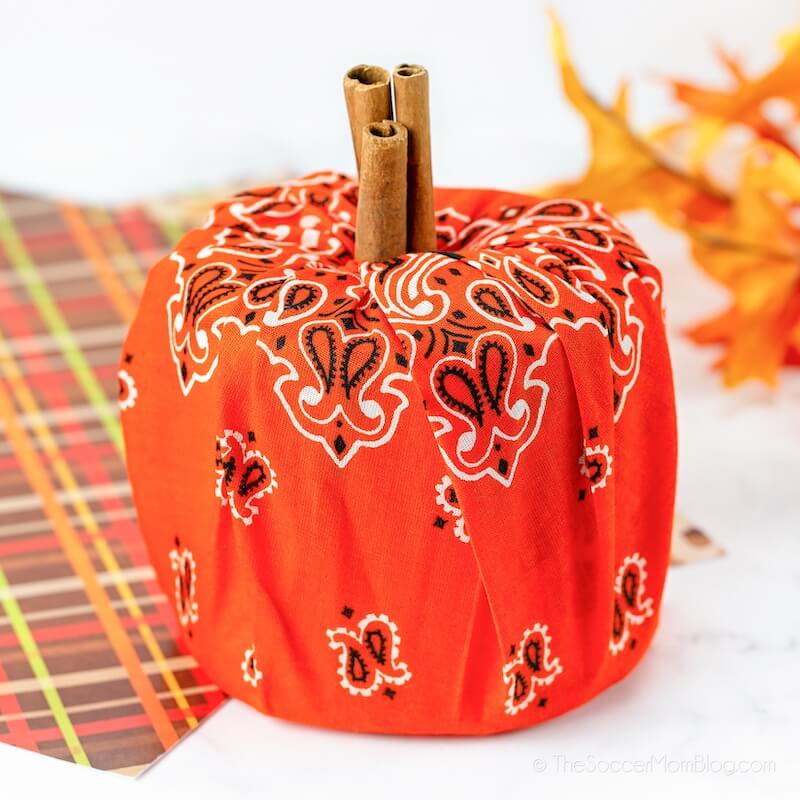
This year I decided to make an even easier version, using toilet paper rolls. I’m kind of obsessed with them!! So cute, so easy, and they smell fantastic too! (Thanks to the cinnamon!)
With pumpkins made out of toilet paper rolls, there’s no cutting or painting required. It’s perfect for kids!
Supply List
Note: I’ve included affiliate links for your convenience in finding supplies used to make this craft; disclosure policy available here.
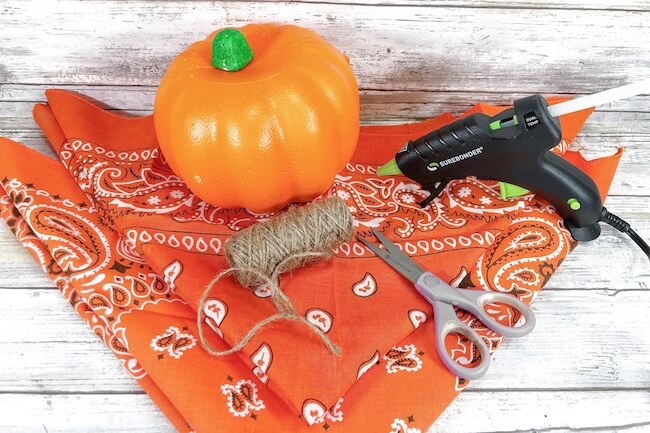
For each pumpkin you’ll need:
- Toilet paper roll
- Orange Bandana
- 2-3 Cinnamon sticks
Instructions – How to Make a Pumpkin out of a Toilet Paper Roll
This is one of the easiest crafts EVER! It only takes about 5 minutes tops…and you really can’t mess up!
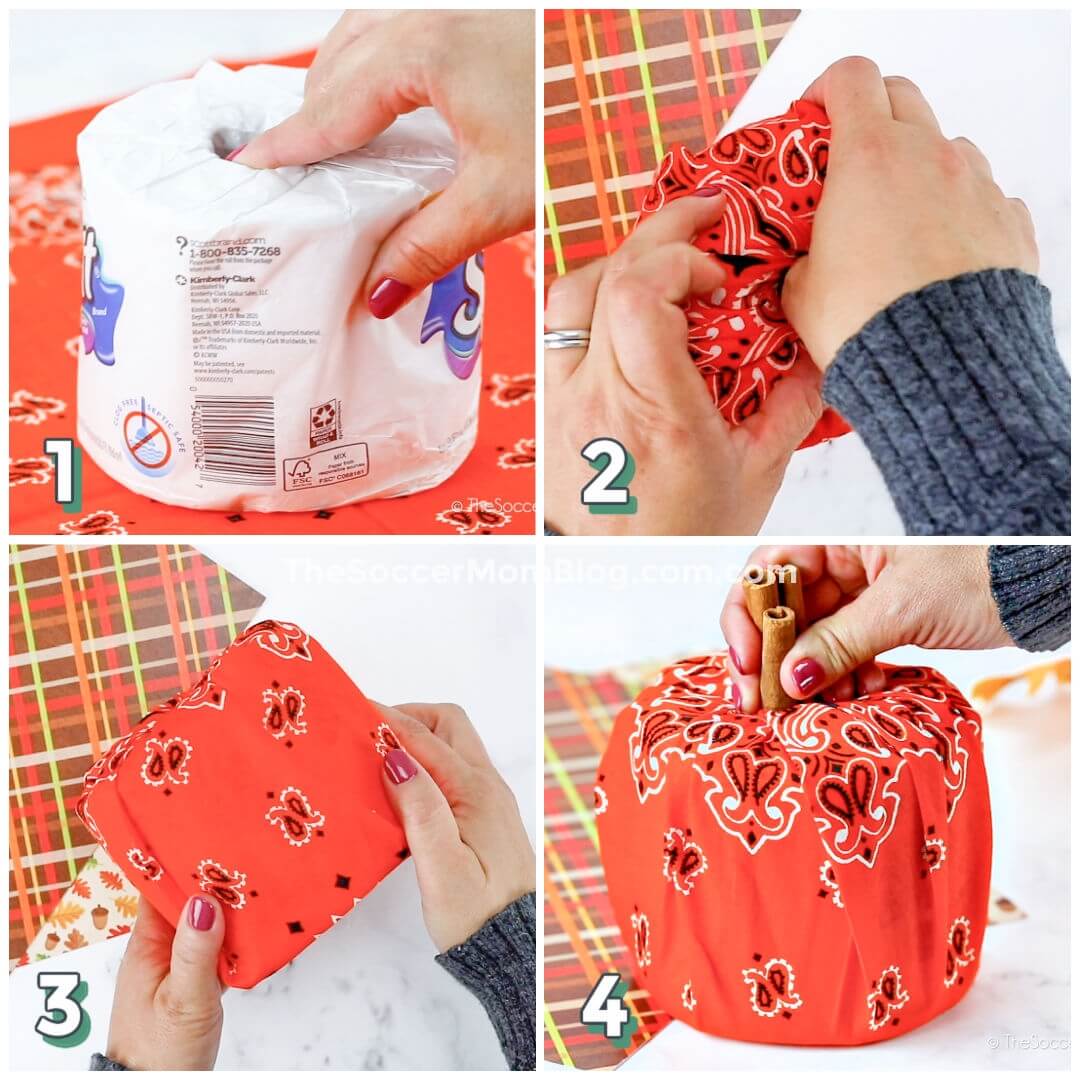
I’ve included a step-by-step photo collage showing how to make toilet paper pumpkins:
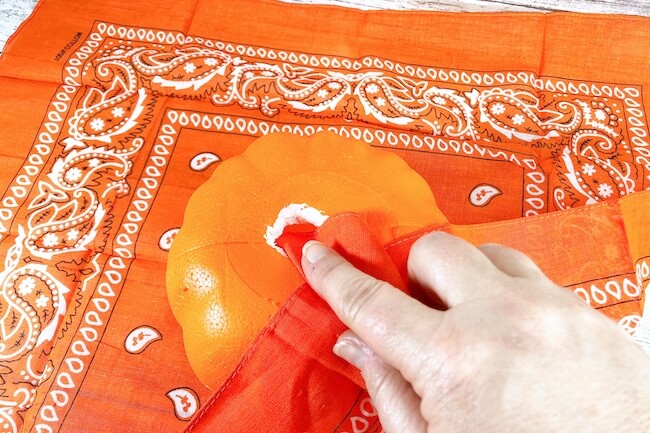
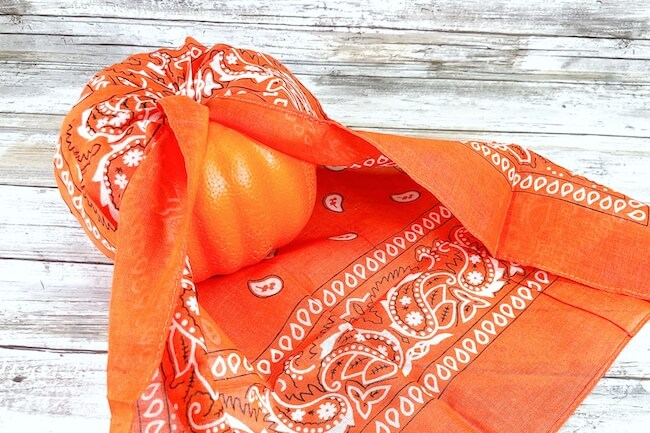
- Spread out bandana and place toilet paper roll in the middle.
- Bring edges of the bandana up over the toilet paper roll.
- Push the excess bandana inside the toilet paper roll opening.
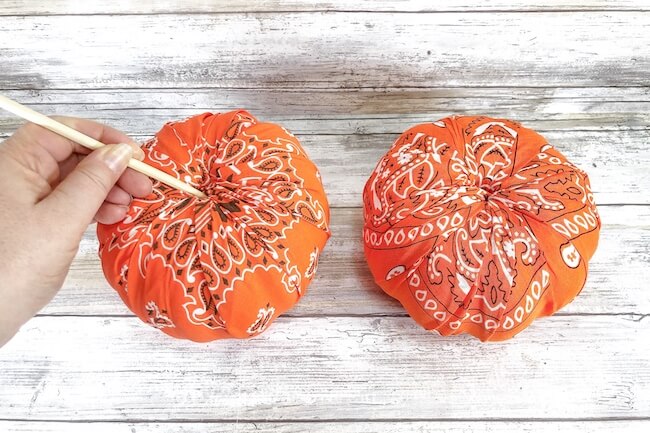
- Place cinnamon sticks in the middle to hold everything in place.
Super easy and SO cute!
If you’d like to see how I made my original bandana pumpkins, using craft foam pumpkins from the dollar store, I’ve included those instructions below. There’s also a video in the printable directions at the bottom of the blog post.
Video Demo:
Supply List for Bandana Pumpkins (Using Foam Pumpkins)
This was the original version of the craft — I love how they looked too, so I’m leaving the directions to make foam pumpkins too.
- Carvable Foam Pumpkins — These a cheap, Dollar Store pumpkins made out of light foam. We need them to be breakable for this craft so we can remove the stem and re-attach it.
- Orange Bandana — You’ll need one bandana for each pumpkin. Feel free to use your favorite fall colors or even black, white, and spooky Halloween colors!
- Twine — This should also be available at the dollar store. You can use any color, but we love the natural “rustic” look.
- Black Craft Paint — For painting the stem.
Craft Tools Used:
- Paintbrush
- Craft scissors
- Craft Knife
- Chopstick or Pencil
- Hot glue gun and glue sticks
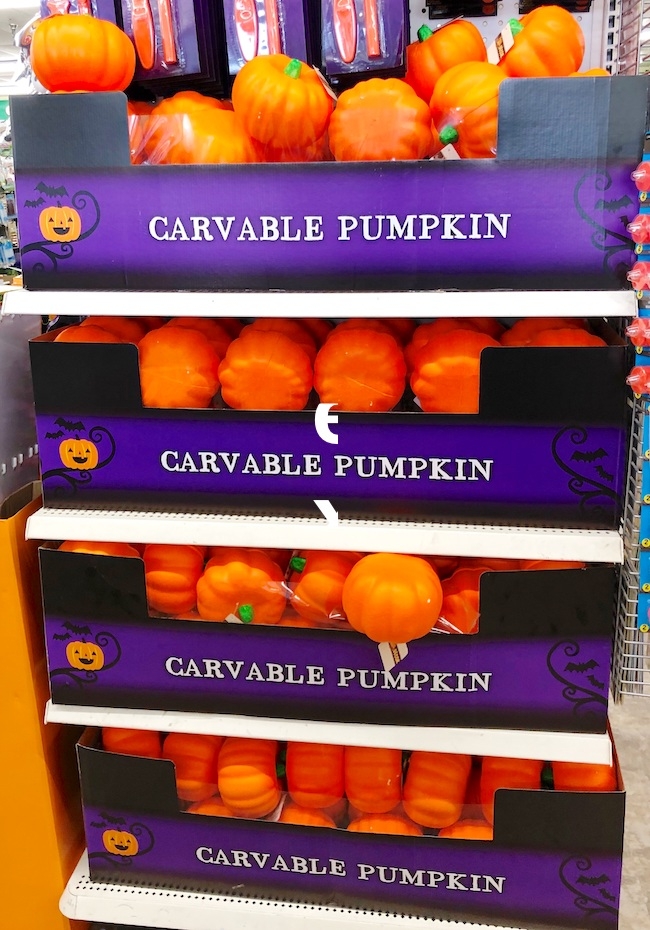
Where do I find carvable foam pumpkins?
The specific type of pumpkins we used in this craft are available in the fall at the Dollar Store or Dollar Tree. The display might vary slightly, but usually looks something like this:
If you’re hoping to avoid in-store shopping this year, they have similar foam pumpkins available on Amazon too. Click here to check them out!
Directions (Using Foam Pumpkins)
Use craft knife to cut out a square around the green foam pumpkin stems to create a hole in the top of each pumpkin.
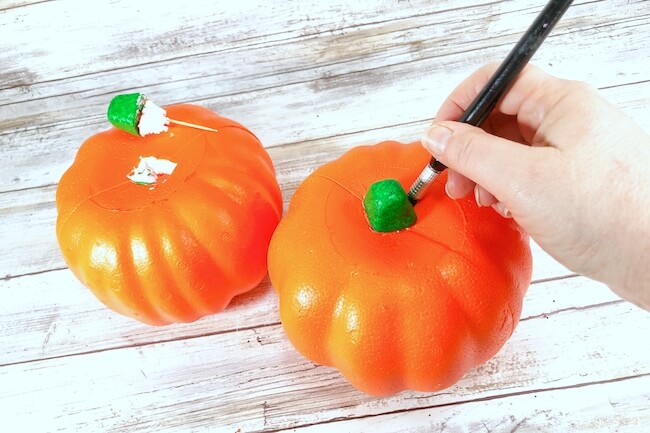
Use craft knife to remove any extra orange foam from the stems. Leave the wooden pick in the stem, as this will help it stay in place when we re-attach.
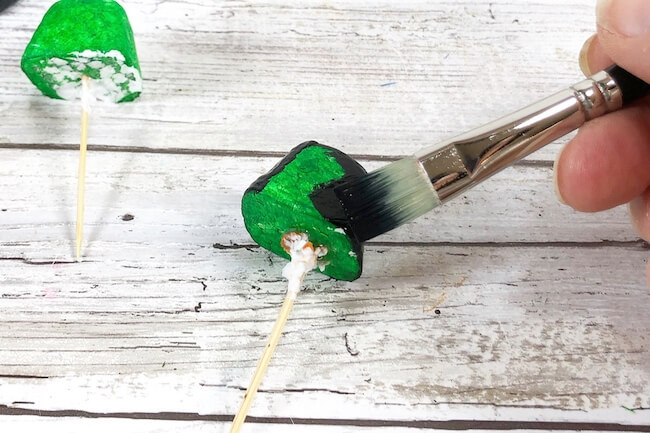
Paint stem black; apply a second coat if needed and let dry.
Spread bandana flat on your workspace. Place the pumpkin in the middle of bandana. Starting at one corner, pull the bandana up to cover the pumpkin and tuck the end of bandana down in the hole where the stem used to be.
Work around the pumpkin, folding the bandana up and over, and tucking it in place, until the entire pumpkin is covered.
Use a chopstick or pencil to push the ends of the bandana further into the hole at the top of your pumpkin, so that everything is taut and secure.
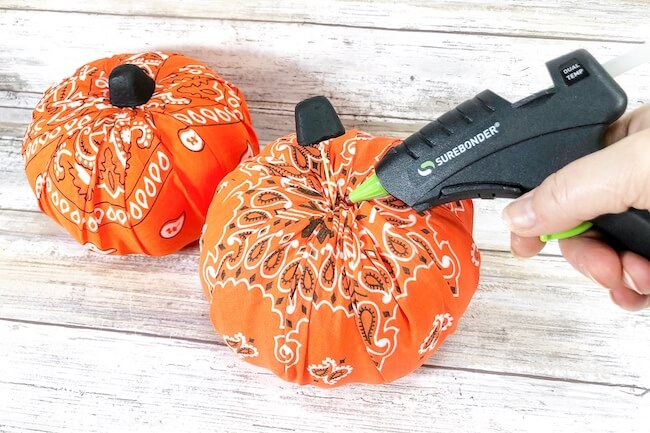
Insert stems into the tops of the foam pumpkins and secure with hot glue.
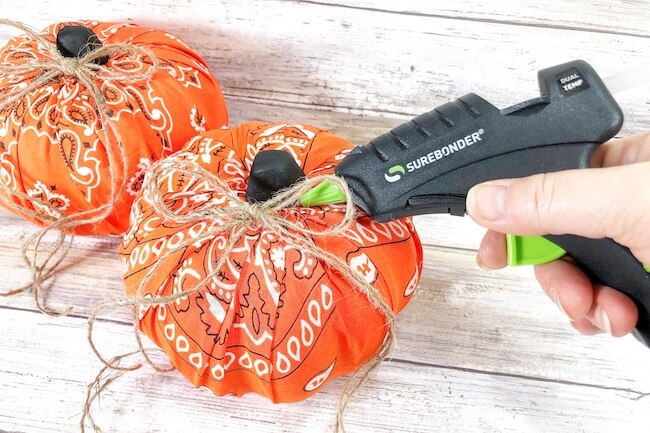
Tie bows using twine and glue the twine bows on top to complete your project.
Can you use another type of pumpkin?
Sure! The main reason we like these foam pumpkins is that it is easy to remove the stem so we can tuck in the bandana.
If you use a hard plastic pumpkin, you may not be able to do this, so even if you use a different pumpkin, look for foam as the material.
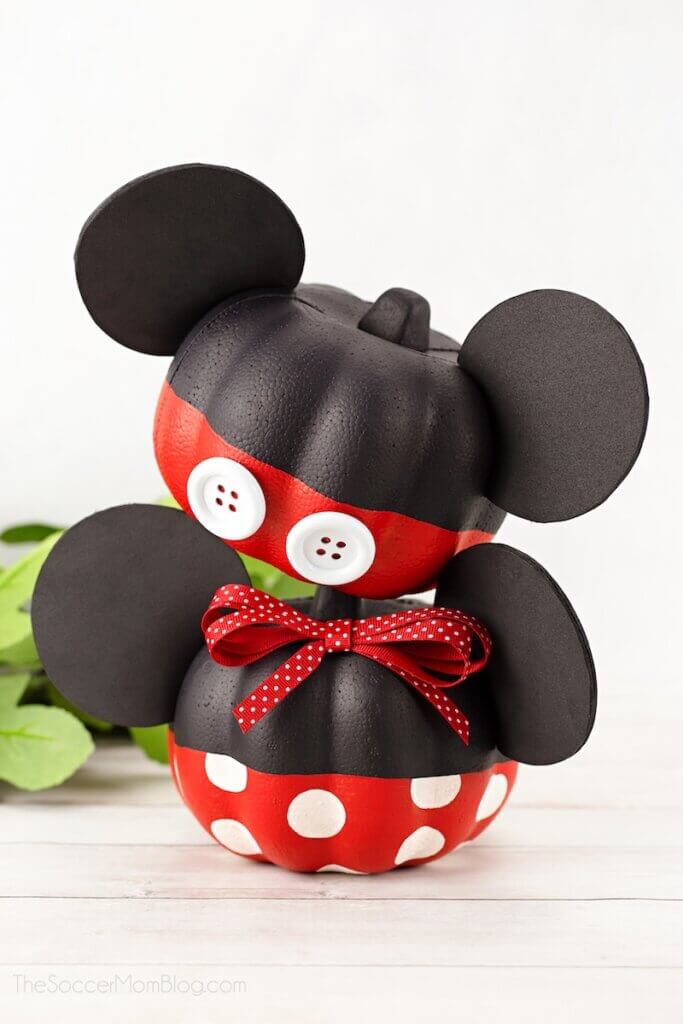
When you find these Dollar Store pumpkins, stock up! They are so versatile for fall crafting! Look at these adorable Mickey & Minnie Mouse pumpkins we made using them:
Printable Instructions to make Bandana Pumpkins
Want to Save This Recipe?
Enter your email & I'll send it to your inbox. Plus, get great new recipes from me every week!
By submitting this form, you consent to receive emails from The Soccer Mom Blog

Toilet Paper Pumpkins - 5 Minute Fall Craft
Equipment
- Glue gun
- Scissors
- Paintbrush
- Craft knife
- Pencil
Ingredients
To Make Toilet Paper Pumpkins
- Toilet Paper Roll
- Orange Bandana
- Cinnamon Sticks
To Make with Craft Foam Pumpkins
- Foam Pumpkin
- Bandana
- Black Craft Paint
- Twine
Instructions
To Make Toilet Paper Pumpkins
- Spread out bandana on workspace. Place roll of toilet paper in the center of bandana.
- Pull the bandana up over the toilet paper roll. Tuck excess bandana into toilet paper roll opening.
- Press cinnamon sticks into the middle of toilet paper roll to hold bandana in place.
To Make Craft Foam Bandana Pumpkin
- Use craft knife to cut out a square around the green foam pumpkin stems to create a hole in the top of each pumpkin. Set the stems aside.
- Use craft knife to remove any extra orange foam from the stems. Leave the wooden pick in the stem, as this will help it stay in place when we re-attach.
- Paint stem black; apply a second coat if needed and let dry.
- Spread bandana flat on your workspace. Place the pumpkin in the middle of bandana. Starting at one corner, pull the bandana up to cover the pumpkin and tuck the end of bandana down in the hole where the stem used to be.
- Work around the pumpkin, folding the bandana up and over, and tucking it in place, until the entire pumpkin is covered.
- Use a chopstick or pencil to push the ends of the bandana further into the hole at the top of your pumpkin, so that everything is taut and secure.
- Insert stems into the tops of the foam pumpkins and secure with hot glue. Attach the twine bows on top to complete your project.
- Use your twine to tie a bow for each pumpkin.
Video
Pin our Toilet Paper Roll Pumpkins on Pinterest:
You might also like:

- Beach Day Rice Krispie Treats - June 23, 2026
- Pickled Jalapeños Recipe - June 15, 2026
- Homemade Nesquick Mix - June 11, 2026

Love it! Quick And easy kids craft thanks for sharing ?