
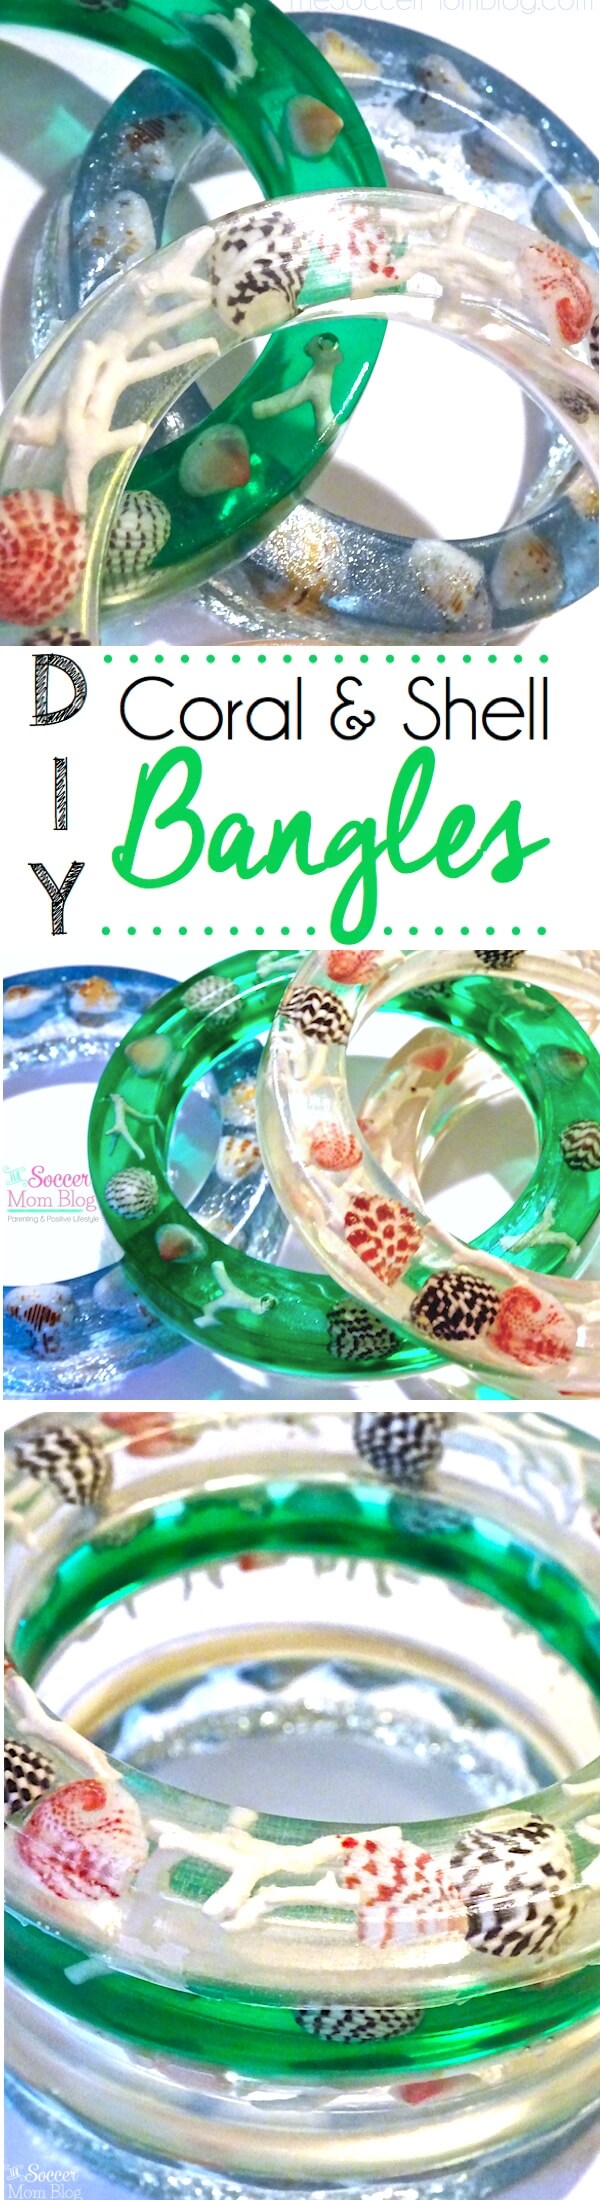
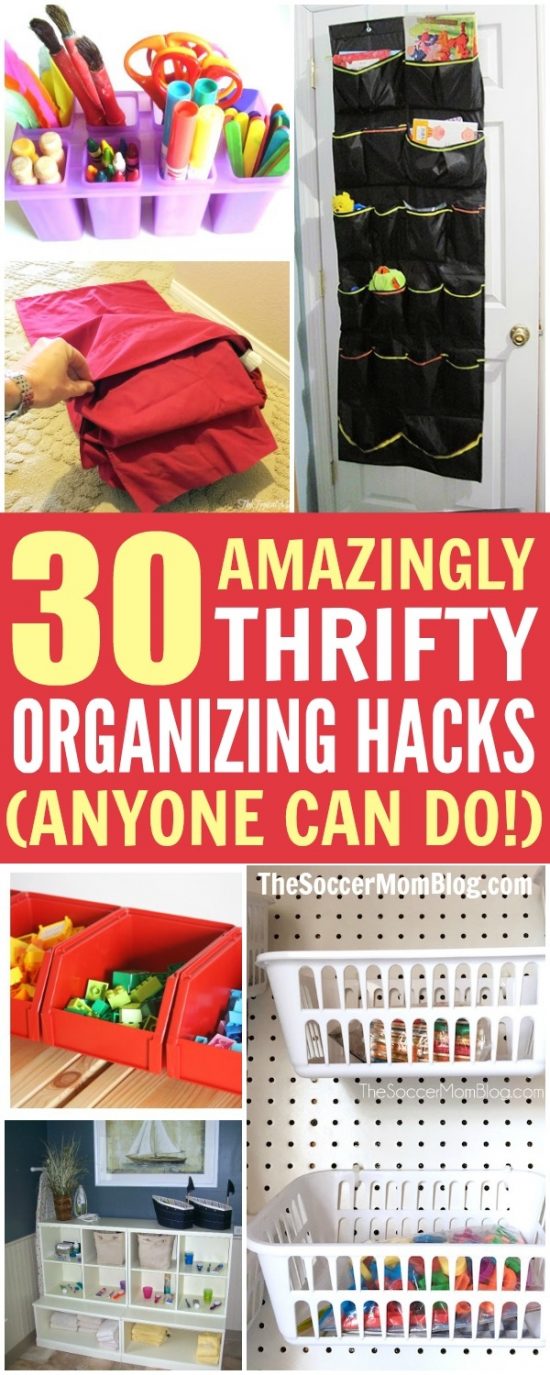
DIY Coral and Shell Resin Bangles
I absolutely LOVE these DIY Coral and Shell Resin Bangles, even though they weren’t what I originally set out to make!
Ever since my mom gifted us each a set of my Grandpa’s beautiful hand-made sea shell resin coasters, my sister and I have wanted to try to recreate the craft. Her recent wedding in the Bahamas gave us the chance to find our own shells, as we were attempting to keep the experience as authentic as possible (though it’s perfectly acceptable to buy shells if you’re not able to get to a beach!)
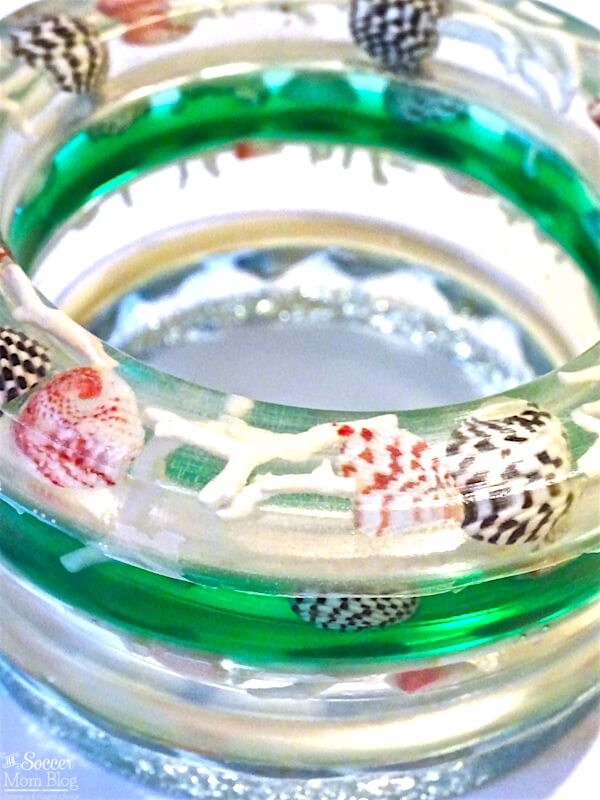
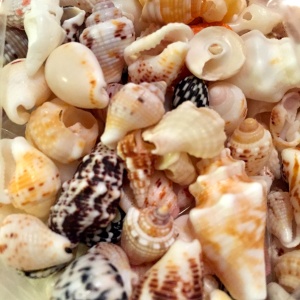
Grandpa was a master shell collector and was known for finding the biggest and most unique specimens the ocean had to offer. What my sister and I brought home was a bag of much smaller shells, though they are incredibly detailed and in vibrant colors. We also found some tiny and amazingly white branches of coral.
![]()
The craft store we visited did not have a single coaster mold, so we created a Plan B on the spot from the available supplies: shell resin bangles!
This new idea was actually much better suited to the tiny pieces we had to work with– these small shells would be the perfect size to fit in a bracelet mold.
Here’s what you need for our coral and sea shell resin bangles:
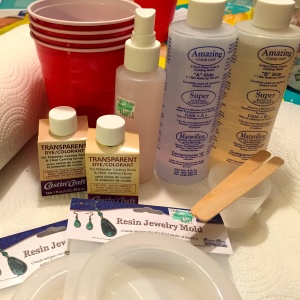
- Clear Casting Resin
 (usually sold as set with Resin Catalyst)
 - Mold Release Conditioner Spray (to make sure your bracelets don’t get stuck permanently to the molds)
- Bangle Bracelet Resin Mold (make sure they are designed specifically to be used with casting resin)
- Transparent Resin Dye (if you want to add color to your bangles)
- Small Sea Shells and/or Coral Pieces (we found them, but you can purchase if you’re landlocked)
- Disposable cups for mixing resin
- Newspaper, cardboard, etc. to protect your workspace (we use unfolded diaper boxes– resin can be messy so you want to make sure everything is covered!)
Coral and sea shell resin bangles tutorial:
STEP ONE: Mix Casting Resin![]() and resin catalyst in disposable plastic cup. Stir slowly to avoid adding extra bubbles (most of the bubbles will disappear on their own as the resin sets), but make sure to stir thoroughly until there are no swirls to be seen. If your mixture is under-stirred it will not set. Ever. (We learned this from experience!)
and resin catalyst in disposable plastic cup. Stir slowly to avoid adding extra bubbles (most of the bubbles will disappear on their own as the resin sets), but make sure to stir thoroughly until there are no swirls to be seen. If your mixture is under-stirred it will not set. Ever. (We learned this from experience!)
STEP TWO: Fill bangle mold halfway with resin. Allow to set. (The time will vary depending on brand used, but for the resin we had it took about an hour.)
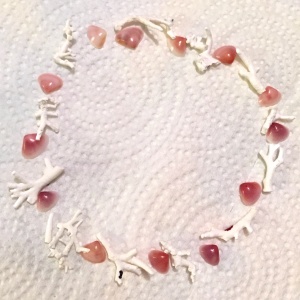
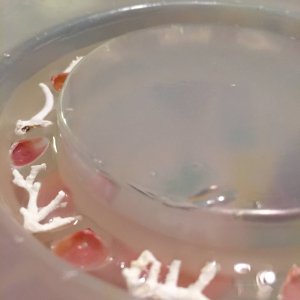
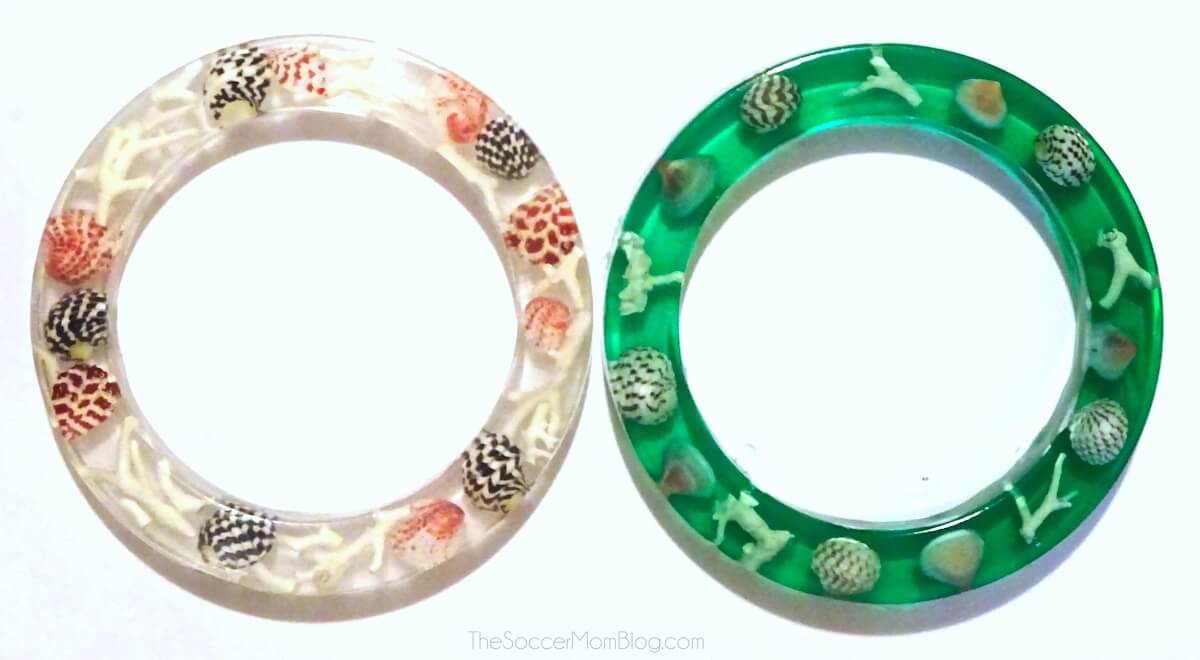
STEP THREE: Once the resin has set (it will still be sticky, but will stay in place if you move the mold), add sea shells and/or coral pieces in desired pattern. We laid our pattern out on the table beforehand so we knew exactly where we wanted things to go– once you put the shells in the resin they will be stuck and hard to change positions.
STEP FOUR: Allow shells to set in resin for another 30 minutes to an hour. Mix another batch of resin and pour to fill the rest of the mold. Make sure the resin has dried completely before trying to remove from the mold. (Ours took a full day, or 24 hours).

Tip: You may want to use sandpaper to smooth the back edges of the bracelet– there may be a couple places where resin did not dry perfectly flat.
Make sure to subscribe to The Soccer Mom Blog by Email for more DIY and craft ideas delivered right to your inbox!
PIN these DIY Shell resin Bangles:

- Beach Day Rice Krispie Treats - June 23, 2026
- Pickled Jalapeños Recipe - June 15, 2026
- Homemade Nesquick Mix - June 11, 2026


Thanks so much for these ! I tried doing the sand dollar as well to make a paperweight and when I checked after it cured the sand dollar was a yucky brown color . What Did you do to keep the color white?
My grandpa used to soak them in bleach water. The ratio should be about 3 parts water to 1 part bleach. As soon as they turn white, rinse them and let them air dry completely. Hope this helps!
You mentioned the conditioning spray but not when you used it. Obviously, you’d want to spray the mold before pouring in the first batch of resin, but do you reapply the spray before pouring in the second batch?
I would reapply yes
Thank you for sharing this wonderful content idea and it is really amazing. Thank you so much. Looking forward for more such creative stuff.
Well i think the designs are really awesome and i gonna buy one for sure keep it up and come up with more new ways and designs.