
“DAD” Salt Dough Picture Frame
This “DAD” salt dough picture frame is an easy kid-made Father’s Day gift that Dad will treasure! With only basic craft supplies, you can create a personalized keepsake that will last for years!
Kid-Made Father’s Day Picture Frame
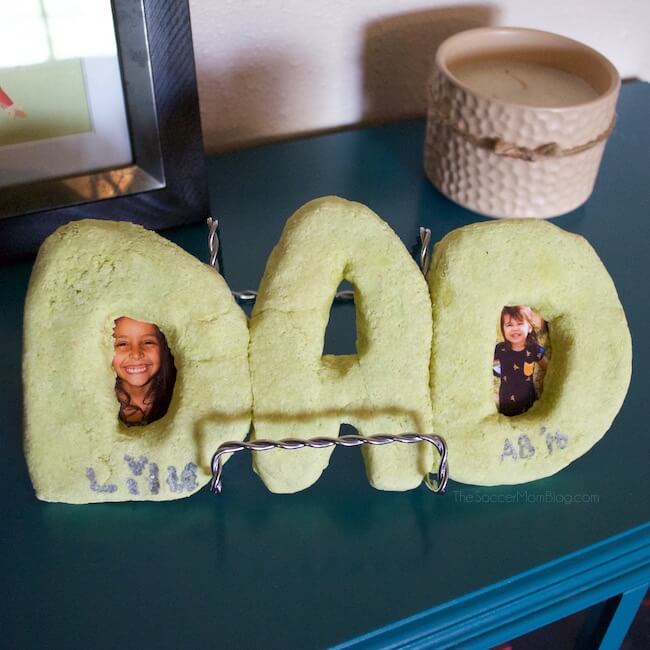
This DAD picture frame was a spur-of-the-moment creation that I made with the girls a few years ago to surprise my husband when he got home from work. It would be the perfect handmade Father’s Day gift, but there’s no way we were waiting that long to give it to him!
Here is our original Father’s Day picture frame craft:
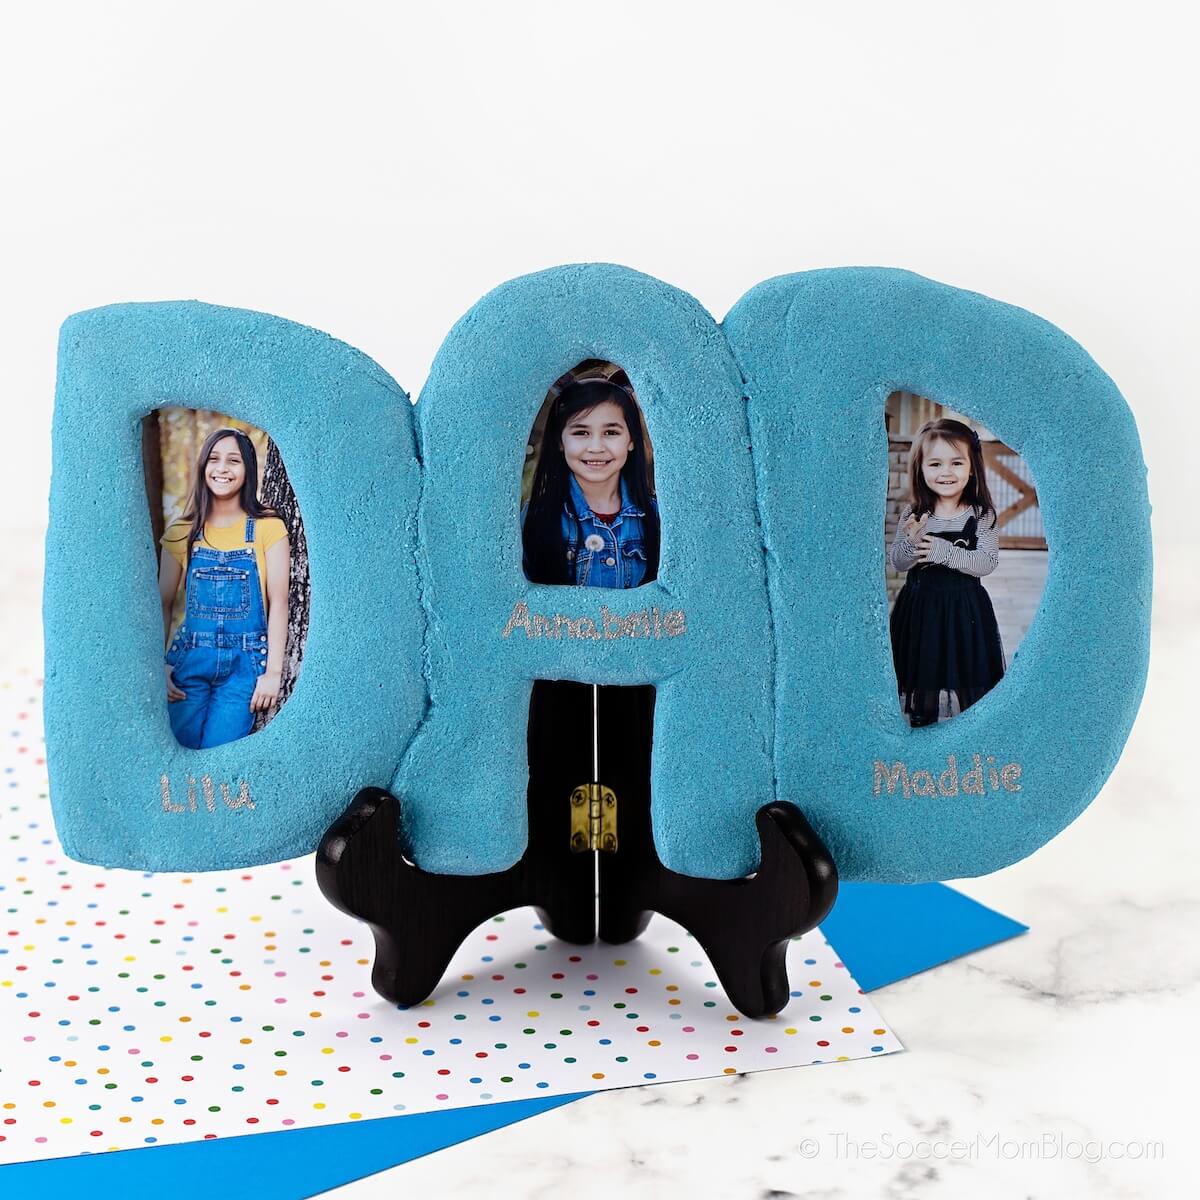
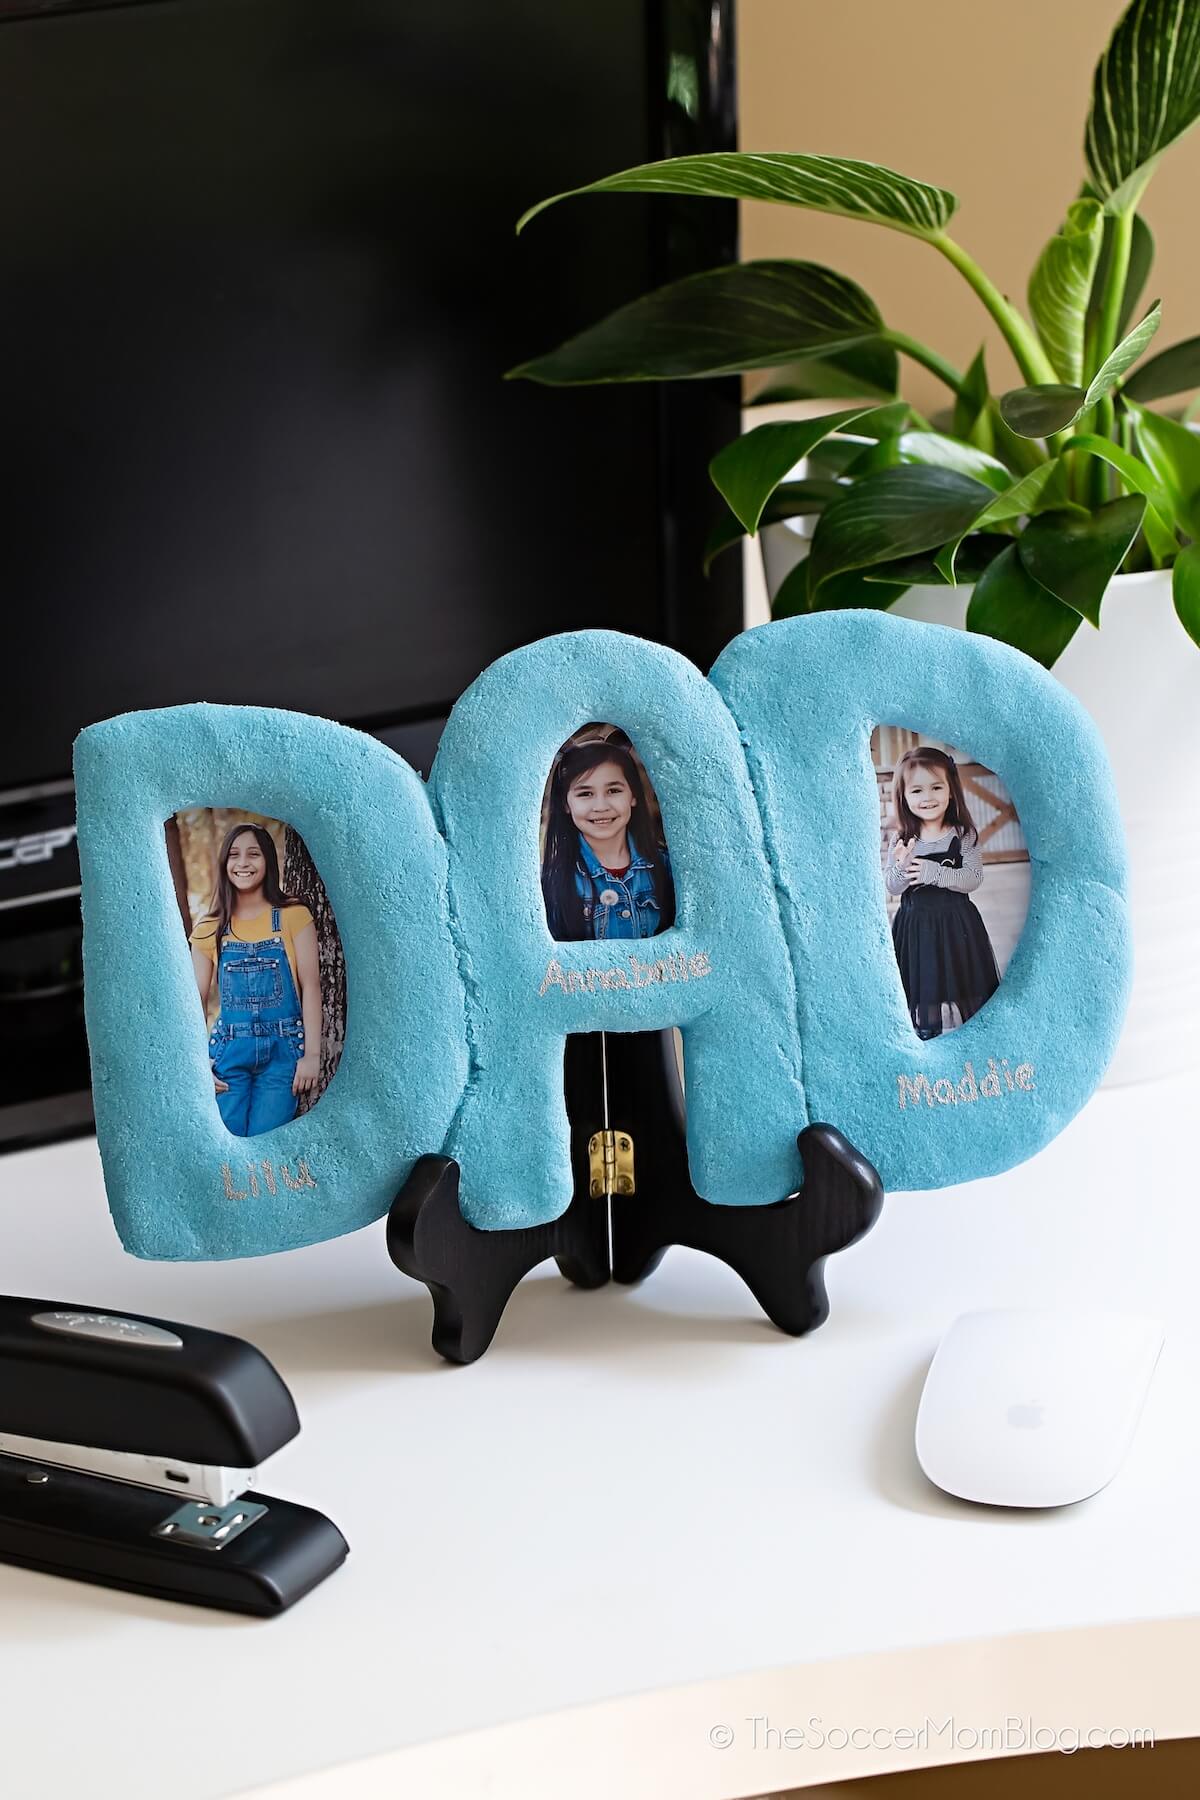
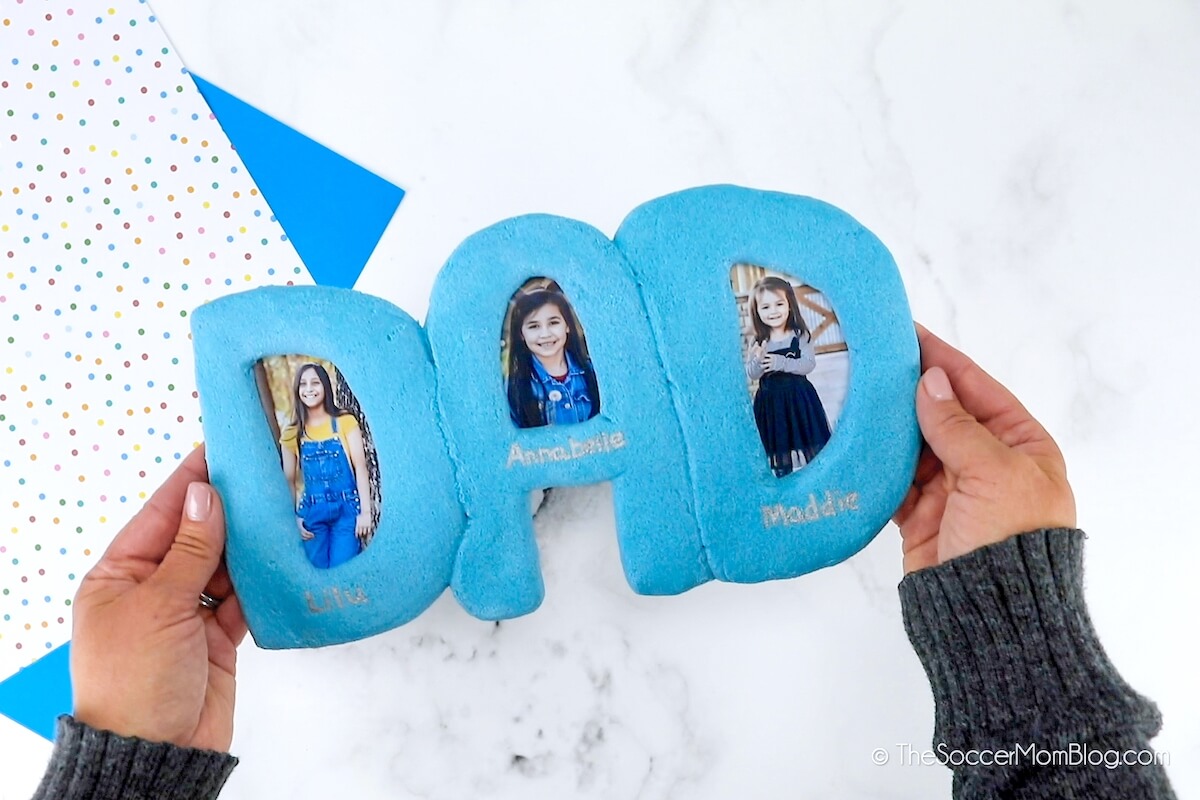
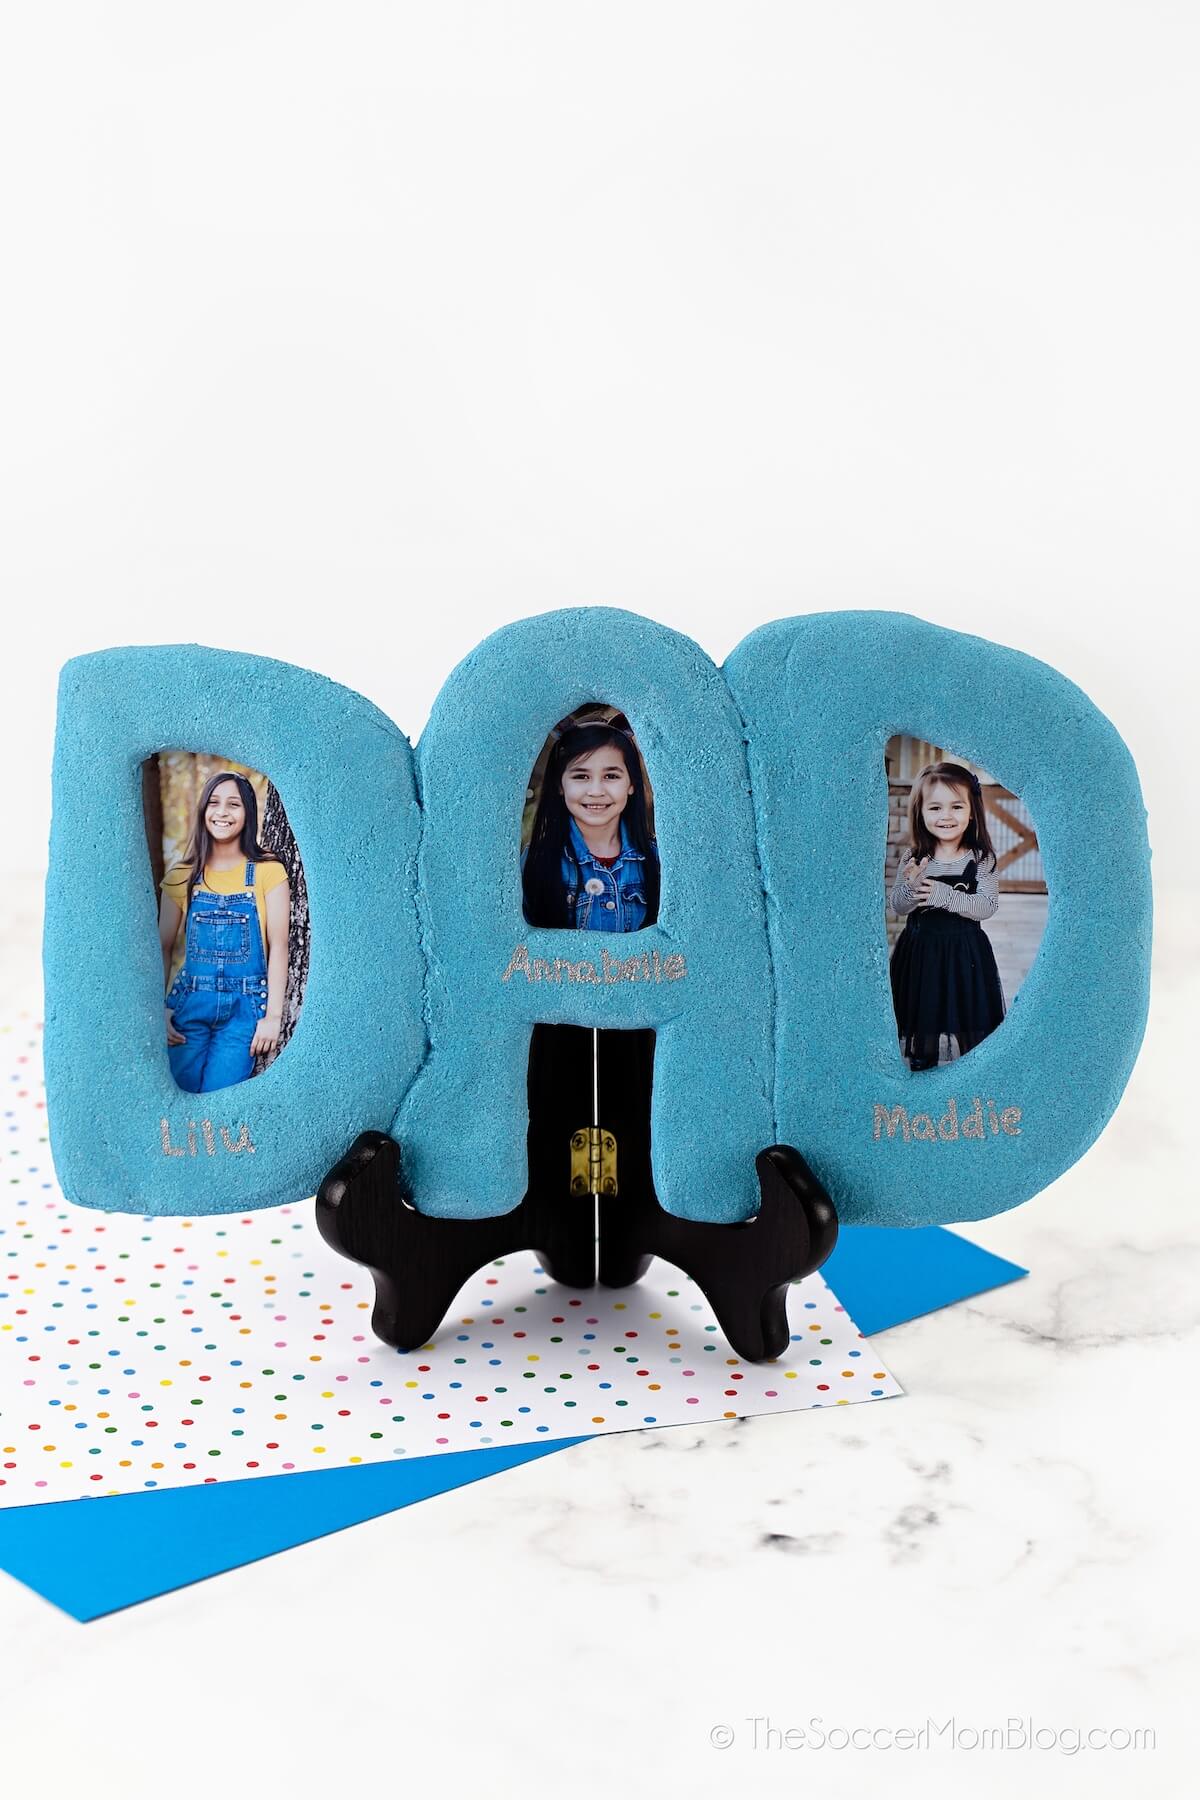
Now that we have three girls, I thought it was time for an update! The ‘A’ had an opening for one more photo after, all!
Oh my gosh you guys…I can’t even handle the cuteness!! And of course, their dad LOVES it too!
Here is what we used to make our “DAD” salt dough picture frame:
We’ve provided shop-able ad links for your convenience in re-creating this salt dough picture frame; read our disclosure policy here.
- 1 cup flour
- 1 cup salt
- 2/3 cup water
- Royal Blue Gel Food Coloring
- Metallic Silver Sharpie
- Non-stick Silicone Baking Mat
- Photographs
How to make a salt dough picture frame with Dad’s name:
A free printable copy of all the steps is available at the bottom of the post.
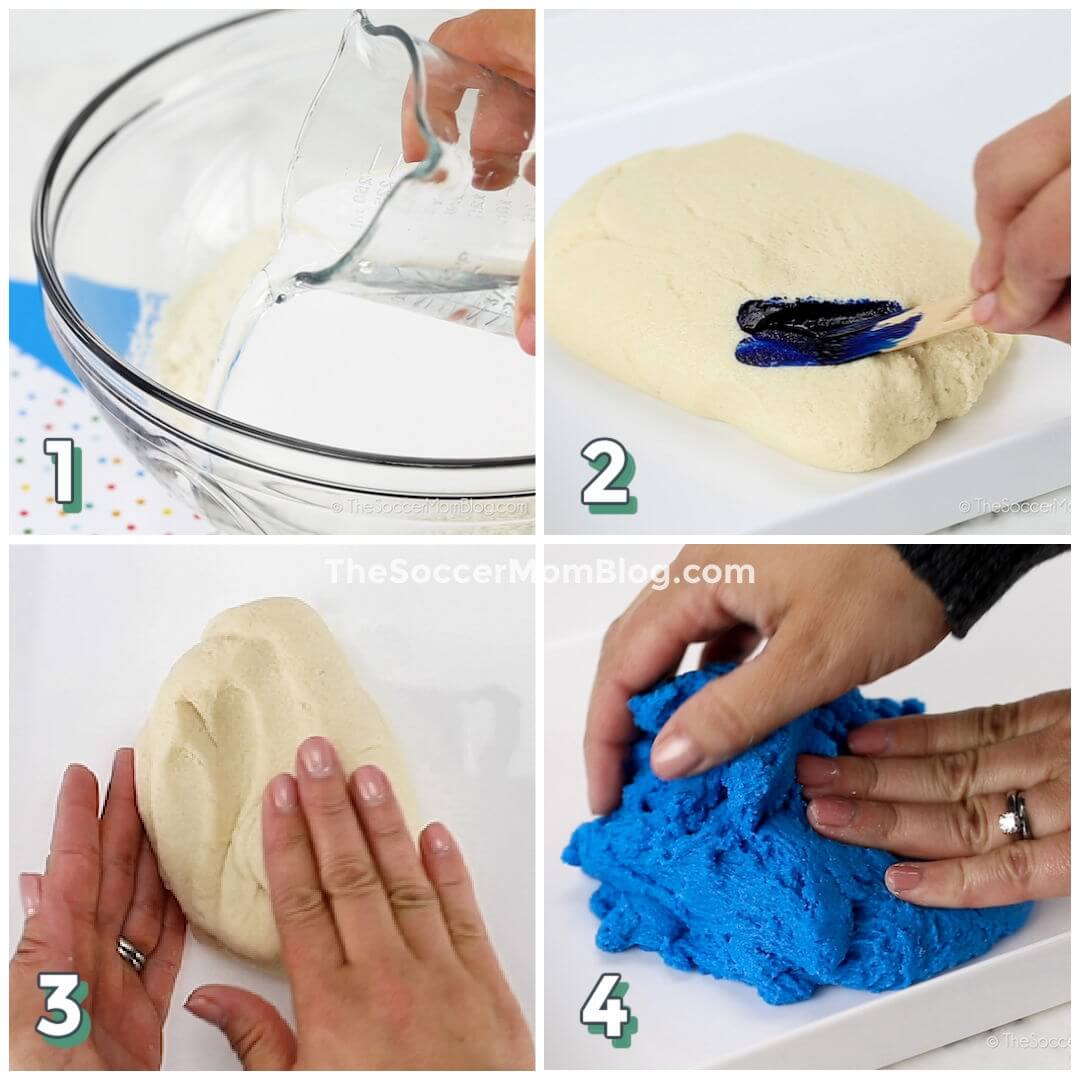
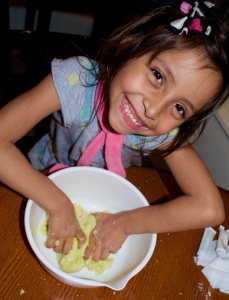
Add 1 cup flour and 1 cup salt to a large mixing bowl. (We only had coarse Kosher salt on hand, but it worked just fine). Slowly add water, kneading along the way until you have a playdough-like consistency. You may not need to use the full 2/3 cup water.
Once you have a dough formed, add the food coloring of your choice. For our original frame, we created lime green with 2 parts yellow to 1 part green dye. For our new frame, we used this gorgeous royal blue dye.
TIP: Start with just a couple drops and work into dough. Add more coloring until you reach your desired shade.
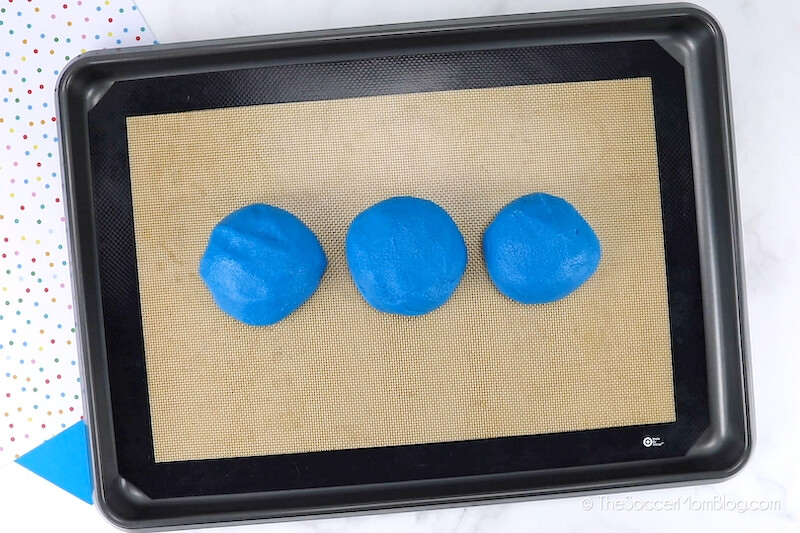
 Divide dough into three balls of even size and place on a reusable silicone baking mat. (These silicone mats are amazing! They only cost a few dollars and we use them over and over and over! SO worth getting!)
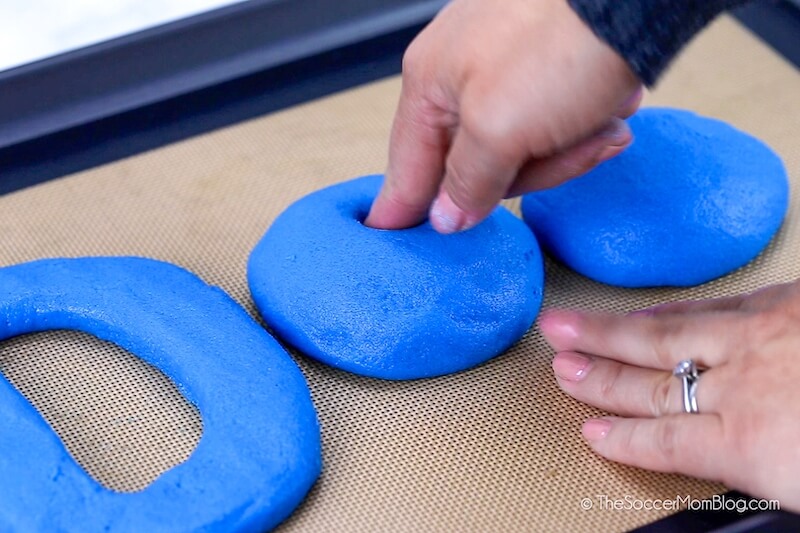
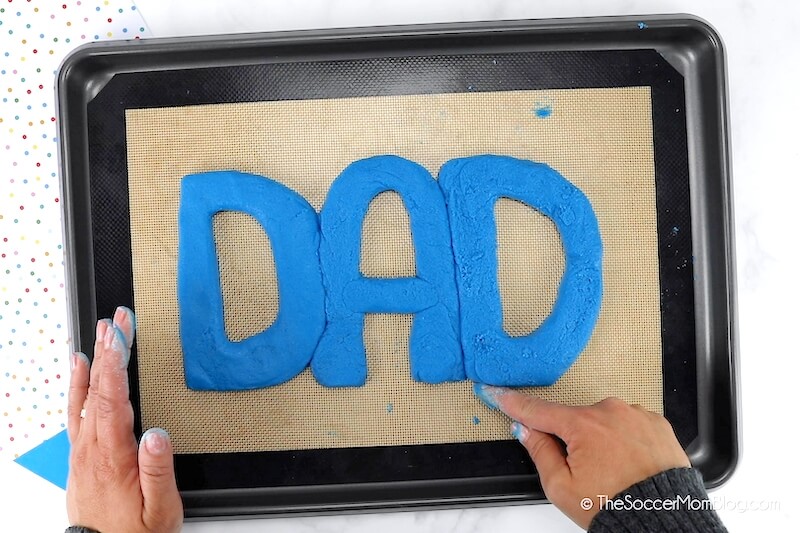
Shape dough to form letters — make sure the letters are touching so they will stay together (though you can always glue later if needed).
You want the dough to be between 1/4″ and 1/2″ thick, but no thicker than that or it may take longer to bake. Any thinner and the letters could break.
Bake at 200°F for about 3 hours. If your dough is still soft, you may need to cook a little longer. Check your dough regularly as it bakes, as oven temperatures and cooking times may vary.
Flip frame so bottom is facing up and bake for an additional hour at 250°.
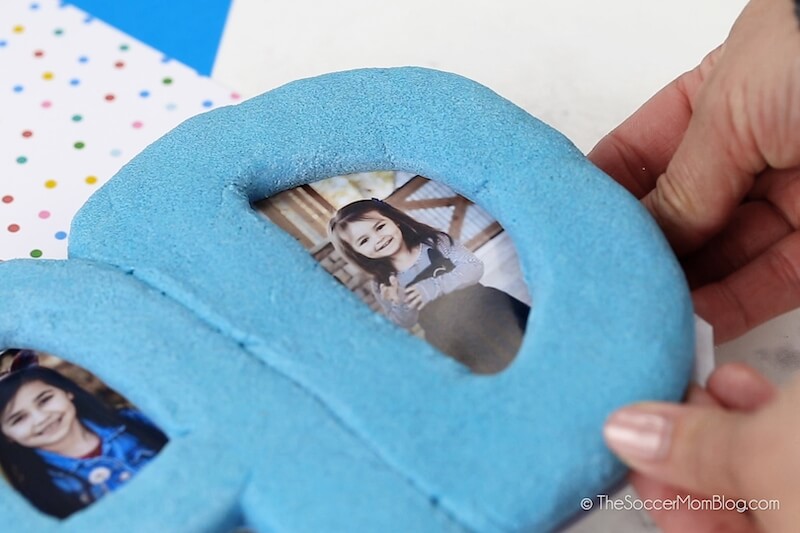
Remove from oven and allow to cool completely. Glue photos to the back of the salt dough picture frame so your each child’s face peeks through the holes in the middle of the letters. (I used the Polaroid ZIP Mobile Printer to print photos directly from my phone…so awesome!!)
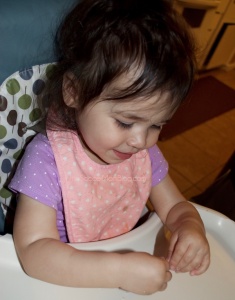
This was actually a lot easier to make than I expected and I LOVE how it turned out! My seven-year-old had so much fun making the dough and forming letters (hers actually looked better than mine!) My youngest had a blast watching and playing with a bit of the extra dough.
You could modify this salt dough picture frame to say “MOM” or other initials too. It is such an adorable kid-made gift idea! You could always show this to your significant other if he needs a little help thinking of a Mother’s Day gift!
More of our most popular Father’s Day craft ideas:
Printable Directions:
Want to Save This Recipe?
Enter your email & I'll send it to your inbox. Plus, get great new recipes from me every week!
By submitting this form, you consent to receive emails from The Soccer Mom Blog

"DAD" Salt Dough Picture Frame
Equipment
- Silicone baking mat
- Metallic Silver Sharpie
Instructions
- Combine 1 cup flour and 1 cup salt in a large mixing bowl. Slowly add water, kneading until you have a playdough-like consistency. You might not need to use all of the water.
- Add 2-3 drops of food coloring of your choice and knead into dough. Add more color as needed, and continue mixing until you have your desired shade.
- Divide dough into three balls of even size and place on your baking sheet.
- Form dough into letters, pressing so that they are generally flat, between 1/4" and 1/2" thick. Make sure all the letters are touching (so you have one big piece of dough) because you want them to stick together as a frame.
- Bake at 200°F for about 3 hours. If your dough is still soft, bake a little longer. Check regularly to make sure it doesn't burn.
- Flip frame so bottom is facing up and bake for an additional hour at 250°.
- Remove from oven and allow to cool completely. Glue photos to the back of the salt dough picture frame so your each child's face peeks through the holes in the middle of the letters.
- Write kids' names with metallic sharpie under their photos.
Video
More kid-made Father’s Day ideas:

21 Personalized Father’s Day Cards for Kids to Make

- Beach Day Rice Krispie Treats - June 23, 2026
- Pickled Jalapeños Recipe - June 15, 2026
- Homemade Nesquick Mix - June 11, 2026


This is absolutely adorable! Could I bake it on parchment paper? Also, if I were to spell DADDY would I have enough dough for the 2 extra letters or would it be better to double it? Do you think the picture easel you used for yours would hold DADDY with the 2 extra letters?
Hi Teresa — if you’re trying to make a longer word with the same amount of dough, then the letters would need to be smaller. Otherwise, I would double the batch of salt dough. The easel I have is kind of small, so it might not work for a longer word. But a craft store should have options!
Could moldable baking clay be an alternative to use? I find that as a keepsake, salt dough isnt durable & tends to crumble.
If it is made for baking, then I think that could probably work. Let me know how it goes!
Awesome! Thank You!