Farmhouse Fall Entryway with Cricut
Inside: Freshen up your Fall entryway decor with these simple Cricut Maker projects! Learn how to make a DIY doormat, decorative pillow, and leaf cutouts. Sponsored by Cricut.

Fall Mudroom Decor Ideas with Cricut
Fall is my favorite season! Even though the cool weather isn’t quite here yet in Texas…Fall decorations are IN THE HOUSE!!
I started with our mudroom/entryway area because this is the first thing you see when you enter our house. So if you’re looking for fall mudroom ideas to brighten up that space where everyone usually just tosses their shoes…you’ve come to the right place!
Today I’m going to show you some of my favorite (easy) Cricut Fall decor ideas that you can make in one day. Everything you see here, I made in one sitting with my Cricut Maker and EasyPress2!
Related: Check out my fall bucket list with lots of autumn themed ideas for families and a free printable!
Fall Leaves Decorative Pillow
Infusible Ink creates vibrant colors…and it won’t ever peel off because it infuses right into the pillowcase! This is one of my favorite Cricut techniques and it is SO easy!

For your convenience, I’ve included shop-able ad links to the supplies used to make this craft; disclosure policy available here.
Supply List:
- Cricut Maker — This one comes with a bundle of handy supplies to get started!
- Standard Grip Machine Mat
- Cricut EasyPress 2
- Heat-Resistant EasyPress Mat
- Pillow Cover Blank — We used cream colored pillow covers, but Circuit also has white available.
- Infusible Ink Transfer Sheets — The pattern I used for my pillow was “Patina” but anything with fall colors would work!
- Pillow Inserts — Use 18″ inserts or 20″ inserts for an over-stuffed look
Pattern: Follow this link to open the pillowcase pattern in Cricut Design Space.
Instructions:
Open the pattern in Cricut Design Space.
Place a full Infusible Ink Transfer Sheet on your machine mat. Make sure that the printed side faces up.
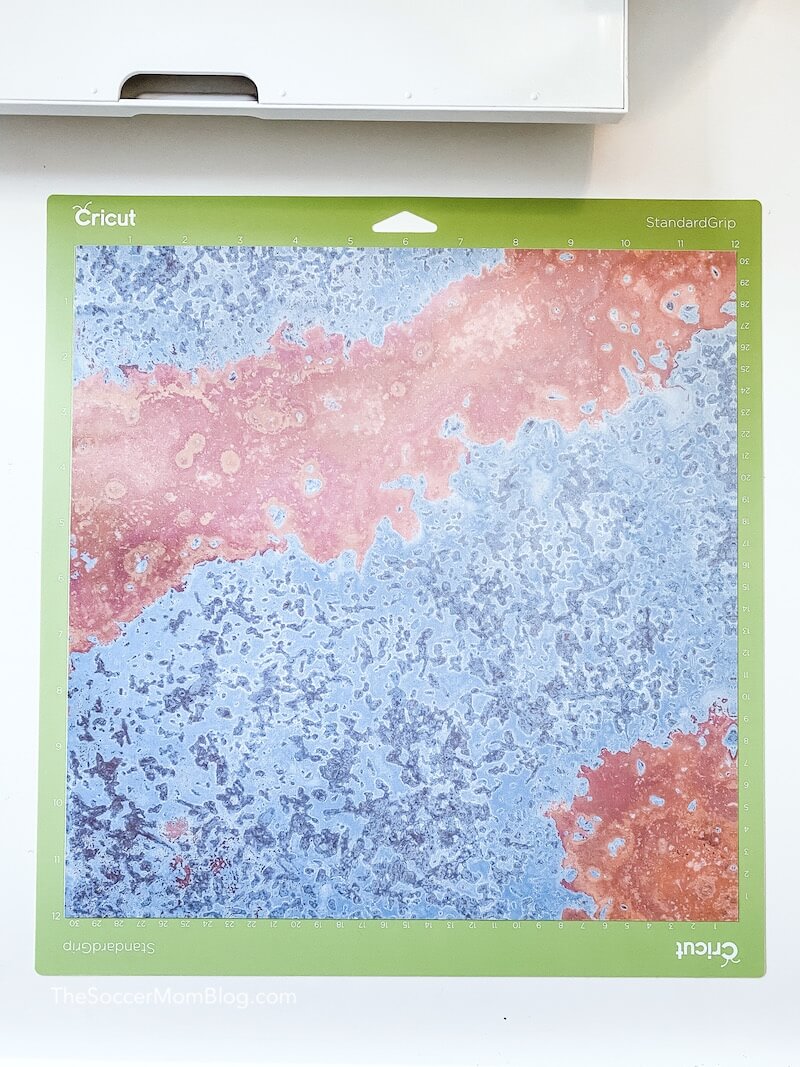
Turn on the toggle for “Mirror” and click “Continue.”

Select Infusible Ink Transfer Sheets from the material list, load the mat into your machine, and press the “Go” button (shaped like the Cricut logo) on the machine.
Once the first sheet is finished cutting, repeat with the second sheet.
After everything is done cutting, use scissors to cut around each leaf shape. You’ll want to leave a bit of extra transfer tape (the backing) so you can stick your leaf cutouts on the pillow and they stay in place during pressing.
Before pressing, use a lint roller to remove any excess fuzz from your pillowcase blanks. Slip the EasyPress mat inside your pillowcase and press out any wrinkles with your EasyPress 2.
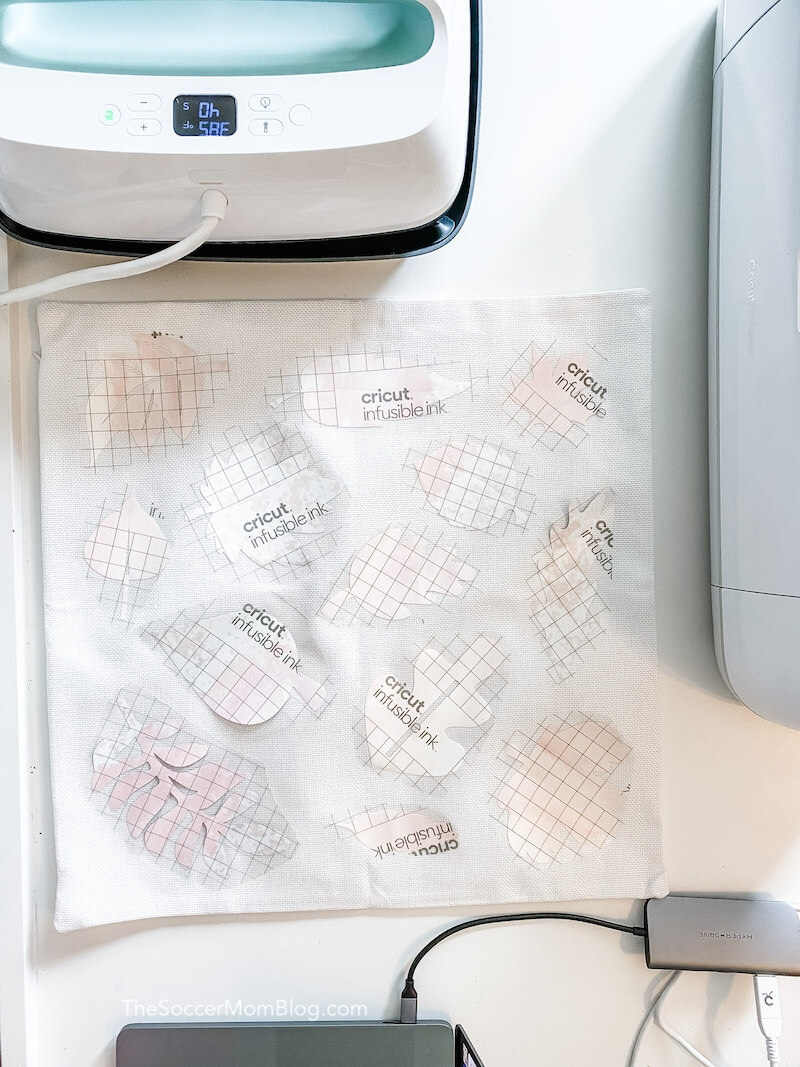
Now you can arrange your leaf cutouts on top of the pillowcase. Make sure that the colorful side of the transfer sheets face down. Cover with a piece of butcher paper (included in every box of Infusible Ink Transfer Sheets) and press.
Heat settings for Infusible Ink: 385°F for 40 seconds.
You’ll need to move the EasyPress a few times to get all of the leaves pressed. As you do so, take care not to move the cutouts, so your design stays where it should.
Once everything has cooled, peel away the transfers to reveal your design.
Cricut Fall Doormat
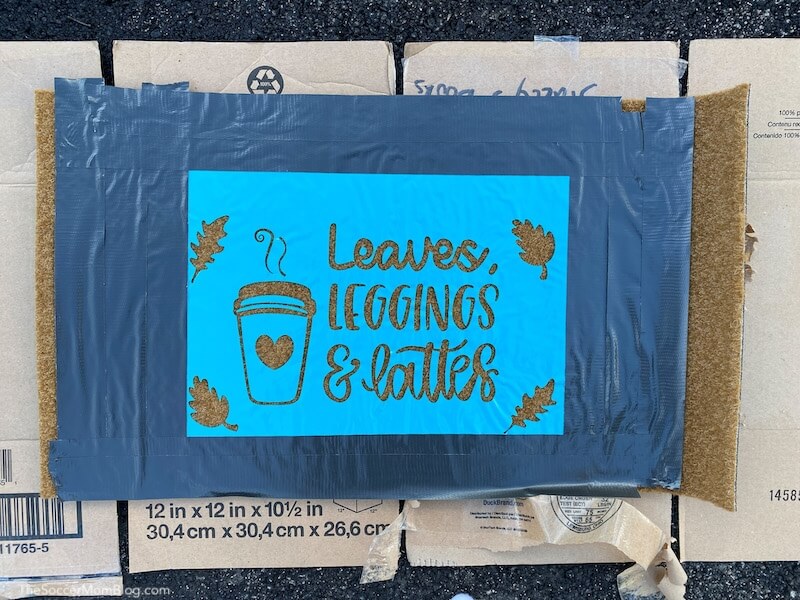
Three of my favorite fall things: leaves, leggings, and lattes!
You can use this same process to make custom doormats with your Cricut for every season! We use doormats at all outside entrances, as well as our mudroom area.

Supply List:
- Cricut Maker — Or Cricut Explore Air or similar cutting machine.
- Standard Grip machine mat 12 x 24″ — You’ll want to make sure to use a long mat for this project, since most doormats are rectangles.
- Matte Cricut Premium Vinyl — Or a similar thick adhesive vinyl.
- Coir doormat — These are often available at IKEA or Target and you an also order through Amazon.
- Flex Seal Spray in Black — You can also use black spray paint
- Painters Tape — To hold your stencil in place and protect the rest of your mat. You can also use duct tape.
Pattern: Get the pattern on Cricut Design Space here!
I found the coffee graphic in the image library on Cricut Design Space and then built the rest of my doormat design around it. I love that there are thousands and thousands of idea starters, images, and fonts with my Cricut Access subscription. It’s SO worth it!
TIP: Learn more about the benefits of Cricut Access here!
Instructions:
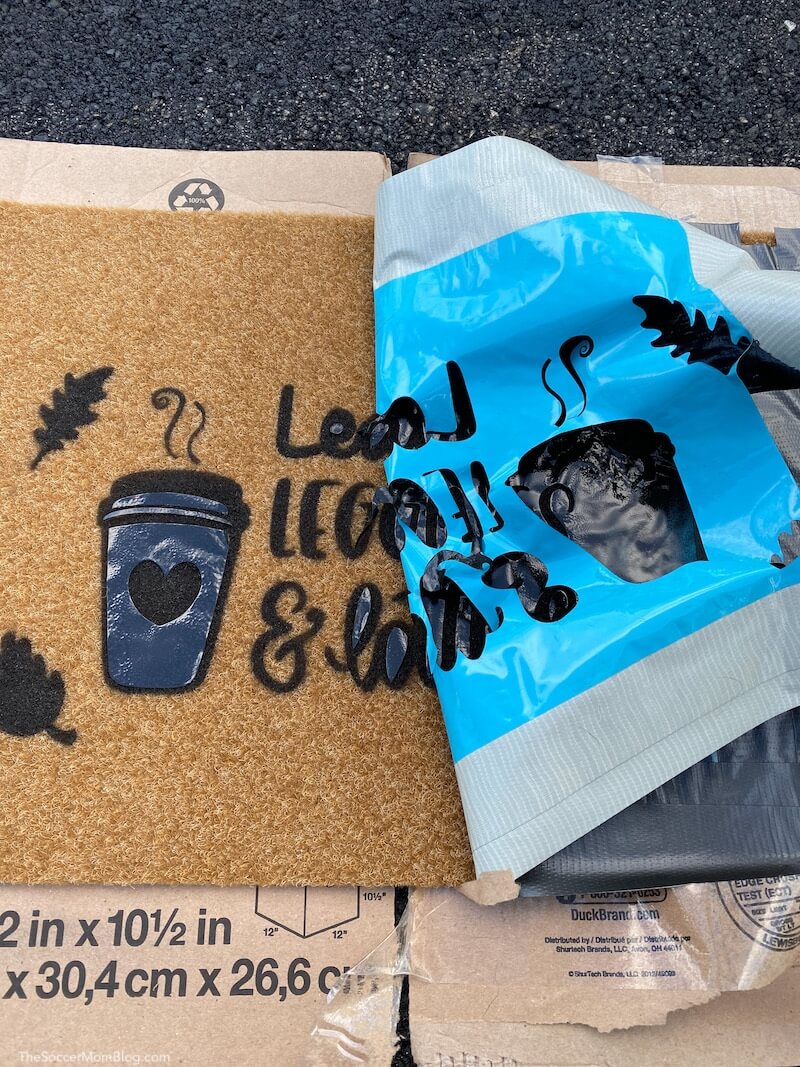
Use any type of vinyl to cut out the pattern. Place on your doormat like a stencil. I used permanent vinyl so it would stay in place while I sprayed the mat.
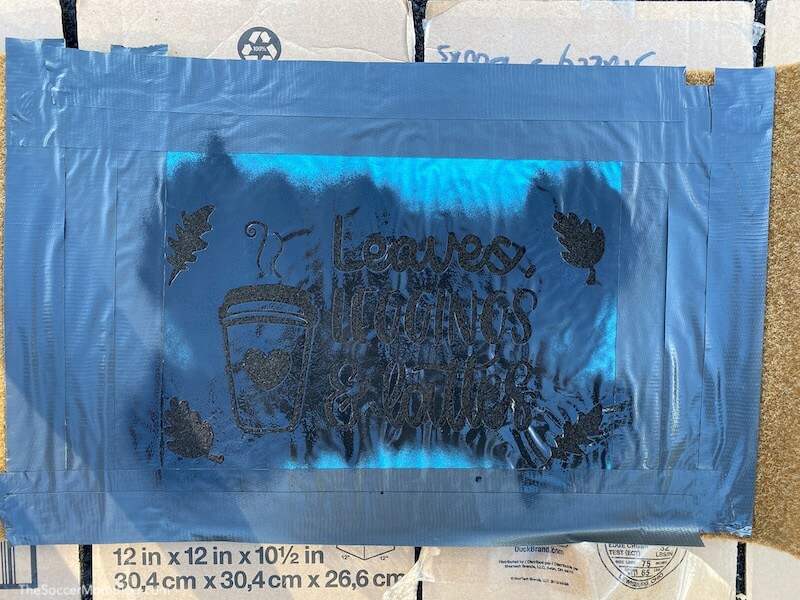
Use painters tape, duct tape, etc. to cover the rest of the doormat while you spray paint. (If painting by hand, this step isn’t necessary).
Hold the nozzle perpendicular to your mat while spraying. Allow to dry, then peel back the stencil to reveal your doormat design.
TIP: For even more detailed instructions and a video tutorial, check out this post, How to Make a Doormat with Cricut.
Fall Leaves Cutouts
These shimmery fall leaves add a whimsical touch to your home! I just love the way this transforms our mudroom for fall!

Supply List
- Cricut Maker — Or Cricut Explore Air or similar cutting machine
- Strong Grip Machine Mat — The poster board I used has a smooth surface, so strong grip ensures that it doesn’t slip during cutting.
- Cricut Poster Board Metallics — I used the gold and bronze colors for my leaves.
Pattern: Follow this link to see the leaf cutouts I used in Design Space.
Instructions:
This project is super easy! There are tons of different leaf shape available in Cricut Design Space with your Cricut Access subscription. Simply click on “images” and search for what you like.
I also saved my project so you can use the sizes/shapes that I did.
Load your poster paper onto your mat and cut.
Fasten to your wall with something temporary, like small pieces of painters tape.
You might also like:


- Beach Day Rice Krispie Treats - June 23, 2026
- Pickled Jalapeños Recipe - June 15, 2026
- Homemade Nesquick Mix - June 11, 2026