
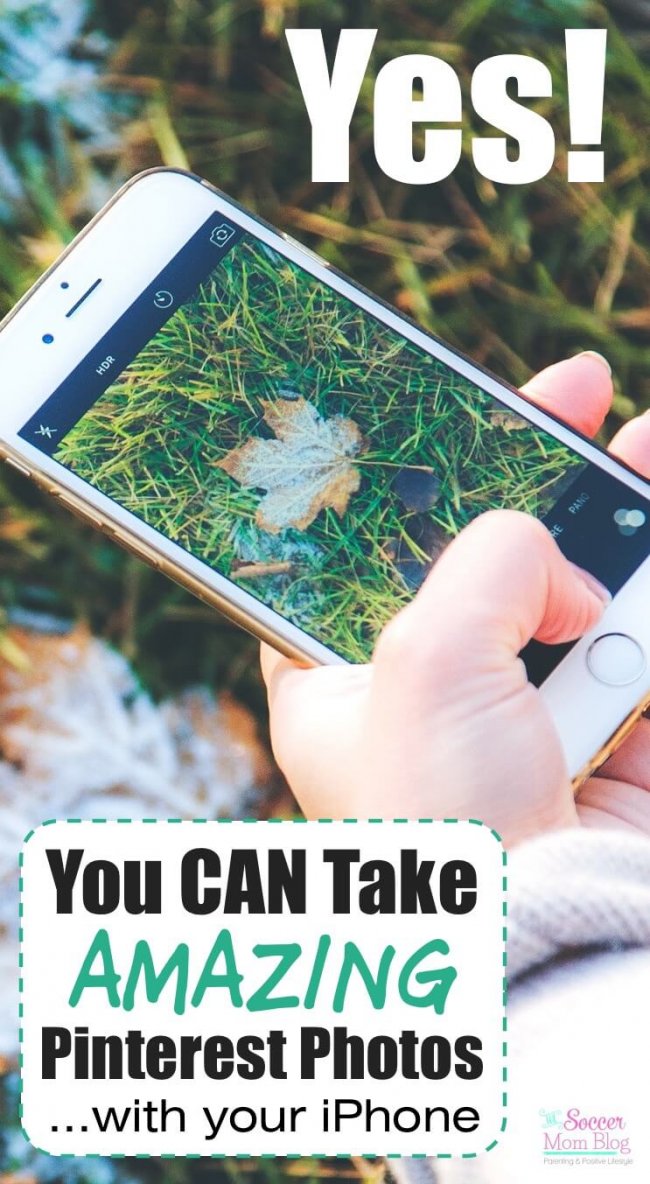
4 Ways to Take Better Pinterest Photos with Your iPhone
If you’re a blogger, then you probably know how important Pinterest is for growing your web traffic. But how do you get your pins to stand out among the crowd? Especially when you’re taking Pinterest photos with your iPhone…
Like many new bloggers, I didn’t want to invest in expensive camera equipment right away. So how do you make sure your Pinterest photos look professional if all you’ve got to work with is your cell phone?
You actually can take eye-catching photos and create interesting pins that get clicks (and page views) with a few easy tricks. Pinterest can be overwhelming at first, but if you do your homework, you’ll see results!
Read on for how I create pins that “work” using only my iPhone and basic computer software!
How to create better Pinterest photos with your iPhone
1. Go Big!
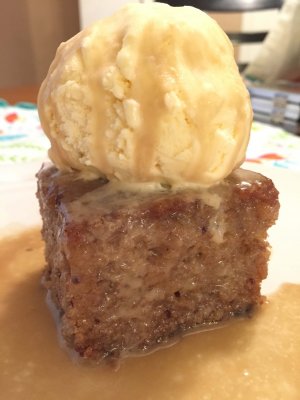
I love photos where the subject is bright and clear and the background is soft and out-of-focus. Unfortunately, you can’t really accomplish this with a camera phone. The solution? Don’t leave much room for a background at all! Close-ups are appealing and show detail, especially with food.
Take a look at the two photos below. It’s the same piece of cake, but in the first shot, the background is distracting and unappealing. For the second shot I got in close and just put a dish towel behind it to block out the corners of the background. It’s one of my most popular pins — you can really see just how gooey the Sticky Toffee Pudding Cake is!

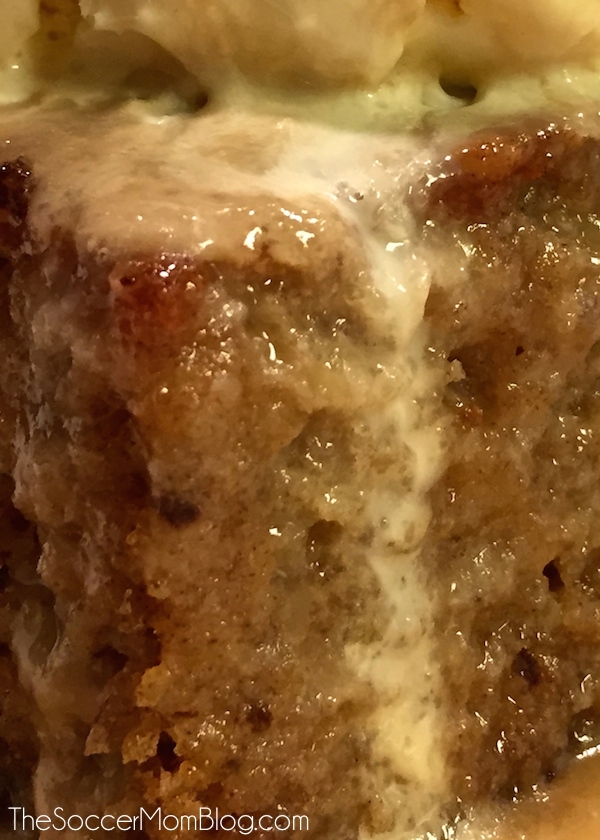
You could even fake an extreme close-up by cropping during the editing process. The photo below is a cropped section from the photo above. Wow! Talk about mouth-watering!
4. Light it up!
More light means that you’ll be able to see more detail in your photos. Natural light works best — try taking your shots outside or next to a window.
If you don’t have a natural light source available, you might need to get creative. I took a lot of my early food photos (including the Sticky Toffee Pudding above) using the bright light above our stove!
Try a few different angles to experiment with the light hitting your photo subject from different directions. It’s always good to have a few options to work with when you’re editing and selecting the winner.
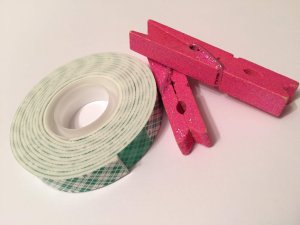
3. Use a White Background (Or Cut Out the Background Completely)
White makes colors pop! Take a look at the first photo below — I simply laid the clothespin and tape roll on a piece of white poster board. If you’re not ready to invest in pricey vinyl backdrops, cheap poster board works wonders for a fraction of the cost!
You might notice that when you upload your photos, they look duller than they did on your phone. Fortunately there’s an easy fix!
The second photo shows my edits in the basic photo software that came with my computer. Simply crank up the exposure and lower the “temperature” (or “cast”) to even out the yellow tones. Now the white background looks clean and the colors of the objects grab your attention.

Another easy fix for dull backgrounds is to erase them!
In the photo below, I used the “Instant Alpha” feature on my photo editing program (the one that came with my computer) to get rid of everything but the subjects themselves. Then I added text in colors prominent in the picture, and the result is a visually appealing pin.


4. Enhance Your Photos with Killer Text!
Speaking of text…
With or without “Rich Pins,” you can still let people know what your pin is about at a glance. Plus, beautiful lettering can make up for less than stellar photographs!
Imagine you’re the editor of a magazine and you have just a few words on the cover to entice people to buy it from the checkout line. Pinterest is much the same — users scroll through tons of pins quickly, so you need to do something to catch their eye!
Incorporate a title on your pin (it doesn’t have to be the exact same as that of your actual article) that will make people want to read more. Sometimes I use the same title as the post itself, sometimes I use a different title on the pin image to give readers more information up front.
Your headline should be BOTH informative (what is the pin about?) and intriguing (why should you want to read the full article?) or your pin could get passed over!
Tips for working with text:
- Try fun fonts, or maybe add a second font for emphasis. But don’t get too crazy! Read-ability is key!
- Use color! Both complimentary and contrasting colors can be very effective. I like to match key words to a prominent color in the photo.
- Make sure the text is large enough to read, even when viewed on a phone screen.
- Keep it simple — no one is going to read a novel!
These are all pins that (still) rock Pinterest…and they’re all iPhone photos!
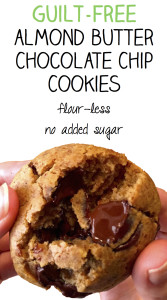

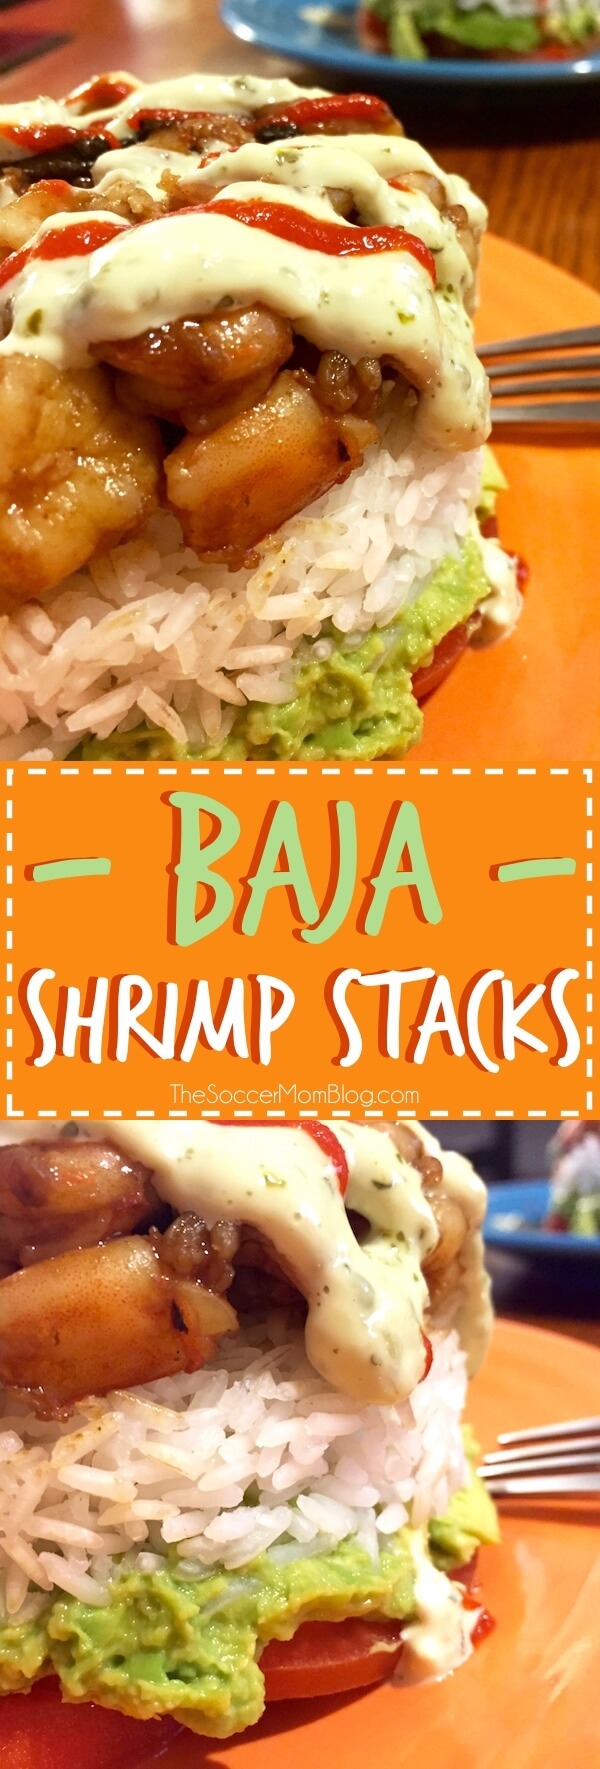

These are a few of the ways that I create pin-worthy images with nothing more than my iPhone and basic editing software. A professional camera is a bonus, but it’s not a necessity. What really matters is creativity, readability, and an overall image that makes you want to look! Happy pinning!
Click here to see all the blogging tip blog posts from The Soccer Mom Blog

- Beach Day Rice Krispie Treats - June 23, 2026
- Pickled Jalapeños Recipe - June 15, 2026
- Homemade Nesquick Mix - June 11, 2026


Grest
Thanks for giving me hope through this post 🙂 I have been blogging for a year now I still take a lot of my photos through my iphone as I don’t own a high quality camera. These are some awesome tips 🙂
-Shamira
Glad you found them helpful! 🙂