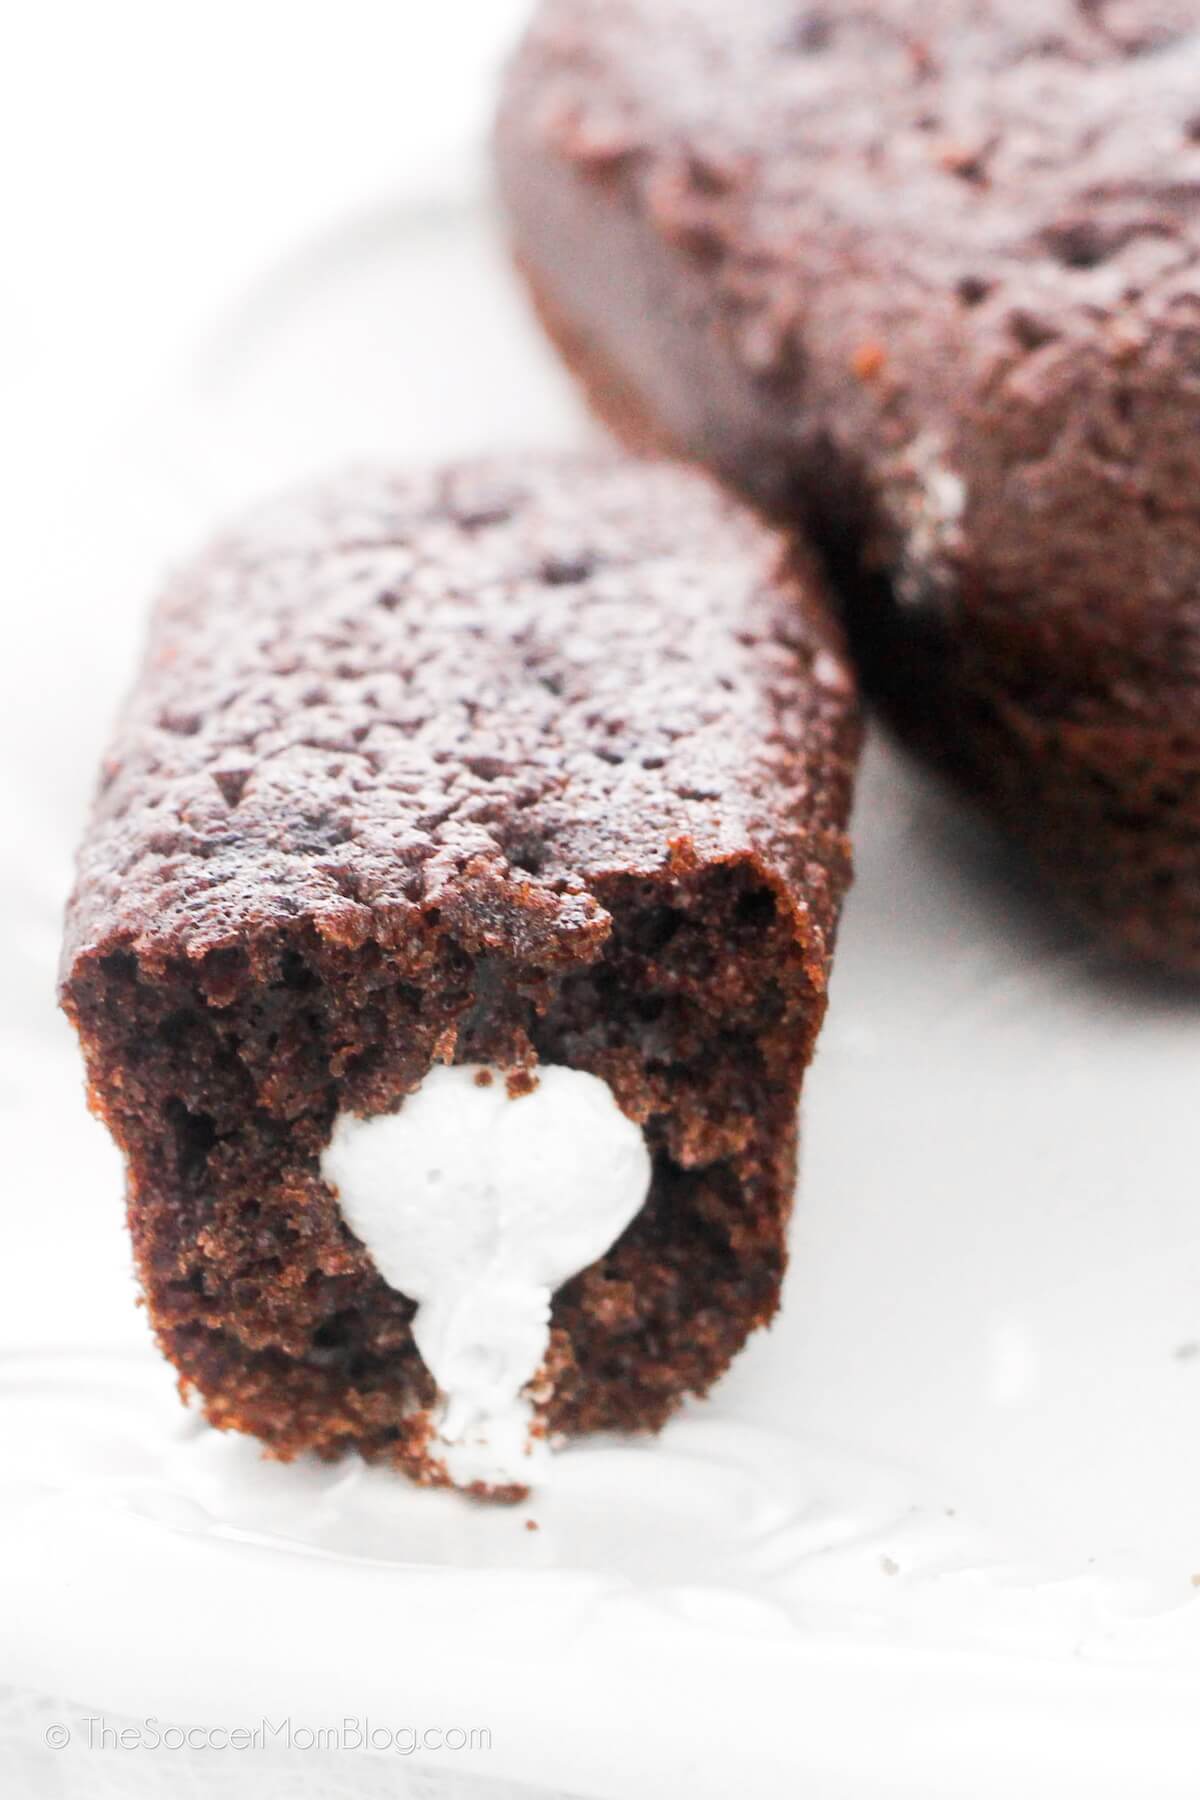
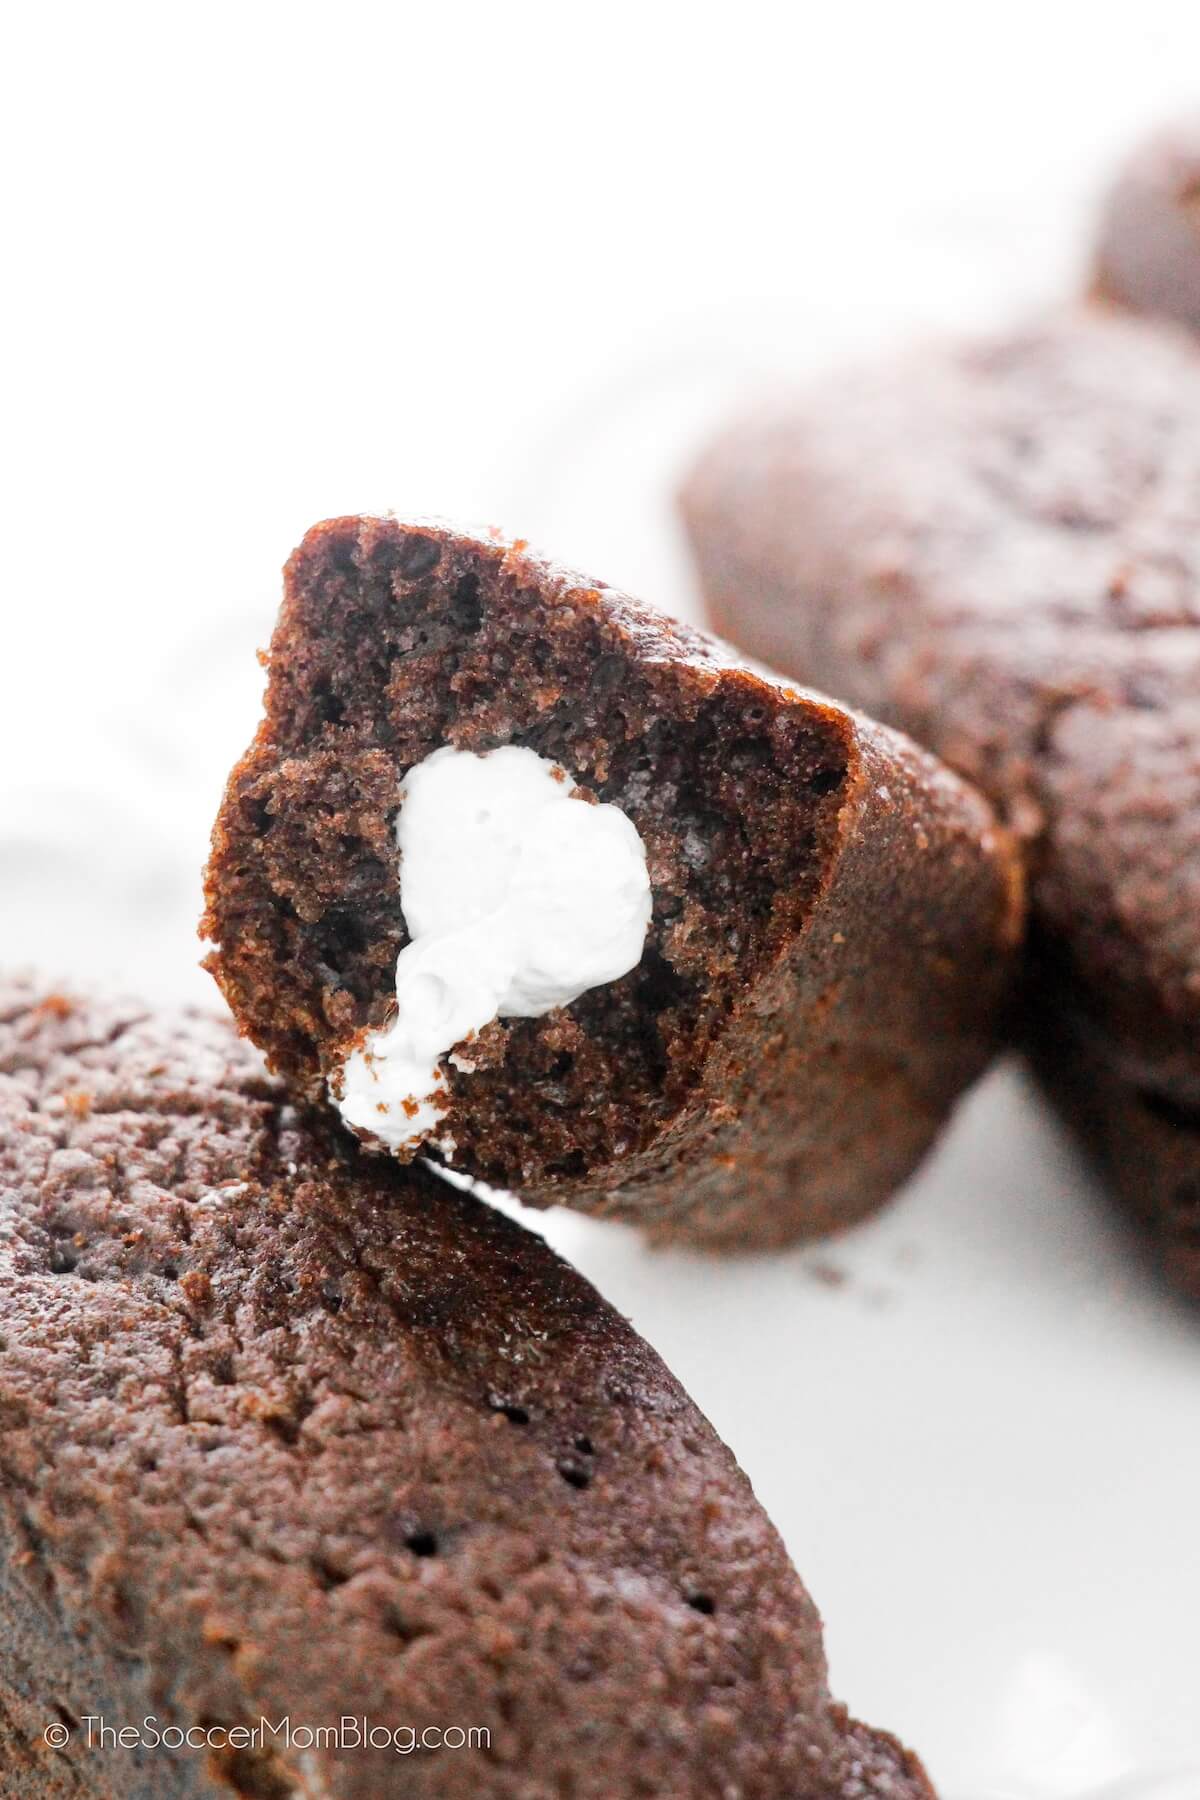
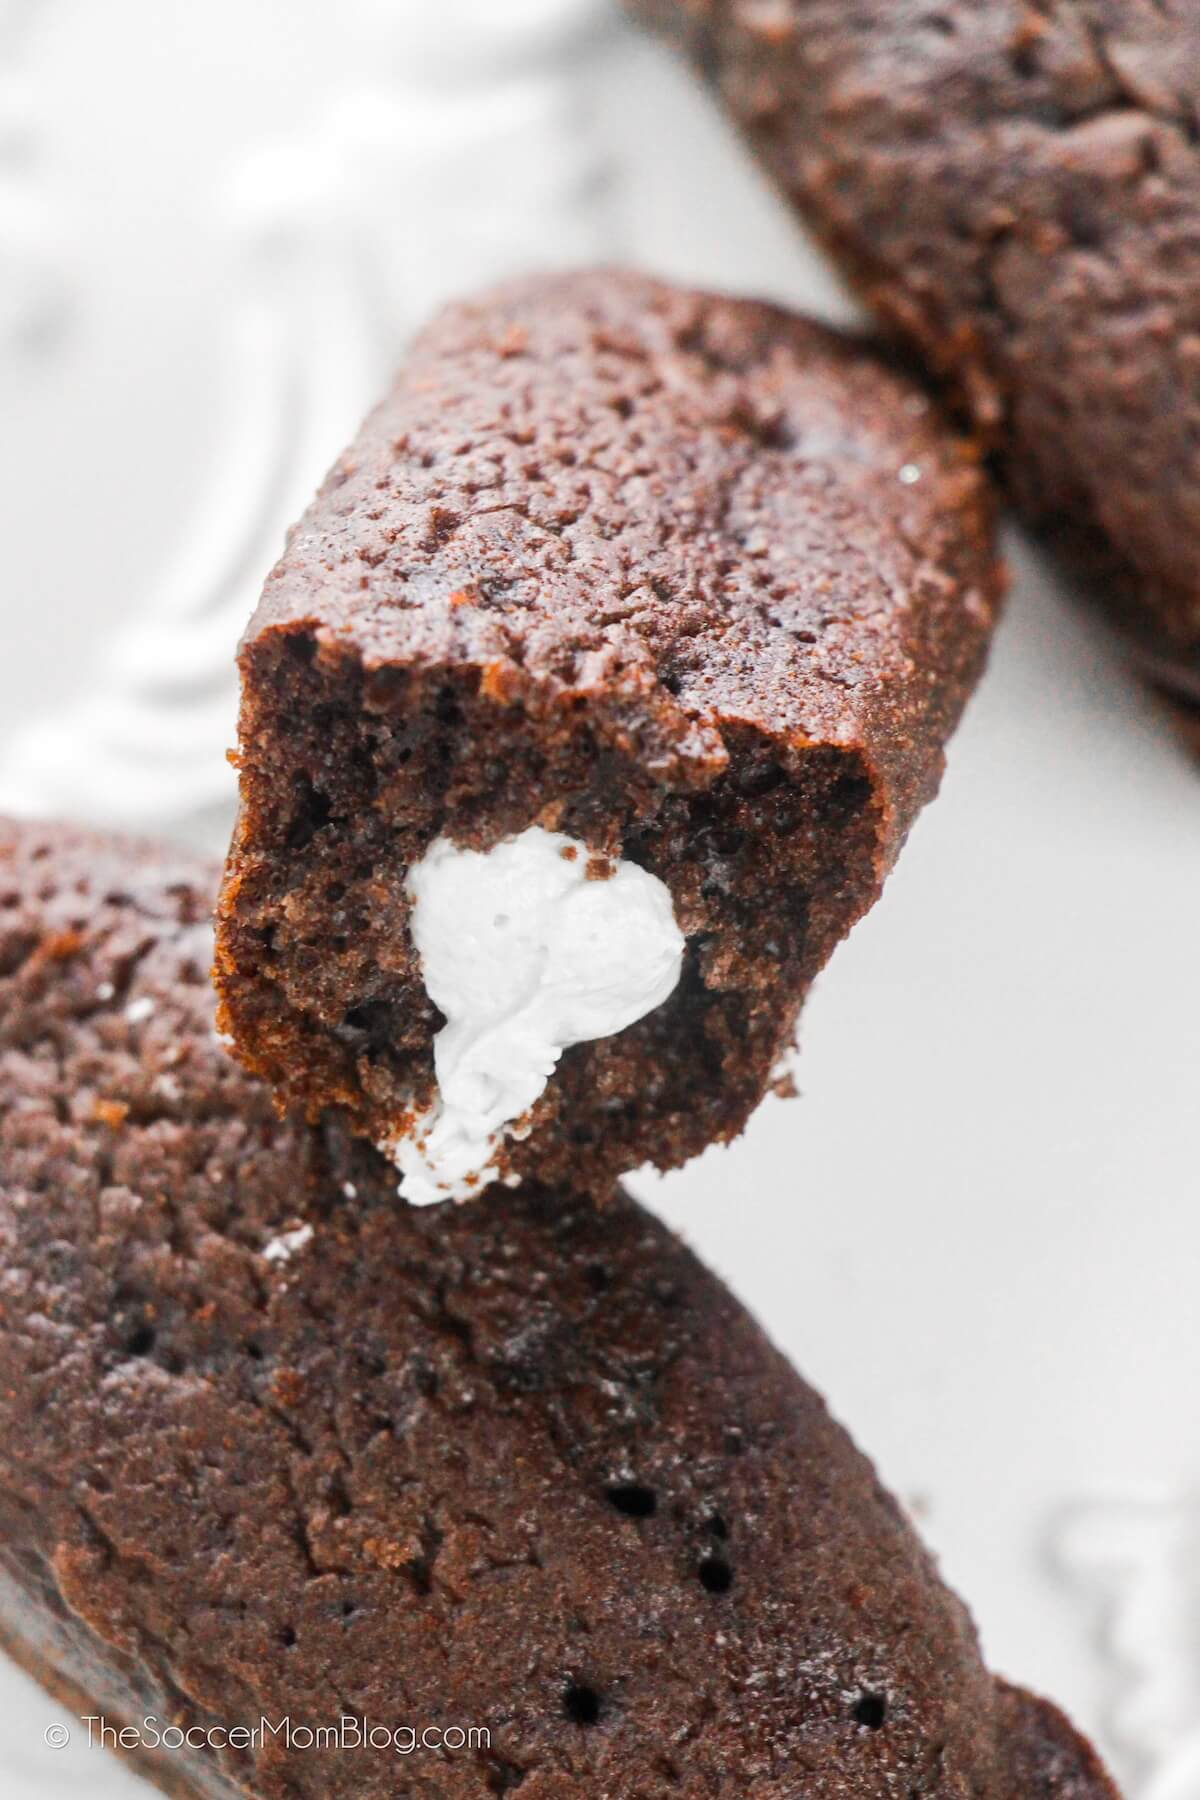
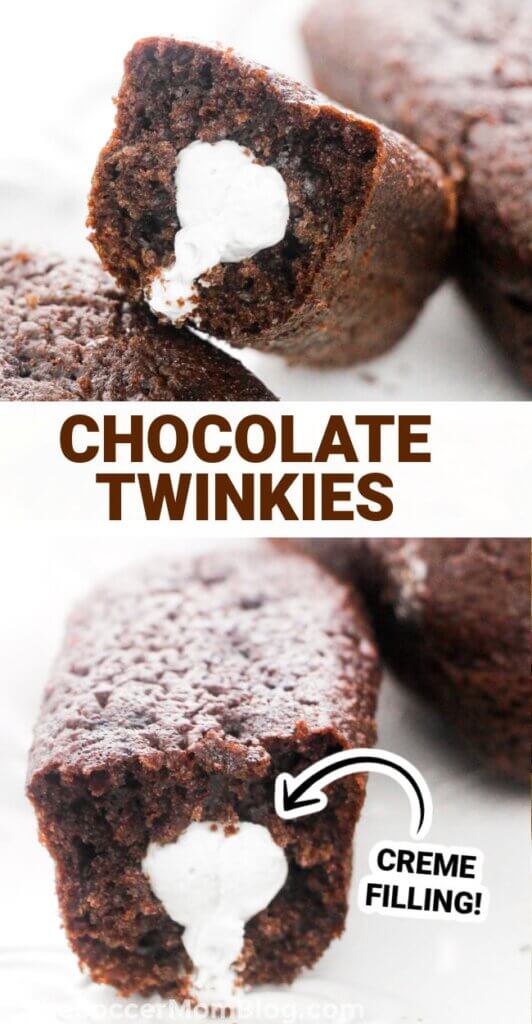
Delicious chocolate sponge cake filled with a fluffy marshmallow cream — these Homemade Chocolate Twinkies are even better than the original!
Chocolate Twinkies
A taste of childhood!
Growing up, every day we got a treat in our lunchbox. Sometimes it was Swiss Cake Rolls, sometimes it was Hostess Cupcakes, and sometimes it was Twinkies! I think Twinkies are pretty much synonymous with childhood nostalgia, am I right?!
If you like Hostess cupcakes, you will LOVE these chocolate twinkies because they taste so similar! It truly is a combination of classic Twinkie and cream-filled chocolate cupcake.
We started with a light and airy chocolate sponge cake and used an easy trick to fill each cake with a fluffy creme. It’s similar to whipped cream, but a little richer in texture. Just like the real deal!
There’s SO much chocolate flavor and it pairs perfectly with that sweet cream center. What’s not to love?!
Love Snack Cakes?: Try our Copycat Little Debbie Oatmeal Creme Pie recipe and our Twinkie Strawberry Shortcake too!
Cake Ingredients
- 4 eggs
- 1 teaspoon salt
- 3/4 cup white sugar
- 3/4 cup flour
- 1/4 cup cocoa powder
- 1 1/2 teaspoon baking powder
- 2 Tablespoons melted butter
Cream Filling Ingredients
- 2 cups marshmallow cream
- 1/2 cup shortening
- 1 teaspoon salt
- 1/3 cup confectioners’ sugar
- 1 teaspoon vanilla extract
Kitchen Tools Used
Affiliate links provided for your convenience in re-creating this recipe; read disclosure policy here.
Instructions
To Prep: Preheat oven to 350°F and spray your pan with non-stick cooking spray.
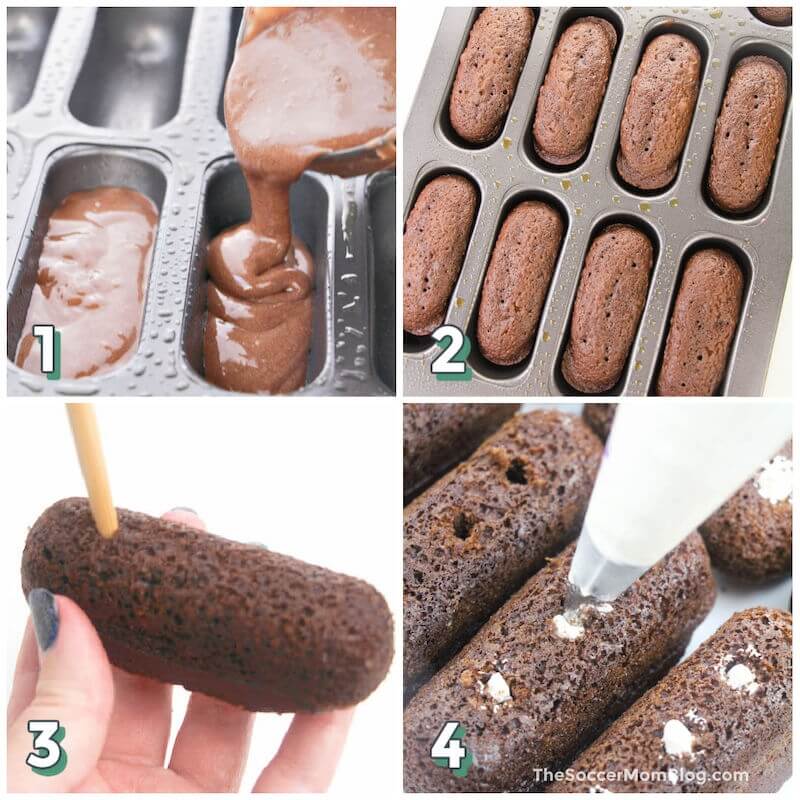
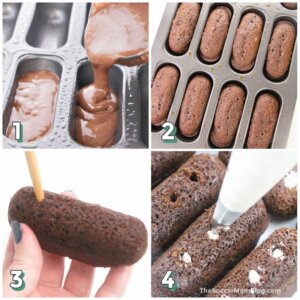
- To Make the Batter: In the bowl of a standing mixer, beat together the eggs and salt for 2 minutes. Add the sugar and continue beating for 13 more minutes until the eggs are bright white and soft peaks form. In a separate large bowl, stir together the flour, cocoa powder and baking powder. Fold half of the flour mixture into the whipped egg mixture. Add the butter, then add remaining flour mixture. Mix until smooth batter forms. Portion out the batter into the twinkie pan, filling each about 2/3 of the way.
- Bake for 15-18 minutes, until an inserted toothpick comes out clean. Allow to cool enough to handle, then pop the cakes out of the pan and onto a wire rack to finish cooling. You want them to cool completely before adding the filling.
- Using a chopstick, poke three holes in the bottom of each twinkie. Wiggle the end of the chopstick around a bit to make a bigger opening for the filling.
- Mix together the cream filling ingredients. We used a stand mixer with whisk attachment. Scoop the filling into a piping bag and snip a tiny amount off the end. Pipe the marshmallow filling into each of the three holes of each twinkie.
Prep Tips
- If the frosting filling seems too thick, mix in a teaspoon or two of hot water before scooping into the piping bag.
- Be sure to allow the cake to cool to room temperature before adding the filling! If the cake is still hot, it may melt the frosting and it won’t stay in place.
- If you don’t have a stand mixer, you can also use an electric hand mixer for this recipe.
- Love Twinkies? Try these fun Twinkie Cupcakes on our sister site, In The Kids Kitchen.
Frequently Asked Questions
Do Homemade Twinkies Need To Be Refrigerated?
As this is a marshmallow-based frosting, it does not require refrigeration. I recommend storing your homemade twinkies in an airtight container at room temperature.
While store-bought Twinkies basically last forever, the homemade version does not contain preservatives so the shelf life is more like 3-5 days. However, the fresh taste makes it so worth it!
Can You Freeze Twinkies?
Sure! If you want to make a big batch and save some for later, you can freeze these chocolate twinkies. To do so, wrap each individual twinkie cake in plastic wrap, then place them in a large freezer bag. They’ll last for 2-3 months when frozen.
Can You Use Cake Mix?
For a shortcut, you can use chocolate cake mix to make your twinkies. Now, keep in mind that the texture will be slightly different, as our from-scratch recipe is for a fluffy sponge cake. But they will still taste great and if you’re in a hurry this may be the way to go!
Chocolate Twinkie Recipe (Printable Recipe Card)
If you tried this recipe and liked it, please rate it!
Want to Save This Recipe?
Enter your email & I'll send it to your inbox. Plus, get great new recipes from me every week!
By submitting this form, you consent to receive emails from The Soccer Mom Blog
Homemade Chocolate Twinkies
Equipment
- Stand mixer
- Mixing bowls
- Twinkie Pan
Ingredients
Cake Ingredients
- 4 eggs
- 1 teaspoon salt
- 3/4 cup sugar
- 3/4 cup flour
- 1/4 cup cocoa powder
- 1 1/2 teaspoon baking powder
- 2 Tablespoons butter melted
Cream Filling Ingredients
- 2 cups marshmallow cream
- 1/2 cup shortening
- 1 teaspoon salt
- 1/3 cup powdered sugar
- 1 teaspoon vanilla extract
Instructions
- To Prep: Preheat oven to 350°F and spray your pan with non-stick cooking spray.
- To Make the Batter: Using a stand mixer or electric hand mixer, beat together the eggs and salt for 2 minutes. Add the sugar and continue beating for 13 more minutes until the eggs are bright white. In a separate mixing bowl, stir together the flour, cocoa powder and baking powder. Add half of this flour mixture to the whipped egg mixture and incorporate fully. Add the butter, then add remaining flour mixture. Mix until smooth batter forms. Portion out the batter into the twinkie pan, filling each about 2/3 of the way.
- Bake for 15-18 minutes, until an inserted toothpick comes out clean. Allow to cool completely before adding the filling.
- Using a chopstick, poke three holes in the bottom of each twinkie. Wiggle the end of the chopstick around a bit to make a bigger opening for the filling.
- Mix together the cream filling ingredients. Scoop the filling into a piping bag and snip a tiny amount off the end. Pipe the marshmallow filling into each of the three holes of each twinkie.
Notes
Nutrition
Pin our Chocolate Twinkies Recipe on Pinterest:
You might also like:
- Paper Chain Octopus Craft - April 24, 2024
- Amish Sugar Cookies - April 19, 2024
- Marshmallow Playdough - April 18, 2024


Leave a Reply