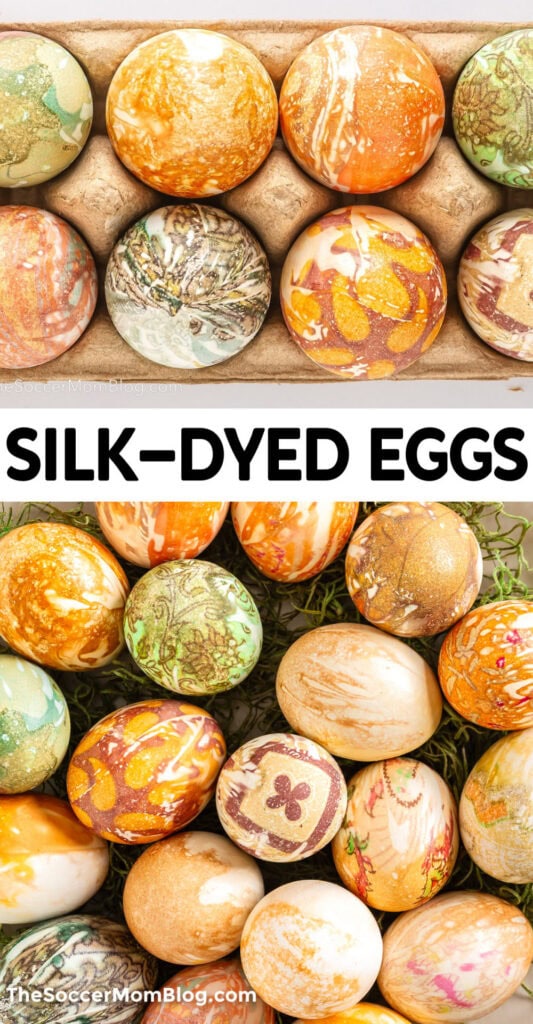
Silk Dyed Eggs
Learn how to make stunning silk-dyed Easter eggs with bold, one-of-a-kind patterns using silk fabric, vinegar, and water.
Silk Dyed Easter Eggs
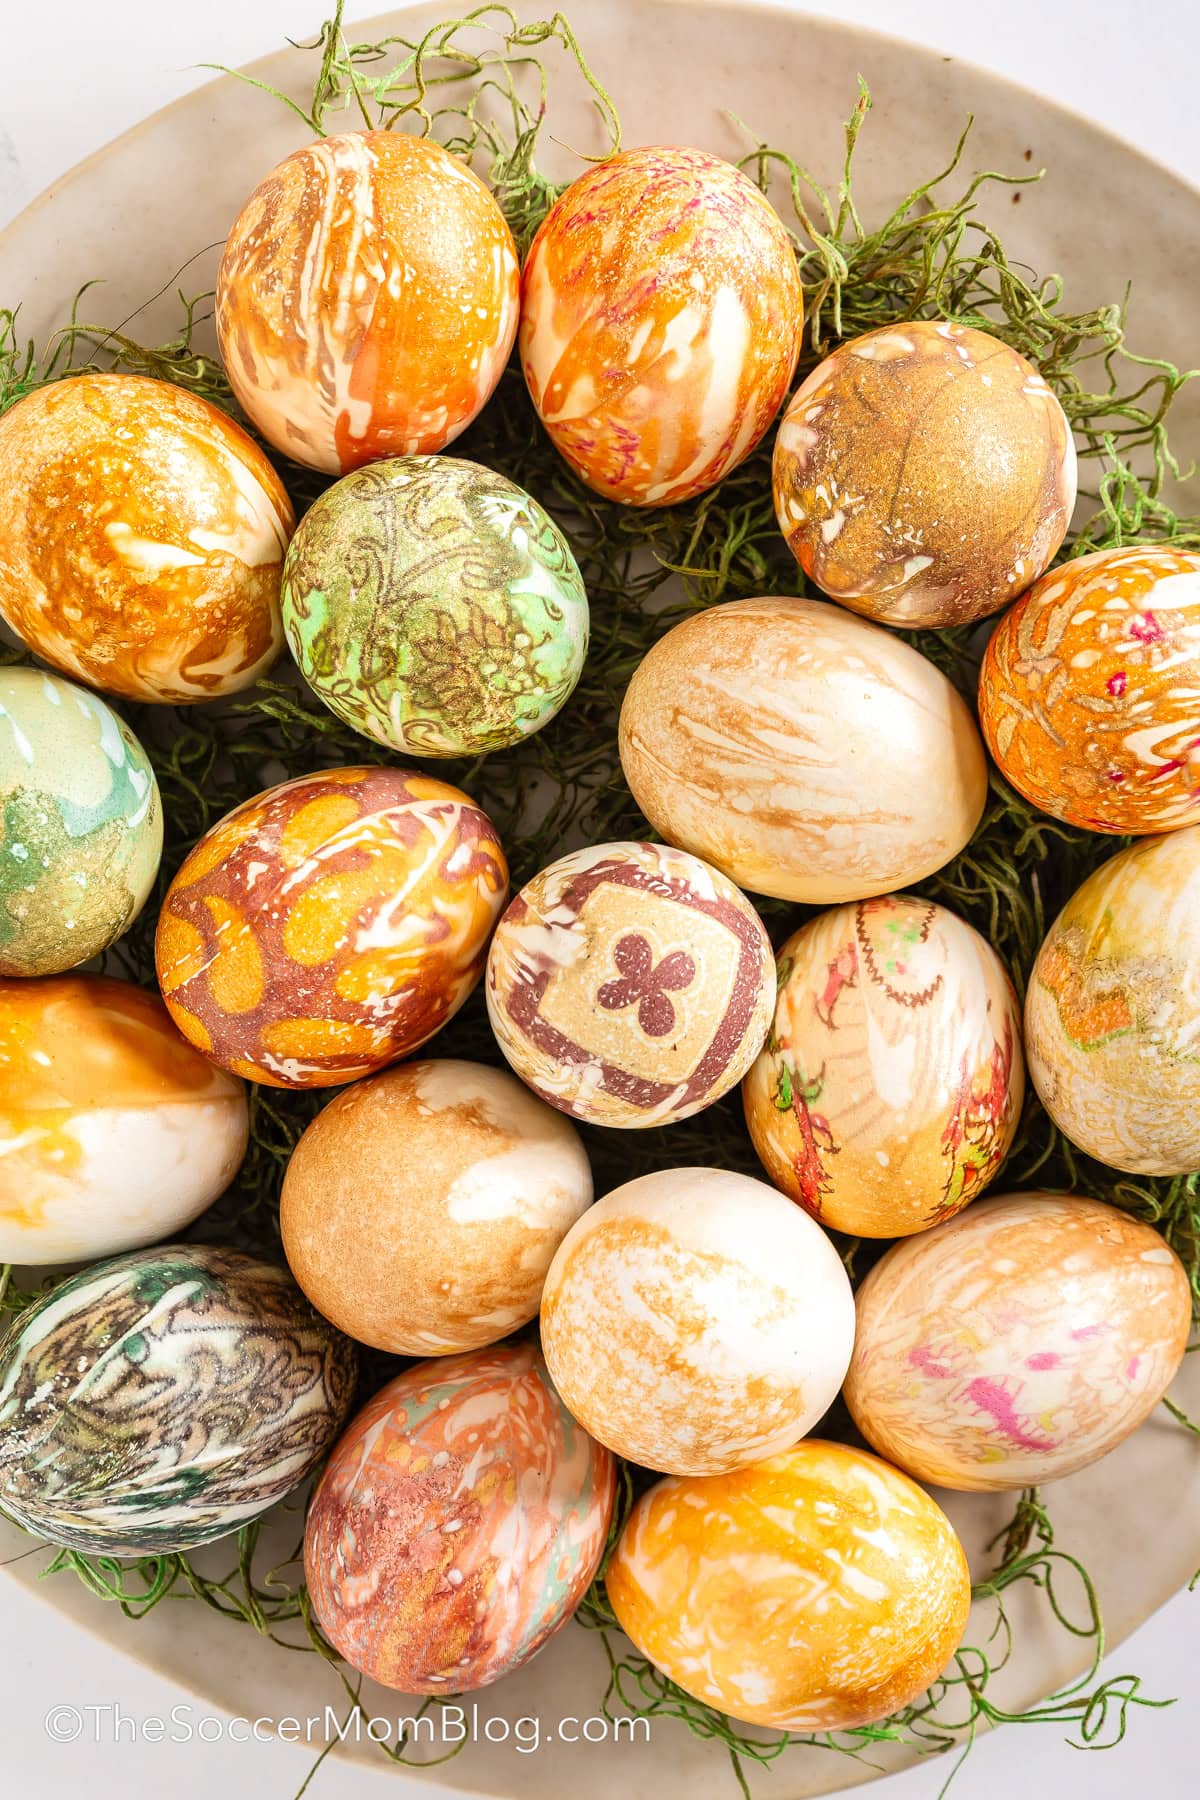
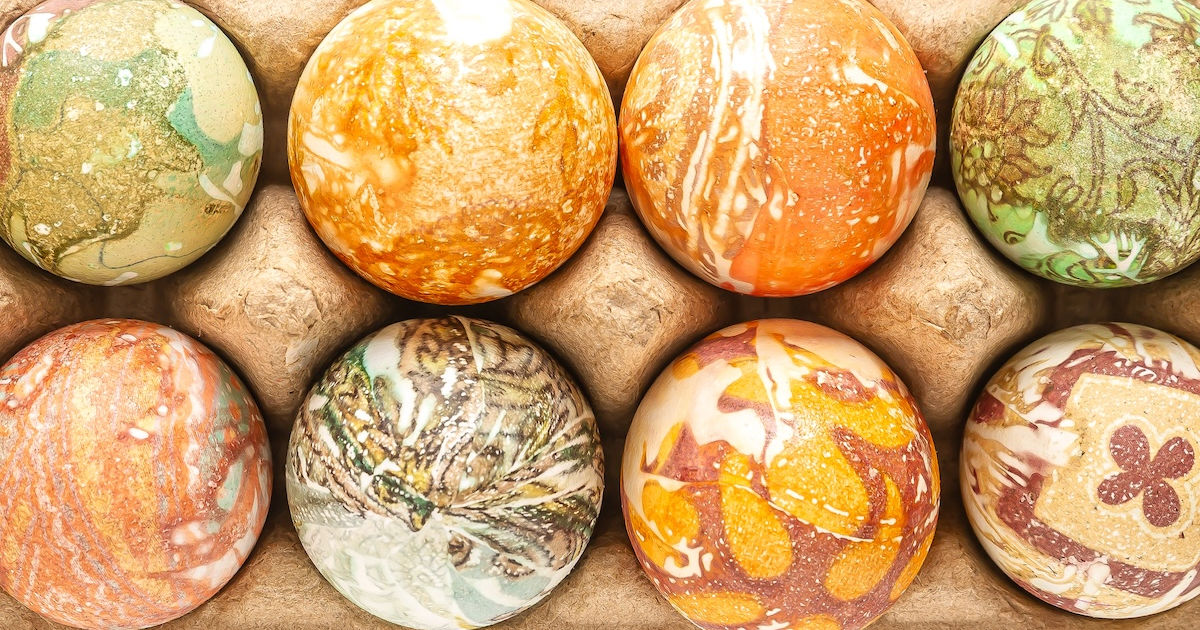
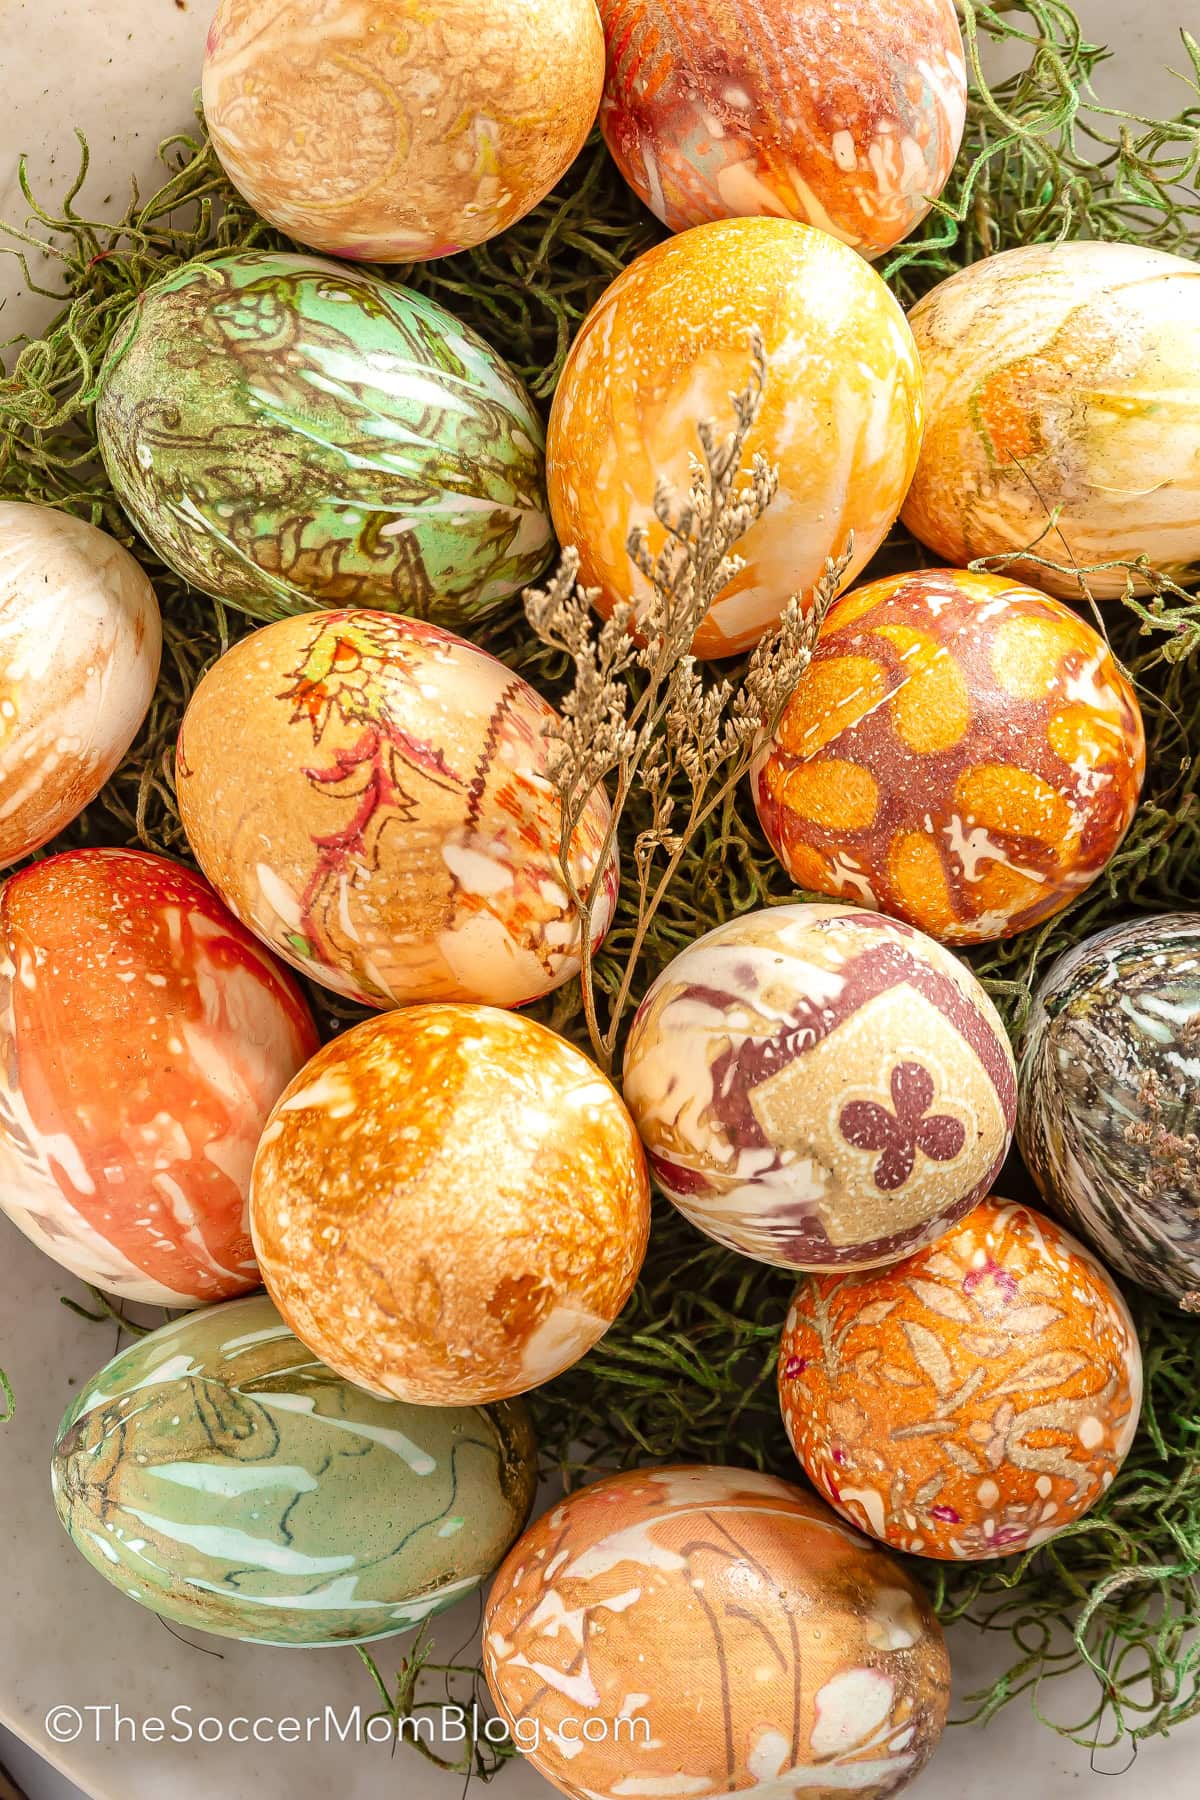
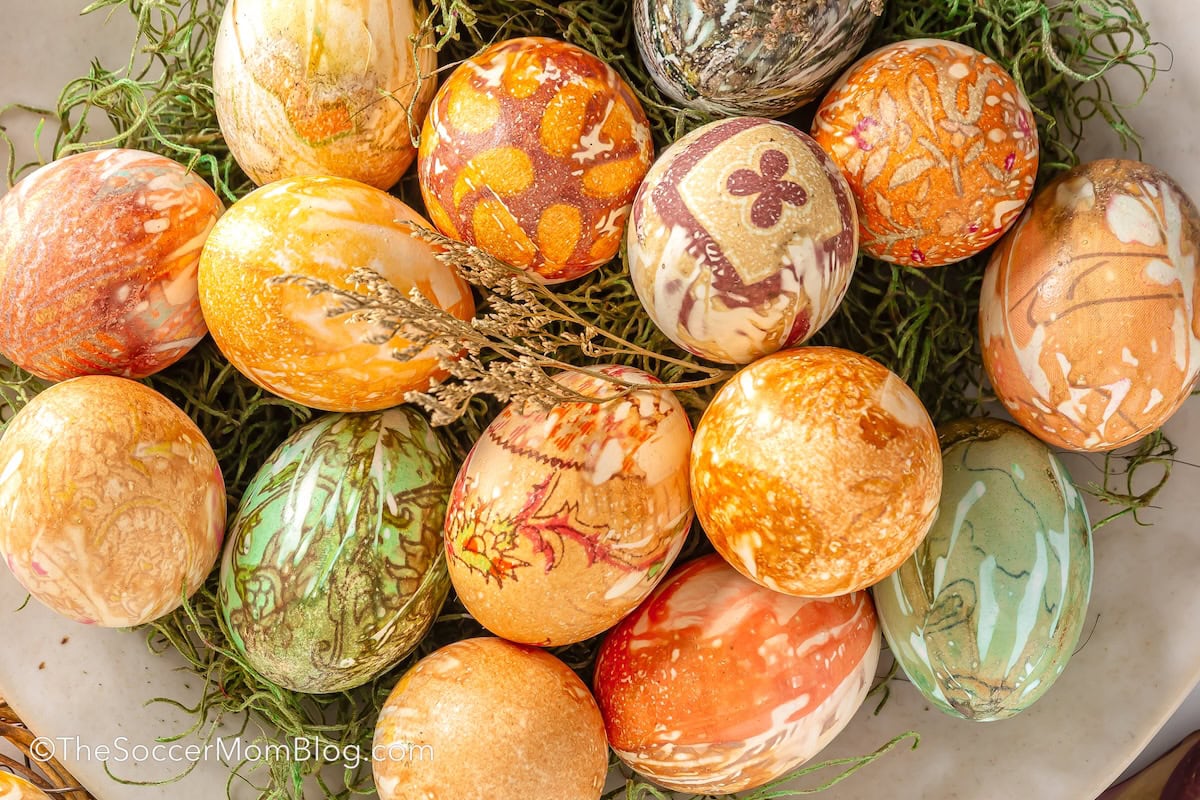
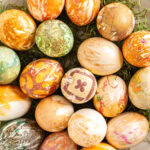
If you’re looking for an Easter project that feels a little extra special, silk-dyed eggs are pure magic. No two eggs ever turn out the same! Each one picks up the intricate patterns and colors from the fabric, creating designs that look almost too pretty to be real. They’re one of those simple crafts that somehow end up looking like you spent way more time on them than you actually did…and they make a stunning centerpiece for your Easter table.
How It Works
The “why this works” part is just as fascinating as the final result. Many 100% silk fabrics are printed with special dyes that are meant to bond with natural fibers like silk itself. Eggshells, even though they look smooth, are actually slightly porous. When you boil the eggs wrapped tightly in silk, those dyes release from the fabric and cling to the surface of the shell. Adding a little vinegar to the water helps that transfer happen more easily, almost like giving the color a gentle nudge to stick.
What makes these eggs so eye-catching is how the pattern transfers. Wherever the silk is pressed snugly against the egg, the design shows up in beautiful detail. Any spots where the fabric doesn’t sit flat stay white, creating that bold contrast that makes each egg look so intricate and one-of-a-kind. It’s part science, part surprise, and completely gorgeous every single time.
For your convenience, I’ve included shop-able ad links to supplies used; read our full disclosure policy here.
Supplies
- Pure silk fabric squares (approx. 8-inch squares)
- Muslin fabric squares (approx. 8-inch squares)
- White Vinegar
- Large Pot
- Water
- Scissors
- Tongs
- Large White Eggs
- Butcher’s twine
- Paper towels
- Vegetable oil (optional)
Instructions
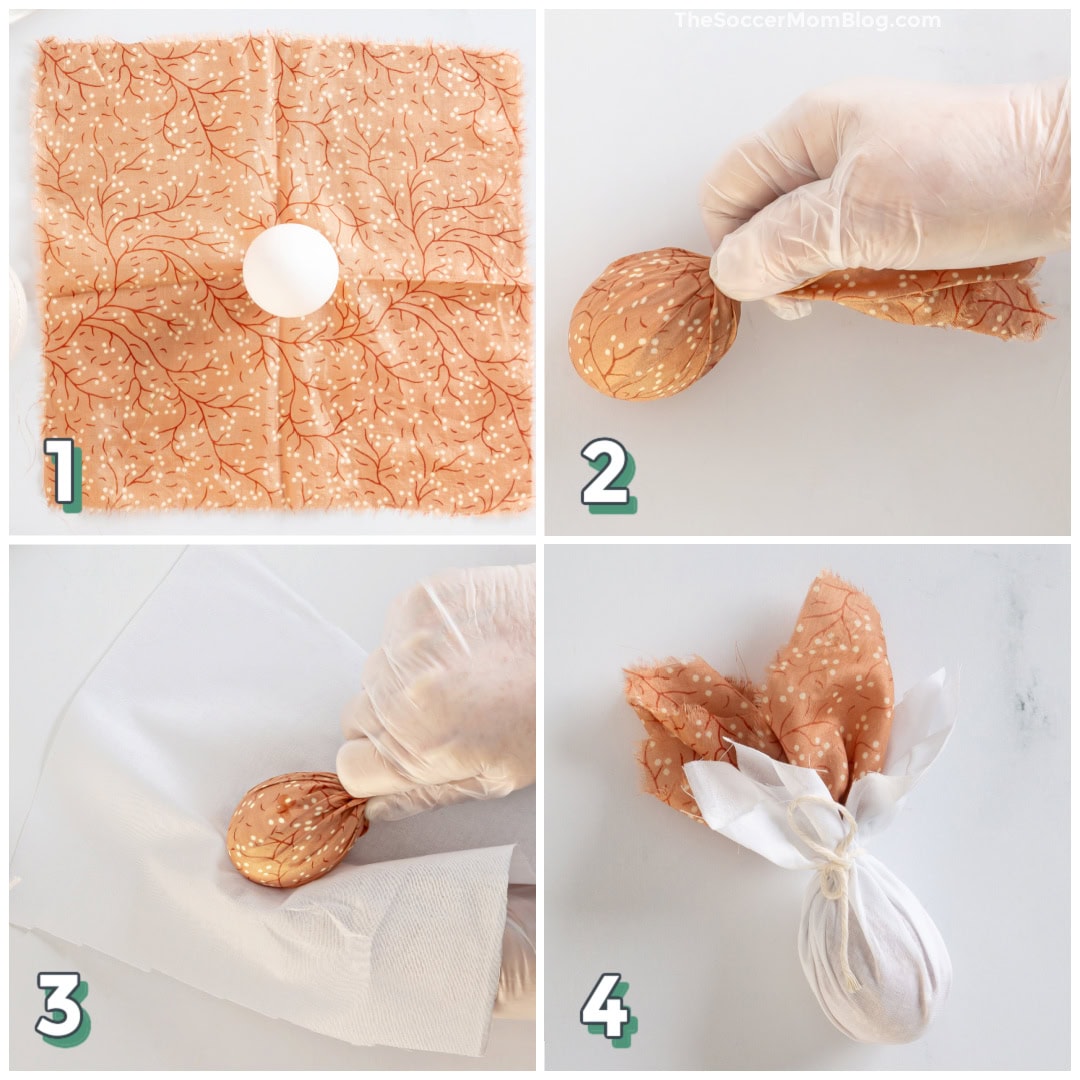
To Prep: Cut the fabric into squares. Cut twine into 6” pieces and set out so everything is easy to reach when you’re working.
- Prepare the Eggs – Place an egg in the center of one piece of the pure silk fabric. Gather the fabric up tightly at the small end of the egg. Add a layer of muslin fabric, wrapping tightly. Tuck the fabric around the egg, smoothing out and flattening the folds. Keep in mind that any spot where the silk does not touch the egg will remain white. Tie the piece of twine around the small end of the egg, taking care not to pull hard enough to break the egg. Gently pull the muslin to flatten any gaps.
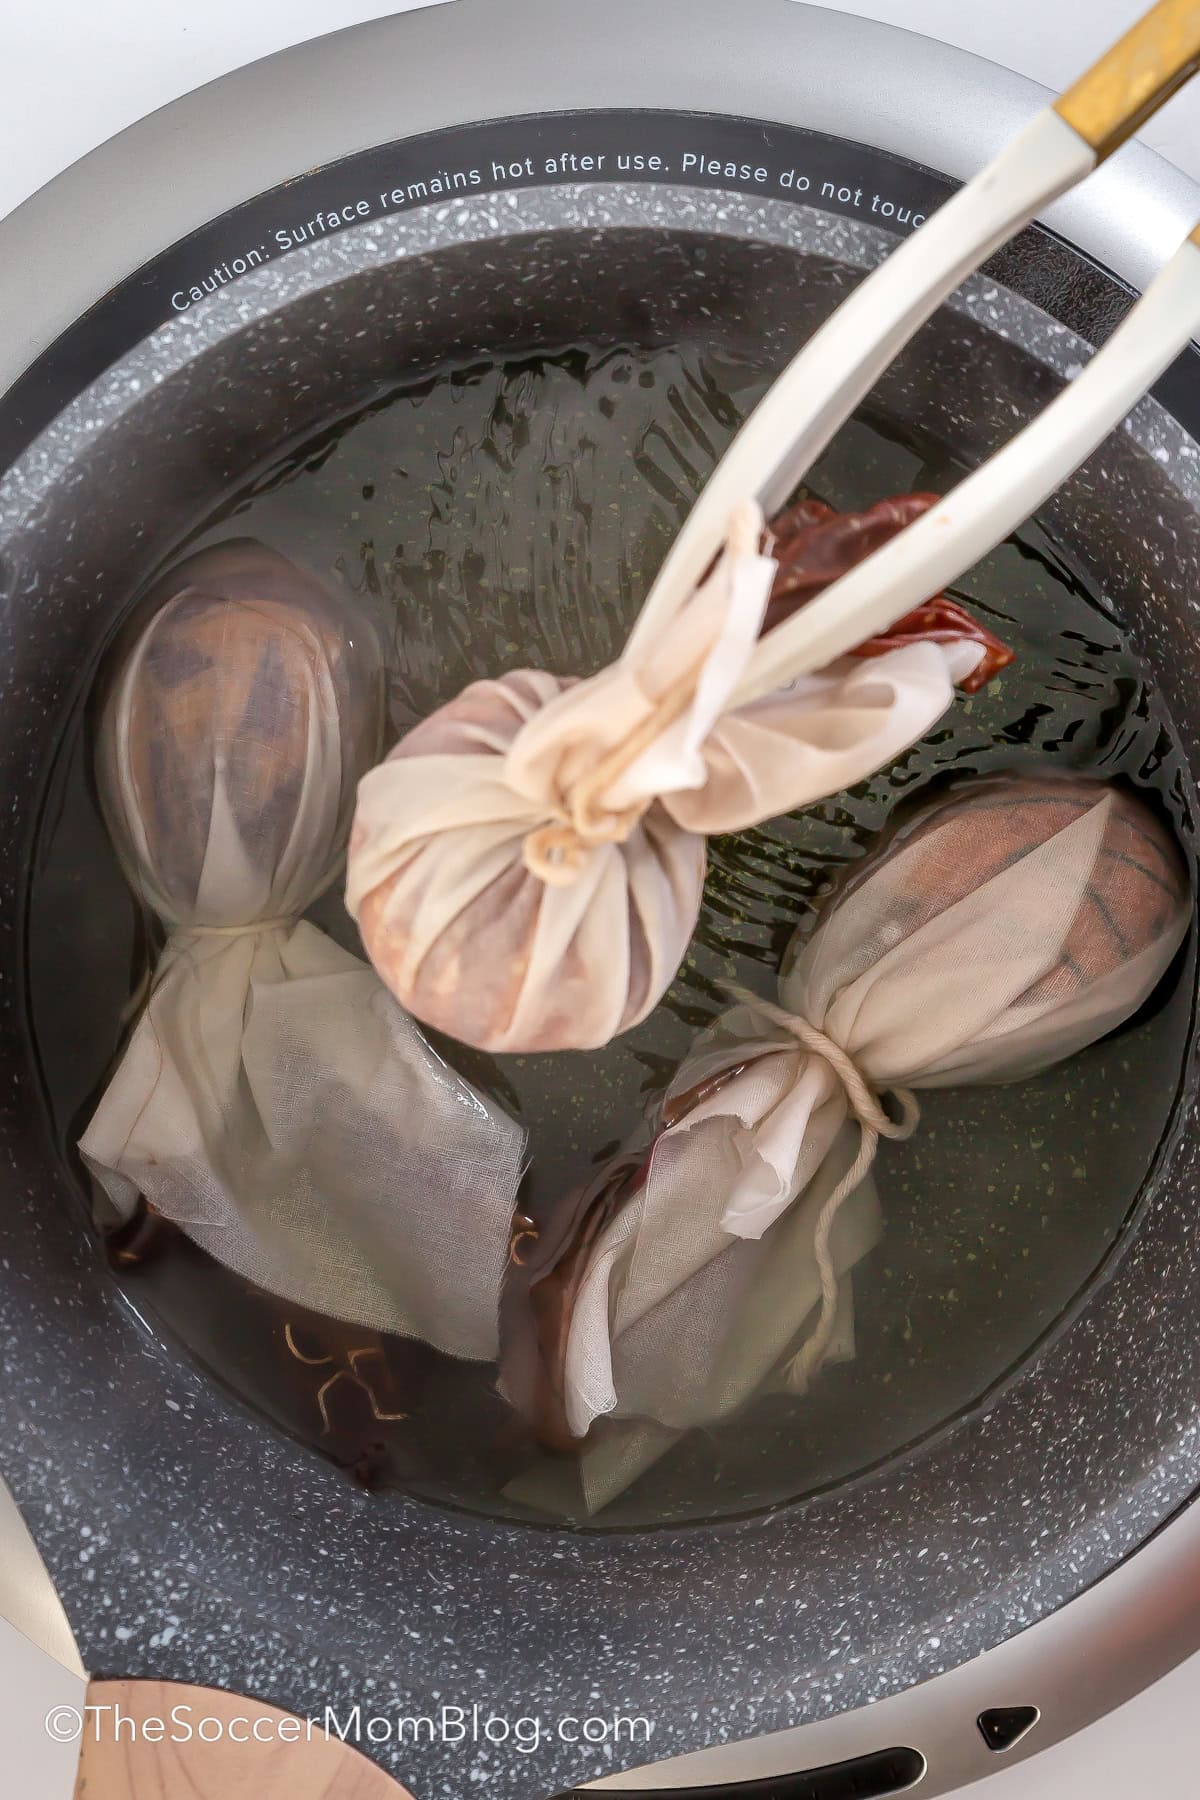
- Prepare the Pot – Add the water to a pot large enough to cover all the eggs, over medium heat. Add vinegar to the pot, at a ratio of about 1/4 cup for each quart (4 cups) of water.
- Boil the Eggs – Bring the water to a rolling boil and use tongs to lower each egg gently into the water. Once all eggs are in the water, set a timer for 20 minutes. Depending on the size of your pot, you may need to work in batches.
- Cool and Dry – After 20 minutes, turn off the stove and remove pan from heat. Use tongs to gently remove the eggs from the water. Place them in a bowl or egg holder and allow them to cool to room temperature. Cut the twine and carefully unwrap the eggs to reveal your designs.
Prep Tips:
- Storage – Because these are real, uncooked eggs, they should be handled gently and kept refrigerated until ready to display. DO NOT EAT THE EGGS. THEY ARE FOR DECORATION ONLY!
- Add Shine – Once the eggs are fully dry, you can gently rub them with a tiny bit of vegetable oil. It gives the shells a soft, natural shine and helps the colors pop a little more. It’s totally optional, but this adds that extra “wow” factor and makes the patterns look richer and more finished.
- Revealing the Pattern – When the eggs are completely cool, gently untie and peel the fabric away from the eggs’ surfaces. Because every piece of silk wraps slightly differently around the egg, no two eggs will ever look the same.
Frequently Asked Questions
What is the Best Type of Silk to Use for Dying Eggs?
Vintage silk ties are a favorite for this project because they’re packed with bold colors and detailed patterns that transfer really well onto the eggs. Silk scarves and fabric scraps work great too, especially ones with small, repeating designs, as they tend to create the most intricate, eye-catching results.
Skip anything that isn’t labeled 100% silk. Blends or polyester fabrics won’t transfer the dye properly, so the colors can turn out faint or uneven.
Why Does The Water Turn Colors?
You might notice the water taking on a little color as it cooks, and that’s completely normal. Most of that dye doesn’t actually tint the eggs. The boldest, most detailed patterns come from the spots where the silk is in direct contact with the shell.
How Can I Make The Patterns Look Bolder?
One of the most important steps is wrapping the egg nice and tight.
The silk needs to be pulled snug against the shell so the dye can transfer clearly. Any wrinkles or air pockets will block that contact, leaving white spots behind. A little contrast can look pretty, but too many loose areas will take away from those crisp, detailed patterns.
Adding a layer of muslin over the silk helps keep everything secure while the eggs simmer, so the design stays sharp and in place.
More Easter Egg Decorating Ideas:
- Speckled Rice-Dyed Easter Eggs
- How to Dye Eggs with Food Coloring
- Natural Easter Egg Dyes
- Nail Polish Marbled Eggs
Silk Dyed Eggs Printable Instructions
If you tried this technique, please let us know how it went!
Want to Save This Recipe?
Enter your email & I’ll send it to your inbox. Plus, get great new recipes from me every week!
By submitting this form, you consent to receive emails from The Soccer Mom Blog
Silk Dyed Eggs
Equipment
- Large Pot
- Scissors
- Tongs
- Paper Towels
Ingredients
- Pure silk fabric squares 8”x8” approximately
- Muslin fabric squares 8”x8” approximately
- White Vinegar
- Water
- Large White Eggs
- Butcher’s twine
- Vegetable oil optional
Instructions
- To Prep: Cut the fabric into squares. Cut twine into 6” pieces and set out so everything is easy to reach when you’re working.
Prepare the Eggs
- Place an egg in the center of one piece of the pure silk fabric. Gather the fabric up tightly at the small end of the egg.
- Add a layer of muslin fabric, wrapping tightly. Tuck the fabric around the egg, smoothing out and flattening the folds. Keep in mind that any spot where the silk does not touch the egg will remain white.
- Tie the piece of twine around the small end of the egg, taking care not to pull hard enough to break the egg. Gently pull the muslin to flatten any gaps.
Prepare the Pot
- Add the water to a pot large enough to cover all the eggs, over medium heat.
- Add vinegar to the pot, at a ratio of about 1/4 cup for each quart (4 cups) of water.
Boil the Eggs
- Bring the water to a rolling boil and use tongs to lower each egg gently into the water.
- Once all eggs are in the water, set a timer for 20 minutes.
Cool and Dry
- After 20 minutes, turn off the stove and remove pan from heat.
- Use tongs to gently remove the eggs from the water and place them in a bowl or egg holder and allow them to cool to room temperature.
- Cut the twine and carefully unwrap the eggs to reveal your designs.
Notes
- Silk Fabric: Use 100% silk (ties, scarves, or scraps) with bold or small repeating patterns for best results. Avoid blends or polyester, as dye transfer will be weak.
- Storage: Handle gently and keep refrigerated until ready to display. These eggs are for decoration only—do not eat.
- Add Shine: Once fully dry, lightly rub with a small amount of vegetable oil for a soft sheen and more vibrant color. Optional, but it enhances the finished look.
- Reveal Pattern: After the eggs are completely cool, carefully unwrap the fabric to reveal the design. Each egg will be unique depending on how the silk was wrapped.
Pin this Silk Dyed Easter Egg Tutorial on Pinterest:
You might also like:


- Beach Day Rice Krispie Treats - June 23, 2026
- Pickled Jalapeños Recipe - June 15, 2026
- Homemade Nesquick Mix - June 11, 2026