
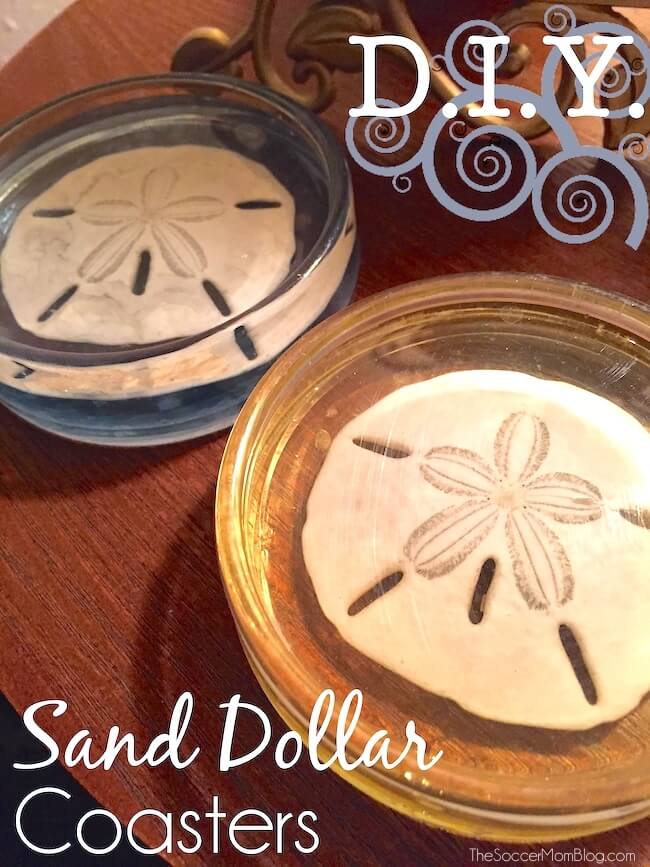
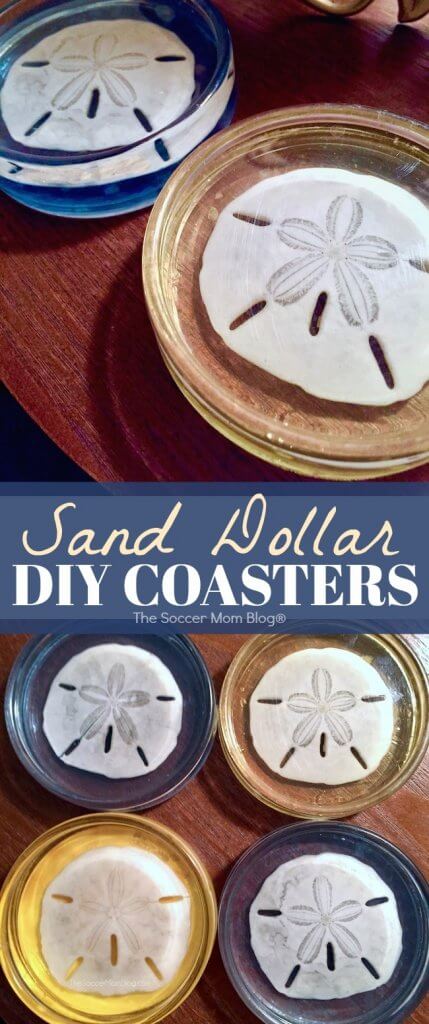
DIY Sand Dollar Resin Coasters
Bring the beach home with these gorgeous Sand Dollar Resin Coasters! They make a stunning and unique gift idea or home decor touch and they last for decades.
DIY Sand Dollar Resin Coasters
Growing up, my Grandpa had a huge basement that he dubbed both “Grandpa’s Dollhouse Workshop” and “Grandpa’s Seashell Workshop.”
He spent hours meticulously crafting wooden dollhouses for each of the girls in the family, as well as numerous resin crafts using seashells from his multiple yearly vacations with my Grandma.
My mom gifted me a set of these blue and gold sand dollar resin coasters that she found while moving and thought I might want. They’re made in the colors of West Virginia University, the alma mater of my dad and most of my aunts and uncles. It’s also where I went to college, so they hold special significance for me.
I loved these resin coasters as a kid, but “rediscovering” them as an adult, I can truly appreciate their uniqueness and the creativity and patience that went in to making each one.
After posting a picture on my social media, I received a lot of feedback, so I did a little research to share the method in which they were created. The process itself is fairly easy, though time-consuming (accounting for resin dry time).
But the results are stunning!
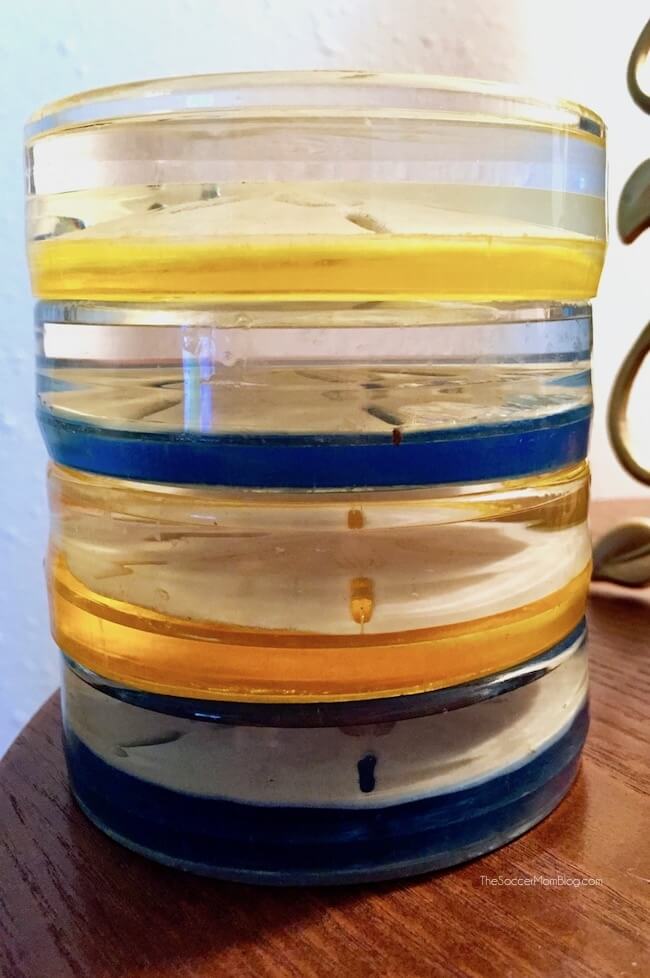
And they last for decades – the set of coasters my Grandpa made has lasted over 25 years so far!
After two and a half decades, they show a little wear, but are still in amazing condition (and we use them every day). Simply beautiful!

Resin Coaster Craft Supplies
For your convenience, I’ve included shop-able ad links to some of the products used to create these sea shell resin coasters; read our full disclosure policy here.
- Reusable coaster mold (make sure it’s designed to be used with resin — this Silikomart Silicone Mold
 has gotten great reviews)
 - Clear casting resin (we used Alumilite Amazing Clear Cast 16 oz)
- Resin catalyst (sold as a two-piece set in the above link)
- Transparent Resin Dye
- Mold Release Conditioner Spray (if you are using a silicon mold this might not be necessary)
- Disposable plastic cups or bowls for preparing resin
- Sand dollars
- Adhesive Felt
- Plenty of old newspaper or the like to cover your workspace!
How to Make Resin Coasters with Sand Dollars
STEP 1 — Apply a generous coating of mold-release spray to the surface of the coaster molds.
STEP 2 — Follow directions on package for preparing clear resin.
**Note: The directions say to stir resin until there are “no swirls,” however, I would err on the side of caution and over-stir. When the resin is not adequately mixed it will not set. Ever. (Don’t ask me how I know…)
STEP 3 — Fill mold halfway with clear resin. Allow to set (this can take anywhere from 5 minutes to a few hours depending on the type you’re using). **The resin we used took over an hour to set.
STEP 4 — Add another layer of clear resin, leaving 1/4 of the mold unfilled. Gently press sand dollar face-down into this layer, making sure that the bottom on the sand dollar is below the top of the coaster mold. Allow to set.
STEP 5 — Prepare colored resin by following directions on dye packaging.
STEP 6 — Fill rest of mold with colored resin. Allow to harden for a full 24 hours before removing coaster from mold.
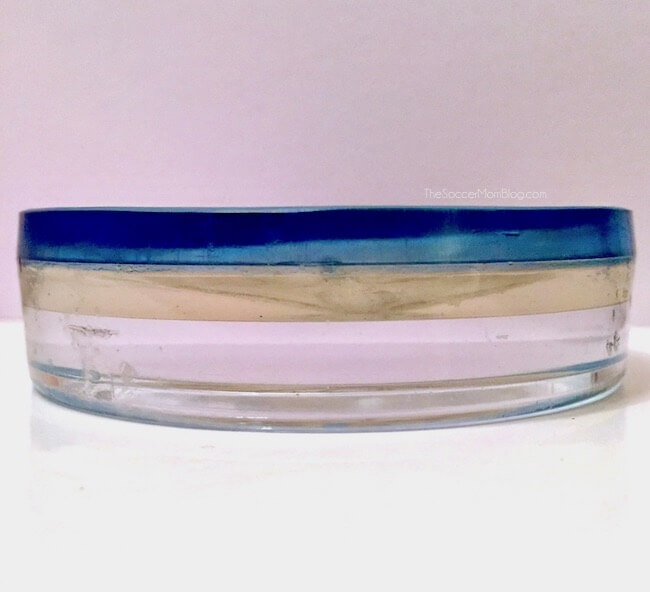
In this enhanced side view, you can clearly see the three resin layers. The bottom (top of the finished coaster) is clear resin, middle is clear resin containing the sand dollar, and top (bottom of finished coaster) is blue-dyed resin.
STEP 7 — When your sand dollar coasters are completely dry and you’ve removed them from the mold, apply adhesive felt to the back of coaster to prevent sliding on table surface. Trim felt as needed.
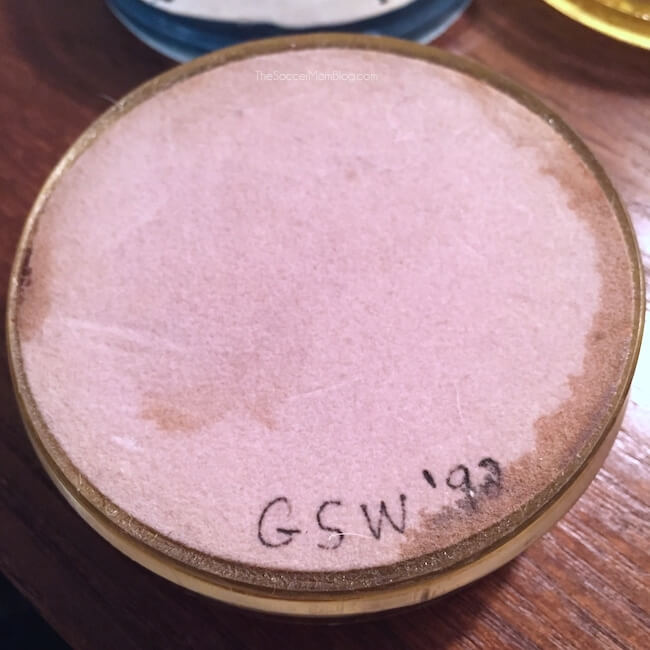
The back of a coaster covered with adhesive felt. GSW= Grandpa’s Seashell Workshop. Still in amazing shape for being over twenty years old!
Be sure to pin these gorgeous Sand Dollar Coasters on Pinterest:
More of our favorite resin crafts:
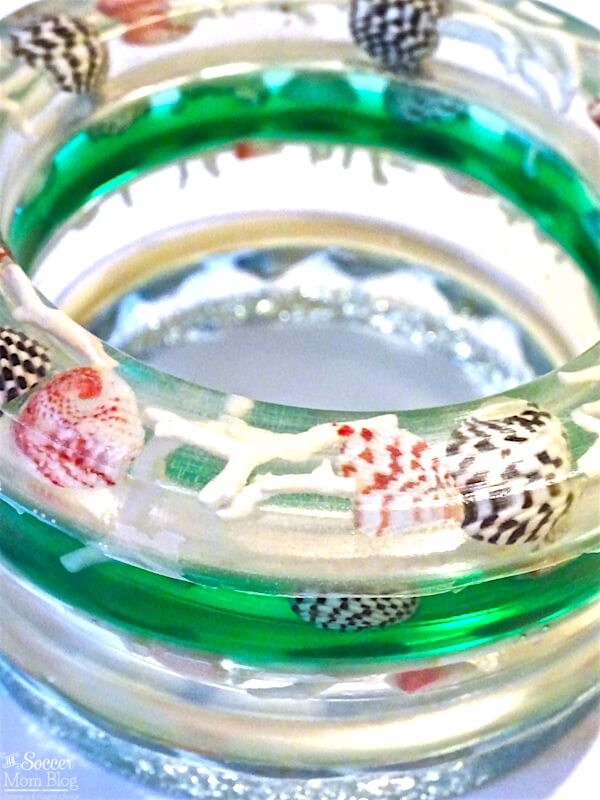
My sister and I also made these coral and seashell resin bangles with mini seashells and bracelet molds. Check them out to see how you can make them too!

- Beach Day Rice Krispie Treats - June 23, 2026
- Pickled Jalapeños Recipe - June 15, 2026
- Homemade Nesquick Mix - June 11, 2026


Oh wow, those are so unique and interesting looking! Your grandpa sounds like a dream grandpa, to be honest. How awesome!
Thank you that is such a nice thing to say! Grandpa was awesome and we miss him a lot! 🙂 I just “rediscovered” these coasters– I always thought they were cool as a kid, but now I really appreciate how creative he was. I’ve never seen anything like them elsewhere!
Would doing this mess up a painted sand dollar? My wife painted a really nice sea turtle on one for me. I’d love to do something to make sure I never brake it, but want to be sure I don’t ruin her artwork in the process.
I think it would probably be fine, but I haven’t tried painted shells before so I can’t say for sure. I would test the paint for color-fastness before dunking the whole thing in resin.
Just what I have been looking for! How many coasters were you able to make with one set of Alumilite Amazing Clear Cast 16 oz?
I think you should be able to make a full set of 4 coasters
Did you need to seal the sand dollars first?
i tried this & it turned my sand dollars grey? made me extremely sad as they were sand dollars collected by my late mother. i wish i could send you a pic to show you, it was such a bummer. did you use purchased sand dollars that have been bleached out and processed? i am so bummed, but willing to try again if there is something i need to do to preserve it first??♀️
Hi Denise – When my grandpa made these, he would find the sand dollars and bleach them himself in the sun. When you put them in the resin, did you put the sand dollars in a layer of clear resin and then put the colored resin on top of that layer?
The same thing happened to me. I called the company that makes the resin recommended by the author and they said the sand dollars should be sealed with a matte finishing spray.
That’s the only thing I can think of too, and I can add a note to the post as a tip for future readers. Unfortunately I can’t ask my Grandpa who created this craft — I’ve tried to recreate it to the best of my knowledge. I do want to let you know that I checked my coasters and my sand dollars are not perfectly white either — I’m not sure if it is possible for them to be bright white!
Update! I tried this again using ModPodge matte spray (strong smell so use in a ventilated area) on the sand dollar. I also did a glue wash consisting of half Elmers glue and half water. I had the best result using the glue wash first and after letting it dry a day or so later, i used the matte spray.
Hi there!
I tried this craft yesterday and I had a similar experience to another one of your readers. I used a sand dollar which I had whitened with sun and bleach. Rinsed repeatedly in fresh water which I left to dry for several weeks. The sand dollar turned a dull gray-brown and now you can’t see the “flower”. I used the recommended resin and silicone molds. Did you seal the sand dollars with anything prior to embedding it in the resin? That’s the only thing I can think of as to why it turned such an ugly color. Please advise. Thank you!
Hi Keli, I took a closer look at my coasters this weekend and the sand dollars are not actually bright white either. They are not totally grey, but not perfect white either. I think you could probably seal them with a spray sealant first, before putting in the resin — that may help slightly. Unfortunately I can’t ask my Grandpa the exact process — I’ve tried to recreate it to the best of my knowledge from watching him work years ago. If you do try them again, let me know how it goes!
I had the same problem of the sand dollar “turning grey” because it absorbed the resin making it translucent. I think I need to seal the San dollar with a coat of watered down glue to plug the holes. Then try it again. Any other suggestions?
Hi Angie, unfortunately I am not able to ask my Grandpa the exact process — I’ve tried to recreate the steps to the best of my knowledge. I took a close look at my coasters, and I do want to let you know that they are not perfectly white either. I don’t know if that is possible! You may try coating with a sealant before putting in the resin. Also, I don’t know if you did this already, but be sure that your sand dollars are only in the clear resin, and that the colored resin is a separate layer on top of that. Hope this helps!
Did you prep the sand dollars? When I used resin some of the sand dollars turn to translucent.
You may try a protective spray coating if you’re having an issue with discoloration.
The pictured coasters appear to have a rim around the coasters. Is there a rim and if so can you please share how this was created?
Thank you!
I believe that the rim is due to the specific mold my Grandpa used in his original coasters.