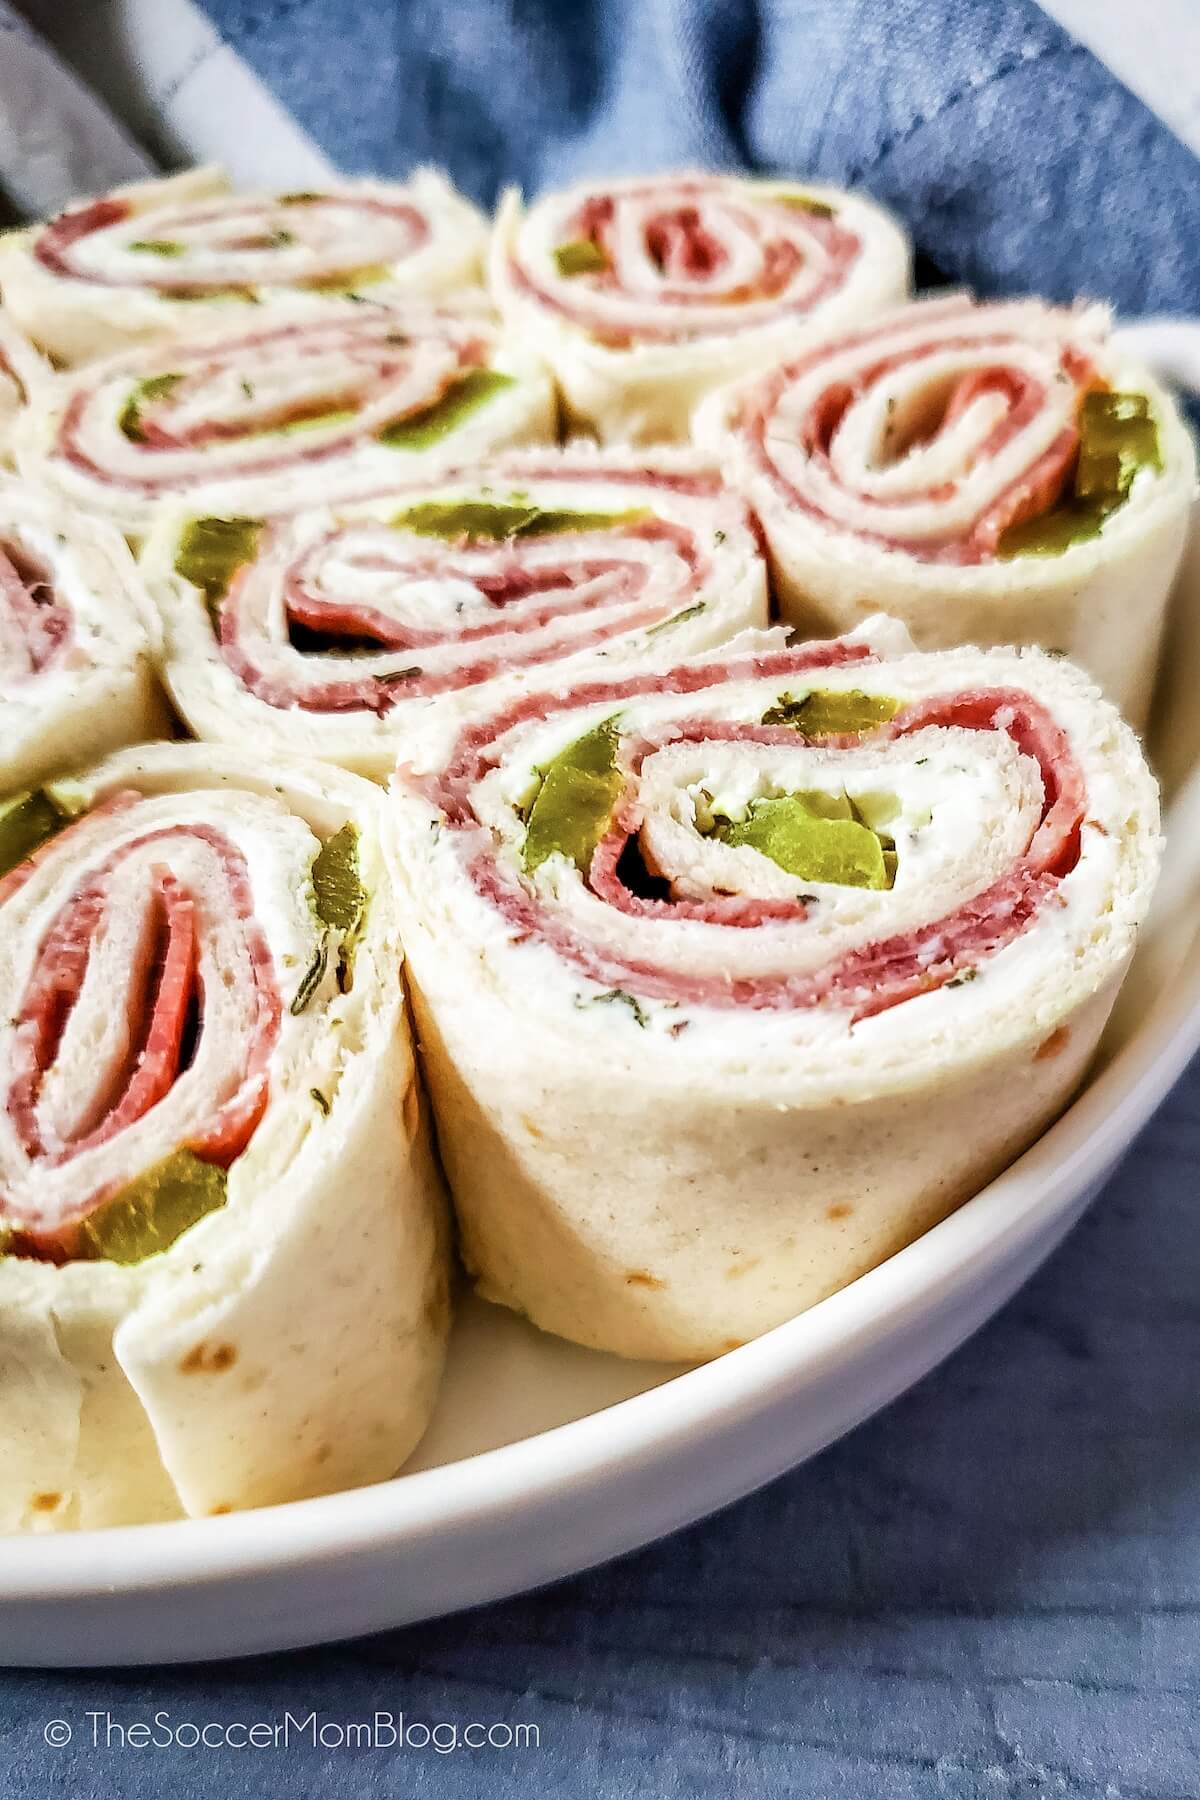
Dill Pickle Roll-Ups
These pickle pinwheels are a fun party food and a great grab-and-go lunch. They only take a few ingredients and 15 minutes to make!
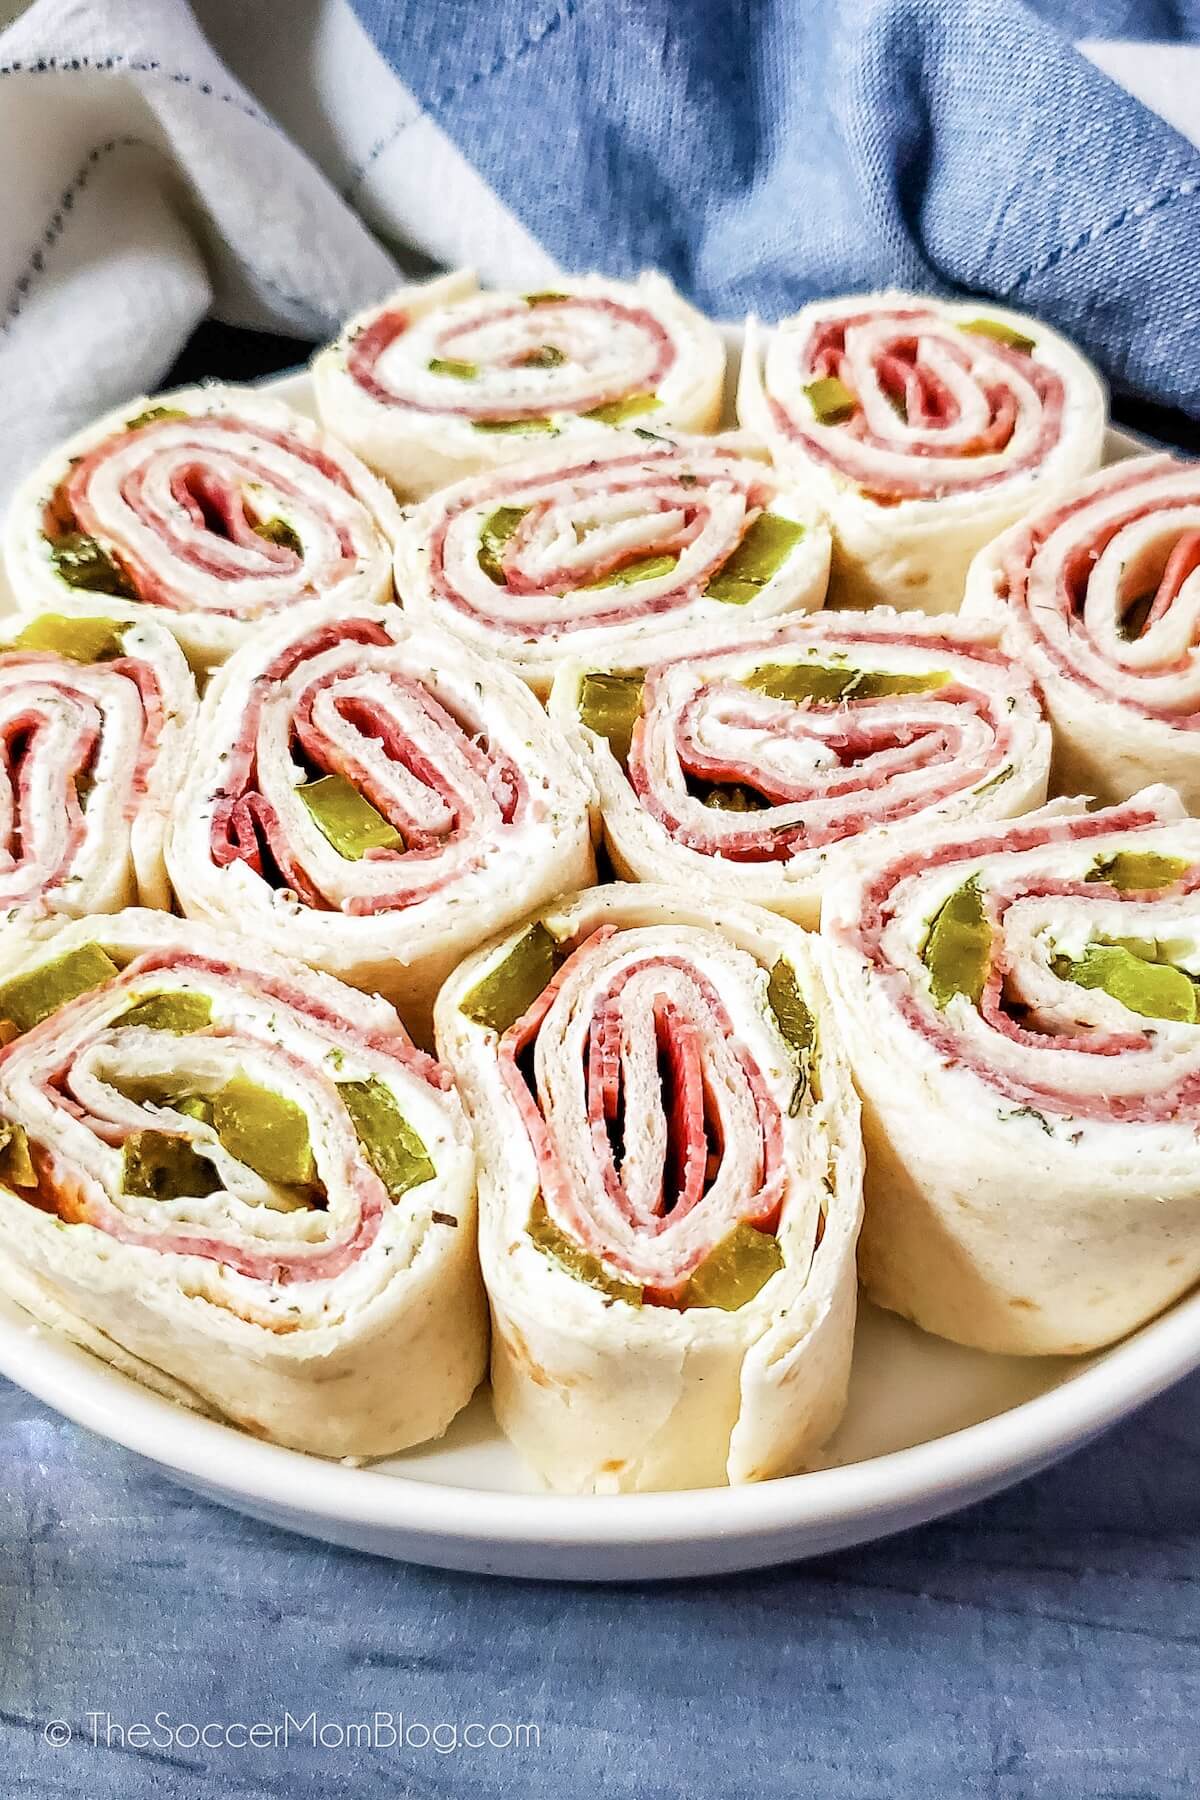
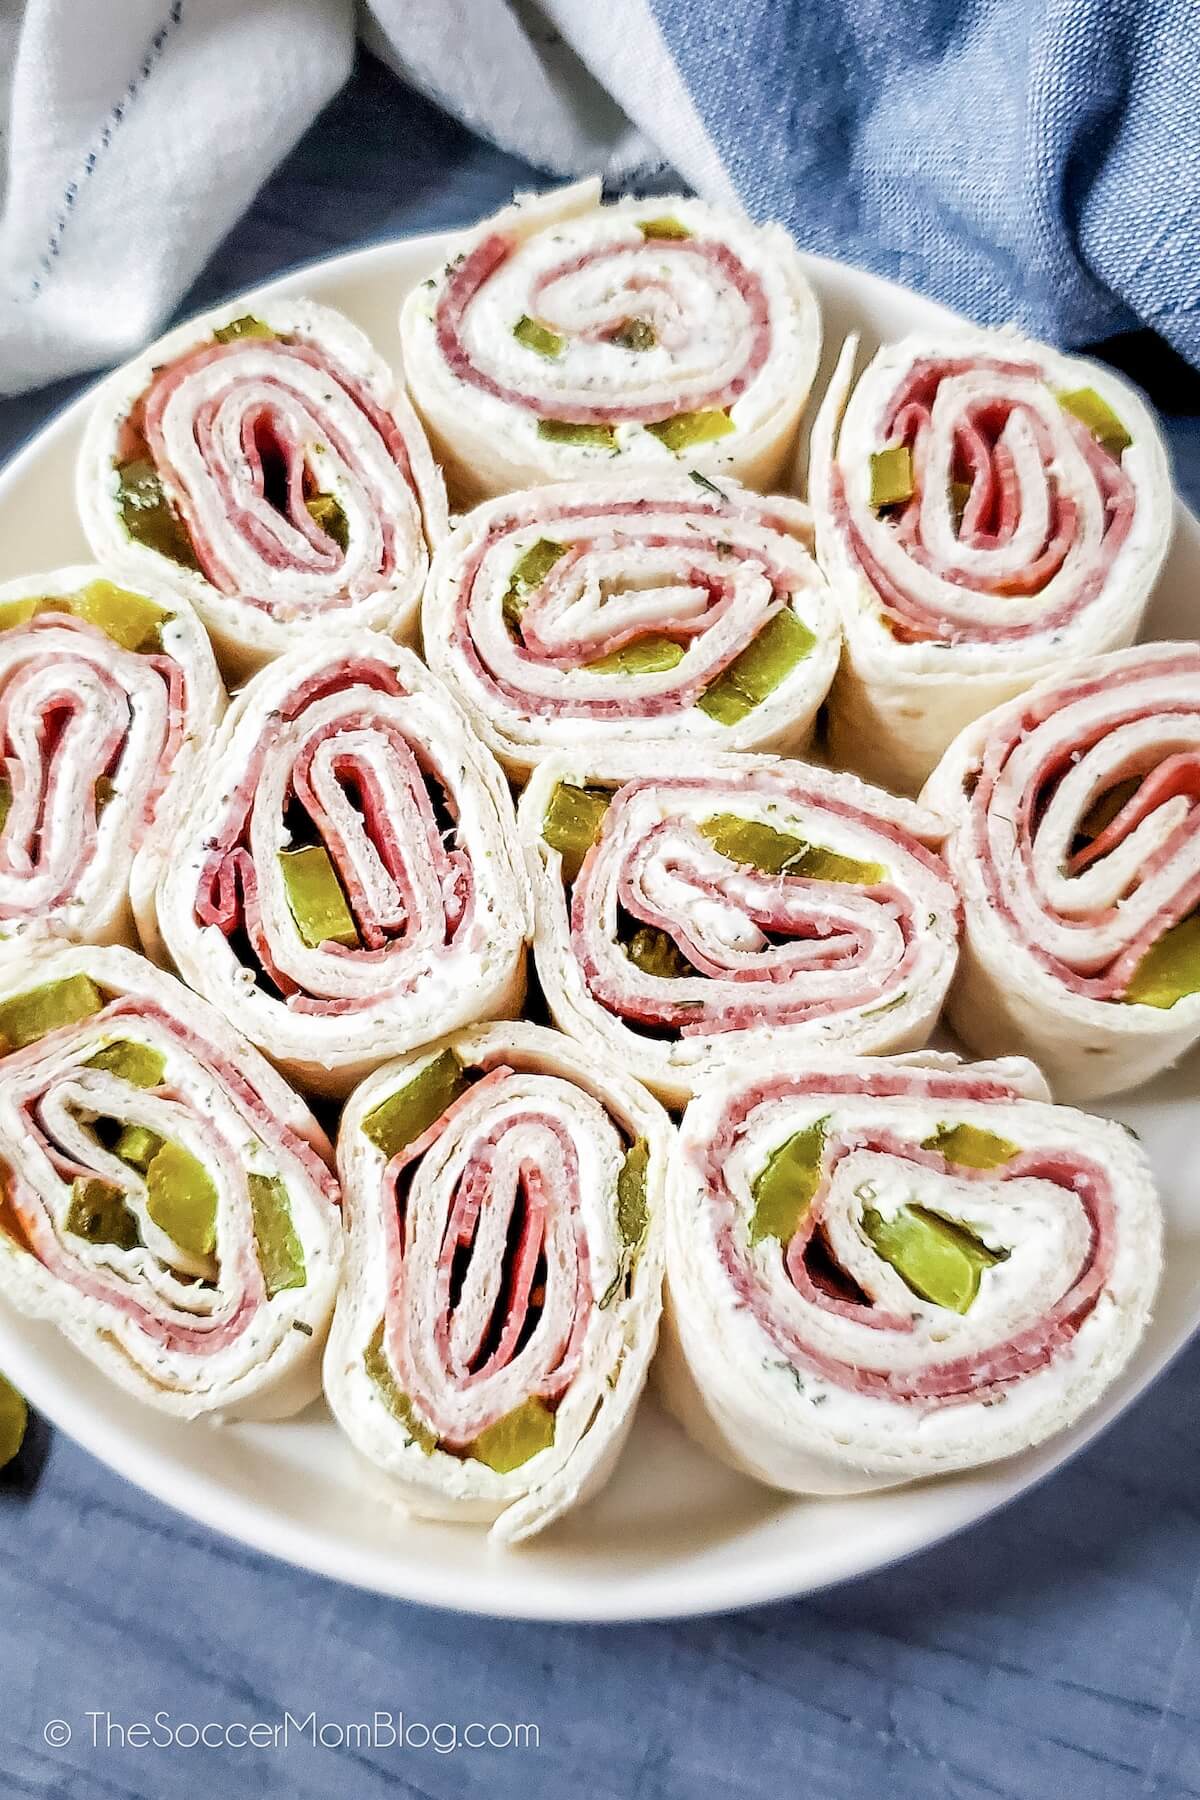
Dill Pickle Pinwheels
If you are looking for an easy party appetizer that only takes a few minutes to put together, you can’t go wrong with these dill pickle pinwheels. With just 5 ingredients, they seem so simple, but these pickle roll ups are packed with flavor!
Savory deli meat, crisp and tangy dill pickles, and a zesty Italian cream cheese spread are rolled up into one tasty bite. Pure perfection!
This is a great game day appetizer because you can make it ahead of time and simply set out the tray when it’s go time. But this also makes a fantastic dish to make if you’re in a hurry or get a last-minute party invite because you can whip up a batch in about 15 minutes!
Pickle pinwheels are a classic appetizer or light lunch that’s been popular for generations, and it’s easy to see why!
Related: Make your own homemade dill pickles with our easy refrigerator dill pickle recipe!

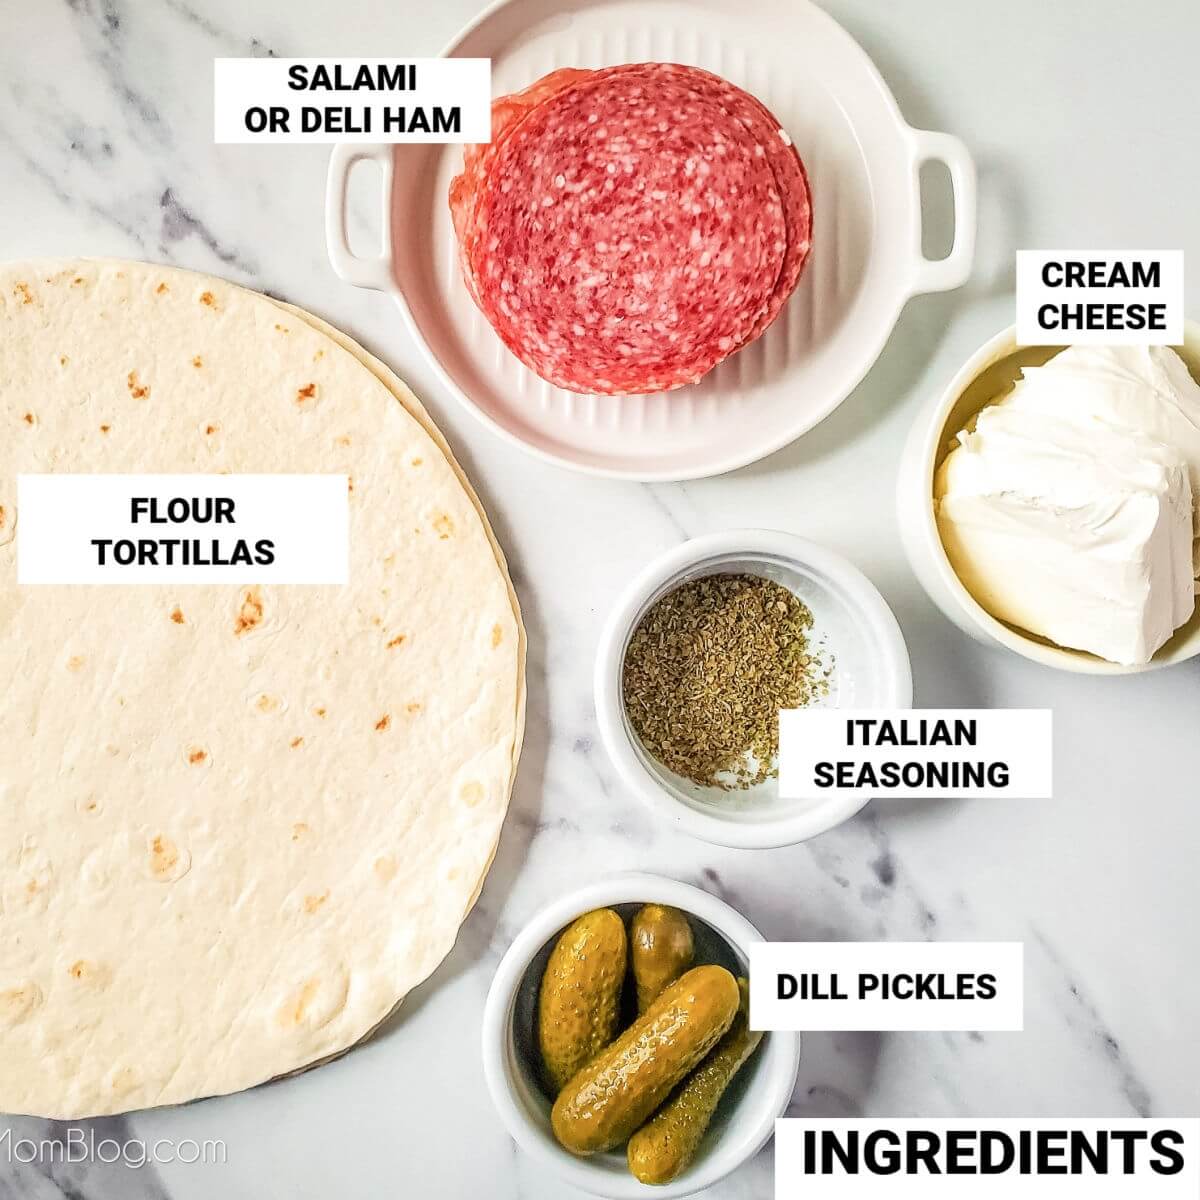
Ingredients
For your convenience, I’ve provided shop-able ad links to products used to make this recipe; read our disclosure policy here.
- Cream cheese, softened
- Italian seasoning
- Large flour tortillas
- Baby dill pickles or dill pickle spears
- Thin sliced hard salami or deli ham
Helpful Kitchen Tools
- Serrated Knife
- Plastic Wrap
- Cutting Board
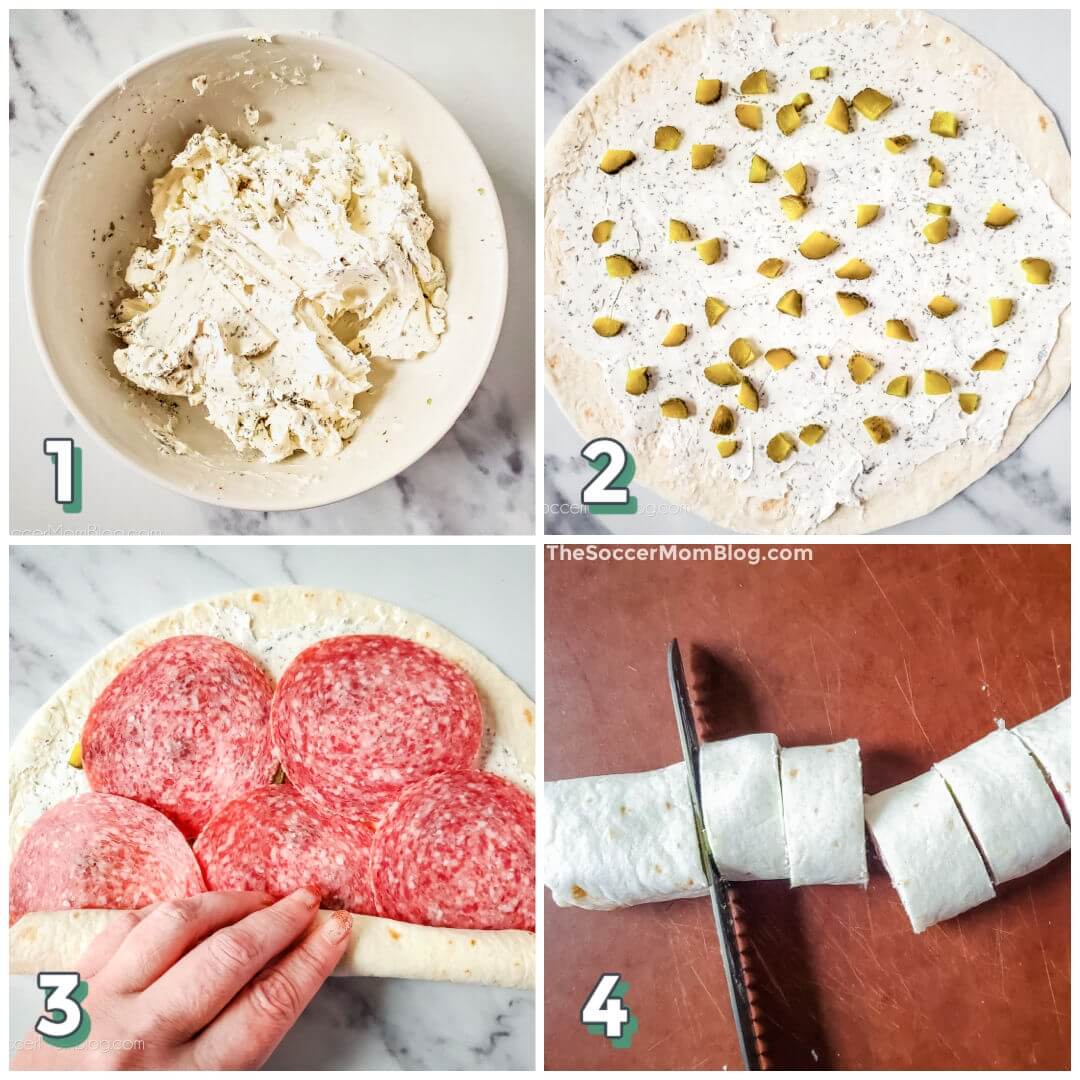
Instructions
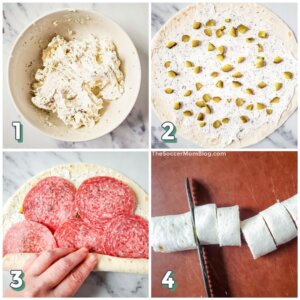
- Combine the softened cream cheese and Italian seasoning in a medium bowl and stir until the seasoning is well incorporated.
- Divide the cream cheese mixture evenly among the four tortillas and spread to coat the surface of each one. Scatter the pickles on the tortillas.
- Layer each tortilla with salami or deli ham. Start from one end and roll tortillas as tightly as possible, without squeezing out the cream cheese. Wrap each of the rolls in plastic wrap and refrigerate for an hour.
- When ready to serve, remove the plastic wrap and use a serrated knife to cut the rolls into one-inch pieces.
Prep Tips
- Be sure to use the large, burrito tortillas. A smaller tortilla may not be enough to contain all the ingredients.
- I find that a serrated knife works best for cutting the pinwheels into individual slices. After you cut each slice, rotate the pinwheel so that one side doesn’t get smashed down as you cut. I learned that trick from a sushi chef!
- You can absolutely use regular sized dill pickles or pickle spears for this recipe. However, I used baby pickles because they are smaller, with fewer seeds and juice inside. This helps keep the tortilla from getting soggy.
- Sweet pickles would also taste fantastic in these pickle rollups! This is my Granny’s sweet pickle recipe — I make a big batch every year!
- If you have the time, I recommend placing the finished pinwheels in the fridge for 30 minutes to an hour. This allows the cream cheese to firm up a bit, which will help the roll-ups keep their shape and stay together. It also allows the flavors to really meld and make the perfect tasty bite!
- Refrigerate any leftovers for up to a day.
Frequently Asked Questions
Can You Make This Recipe Ahead Of Time?
Sure! Tortilla roll ups can be prepared up to a day in advance and stored in an airtight container in the fridge until you’re ready to serve. I don’t recommend making them more than a day ahead, to prevent the tortillas from becoming soggy.
How Many Servings Does This Recipe Yield?
It depends on how much of each ingredient you use. But for reference, I did provide specific amounts in the printable recipe card below. With 4 flour tortillas cut into 1-inch slices, you should end up with about 6 pieces per wrap, for 24 individual pieces. Your serving size depends on how many pieces you have, but I’d estimate one wrap as a serving size for one person.
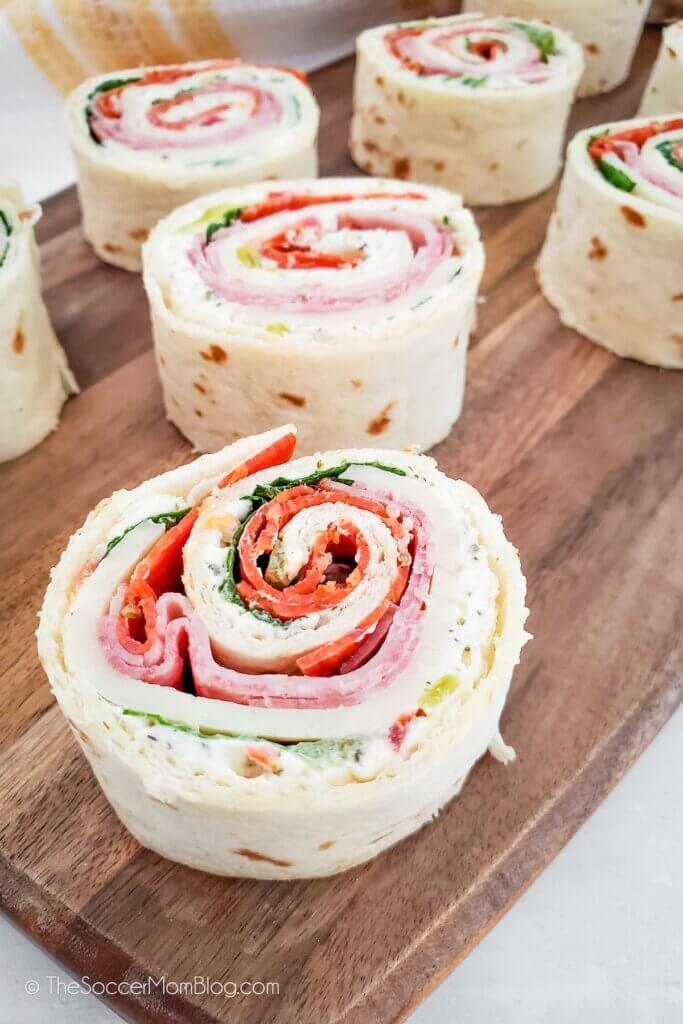
Can You Use A Different Kind Of Meat?
If you want to switch up the protein, this basic recipe works great with a variety of meats! We usually use salami or deli ham, but here are some more ideas:
- Smoked turkey and ranch dressing
- Roast beef and horseradish
- Sliced ham, cream cheese, green onions
Is This Recipe Keto Friendly?
The original recipe uses flour tortillas, which would have more carbohydrates than you’d want on a keto diet. However, a simple switch to a low carb tortilla or lettuce leaf wraps would make this keto compliant.
Related: Try our Keto Ham and Pimento Cheese Wraps too!
More Easy Appetizer Recipes To Try
- Warm Caprese Dip
- Tropical Salsa
- Individual 7-Layer Dip Cups
- Pepperoni Rolls
- Keto Buffalo Chicken Meatballs
- Big Mac Sliders
Dill Pickle Pinwheels Recipe (Printable Recipe Card)
If you tried this recipe and loved it, please rate it!
Want to Save This Recipe?
Enter your email & I'll send it to your inbox. Plus, get great new recipes from me every week!
By submitting this form, you consent to receive emails from The Soccer Mom Blog

Dill Pickle Pinwheels
Equipment
- Cutting Board
- Serrated Knife
- Plastic Wrap
Ingredients
- 8 oz cream cheese softened
- 1 TB Italian seasoning
- 4 large flour tortillas
- 4 baby dill pickles chopped
- 7 oz package thin sliced hard salami or deli ham
Instructions
- Combine softened cream cheese and Italian seasoning in a small bowl; stir until seasoning is well incorporated.
- Divide the cream cheese mixture evenly among the four tortillas and spread to coat the surface of each one. Scatter the pickles on the tortillas.
- Layer each tortilla with salami or deli ham.
- Start from one end and roll each tortilla as tightly as possible, without squeezing out the cream cheese. Wrap each of the rolls in plastic wrap and refrigerate for an hour.

- When ready to serve, remove the plastic wrap and use a serrated knife to cut the rolls into one-inch pieces.
- Refrigerate leftovers for up to 1 day. Any longer, and they may start to get soggy.
Notes
Nutrition
Pin our Dill Pickle Pinwheels on Pinterest:

You might also like:

- Beach Day Rice Krispie Treats - June 23, 2026
- Pickled Jalapeños Recipe - June 15, 2026
- Homemade Nesquick Mix - June 11, 2026