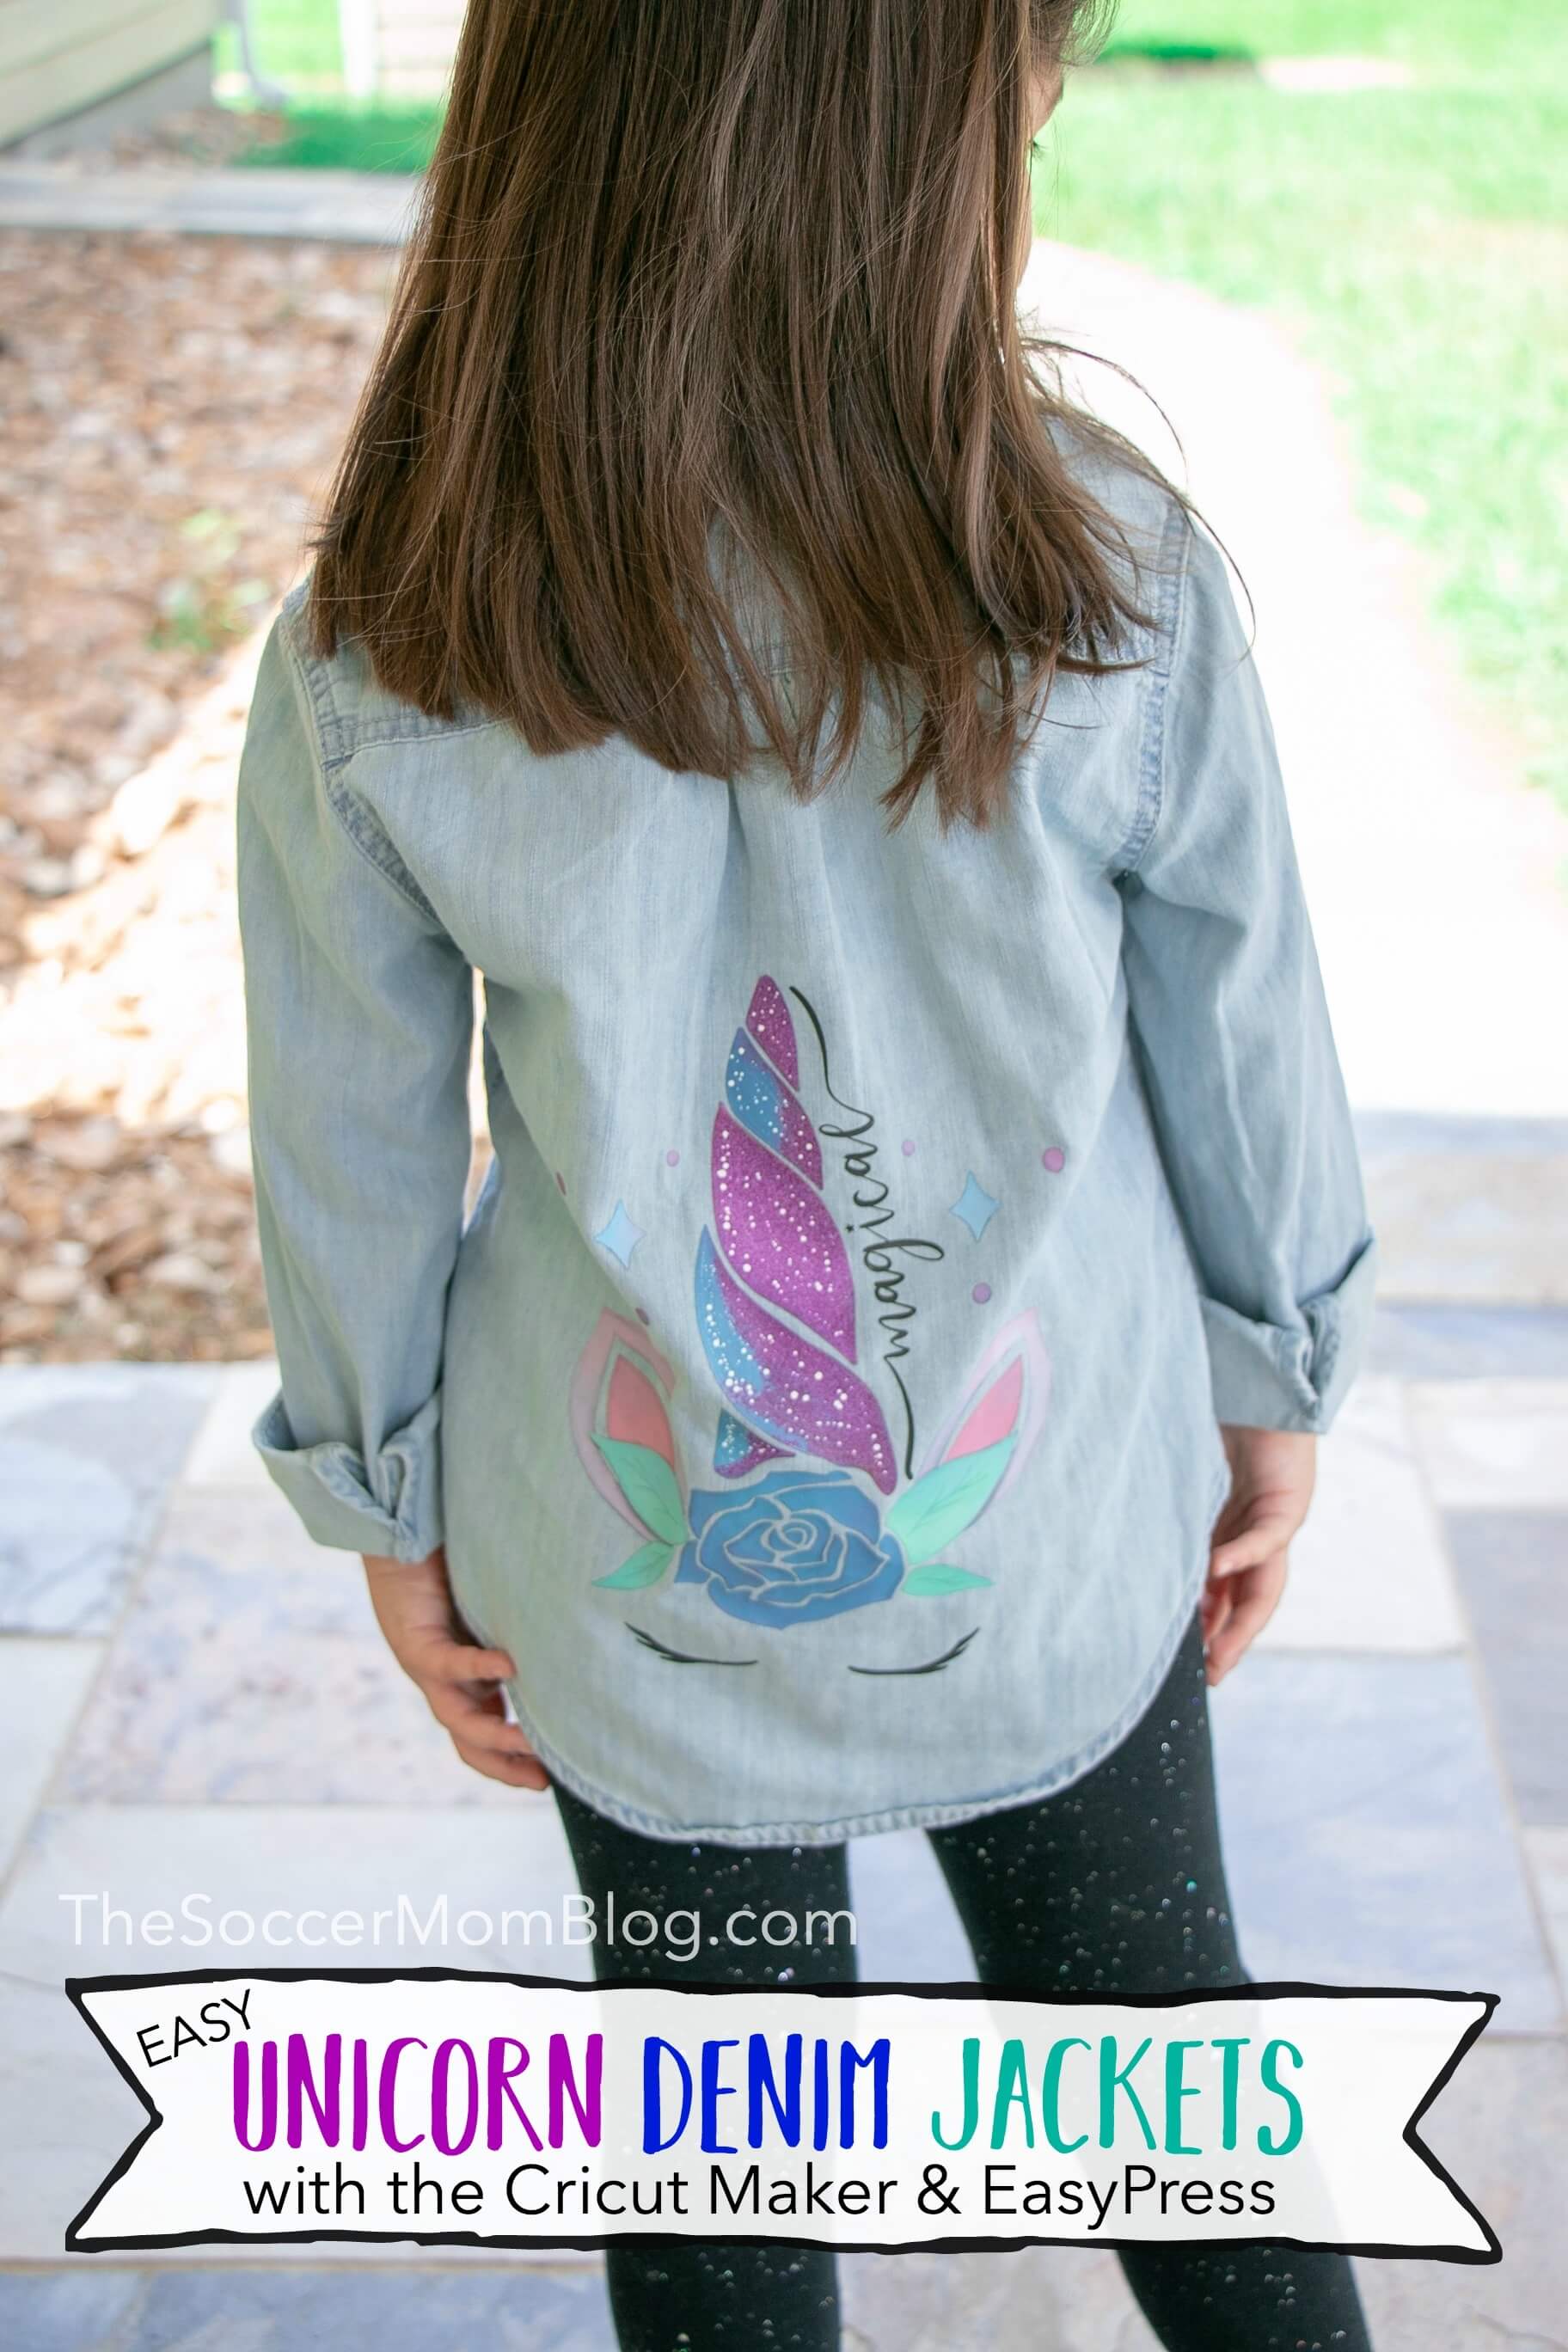
How to use a Cricut Maker and Cricut EasyPress as a total beginner, plus our very first project just in time for back to school – custom unicorn jean jackets! Sponsored by Cricut.
School starts next week and I wanted to do something fun for the girls to celebrate. A couple of my friends have the Cricut Maker and rave about all the amazing things you can do with it, so I decided to go for it!
The Cricut Maker and EasyPress are awesome personalization tool for everything, but definitely for back to school. You can personalize backpacks, lunch boxes, t-shirts, you name it!
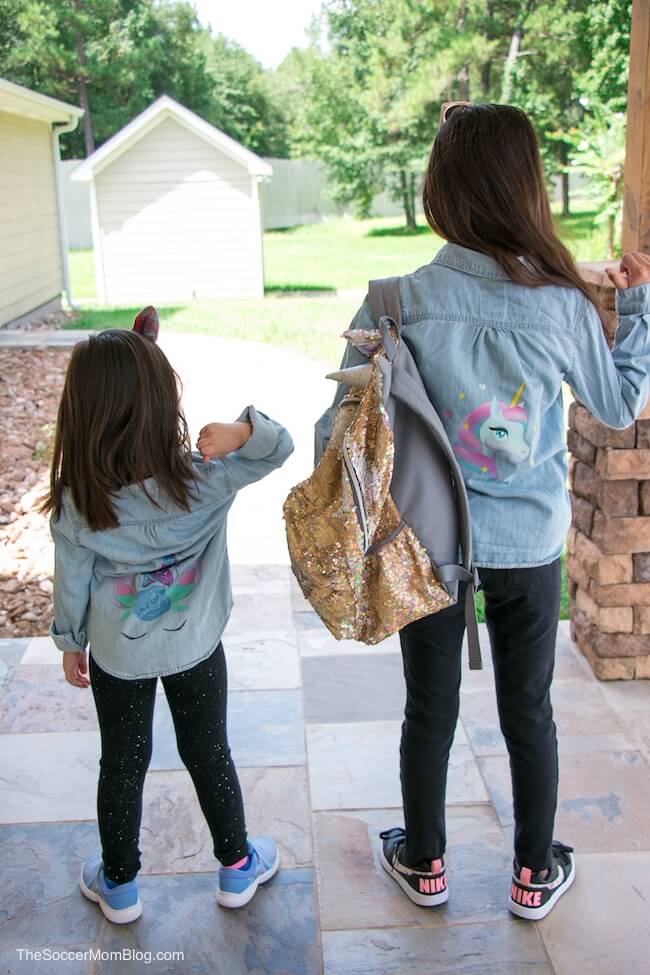
For our first project I decided to make unicorn jean jackets, since both of the girls are obsessed with jean jackets! (Plus they match our unicorn backpacks!)
First, I give you the run-down of the most important Cricut tips I learned along the way. Then I’ll show you step-by-step how to make a unicorn jean jacket like ours.
Cricut Tips for Beginners
If you’re a total beginner (like me) these are a few of the things I wish I’d known before I tried to jump right in to making my first project!
Fortunately, the Cricut Maker and EasyPress are pretty easy to figure out and I finished my first project within 2 hours of opening the boxes for the first time.
However, it’s always a good idea to read up on them first so you won’t make any of the mistakes that I did!
One thing I noticed as I was searching online for Cricut tutorials is that they are usually not written for total beginners (like me).
I had such a difficult time finding instructions for how to use the machines – I’m talking the very basics, like which way to insert the mats!
That’s why I really wanted to write a Cricut tutorial aimed at first-time users. That way you can see exactly what to do the first time you set up your machine and skip all the searching I did!
1. Complete the tutorial projects first
Both the Cricut Maker and Cricut EasyPress come with a small starter project that serves as a tutorial. It’s tempting to skip ahead to your own custom projects, but I highly encourage you to do all of the tutorial projects first.
Not only does this help familiarize you with the machines and the process, but if you mess up it’s no big deal and you haven’t wasted any of your own materials.
2. Start with a small project
The first time I opened Cricut Design Space and saw the nearly limitless project possibilities, I’ll admit that it was a bit overwhelming.
That’s why I recommend starting with something super simple for your first Cricut project. Once you figure out how to use the machine and the basics of Cricut Design Space, you can work your way up in difficulty to more complex projects.
3. Save time with Cricut Iron-On Designs
Since I’m a total beginner, I decided to incorporate Cricut Iron-On Designs into our first project. That way we could get fabulous, professional looking graphics on our jean jackets right away!
As I become more familiar with the Cricut Maker, I’m sure I’ll be able to create my own custom designs. However, in the meantime, these pre-made iron-on designs turned out gorgeous and are super easy to use!
4. Learn how to adjust cutting pressure
The first time I tried to cut out our glitter iron-on letters, the blade didn’t quite cut all the way through. Fortunately, there is extensive troubleshooting information on Cricut’s website and I was able to figure out a fix quickly.
If you have any issue with your Cricut Maker not cutting through materials, here’s what to do:
- First, make sure you’re using the right Cricut brand blade and that it is free from debris. If all that looks as it should, continue to steps 2-6.
- Click the menu icon in top left corner (3 lines).
- Select “Manage Custom Materials.”
- Find the specific material you’re using in the list and increase pressure by 2-4.
- Perform a test cut.
- If it cuts through, you’re all set! If not, increase the pressure again by 2-4 and try another test cut. Repeat if needed.
5. Don’t forget to select “mirror” for iron-on projects
The first time I cut out the girls’ initials for our jean jackets, I forgot to select “mirror.” That means that when you flip the finished cut-outs over to iron them on to the clothing, the letters would be backwards!
How to Make Unicorn Jean Jackets for Back to School – An Easy Cricut Iron-on Project
Now that we’ve gone over the, I’ll show you step-by-step how to make our easy unicorn jean jackets. If you’ve never used a Cricut Maker or EasyPress before, this is a great tutorial because I’m going to go into detail exactly how to use the machines.
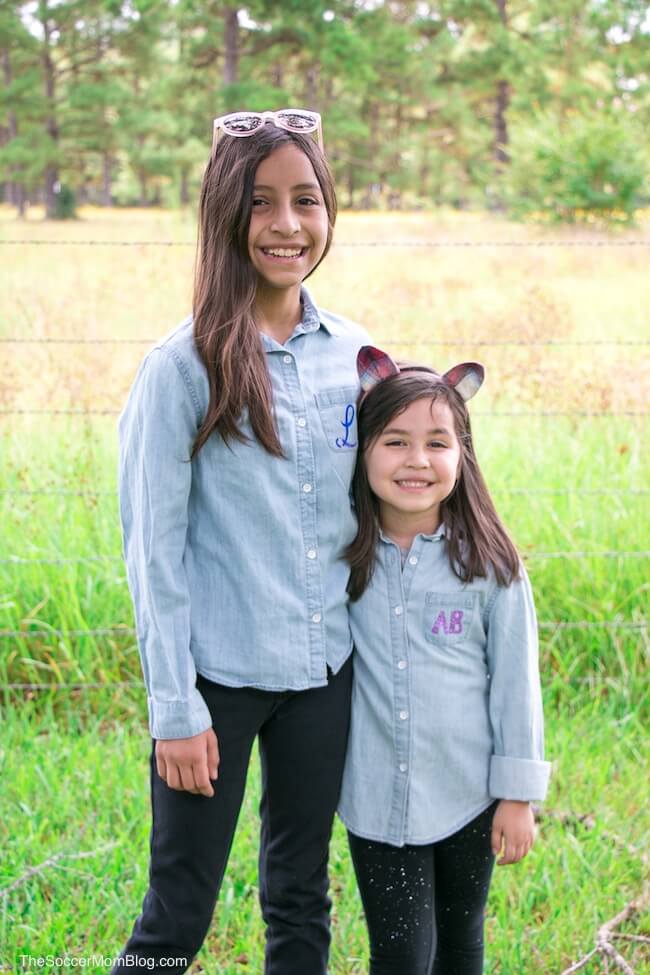
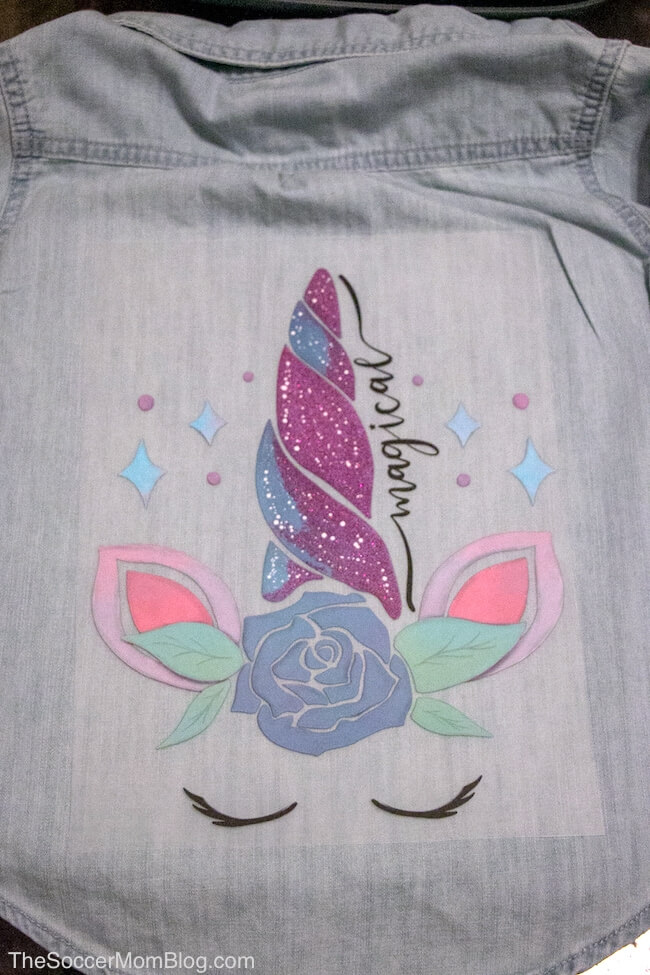
On the back I used unicorn Iron-on Designs from Cricut and on the front I created custom iron-ons with the girls’ initials using the Cricut Maker.
Materials Used:
- Cricut Maker + Everything Materials Bundle (This set has pretty much everything you need to get started, including the fine-point blade used in this project and a machine mat)
- Cricut EasyPress 2 12×10″
- Cricut EasyPress mat 12×12″
- Glitter Iron-on Sampler (Princess)
- Holographic Iron-on
- Iron-on Designs, Magical Unicorns
- Iron-on Designs, Unicorn
We made sure to use Cricut brand iron-on materials because they come with a StrongBond™ Guarantee. Use as directed, and if for any reason you’re not satisfied with the results, they’ll replace the product. I found the iron-on quality to be top-notch, but it’s always good to know that a brand stands behind their products!
1. Turn on your Cricut Maker and connect to your computer.
If you haven’t already done so, install Cricut Design Space and set up your account. This is where you will create your projects and send them over to your Cricut Maker to be cut.
2. Design your initials
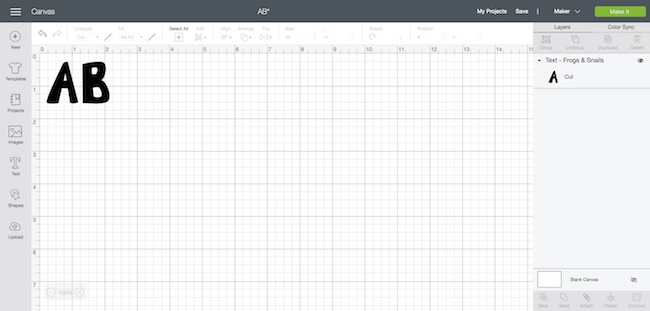
In Cricut Design Space, select “Canvas” from the menu to create your own custom design.
I typed the letters for each of my daughters’ initials and picked a fun font for each of them. Be sure to measure the space available on your jean jacket (I designed the initials to fit on the front pockets) and match that to the measurements on the canvas.
3. Make it!
Click the green “Make It” button in the top right corner. From there, you’ll see on-screen instructions to guide you through the process.
You’ll be prompted to select the material you’re using (so the machine knows how much pressure to apply when cutting) and to check to make sure that you’ve got the correct blade in place.
Don’t forget to select “mirror” since you’re working with iron-ons!
4. Place your materials on your mat
I used iron-on glitter to create the letters for one jacket and holographic iron-on for the other. If needed, trim your materials to fit on your mats.
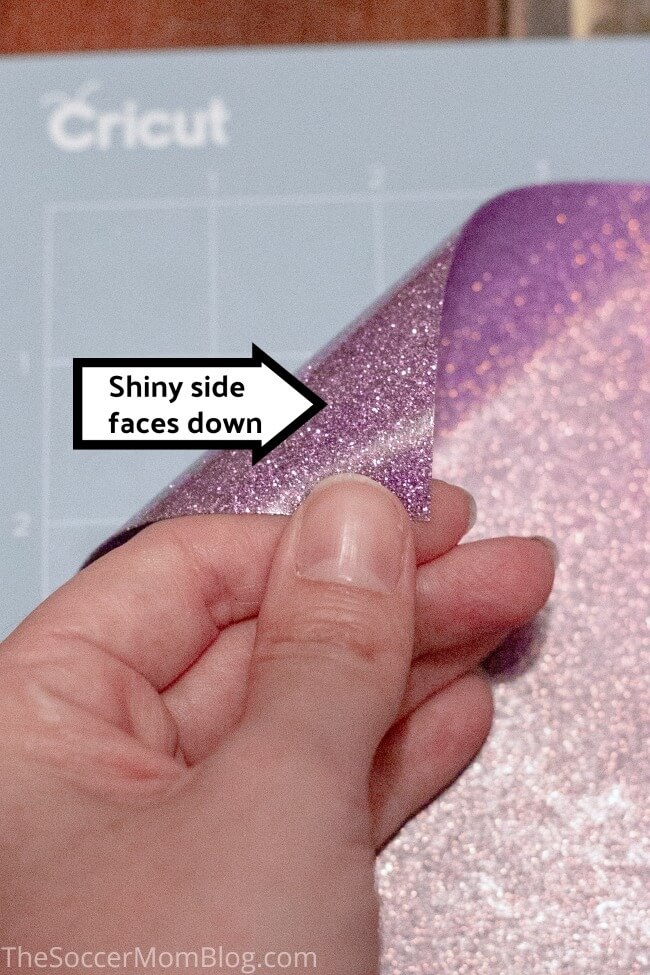
Cricut Maker mats are sticky on one side to hold your materials in place while going through the machine. Place the materials you’re using on the sticky side of your mat, with the shiny side of the material face-down.
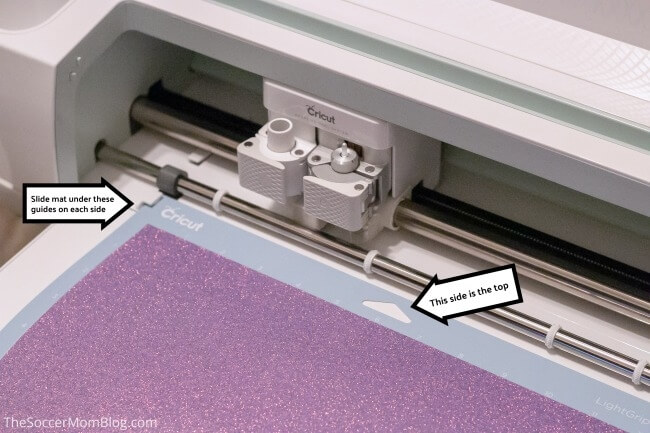
Look for the hole in your mat and make sure that side is the top.
5. Load your mat into your Cricut Maker
Again, double-check that your mat is facing the correct direction, then slide the edges of the mat under the guides on the side of the machine.
Press the load button when instructed on-screen. The button will flash on your Cricut Maker when it’s time to push it.
6. It’s go time!
When prompted, press the “go” button on your machine. The button will be flashing when it’s time.
7. Pop out your designs
Watch your computer screen to follow the cutting process. This steps should only take a minute or two since we’re doing a simple letter.
After the machine stops moving and the Cricut Design Spaces says it’s “finished,” press the load button on your Cricut Maker. This will safely unload the Cricut mat and your finished design from the machine.
Now you can peel the material off the mat and pop out your designs.
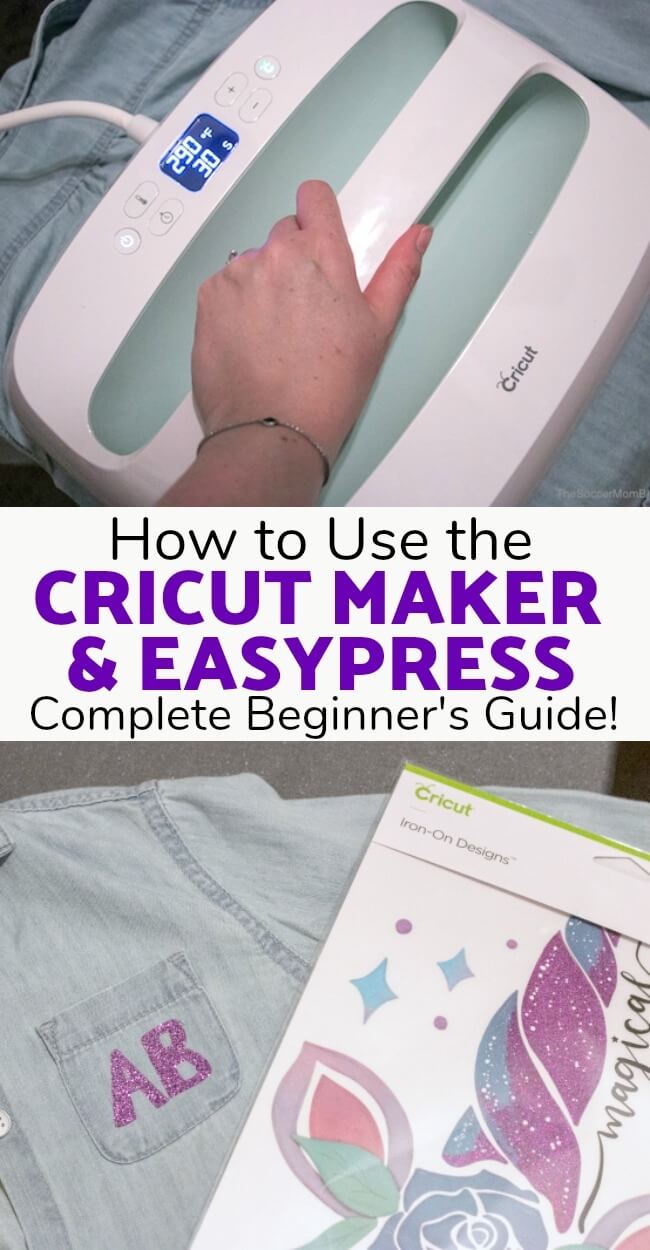
8. Turn on your Cricut EasyPress and prepare your workspace
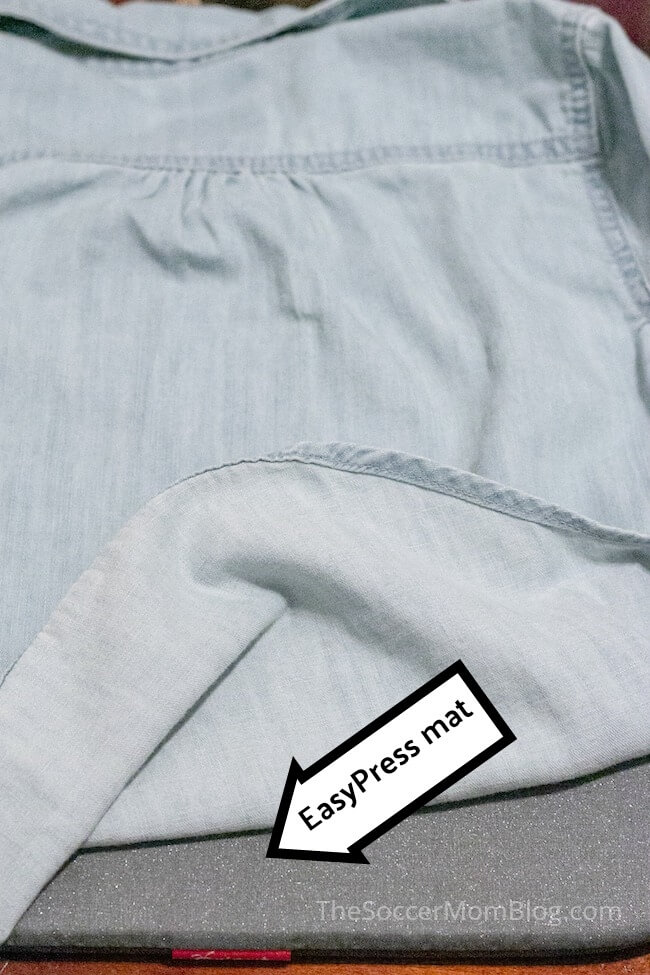
While your EasyPress heats up, place your EasyPress mat on your workspace. You want to make sure that your work surface is flat and firm and you have plenty of room.
Arrange your shirt or jacket on the EasyPress mat and smooth out the wrinkles by hand.
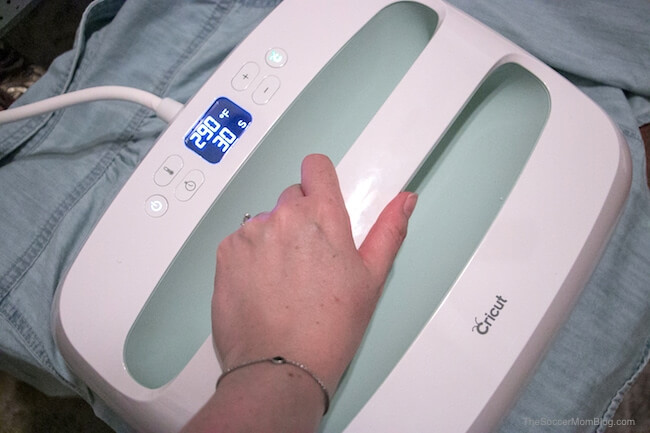
When your EasyPress is ready, place it on the shirt (without iron-ons) and pre-heat the fabric for 15 seconds. Don’t skip this step!
Pre-heating the fabric removes any wrinkles or moisture and will help your iron-ons adhere better.
9. Place your iron-on designs
We started with our Cricut Iron-on Designs, which I placed on the back of each shirt. I picked a different unicorn design for each girl, so their jackets would be similar, but not too matchy-matchy.
10. It’s time to press!
Place the EasyPress on top of your iron-on design and apply gentle pressure. Hold for 30 seconds.
Remove the EasyPress and place back on the silicone base.
Carefully flip your shirt over so that the iron-on is facing your mat and the back of the shirt faces up. Place the EasyPress on top of the fabric and press for 15 seconds.
Return EasyPress to its base.
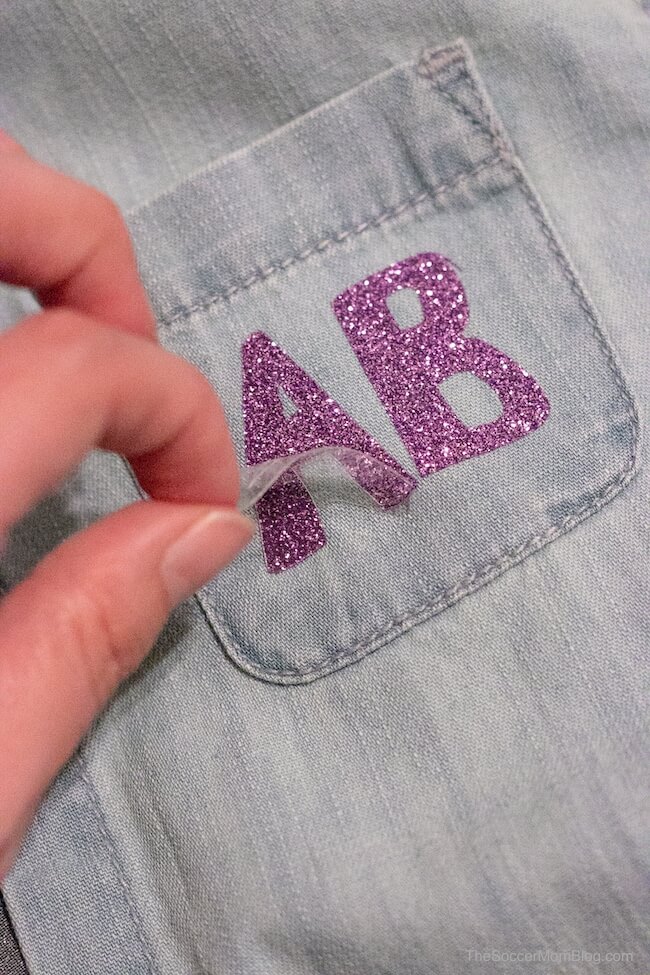
Test a corner of your iron-on design. If it peels up easily, you’re all set and can remove the backing. If it sticks, press for 15-30 more seconds and try again.
11. Press your letters
Finally, we pressed the initials we cut with our Cricut Maker onto the front pockets of our jackets, using the steps above.
12. Wear it!
See, that was pretty simple right?!
From start to finish, I made two unicorn jean jackets in about 2 hours. This includes the time it took for me to learn how to use the Cricut Maker and Cricut EasyPress.
If you already know how to use either or both machines, then you could make these unicorn jean jackets in minutes!
Now that I’m getting the hang of things, I can’t wait to create more goodies for back to school and beyond! Did someone say customized lunch boxes?
Stay tuned!
Click here to shop Cricut and see all the awesome tools and materials!
Your turn: Do you have a Cricut Maker or EasyPress? What tips would you add to our list? Share them in the comments below!
This is a sponsored conversation written by me on behalf of Cricut. The opinions and text are all mine.
More of our most popular back to school ideas:
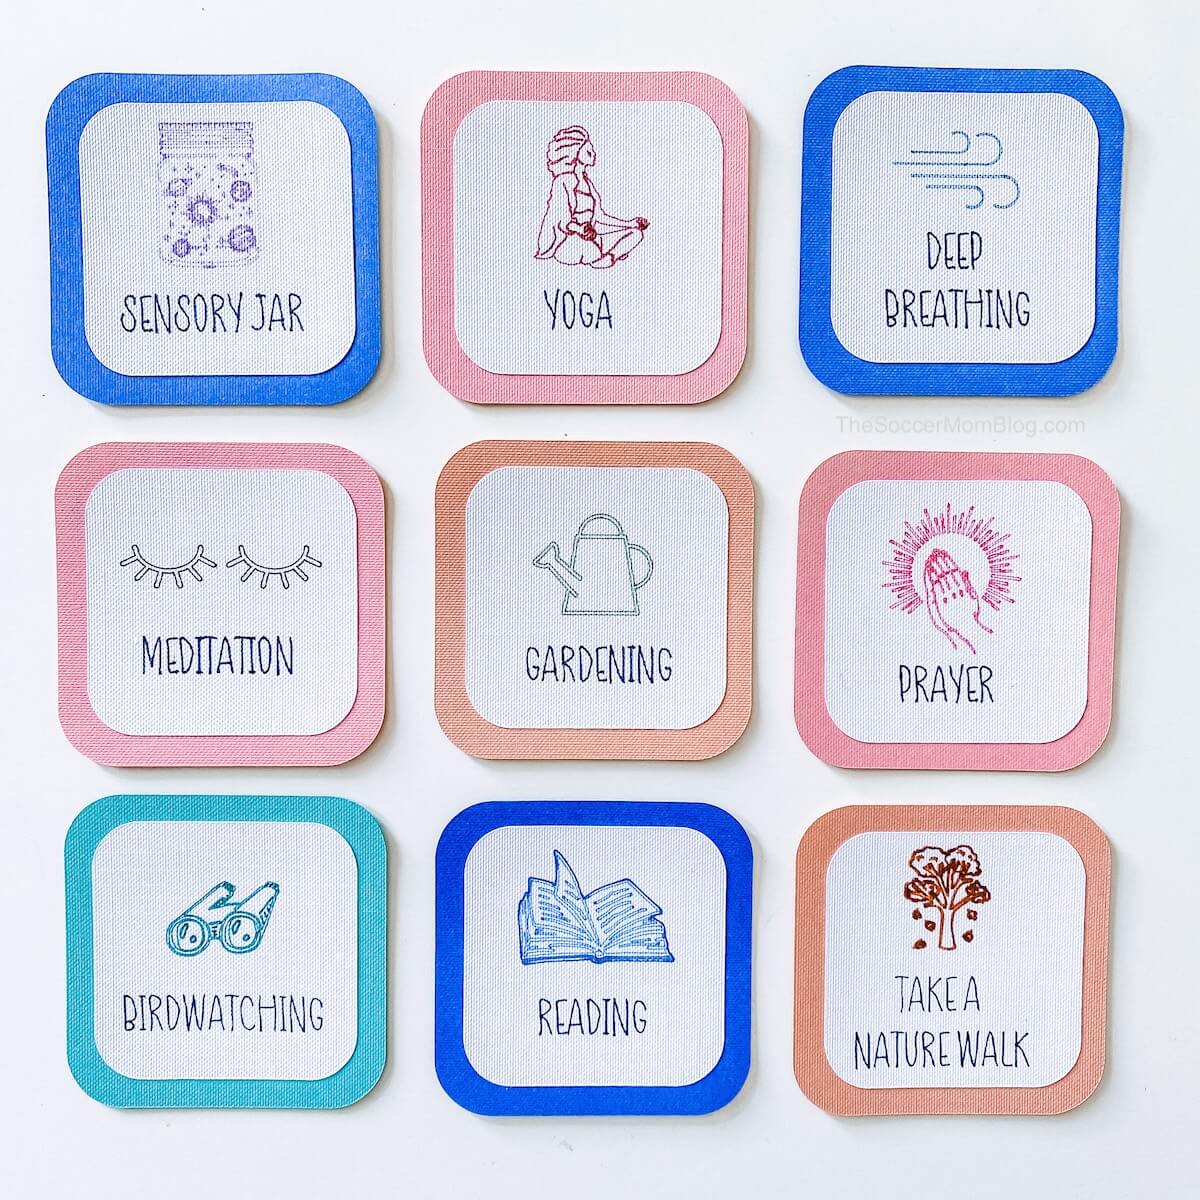
Mindfulness Activity Cards for Kids
Back to School Hair Hacks for Girls
- Paper Chain Octopus Craft - April 24, 2024
- Amish Sugar Cookies - April 19, 2024
- Marshmallow Playdough - April 18, 2024



Leave a Reply