Mix and Match Pumpkin Faces Craft
Kids will have a blast making lots of funny faces with this easy popsicle stick pumpkin craft for Halloween!
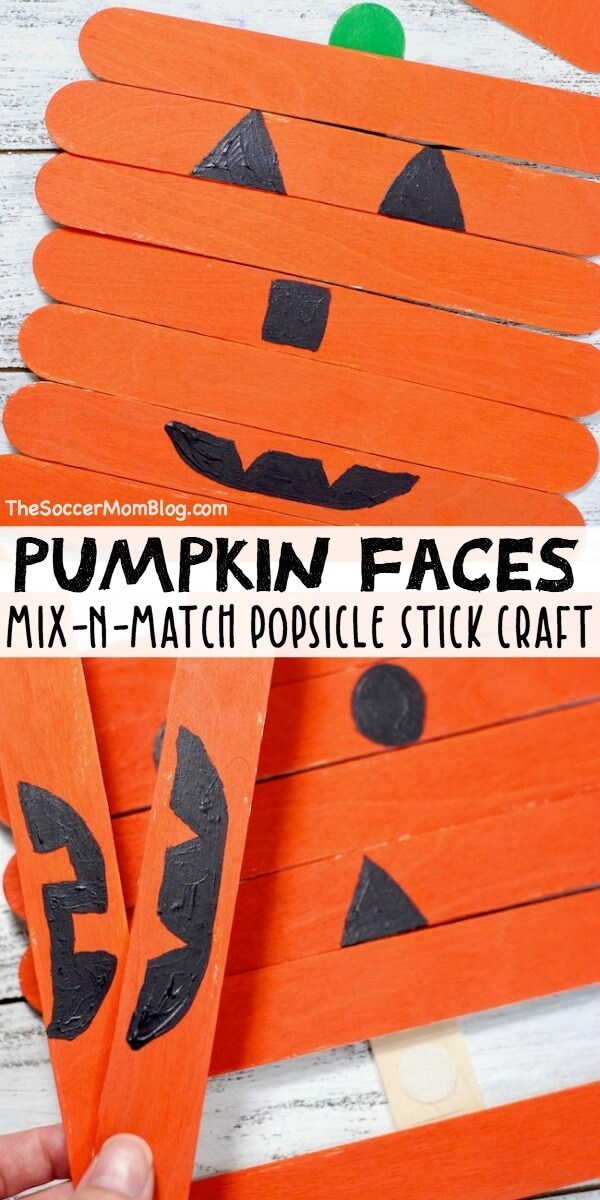
Mix and Match Pumpkin Faces
At Halloween time, even though they can’t carve the Jack ‘O Lanterns themselves, kids love to help pick out the pumpkin faces! (I know I sure did!)
However, with this Mix and Match Pumpkin Faces craft, kids can not only pick out the pumpkin face ideas, they can make them too!
Using craft sticks and paint, kids can design a variety of creative eyes, noses, and mouths — then swap them out to make different pumpkin faces!
We used velcro stickers to attach our pumpkin faces to our pumpkin “stem,” which holds them all together.
This pumpkin faces Halloween kids craft requires only basic supplies that even young kids can handle themselves.
But making is only half the fun!
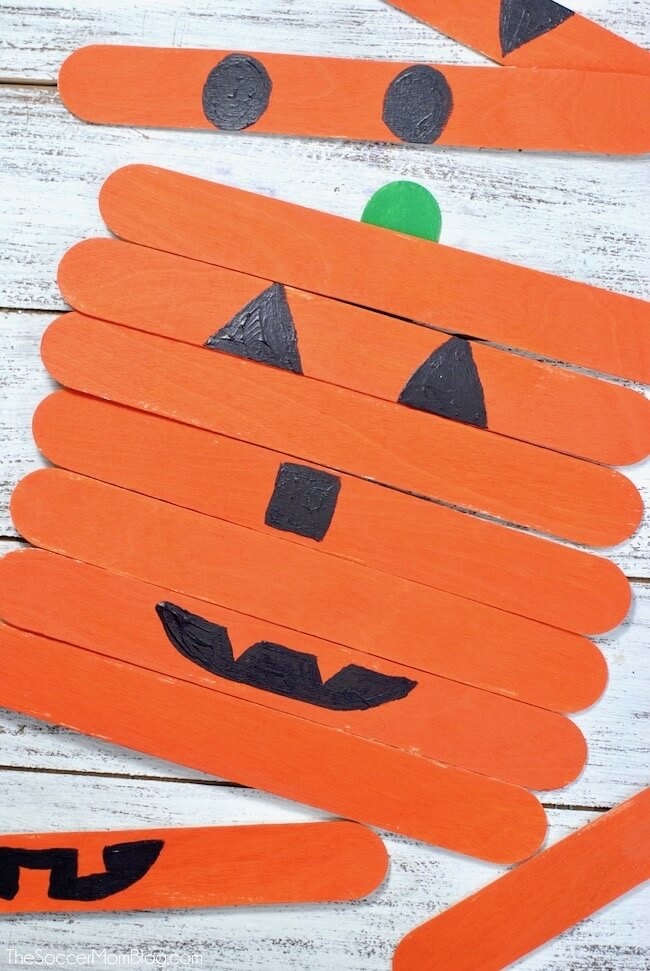
After they’ve made all the pieces, kids can play for hours putting together different pumpkin faces! Our example is pretty basic, but you can really have fun with this one — paint unique shapes, use different color paints, or even attach stickers, gemstones, and the like!
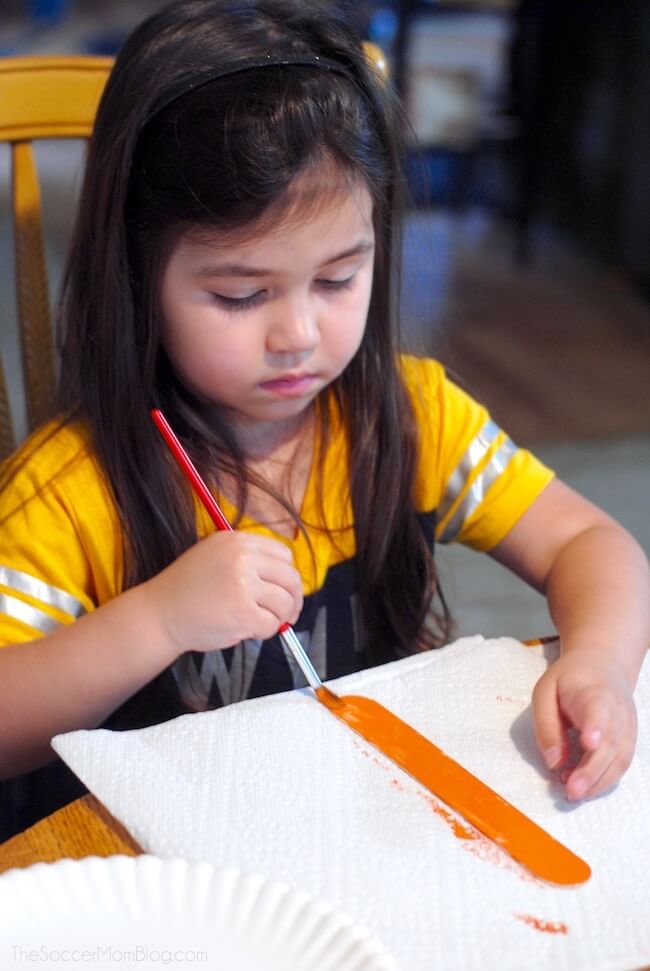
My daughter and I spent the afternoon painting pumpkin faces — she looks very serious, but I promise she enjoyed herself! Crafting is one of her favorite activities and she has a special bag of her own favorite craft supplies.
I can’t wait to see what you create!
Related: See ALL of our favorite Kids Pumpkin Crafts here (there’s more than 70!)
Supply List
For your convenience in re-creating this craft I’ve included shop-able ad links to some of the supplies we used. Our disclosure policy is available here.
- Extra-jumbo craft sticks
- Craft paint (orange, green, and black)
- Velcro stickers
- Paintbrush
How to Craft a Pumpkin Made Out of Popsicle Sticks
TIP: We used extra-jumbo craft sticks – about 8 inches long and almost an inch wide.
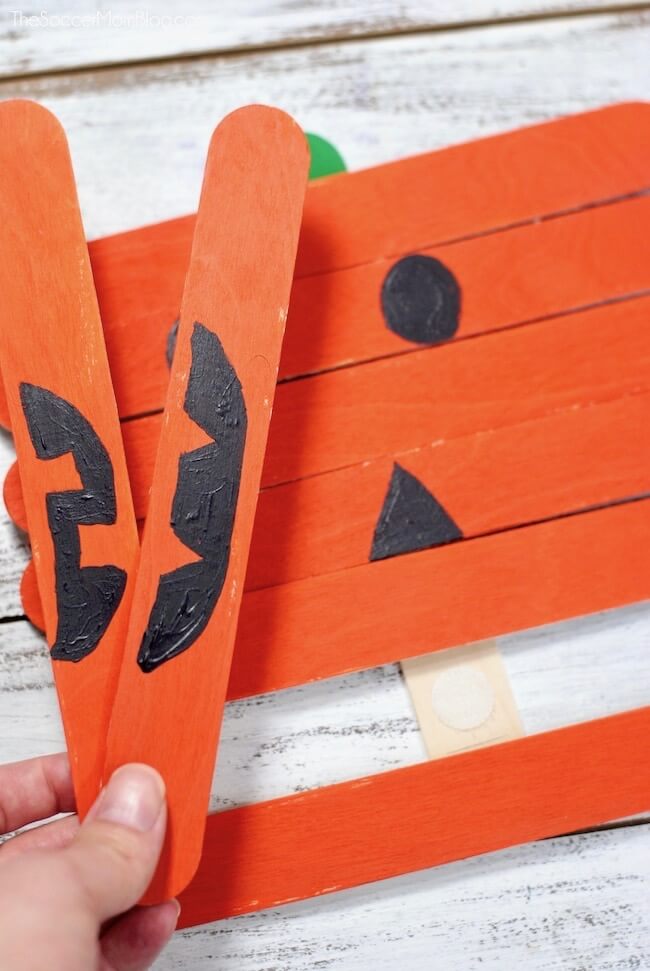
First, we painted a bunch of craft sticks orange. You need at least 7 to fill up the pumpkin (4 plain orange, 1 set of eyes, 1 nose, and 1 mouth). However, you’ll want to paint a few more so you can design different facial features to swap in and out.
Next, we painted on craft stick green at the top. This is our pumpkin “stem” and it is where we will attach all of our pumpkin face pieces.
After all of our orange craft sticks are dry, we used black paint to create different sets of eyes, noses, and mouths. You can make as many as you like!
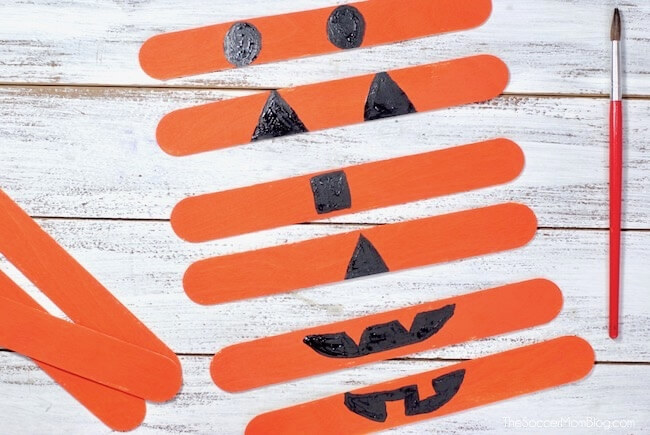
TIP: Be sure to leave 4 craft sticks plain orange for every pumpkin you make.
Allow paint to dry completely, then attach 7 velcro stickers to your stem, leaving the very top green. This will peek out the top, so you don’t want a sticker there.
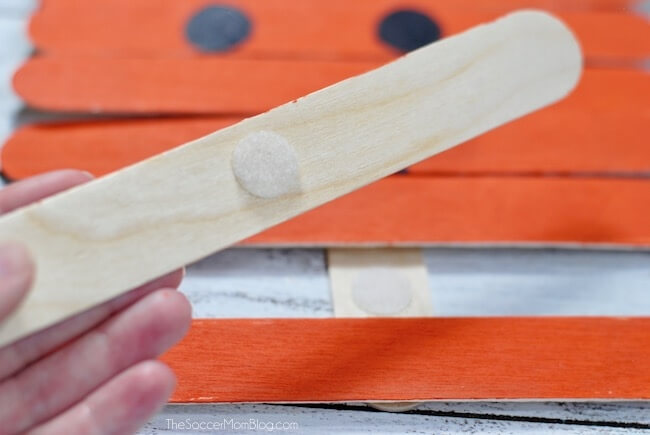
Attach the opposite velcro stickers to the back of each of your orange pieces, in the middle.
Now it’s time to play and make lots of funny pumpkin faces!
More of our most popular Halloween crafts:
Popsicle Pumpkin Craft Printable Directions
Want to Save This Recipe?
Enter your email & I'll send it to your inbox. Plus, get great new recipes from me every week!
By submitting this form, you consent to receive emails from The Soccer Mom Blog

Popsicle Stick Pumpkin Craft: Mix-N-Match Faces!
Ingredients
- Jumbo craft sticks
- Velcro stickers
- Orange craft paint
- Green craft paint
- Black craft paint
Instructions
- Paint large craft sticks orange -- we used 7 for each pumpkin. Paint a few extra orange sticks to design different facial features to swap in and out.
- Paint one craft stick green at the top. This will be the pumpkin "stem" and it where we'll attach velcro.
- Allow orange paint to dry, the use black paint to create different sets of eyes, noses, and mouths. You can make as many as you like!
- While black paint to dries, attach 7 velcro stickers to your "stem", leaving the very top green. This will peek out the top, so you don't want a sticker there.
- Attach the opposite velcro stickers to the back of each of your orange pieces, in the middle.
- Have fun making funny faces!
Video
You might also like:

- Beach Day Rice Krispie Treats - June 23, 2026
- Pickled Jalapeños Recipe - June 15, 2026
- Homemade Nesquick Mix - June 11, 2026