
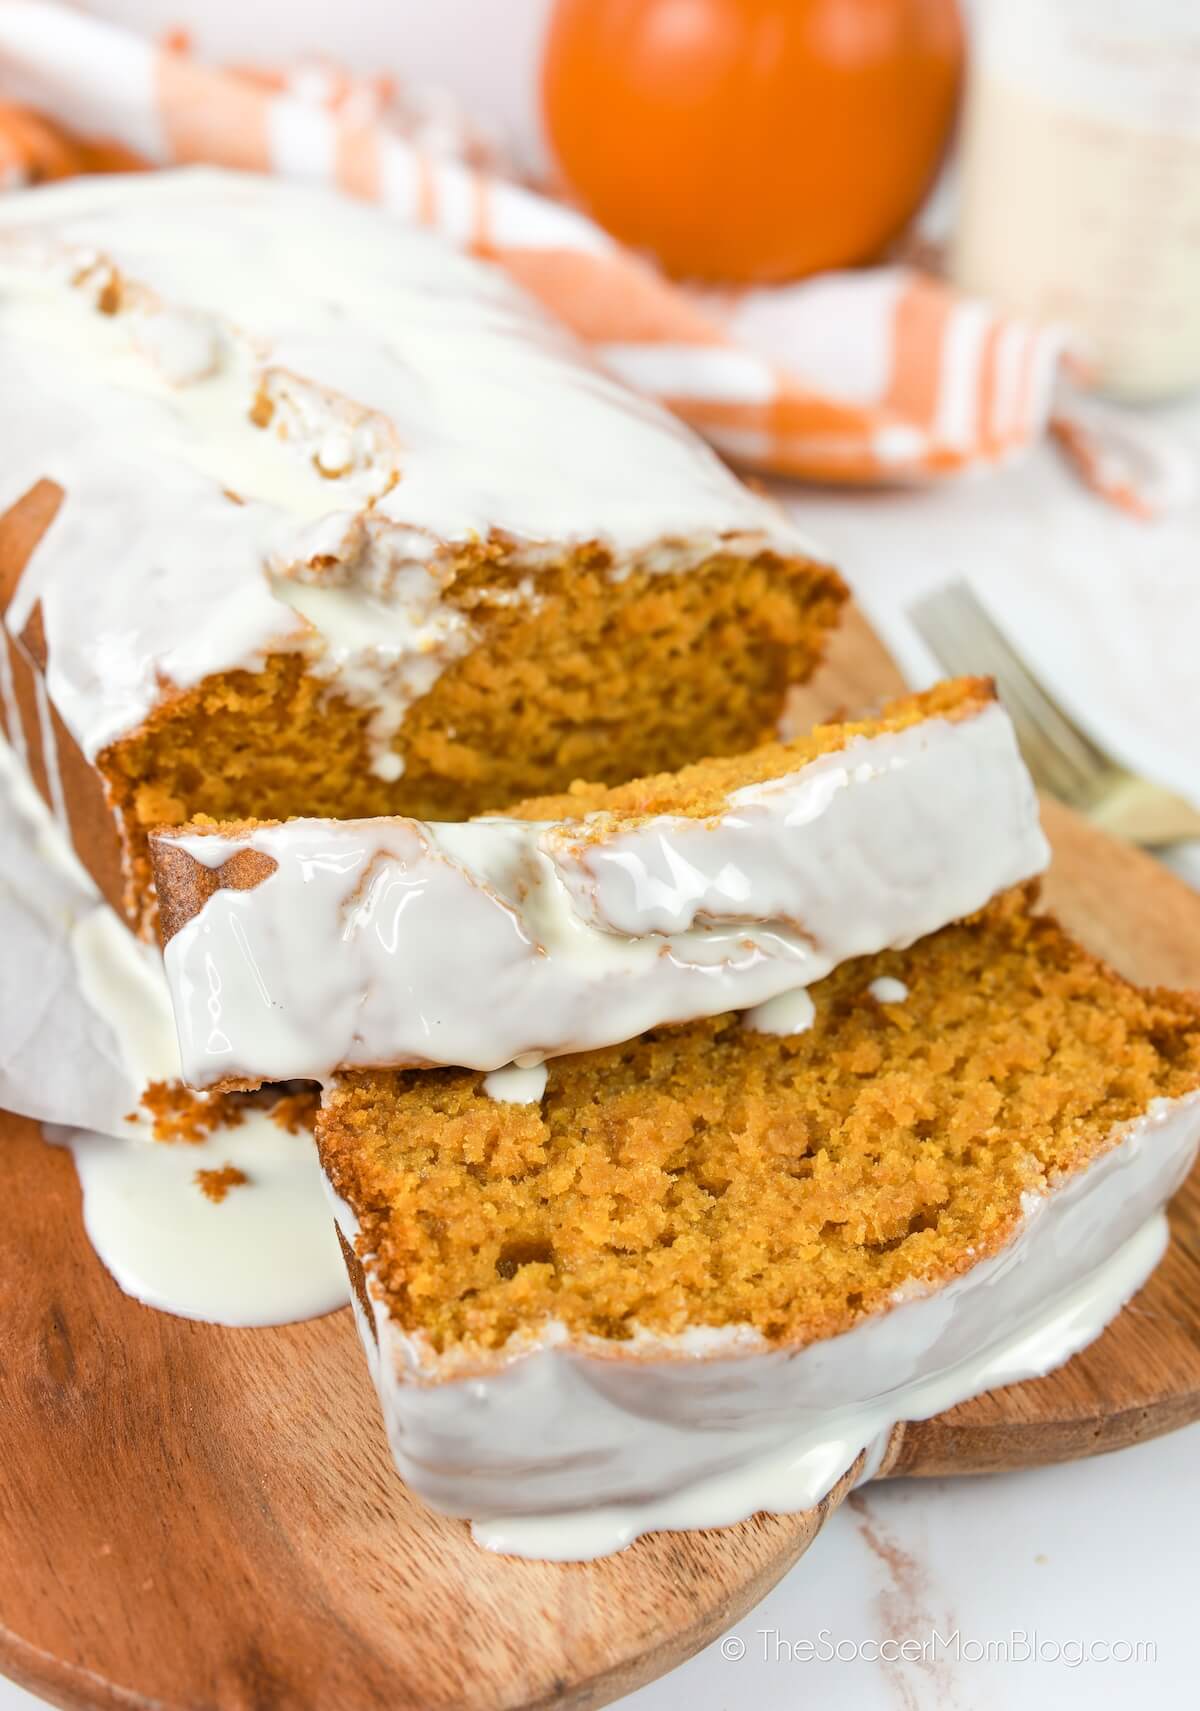
Chocolate Orange Cake
This decadent Chocolate Orange Cake is a masterpiece of Candied Oranges, Chocolate Buttercream, and Chocolate Ganache literally dripping down the sides.
If you’re looking for a show-stopping special occasion dessert, This. Is. It.
Triple Chocolate Orange Cake with Candied Oranges
One of my favorite Christmas treats has always been those chocolate oranges that you have to break into segments and eat.
I would always receive one – only one – at Christmastime and I would make it last for days, enjoying and savoring each segment, making the experience last as many days as possible.
This cake recreates that special indulgence on a grander, share-able scale. (Because let’s be honest, no one else ever got a slice of my chocolate oranges.)
I typically go for cupcakes as they are a bit less intimidating to decorate (check out our Fresh Mango Cupcakes and Buttermilk Cupcake with Cream Cheese Frosting), but this ornate Chocolate-Orange cake is easier to make than you’d think. You just need to proceed with an air of confidence… and a bit of foresight!
The candied oranges for this cake take the longest because they need to dry for 24 hours. However, they can easily be sugared (dipped in water and then white granulated sugar), dipped in chocolate without being candied, or replaced with my favourite – those timeless chocolate orange segments.
All other components of this cake come together in about two hours, depending on your confidence in decorating. (Hint: the more confident you are, the quicker it will be!)
– Jennifer (See more of her work at Sugar Spice & Glitter and In The Kids Kitchen).
This Chocolate Orange Cake recipe was featured on Buzzfeed!
Kitchen Tools you might find useful:
For your convenience in re-creating this gorgeous Chocolate Orange Cake, we’ve included shop-able ad links to some of the products used. Read our disclosure policy here.
- 9″ round cake pans
- KitchenAid stand mixer
- Non-slip mixing bowls
- Offset spatula for frosting
- Wilton #2D decorating tip
- Cooling rack
Chocolate Orange Cake Prep Tips
A free printable copy of this Chocolate Orange Cake is available at the bottom of the post. Keep reading for photo step-by-step instructions and prep tips, or scroll down for printable recipe.
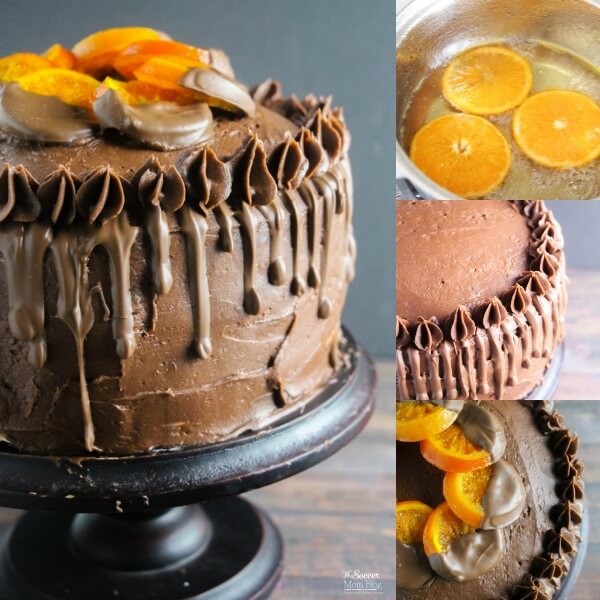
Start with the Candied Oranges
You’ll want to make the candied oranges 24 hours ahead of the cake.
Be sure to cook oranges until translucent (like photo below), flipping about halfway through.

Using tongs, carefully remove the candied oranges to a cooling rack and allow to dry for 24 hours. (This is why you need to do this part a day in advance).
NOTE: SAVE THAT SYRUP! Reserve that delicious orange simple syrup (the sugar-water in which you candied your oranges) in a mason jar for gourmet homemade cocktails.
If you have extra oranges, make these beautiful and fragrant Orange Pomander Ornaments!
To prepare the Chocolate Orange Cake:
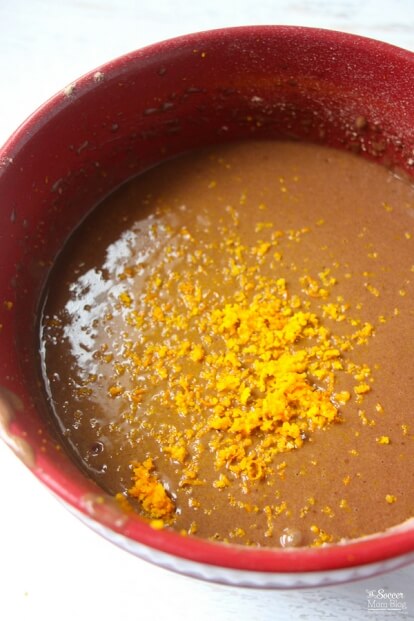
Don’t forget to add the orange zest to the batter:
TIP: To level the cakes after they’ve baked and cooled, use our go-to cake-cutting method here.
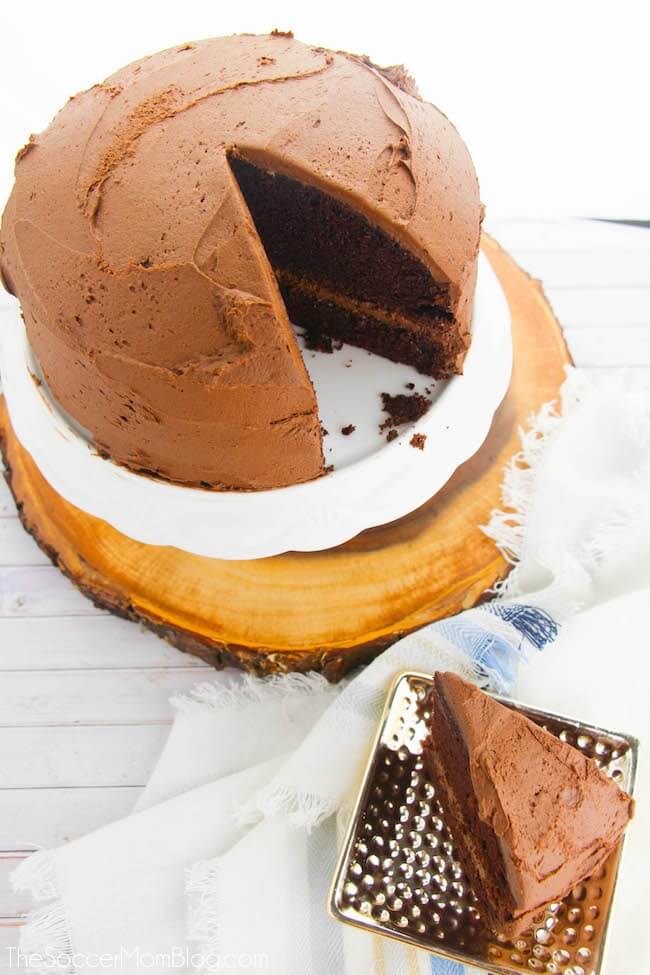
We recommend creating what is known as a “crumb coat” before frosting with the final layer of chocolate buttercream icing.
Using an offset spatula, cover the entire cake with frosting. The first photo below shows a crumb coat from another cake, which is why the frosting is white. However, you can use your chocolate buttercream for the crumb coat to your Chocolate Orange Cake.
Remember, this helps keep crumbs out of the final icing layer and does not need to be perfect, but try to make it as even and smooth as you can.
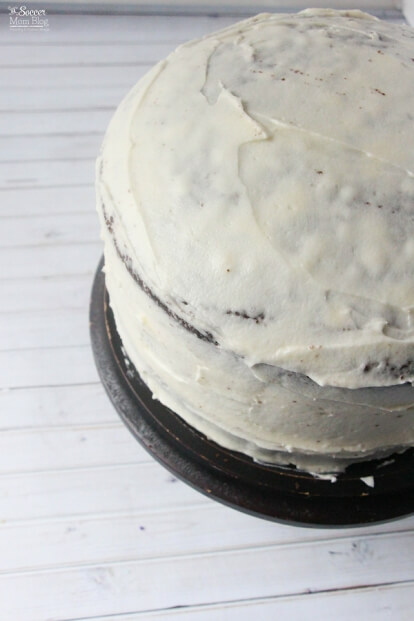
If you can, let the cake set for about 1-3 hours until no longer soft to the touch. You can place in the fridge to speed up this process. Once it’s set you can apply the final layer of frosting.
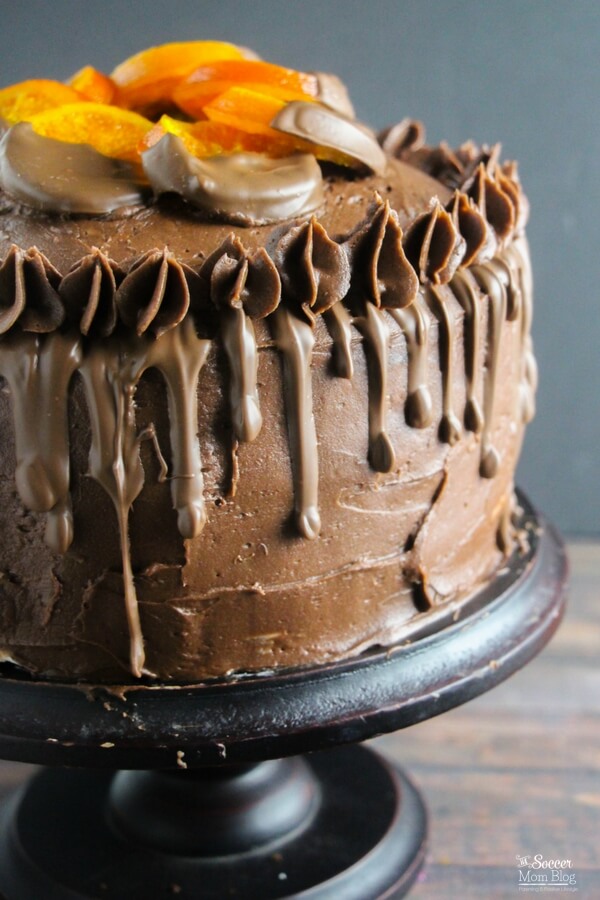
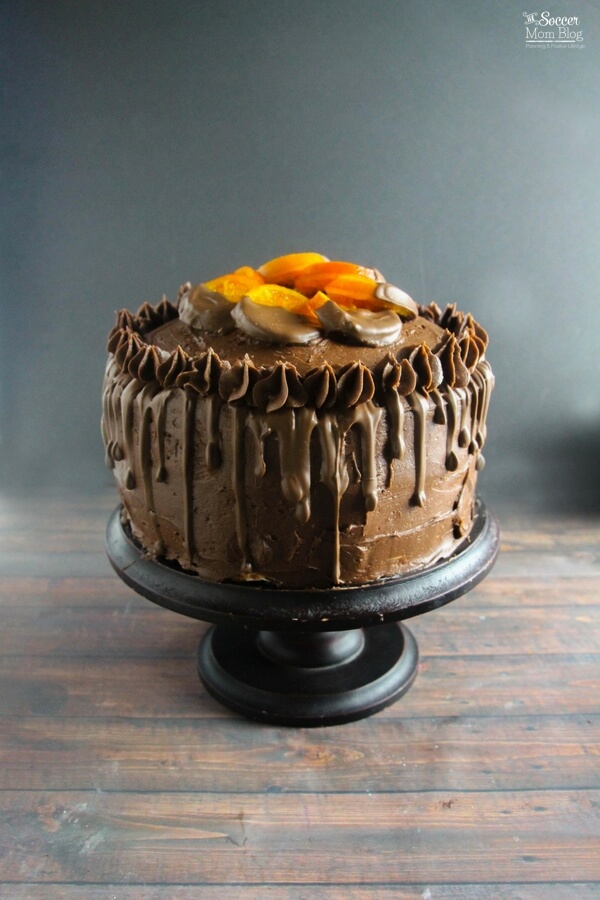
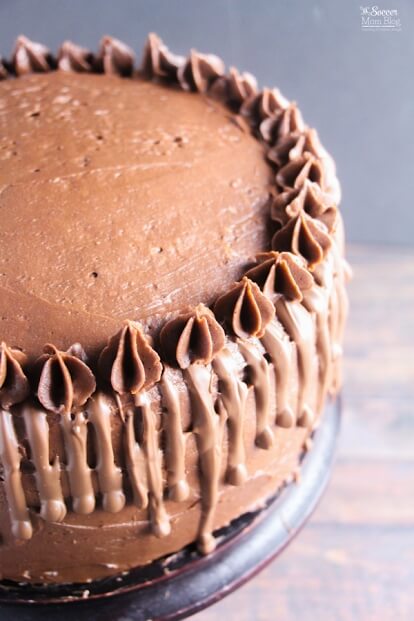
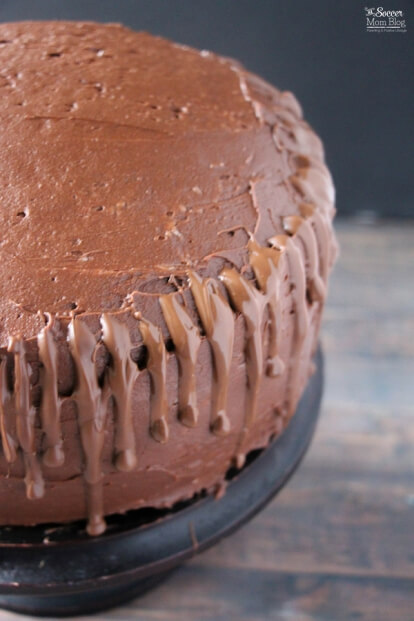
How to get the “drip effect” with chocolate buttercream icing:
Place the remaining buttercream in a piping bag fitted with a 2D Wilton tip and set aside.
Heat your chocolate in a microwave-safe bowl and heat for 25 seconds. Stir thoroughly and reheat if necessary.
Tip: Check the consistency of the melted chocolate by placing a spoonful of melted chocolate along the side of the cake and allowing it to drip down the side. Add a bit of shortening if the chocolate does not drip easily – you don’t want it too runny so it runs off the cake, but you want to get that dramatic drip.
Take your time placing spoonful after spoonful of chocolate along the side of the cake, rotating as you go. The chocolate will re-melt nicely, so don’t worry about it hardening.
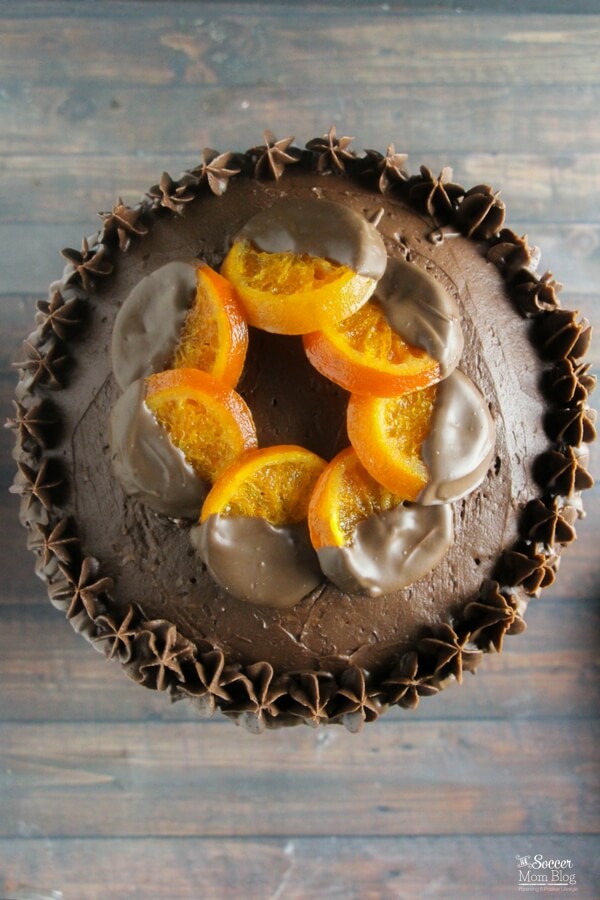
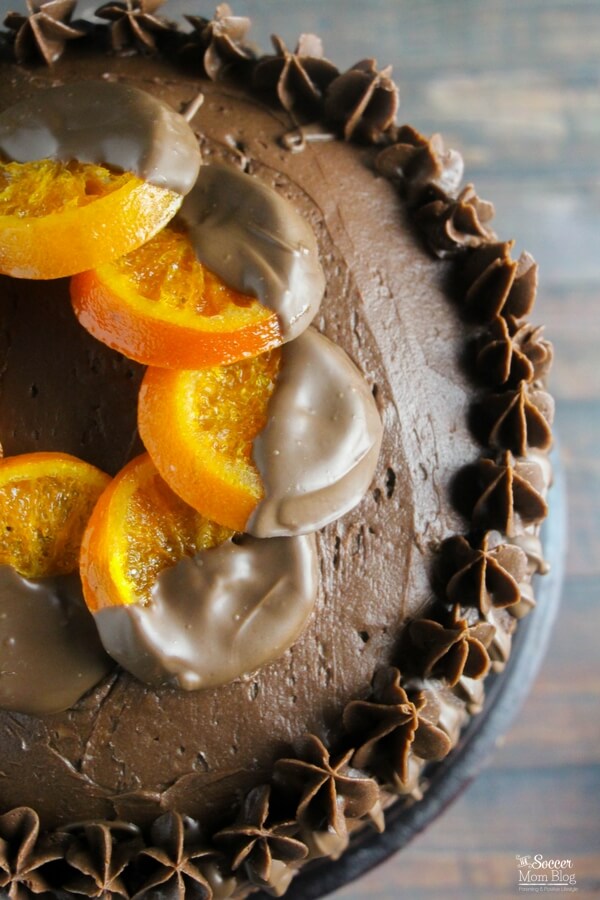
When you have covered the cake with the chocolate drips, take your candied oranges and dip them halfway in the melted chocolate. Set back on the cooling rack to set.
Take your piping bag and make short, quick spots of icing along the top, squeezing the bag to start the dollop, and then stopping pressure and pulling your hands away quickly to create that defined peak. This is a repetitive motion that you will quickly get the hang of – and feel free to use that offset spatula to remove any peaks that you don’t like and re-do them.
One you have covered the cake in a crown of chocolate buttercream peaks, arrange your dried chocolate oranges as you desire on top of the cake.
Marvel at your gorgeous creation and be sure to serve it with confidence!
Free printable copy of this recipe available at bottom of post.
[convertkit form=4956168]
Be sure to pin this Chocolate Orange Cake on Pinterest:

More of our favorite decadent chocolate desserts:
- Luscious Cookies & Cream White Chocolate Lasagna
- Decadent Chocolate Mudslide Cocktails
- Gluten Free Almond Butter Chocolate Chip Cookies
- 3-Ingredient Cookies & Cream Ice Cream Cake
- Double Chocolate Hershey’s Kiss Cake
- Nestle Toll House Cake
Grab a free printable copy of this Chocolate Orange Cake recipe:
Want to Save This Recipe?
Enter your email & I'll send it to your inbox. Plus, get great new recipes from me every week!
By submitting this form, you consent to receive emails from The Soccer Mom Blog

Chocolate Orange Cake
Ingredients
For the Cake:
- 1 1/3 cups all-purpose flour
- 1/4 teaspoon baking soda
- 2 teaspoons baking powder
- 3/4 cup unsweetened cocoa powder
- 1/8 teaspoon salt
- 3 tablespoons butter softened
- 1 1/2 cups white sugar
- 2 eggs
- 3/4 teaspoon vanilla extract
- 2 zests of orange
For the Chocolate Buttercream:
- 1 cup butter softened
- 3-4 cups icing sugar
- 1 cup cocoa powder
- 2 teaspoons vanilla extract
- pinch salt
- 2-3 tablespoons milk or heavy cream
For the Chocolate Ganache:
- 1 cup melting chocolate or chocolate chips
- 1 Tablespoon shortening optional
For the Candied Oranges:
- 2 oranges sliced into 1/4” thick slices
- 2 cups sugar
- 2 cups water
Instructions
To prepare the Chocolate Orange Cake:
- Preheat your oven to 325°F
- Prepare (3) three 9" circle cake pans with a spray of oil and lining the bottoms with parchment paper.
- In a large mixing bowl, sift together the flour, baking powder, baking soda, cocoa and salt. Set aside.
- In a large bowl, cream together the butter and sugar until light and fluffy, about 2 minutes. Add the eggs one at a time, beating well with each addition, then stir in the vanilla.
- Add the flour mixture to the bowl of wet ingredients, alternately with the milk; beat well. Add orange zest to batter.
- Divide the the cake batter evenly among your three pans.
- Bake for 20 to 22 minutes, until a toothpick inserted into the cake comes out clean.
To make the Chocolate Buttercream:
- Place the cocoa, 3 cups of the icing sugar, butter, vanilla, and 1 Tablespoon of heavy cream in a large bowl and beat until completely blended.
- Adjust the consistency with additional heavy cream, or adding more icing sugar or cocoa (select which to use based on the taste of the buttercream and your desired level of chocolatey-ness.)
To put the whole thing together:
- When the cake has cooled, level your cakes, and then sandwich them together using a generous, even layer of the chocolate buttercream.
- Using an offset spatula, cover the entire cake in an initial crumb coat - this helps keep crumbs out of the final icing layer and does not need to be perfect, but try to make it as even and smooth as you can.
- Cover your icing (I like to place mine in the fridge) and let the cake set for about 1-3 hours until no longer soft to the touch.
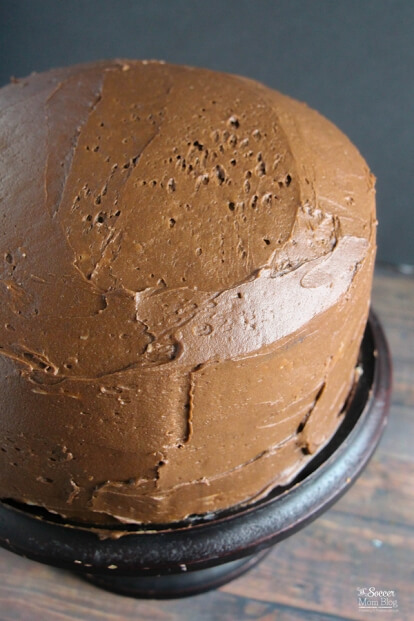
- Using the offset spatula, smooth a final layer of frosting on the cake.
- Place the remaining buttercream in a piping bag fitted with a 2D Wilton tip and set aside.
- Heat your chocolate in a microwave-safe bowl and heat for 25 seconds. Stir thoroughly and reheat if necessary.
- Take your time placing spoonful after spoonful of chocolate along the side of the cake, rotating as you go. The chocolate will remelt nicely, so don’t worry about it hardening.
- When you have covered the cake with the chocolate drips, take your candied oranges and dip them halfway in the melted chocolate. Set back on the cooling rack to set.
- Take your piping bag and make short, quick spots of icing along the top, squeezing the bag to start the dollop, and then stopping pressure and pulling your hands away quickly to create that defined peak. This is a repetitive motion that you will quickly get the hang of - and feel free to use that offset spatula to remove any peaks that you don’t like and re-do them.
- One you have covered the cake in a crown of chocolate buttercream peaks, arrange your dried chocolate oranges as you desire on top of the cake.
Notes
Nutrition
More of our favorite chocolate cake recipes:

- Beach Day Rice Krispie Treats - June 23, 2026
- Pickled Jalapeños Recipe - June 15, 2026
- Homemade Nesquick Mix - June 11, 2026


I think you may have forgotten a step, there weren’t nearly enough wet ingredients for the cake when I tried this. There wasn’t any milk or oil.
I added some on my own and it’s baking now! We’ll see how it turns out! I hope it’s yummy!
Hi Katie, I’ll take a look and double check! Thanks for the heads up!
I would definitely try it, such an easy recipe. thank you Stacey!