
How to Use Heat Transfer Vinyl on Fleece Blankets
Personalized blankets make a great gift idea, but they can be quite pricey to purchase! We’ll show you how to make your own DIY nap blanket and how to use heat transfer vinyl on fleece blankets with an easy step-by-step guide.
Note: I’ve included shop-able ad links to products used in this tutorial; read our disclosure policy here.
Can you put vinyl on fleece blankets?
Yes! I’ve made quite a few personalized fleece blankets now using different types of blankets and designs. I love the finished results — and as I get more practice, they look better and better each time!
A few tips for using heat transfer vinyl on fleece blankets:
- Look for fabric with low pile. A thicker blanket with longer fibers may create an uneven press and make your design look crooked or wrinkled. I found my blankets at Target, Walmart, etc. for about $8-15. They don’t have to be fancy or expensive!
- Use thicker, textured vinyl materials. I’ve used both Flocked Heat Transfer Vinyl and Glitter Iron-on Vinyl successfully. Both look great and hold up well on fleece! You can use flat heat transfer vinyl, but it may look a bit bumpy with the fleece underneath. That’s why I stick to materials with texture.
- Test the fabric first before you press to make sure that it holds up to high temperatures without discoloring or melting. You just never know what blankets are really made of until you try! So far I haven’t had any issues though.
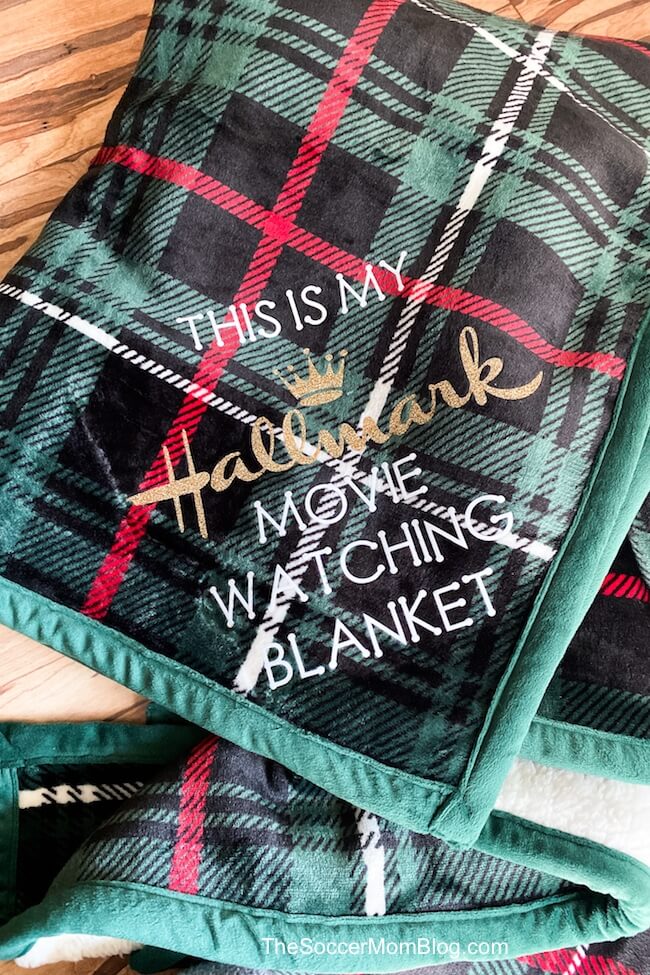
Here are two personalized blanket designs I’ve made using my Cricut Maker and EasyPress 2:
In this fleece blanket tutorial I’ll show you how to make the personalized nap blanket above. It’s a relatively easy Cricut project — not counting the design it probably only took me about 30 minutes!
What You Need to Make a Personalized Nap Blanket
- Cricut Maker + Everything Materials Bundle
- Cricut EasyPress 2 12×10″
- Cricut EasyPress mat 12×12″
- Fleece blanket
- White Flocked Heat Transfer Vinyl (HTV)
- Glitter Iron-on Vinyl
How to Make a Personalized Nap Blanket with Cricut Maker and EasyPress
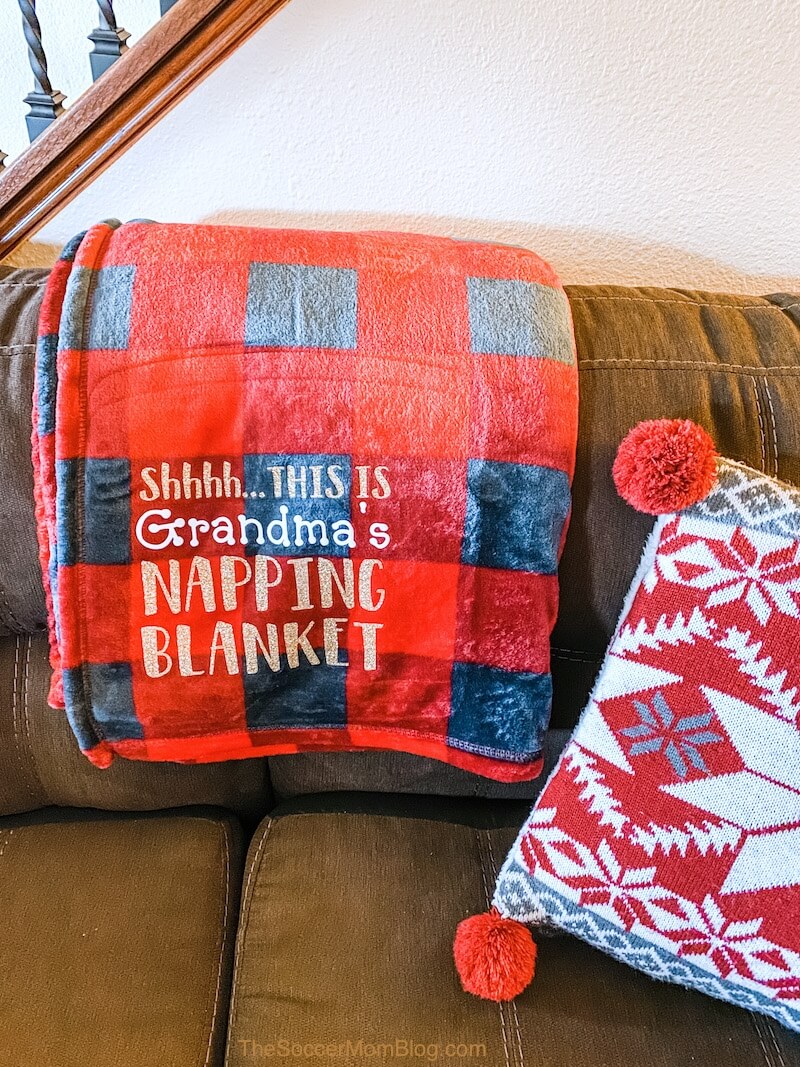
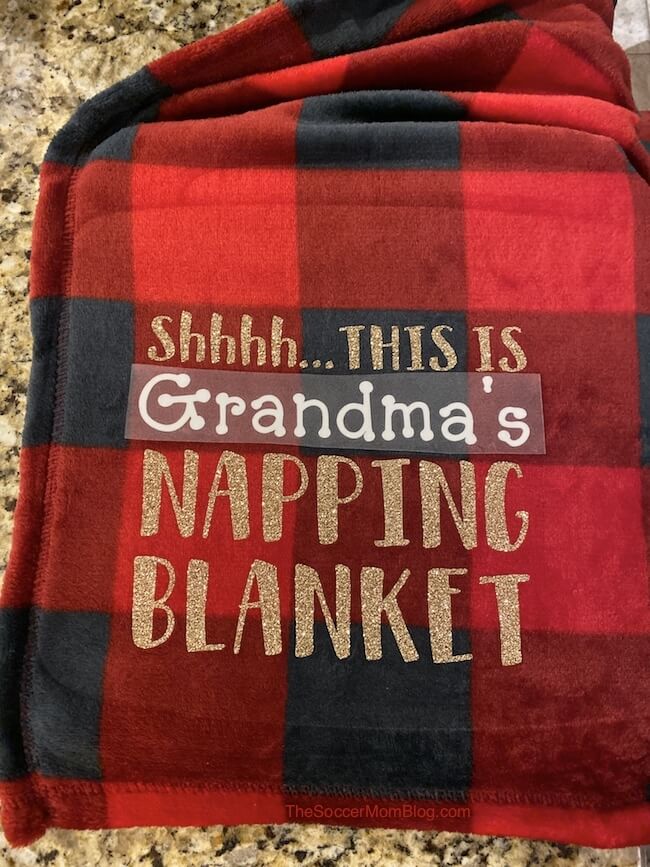
I made this nap blanket as a Christmas gift for my Grandma. My original idea was simply to say “Grandma’s Nap Blanket” but then I saw this tutorial from The Crafty Blog Stalker and I loved how she added “Shhhhh” at the top. Gotta give credit where credit is due!
Here’s how it’s made, and how you can use heat transfer vinyl on fleece blankets with ANY design.
Step 1: Prep Your Materials
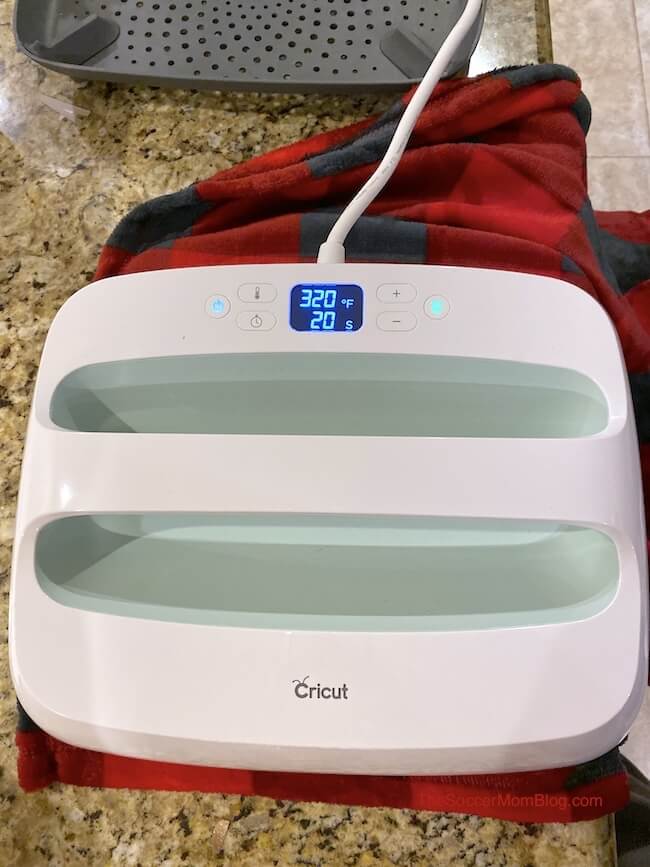
- Set your EasyPress for 320 degrees and allow to heat up all the way.
- Arrange your blanket so that the corner you want to personalize is lined up on your EasyPress mat.
- Use a lint roller to remove as much excess fuzz as possible. Use your EasyPress to press the blanket for 20 seconds to smooth and remove any moisture.
- Load design in Cricut Design Space (click here to use our nap blanket design)
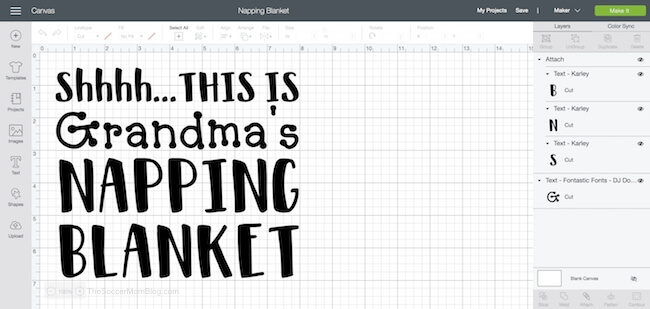
If using one type of iron-on, you can simply customize the design with your own name and cut.
If using two types of materials (like we did), you’ll want to make sure that everything but the name is grouped and attached. Hide the name text (as shown below) and cut out the rest of the text on one sheet of vinyl.

Be sure to click “mirror” text and place vinyl shiny-side down.
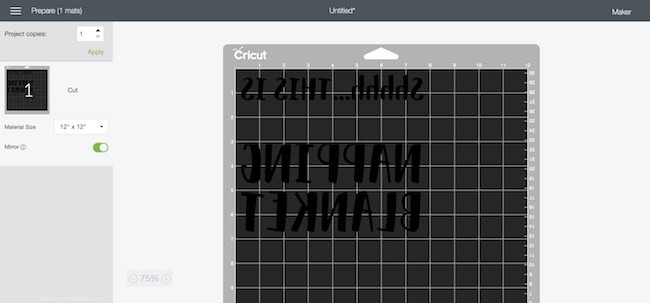
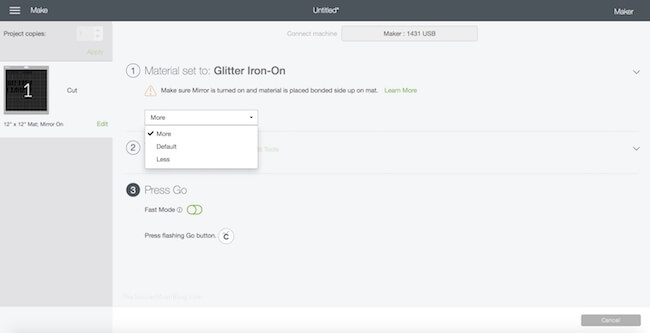
TIP: When working with thicker materials like glitter iron-on and flocked iron-on I always set the pressure on my Cricut to “more” instead of “default.” Otherwise it doesn’t always cut through evenly. This little trick works like a charm every time!
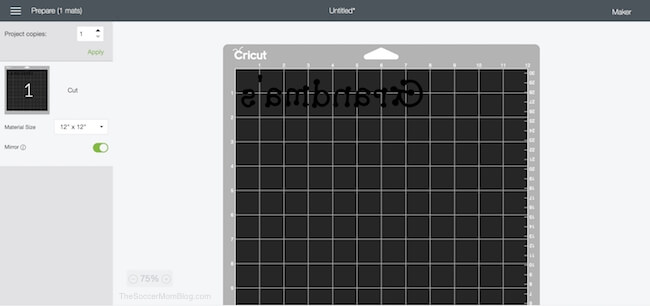
Now, go back to your full design and unhide the name by clicking on the same eyeball icon you used to hide it.
The hide the group you made of all of the text except the name. Cut, making sure to mirror the text.
Trim excess vinyl and weed your designs. Place the first sheet face-down on your prepped blanket. I left it all together so it would be lined up correctly.
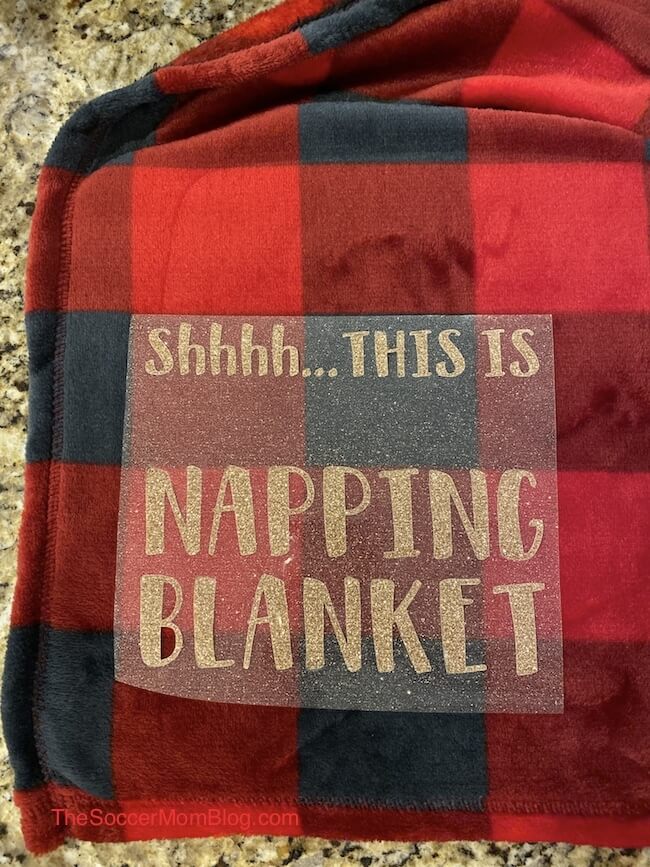
Press for 20 seconds at 320 degrees and allow to rest. Press for another 20 seconds if needed.
Once cool, remove backing and press the name text using the same steps above.
Carefully peel away any remaining backing. If needed, you can press one more time for 20 seconds, directly on the design.
Allow to cool completely and check to make sure that all of the vinyl is secure before using.
Cricut FAQ
- What is a Cricut Maker & 5 Reasons I Love Mine
- Step-by-Step Guide How to Use the Cricut Maker
- Is Cricut Worth the Price?
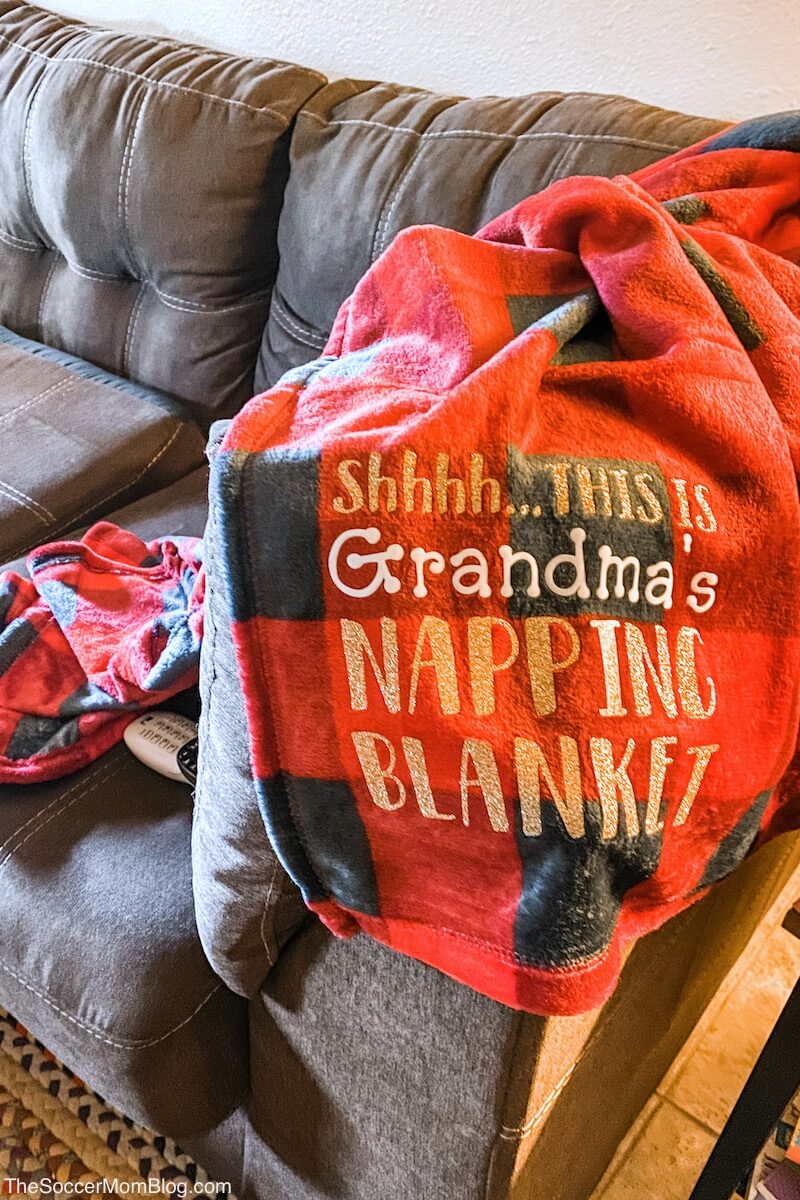
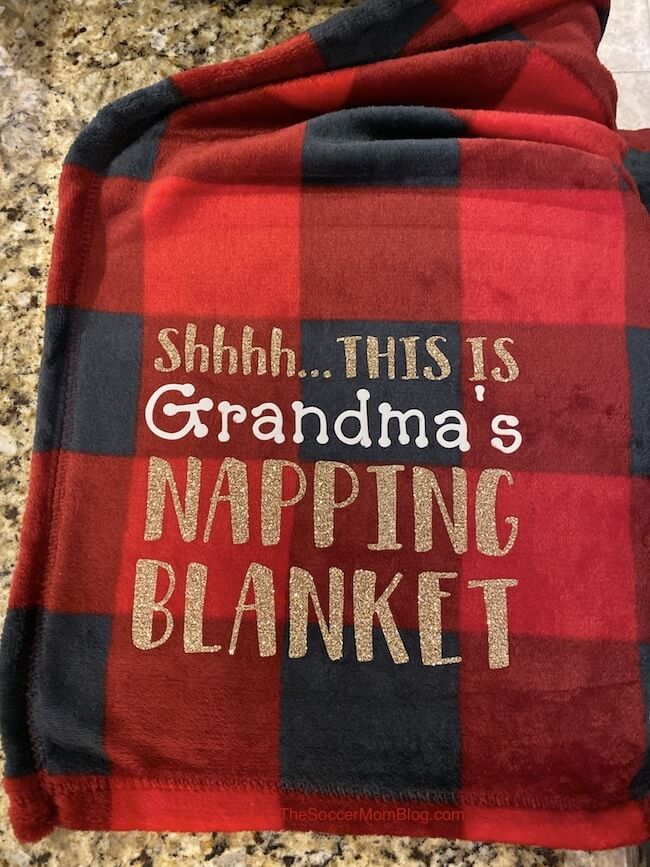
Personalized Nap Blanket DIY
Want to Save This Recipe?
Enter your email & I'll send it to your inbox. Plus, get great new recipes from me every week!
By submitting this form, you consent to receive emails from The Soccer Mom Blog
How to Use Heat Transfer Vinyl on Fleece Blankets
Equipment
- Cricut Maker + Everything Materials Bundle
- Cricut EasyPress 2 12×10″
- Cricut EasyPress mat 12×12″
Ingredients
- Fleece blanket
- White Flocked Heat Transfer Vinyl HTV
- Glitter Iron-on Vinyl
Instructions
- Set your EasyPress for 320 degrees.
- Arrange your blanket so that the corner you want to personalize is lined up on your EasyPress mat.
- Use a lint roller to remove as much excess fuzz as possible. Use your EasyPress to press the blanket for 20 seconds to smooth and remove any moisture.
- Load design in Cricut Design Space and cut onto heat transfer vinyl. Be sure to mirror the text.
- Trim excess vinyl and weed your designs.
- Press for 20 seconds at 320 degrees and allow to rest. Press for another 20 seconds if needed.
- Once cool, carefully remove backing.
- If needed, press for another 20 seconds and allow to cool completely.
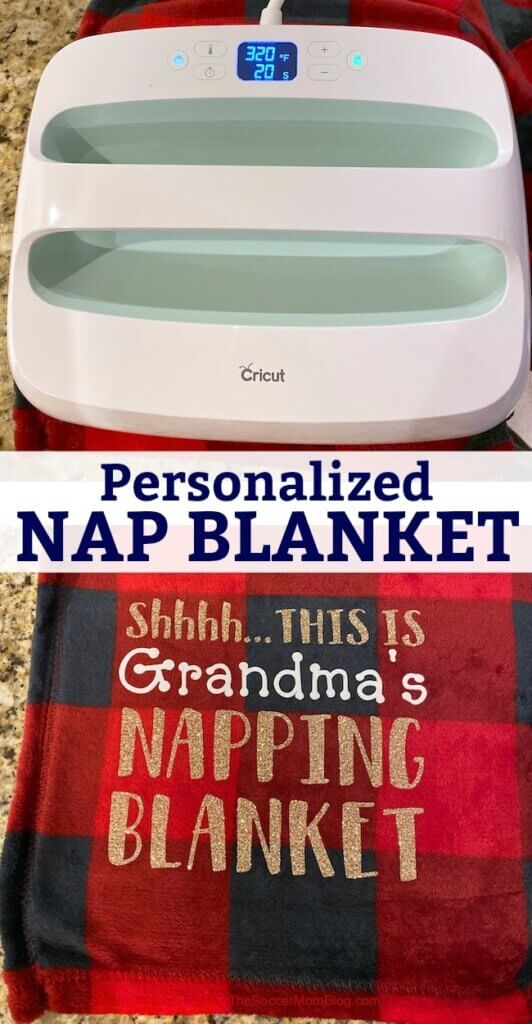
Pin our DIY Nap Blanket on Pinterest:
More of our favorite Cricut projects:

How to Make a DIY Doormat with a Cricut

- Beach Day Rice Krispie Treats - June 23, 2026
- Pickled Jalapeños Recipe - June 15, 2026
- Homemade Nesquick Mix - June 11, 2026


What do you tell your customers about washing them?
Hi Abby, I’d recommend sticking with cold wash, gentle cycle. You can dry on low heat or hang to dry. Basically, you want to avoid heat (which can mettle vinyl) or excessively heavy washing or scrubbing.
Hello, will a regular iron work as well?
I haven’t tried, so can’t say for sure if your iron will get hot enough to work. Some irons do, some don’t. If you try, I’d recommend putting a teflon sheet or another protective type of sheet between the HTV and your iron. Also, hold the iron in place as you would an EasyPress instead of using like you’d iron clothes.
This is great! Just made 6 blankets with designs. Do you remember which font you used for the hallmark blanket that’s shown in this blog?