
Minnie & Mickey Mouse Pumpkins
Inside: How to transform a dollar store orange foam pumpkin into an adorable Minnie or Mickey Mouse Pumpkin! Simple Disney pumpkin ideas for Halloween that are a must for Disney fans!
Mickey & Minnie Disney Halloween Pumpkins
Last year our family got to visit Disneyland during HalloweenTime – what an amazing experience!! This year, I’m going through a little bit of “Disney withdrawals” and missing all that Halloween decor and food!
That’s why I’m so excited to share these Disney Halloween pumpkins! With simple supplies from the dollar store, you can make both an easy Mickey mouse pumpkin and an adorable Minnie Mouse pumpkin!
Aren’t they the cutest Disney Halloween decorations you’ve ever seen?!
This Mickey Mouse painted pumpkin and Minnie Mouse painted pumpkin are easy to make and safe for kids to help – if you’re looking for an alternative to carved pumpkins. You might give them a hand with the hot glue gun, but other than that, this Disney Halloween craft is great for all ages!
What You Need to Make Disney Pumpkins
Note: I’ve included affiliate links for your convenience in finding supplies used to make these Mickey & Minnie Pumpkins; disclosure policy available here.
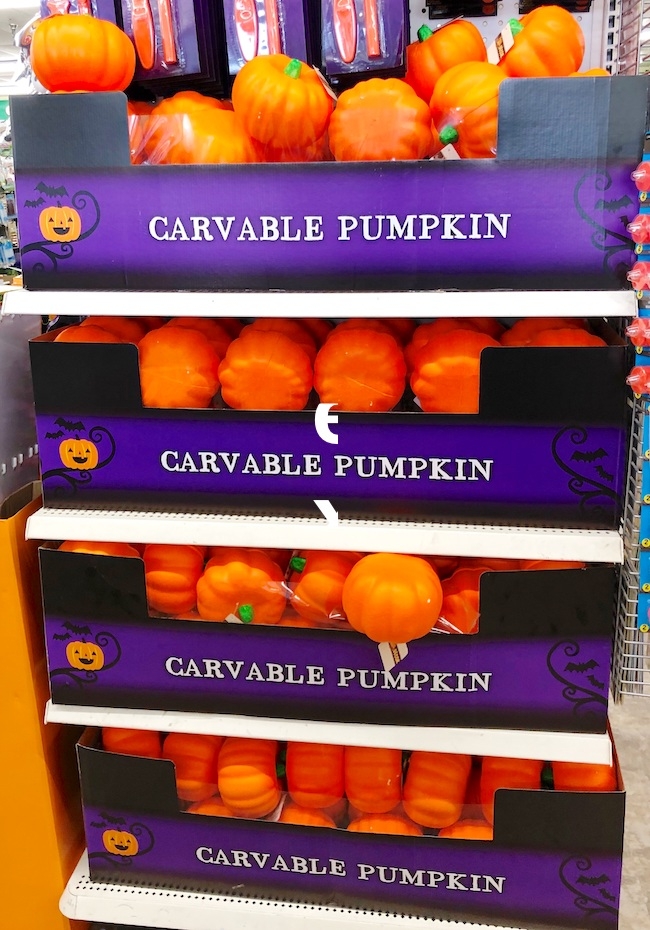
- Dollar store foam pumpkins (2) – You can also find them on Amazon
- Acrylic craft paint – black, red and white
- Black craft foam
- Large white buttons (2)
- Ribbon – Red with white polka dots
- Paintbrush
- Round sponge paint applicator
- Hot glue gun and glue sticks
- Craft scissors
- Black permanent marker
A printable copy of the following instructions are available at the end of the blog post.
Can I Use Real Pumpkins?
Sure! If you’re looking for a no-carve Halloween pumpkin idea, it doesn’t get much cuter than this! Depending on the size of the pumpkin you use, you may need to adjust the ear size, polka dot size, etc. to make the proportions look right.
We used artificial pumpkins so our finished product could be re-used year after year. You can find them at dollar stores or on Amazon (and perhaps other locations, but these are two we’ve seen them at personally).
Check out another cute fall craft we made using these foam pumpkins:
First, Prepare Your Pumpkins
For both pumpkins you’ll need to do the following:
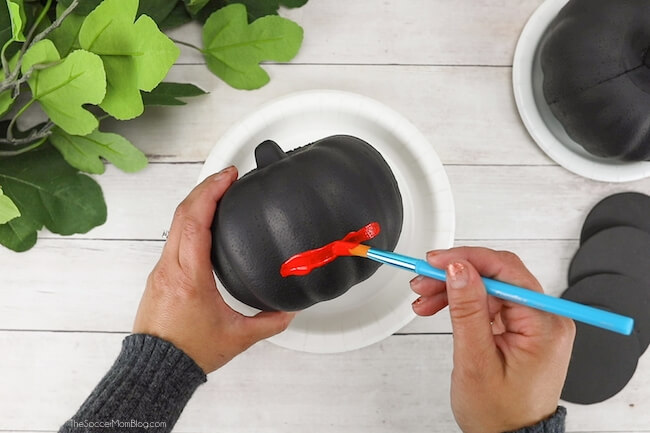
1. Paint the entire pumpkin black and allow to dry completely. If needed, apply a second coat to ensure even coverage. Allow paint to dry completely.
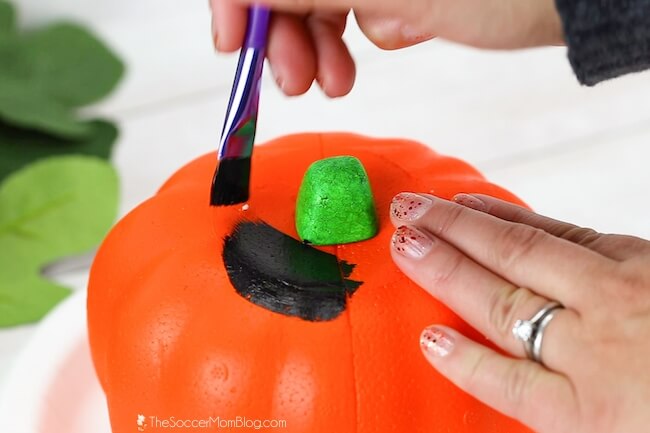
2. Once the black paint is dry, paint the bottom half of the pumpkin red. Again, you may need to apply a second coat.
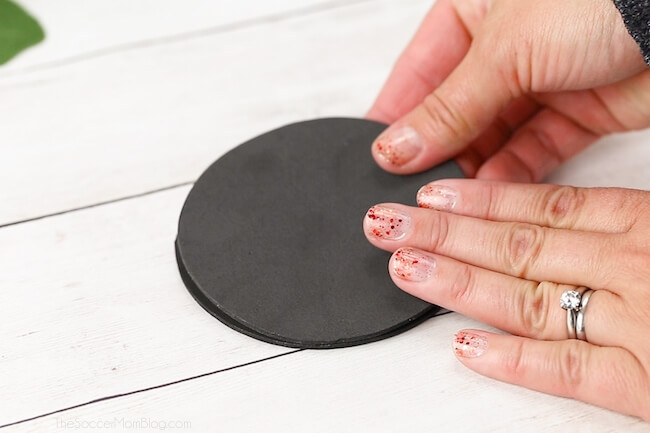
3. While your paint dries, you can make the ears out of craft foam. I usually don’t attach these until after I’ve finished decorating the entire pumpkin, but it’s helpful to go ahead and make them. To make the ears, use a wide-mouth mason-jar lid (or similar sized object) to trace 4 circles on black craft foam.
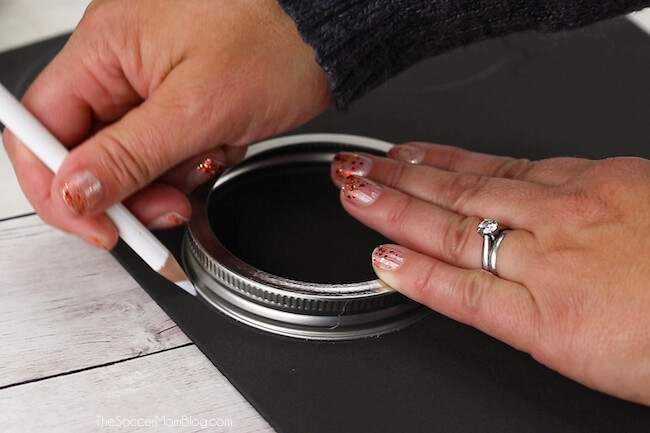
Glue two circles together to make one set of ears, then the other two circles to make another set of ears. If making both Mickey and Minnie pumpkins you’ll need 8 circles to make 4 ears.
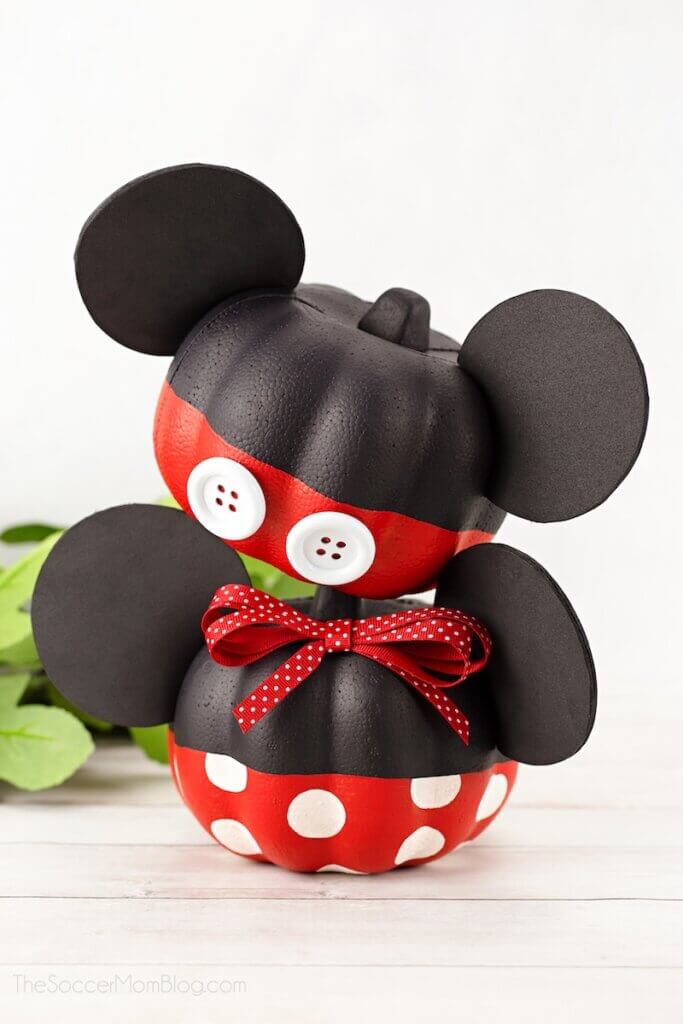
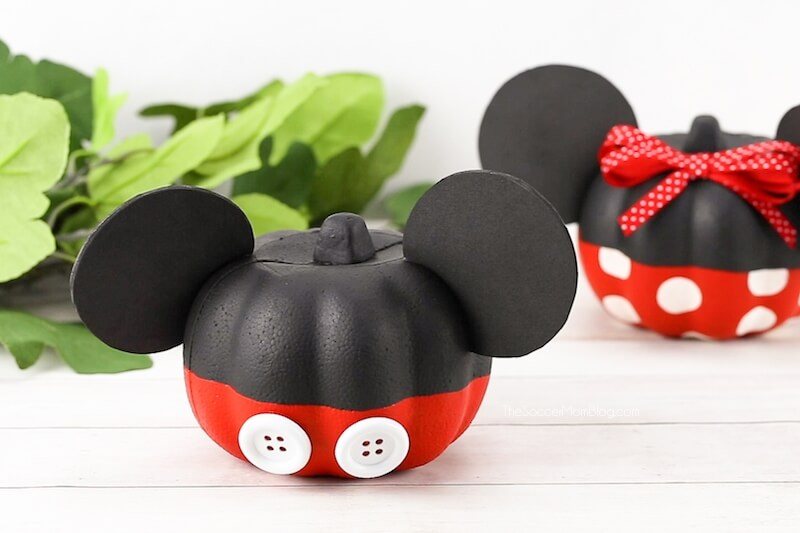
How to Make a Mickey Mouse Pumpkin
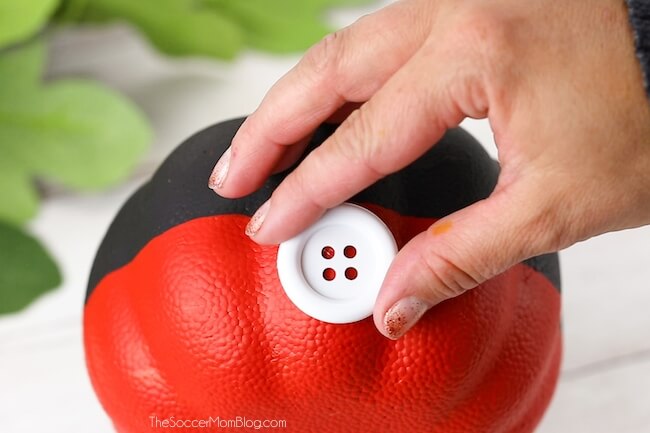
Use a hot glue gun to attach two large white buttons to the front of your Mickey Mouse pumpkin.
Trim a small sliver off the bottom of each ear. Glue this part of each ear to the top right and top left of your pumpkin, pushing the ear toward the pumpkin as the glue sets to secure well.
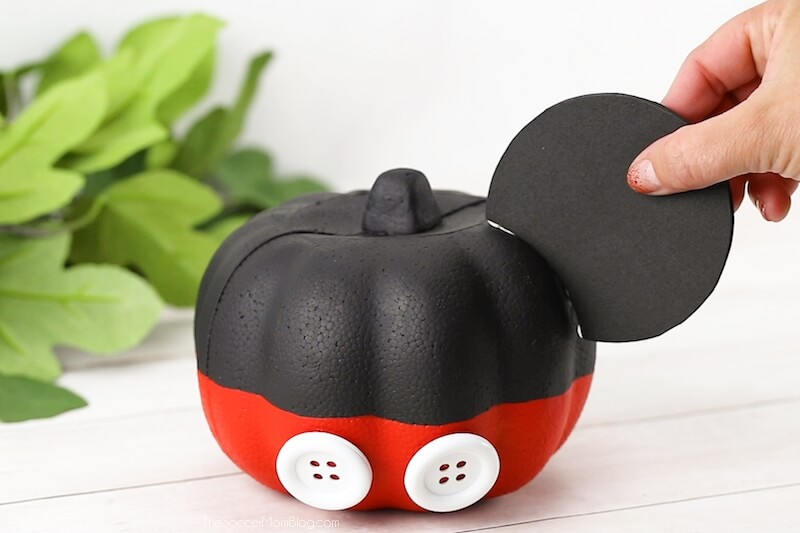
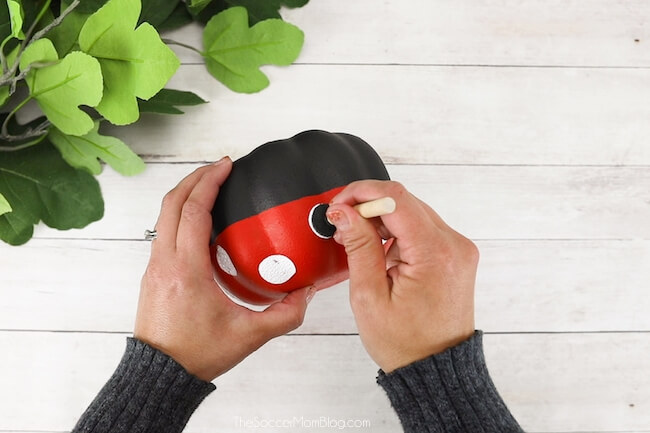
If the glue shows at the base of the ears, cover with permanent black marker.
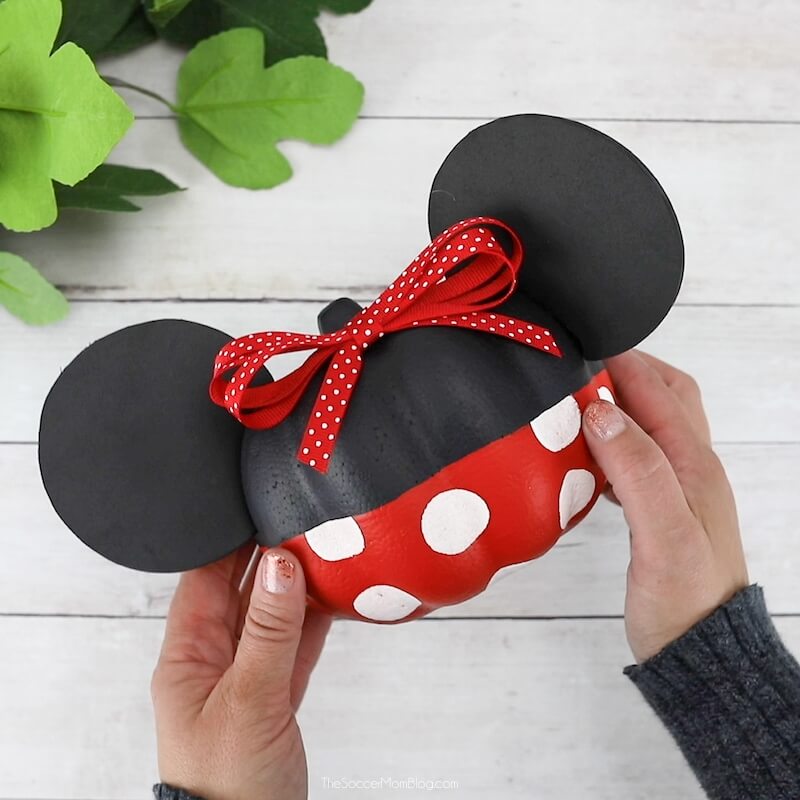
How to Make a Minnie Mouse Pumpkin
Use your round sponge applicator and white paint to make polka dots on the bottom half of your Minnie Mouse pumpkin. Let dry.
Trim a small sliver off the bottom of each ear. Glue this part of each ear to the top right and top left of your pumpkin, pushing the ear toward the pumpkin as the glue sets to secure well.
Create the bow by wrapping ribbon around all four of your fingers three times. Carefully remove ribbon from your fingers and tie in the center with a separate 12” length of ribbon to create the tail ends.
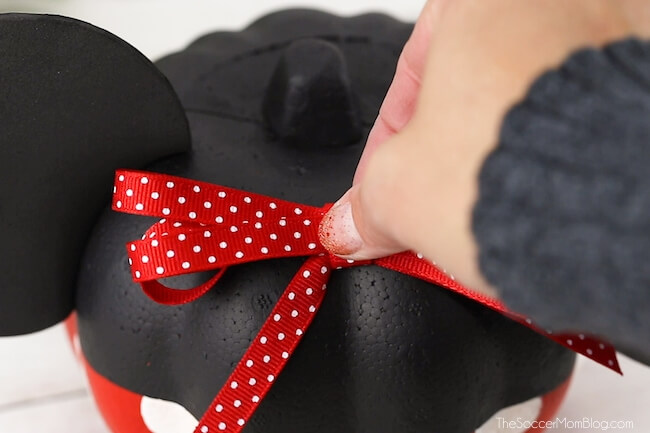
Attach bow to the top center of the Minnie pumpkin with glue gun and then fluff bow loops and trim tails end to prevent fraying.
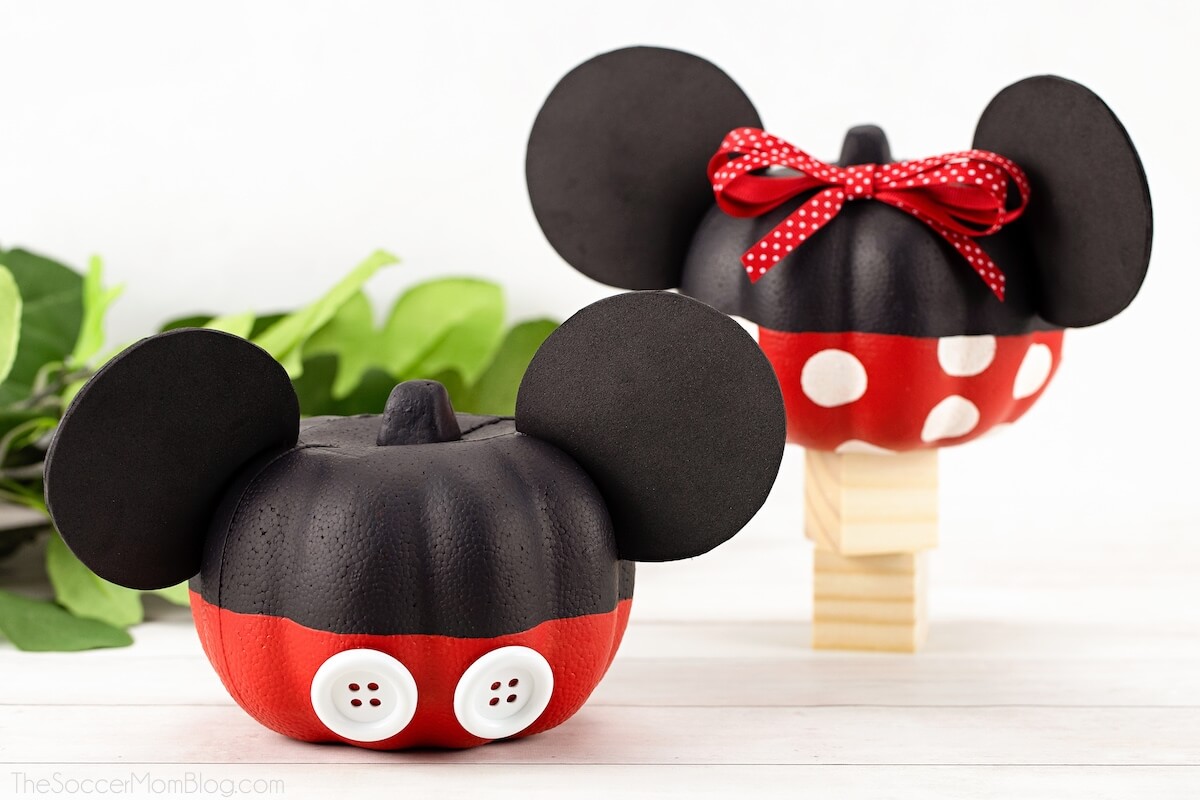
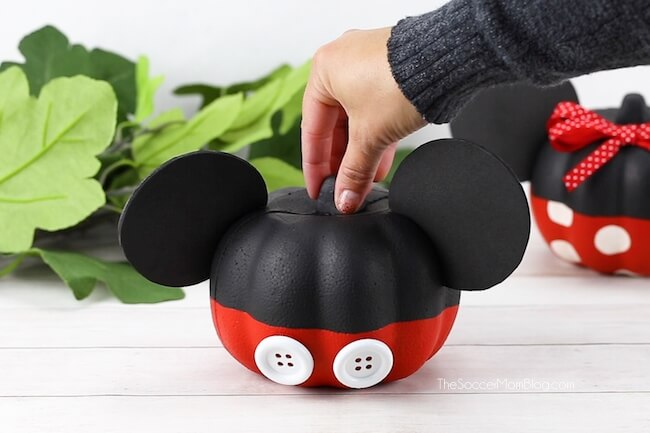
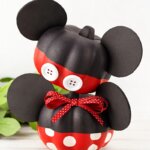
Here’s a look at the final Mickey Mouse Pumpkin and Minnie Mouse Pumpkin:
More of our Favorite Easy Halloween Crafts:
- Halloween Sensory Bottles – 3 Ways
- Pumpkin Pop-Up Card
- Mix-N-Match Pumpkin Faces
- Quilled Pumpkin Paper Craft
- Halloween Potion Bottles with Printable Labels
Printable Instructions to Make our Minnie & Mickey Mouse Pumpkins
Want to Save This Recipe?
Enter your email & I'll send it to your inbox. Plus, get great new recipes from me every week!
By submitting this form, you consent to receive emails from The Soccer Mom Blog
Minnie & Mickey Mouse Pumpkin - Dollar Store Halloween Craft
Equipment
- Hot Glue Gun
- Scissors
- Black Marker
Ingredients
- Dollar store foam pumpkins 2
- Acrylic craft paint – black red and white
- Black craft foam
- Large white buttons 2
- Ribbon – Red with white polka dots
- Paintbrush
- Round sponge applicator
- Hot glue gun and glue sticks
- Scissors
- Black permanent marker
Instructions
- Coat entire pumpkin with black craft paint. Apply a second or third coat, as needed. Allow paint to dry completely.
- Trace four circles (about 2 ½” in diameter) onto black craft foam and cut out. Attach two circles together with glue, then attach the other two together - to create two ears total. Set aside to dry.
- Paint the bottom half of pumpkin red. Apply a second coat if needed and let dry.
How to Make a Minnie Mouse Pumpkin
- Use your round sponge applicator and white paint to make polka dots on the bottom half of your Minnie Mouse pumpkin. Let dry.
- Trim a small sliver off the bottom of each ear. Glue ears to the top right and top left of pumpkin, pushing the ear toward the pumpkin as the glue sets to secure.
- If the glue shows at the base of the ears, cover with permanent black marker.
- Create the bow by wrapping ribbon around all four of your fingers three times. Carefully remove ribbon from your fingers and tie in the center with a separate 12” length of ribbon to create the tail ends.
- Attach bow to the top center of the Minnie pumpkin with glue gun and then fluff bow loops and trim tails end to prevent fraying.
How to Make a Mickey Mouse Pumpkin
- Repeat steps to make red and black painted pumpkin and mouse ears.
- Use a hot glue gun to attach two large white buttons to the front of your Mickey Mouse pumpkin.
Video
More of our favorite Disney related posts:

How to Visit Disneyland with a Baby
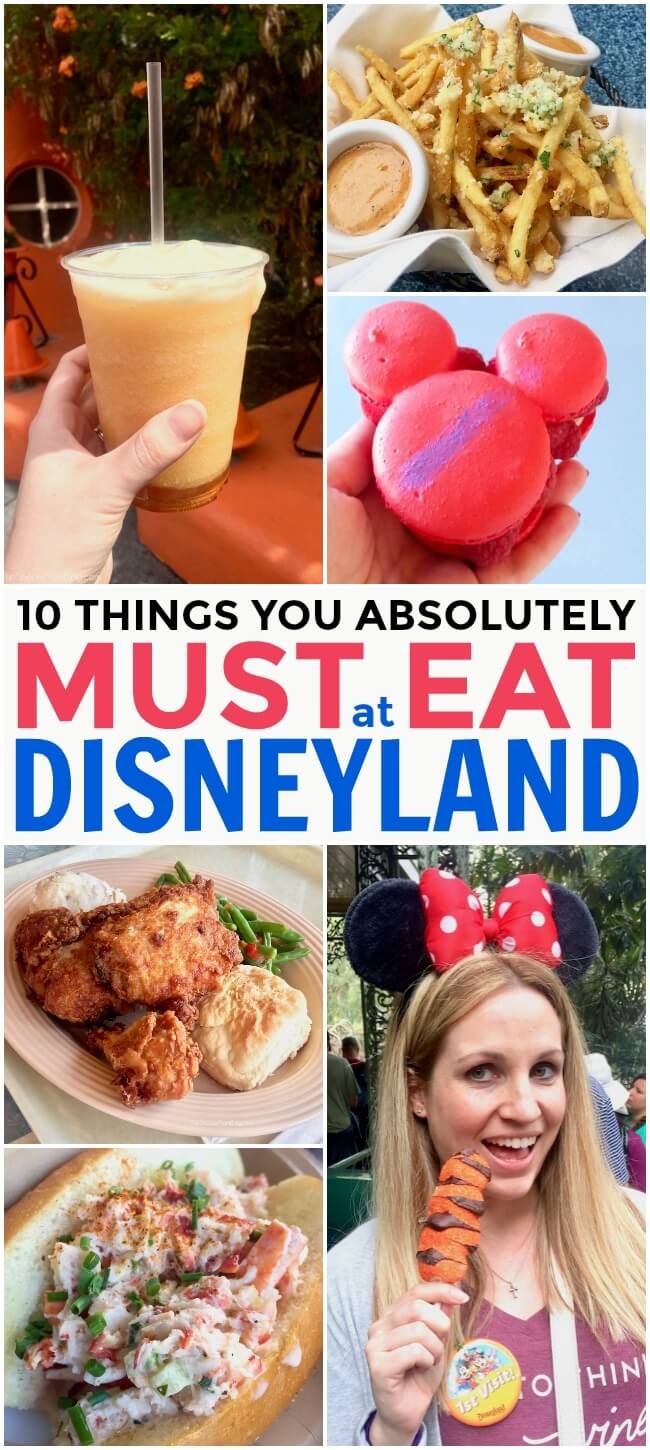
10 Best Things to Eat at Disneyland

- Beach Day Rice Krispie Treats - June 23, 2026
- Pickled Jalapeños Recipe - June 15, 2026
- Homemade Nesquick Mix - June 11, 2026

It is taking a LOT more than 2 coats of red to cover the black paint sufficiently. Is there a brand you used that works better?
I find that with craft supplies you usually get what you pay for, but I try to recommend solid brands in the post. When I paint, I usually apply really thick coats — it takes longer to dry, but is better coverage.