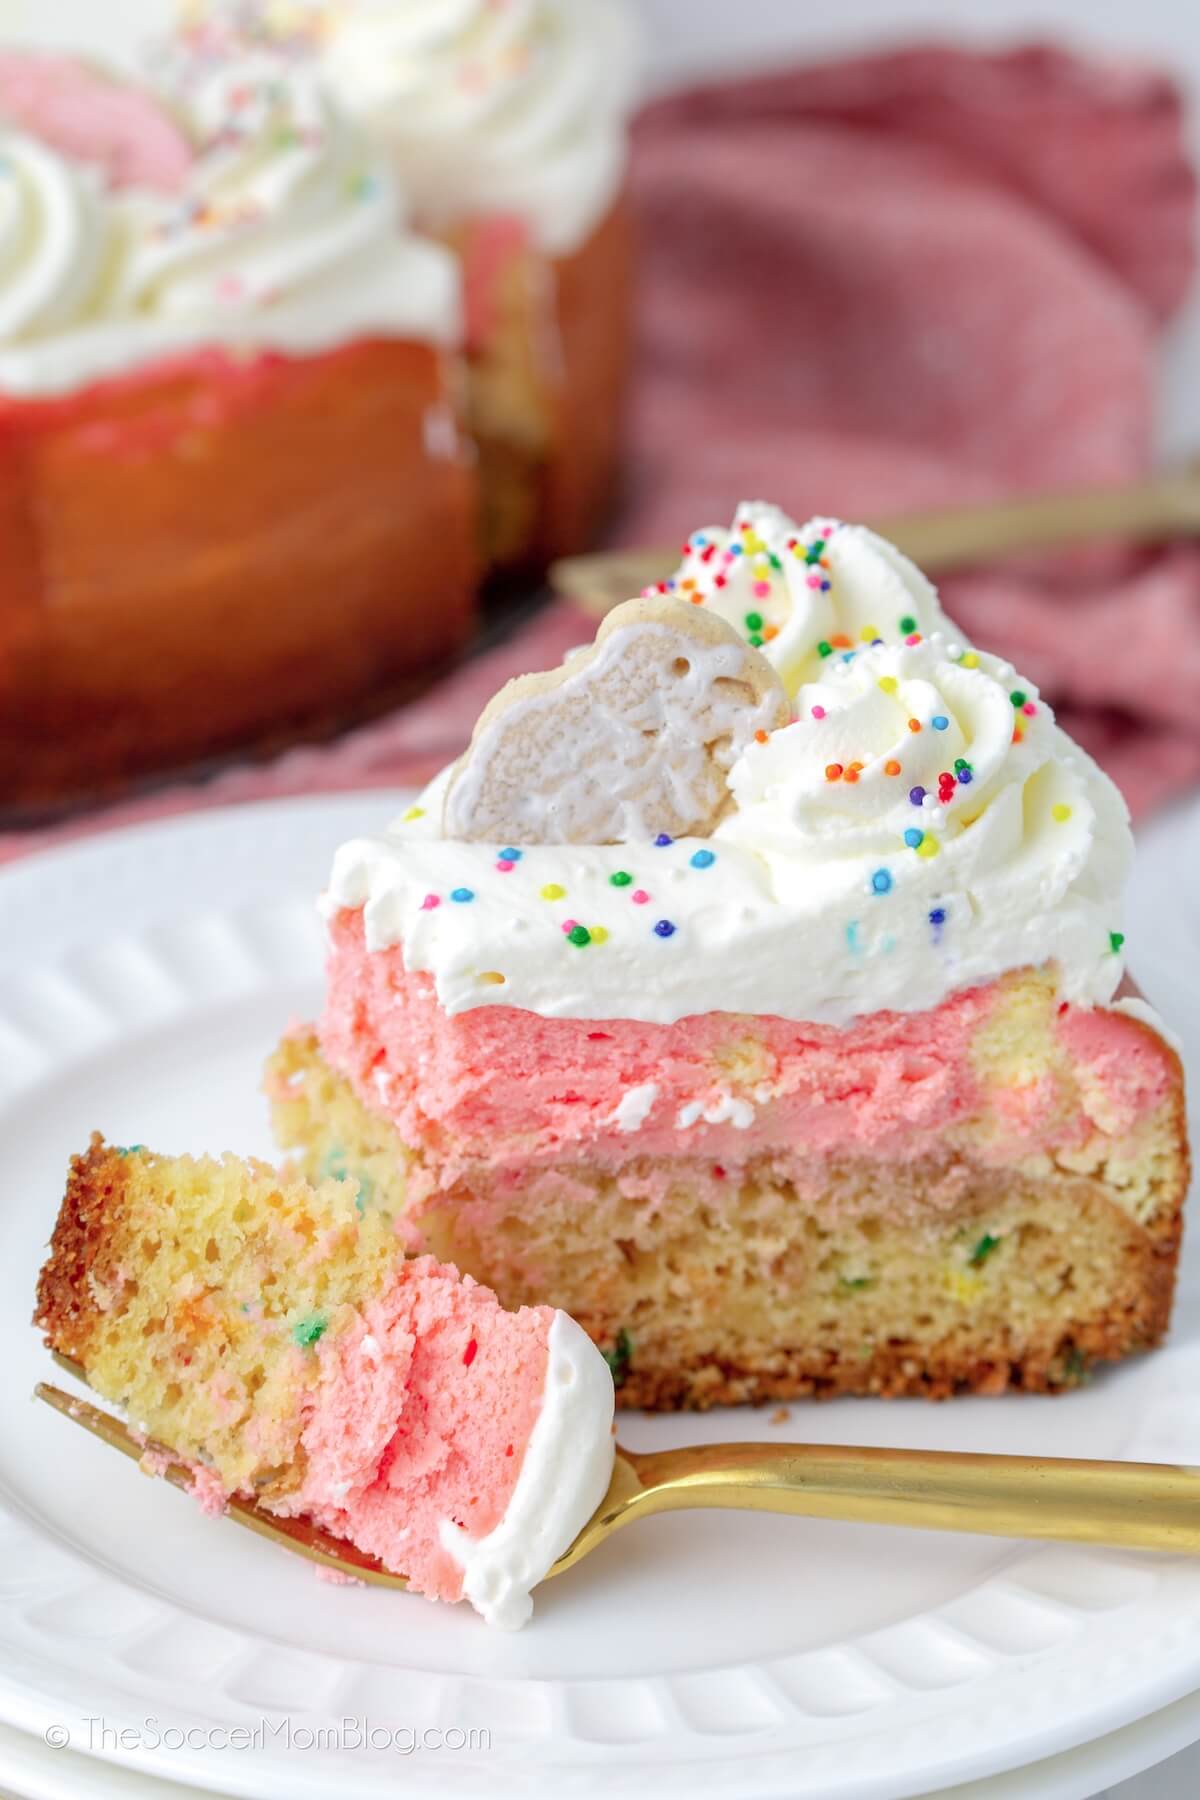
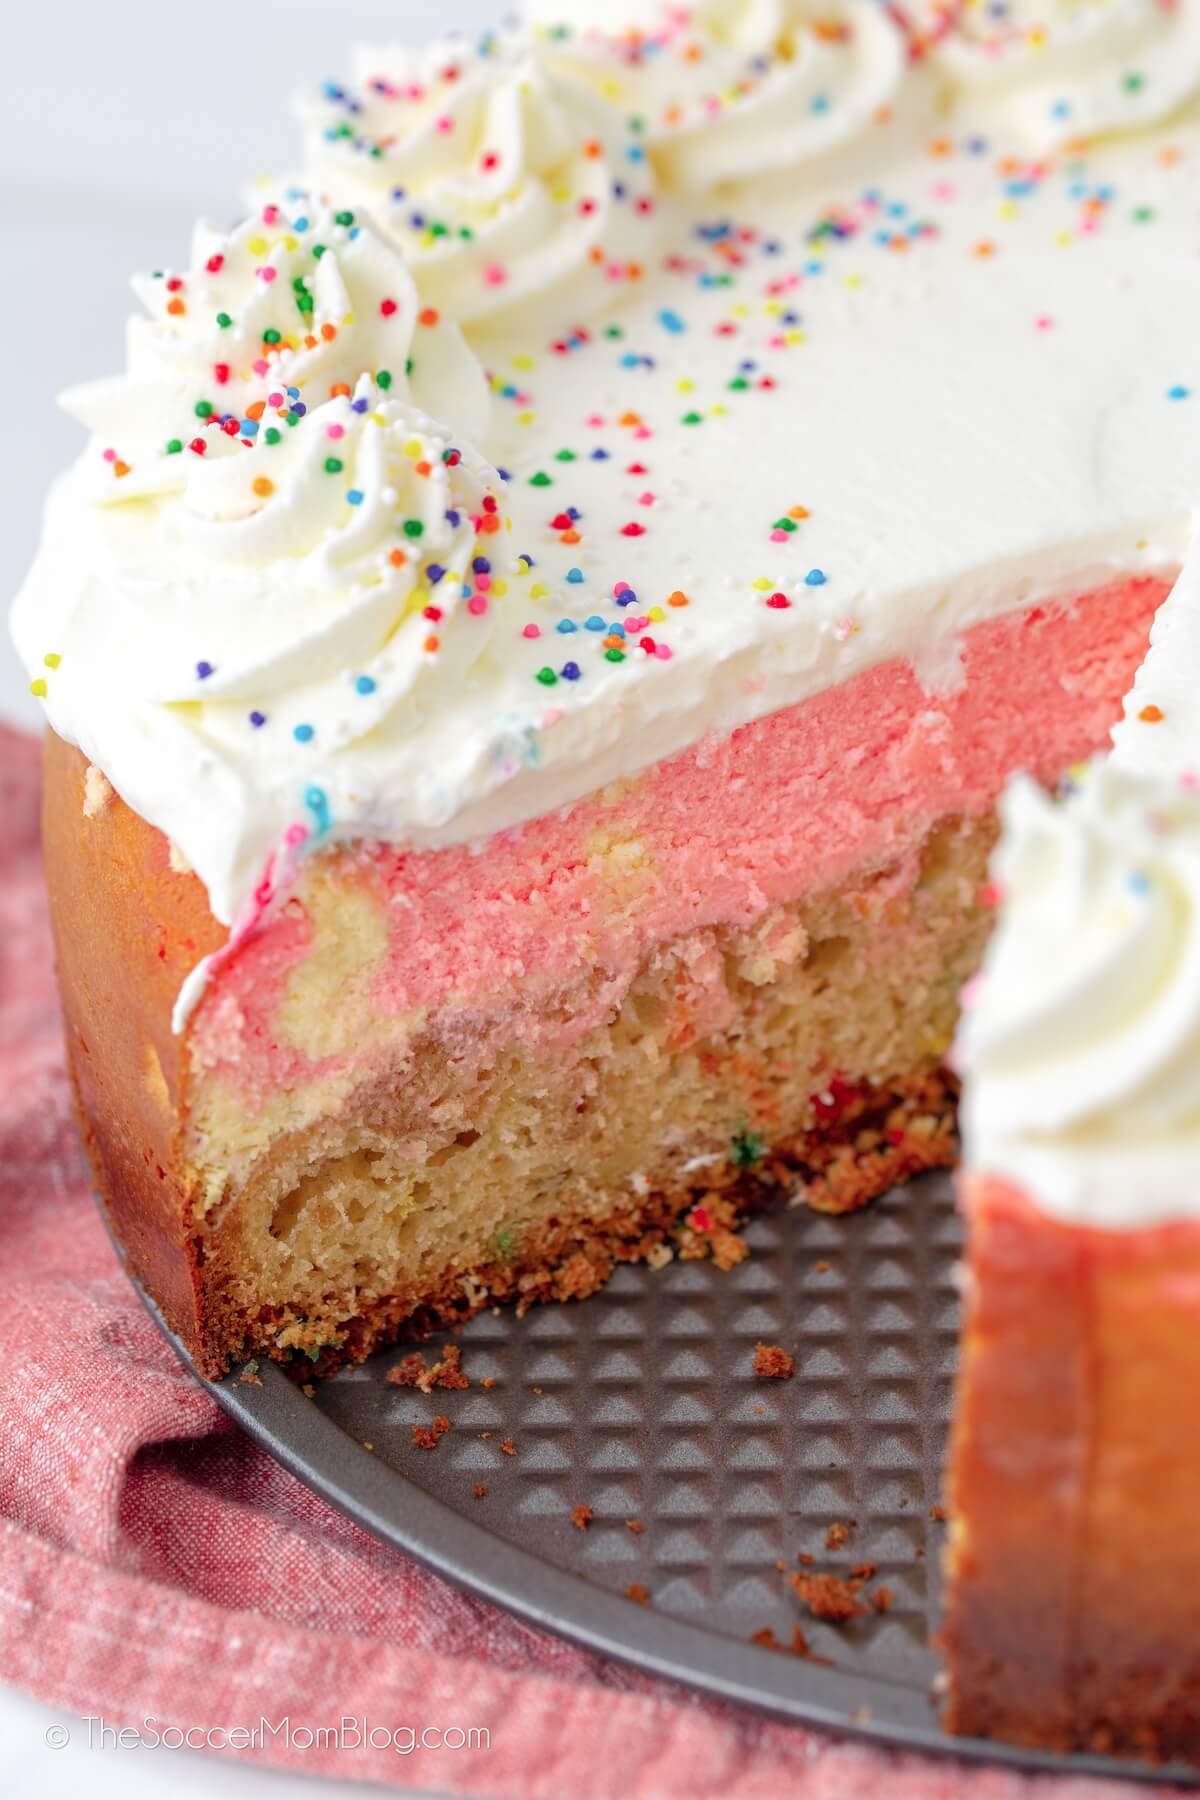
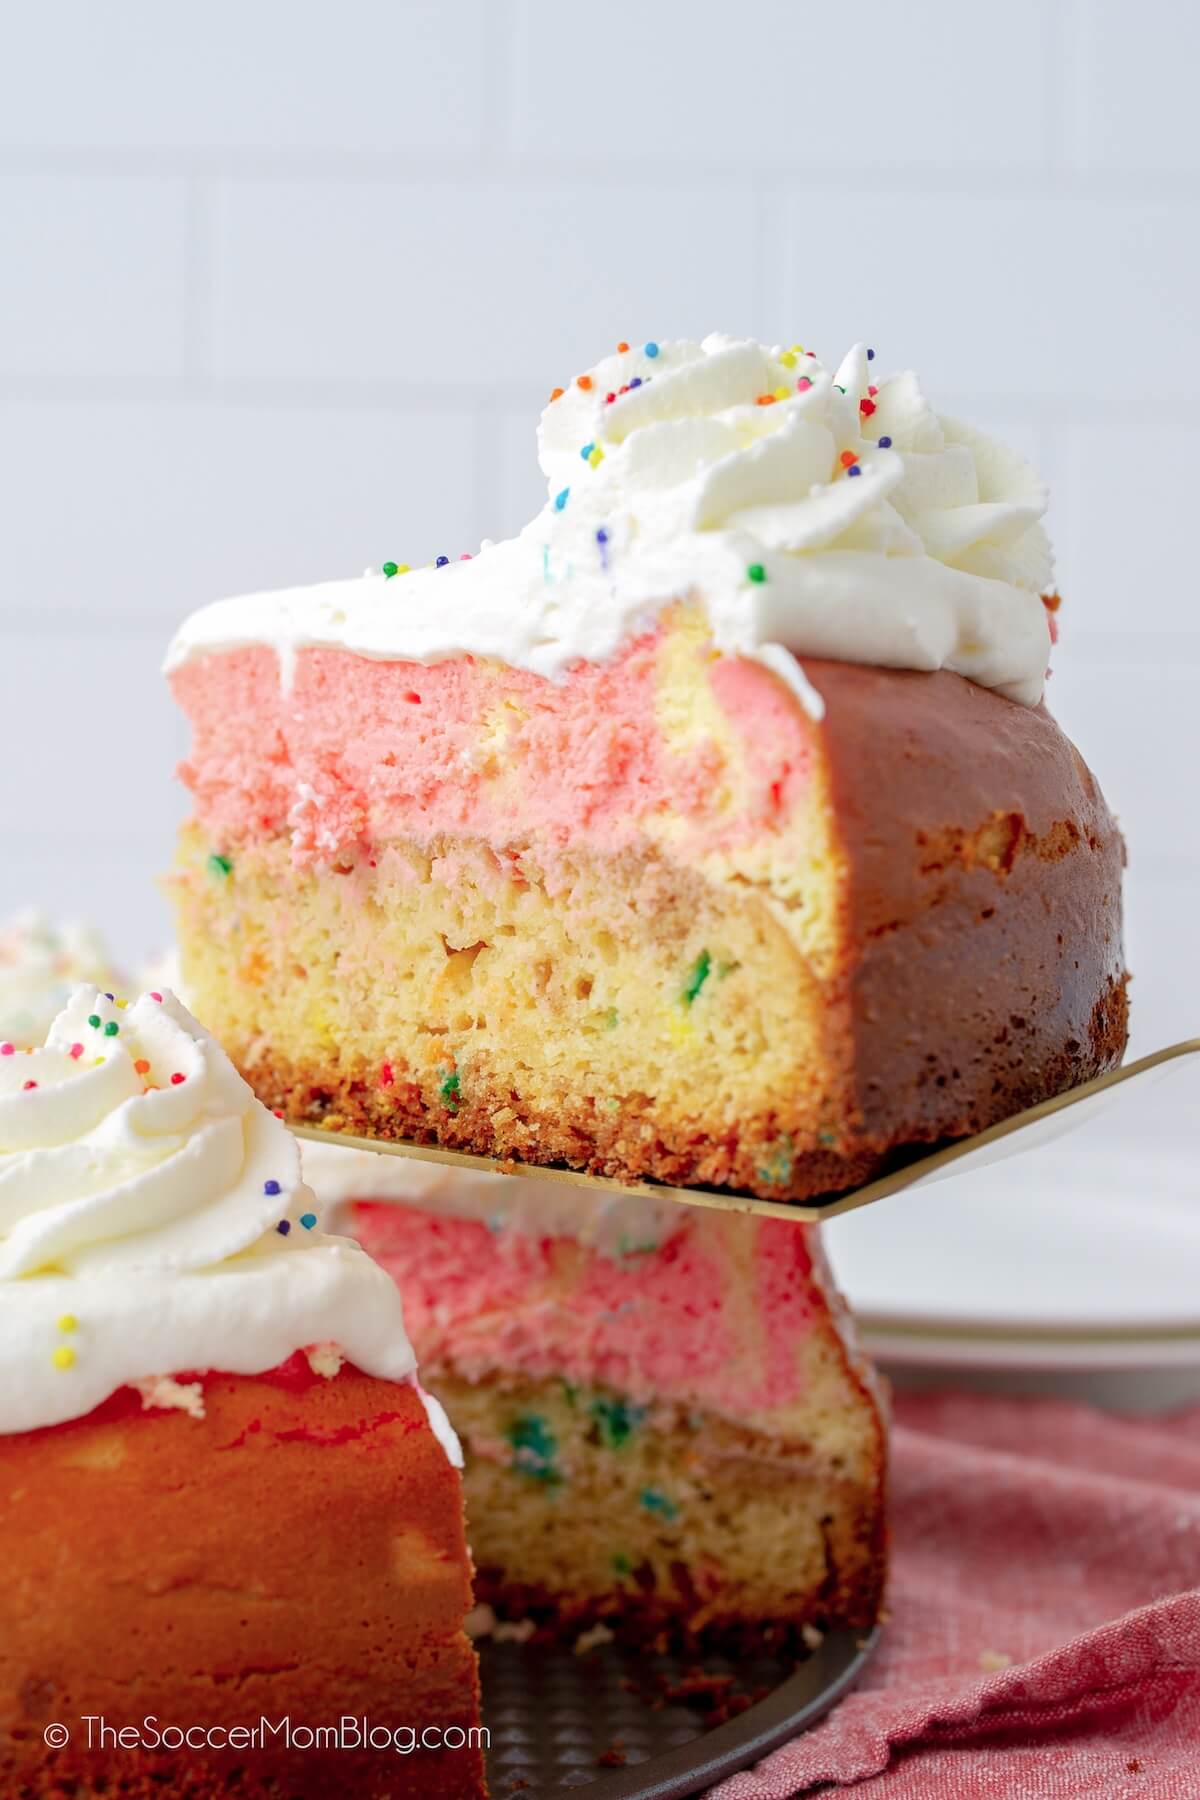
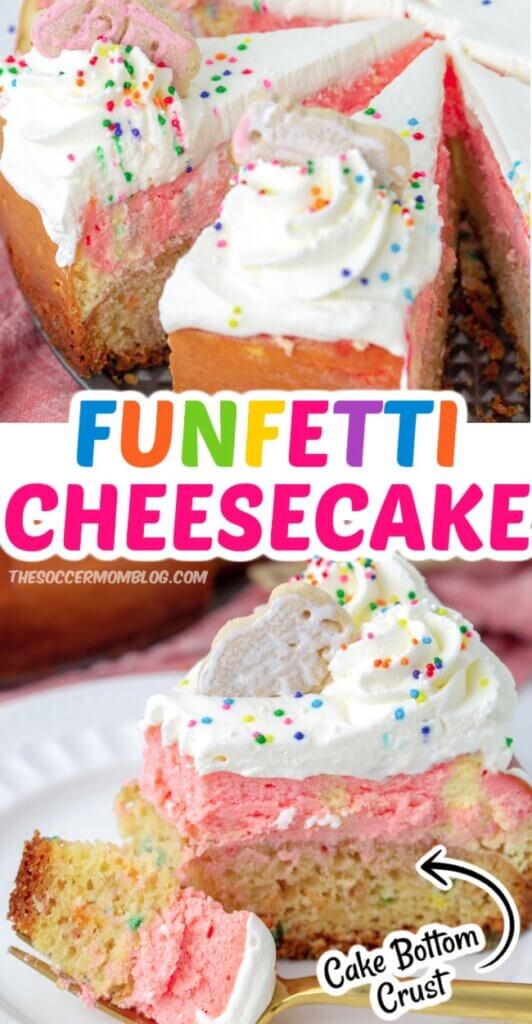
Funfetti Cheesecake with Cake Bottom Crust
This funfetti cheesecake is practically a party on a plate! It’s got all the best parts of birthday cake, combined with a creamy swirled cheesecake! And of course, topped with sprinkles!
Funfetti Cheesecake
This cheesecake puts the FUN in funfetti, with layers and layers of deliciousness!
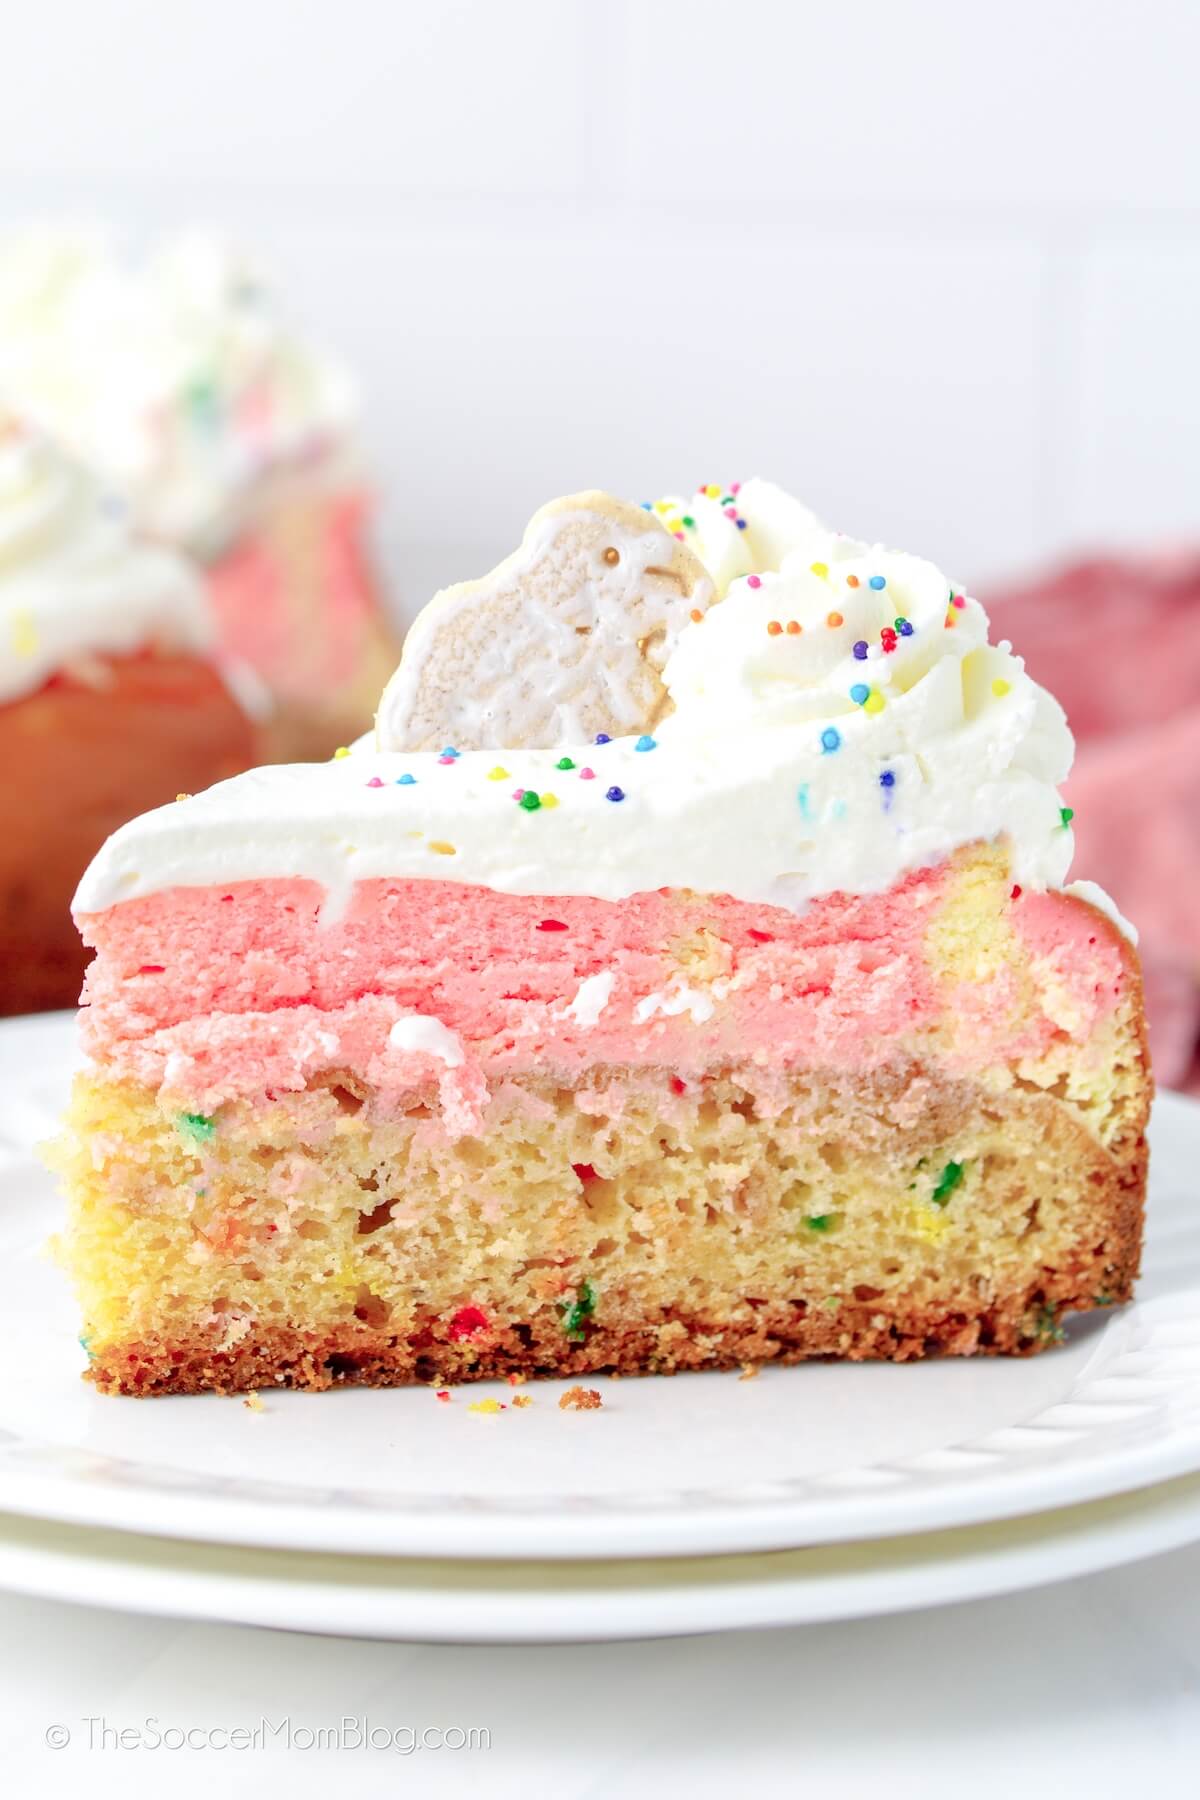
First, instead of your typical crust made with graham crackers, we started with a fluffy cake bottom crust. To make the crust extra special, we baked animal cracker crumbs into the batter — they sink to the bottom to create the perfect sweet and crunchy texture!
Then we topped this unique cake batter crust with a pink swirl cheesecake. This layering is inspired by Brooklyn-style cheesecakes, which combine a yellow cake bottom crust with creamy cheesecake on top.
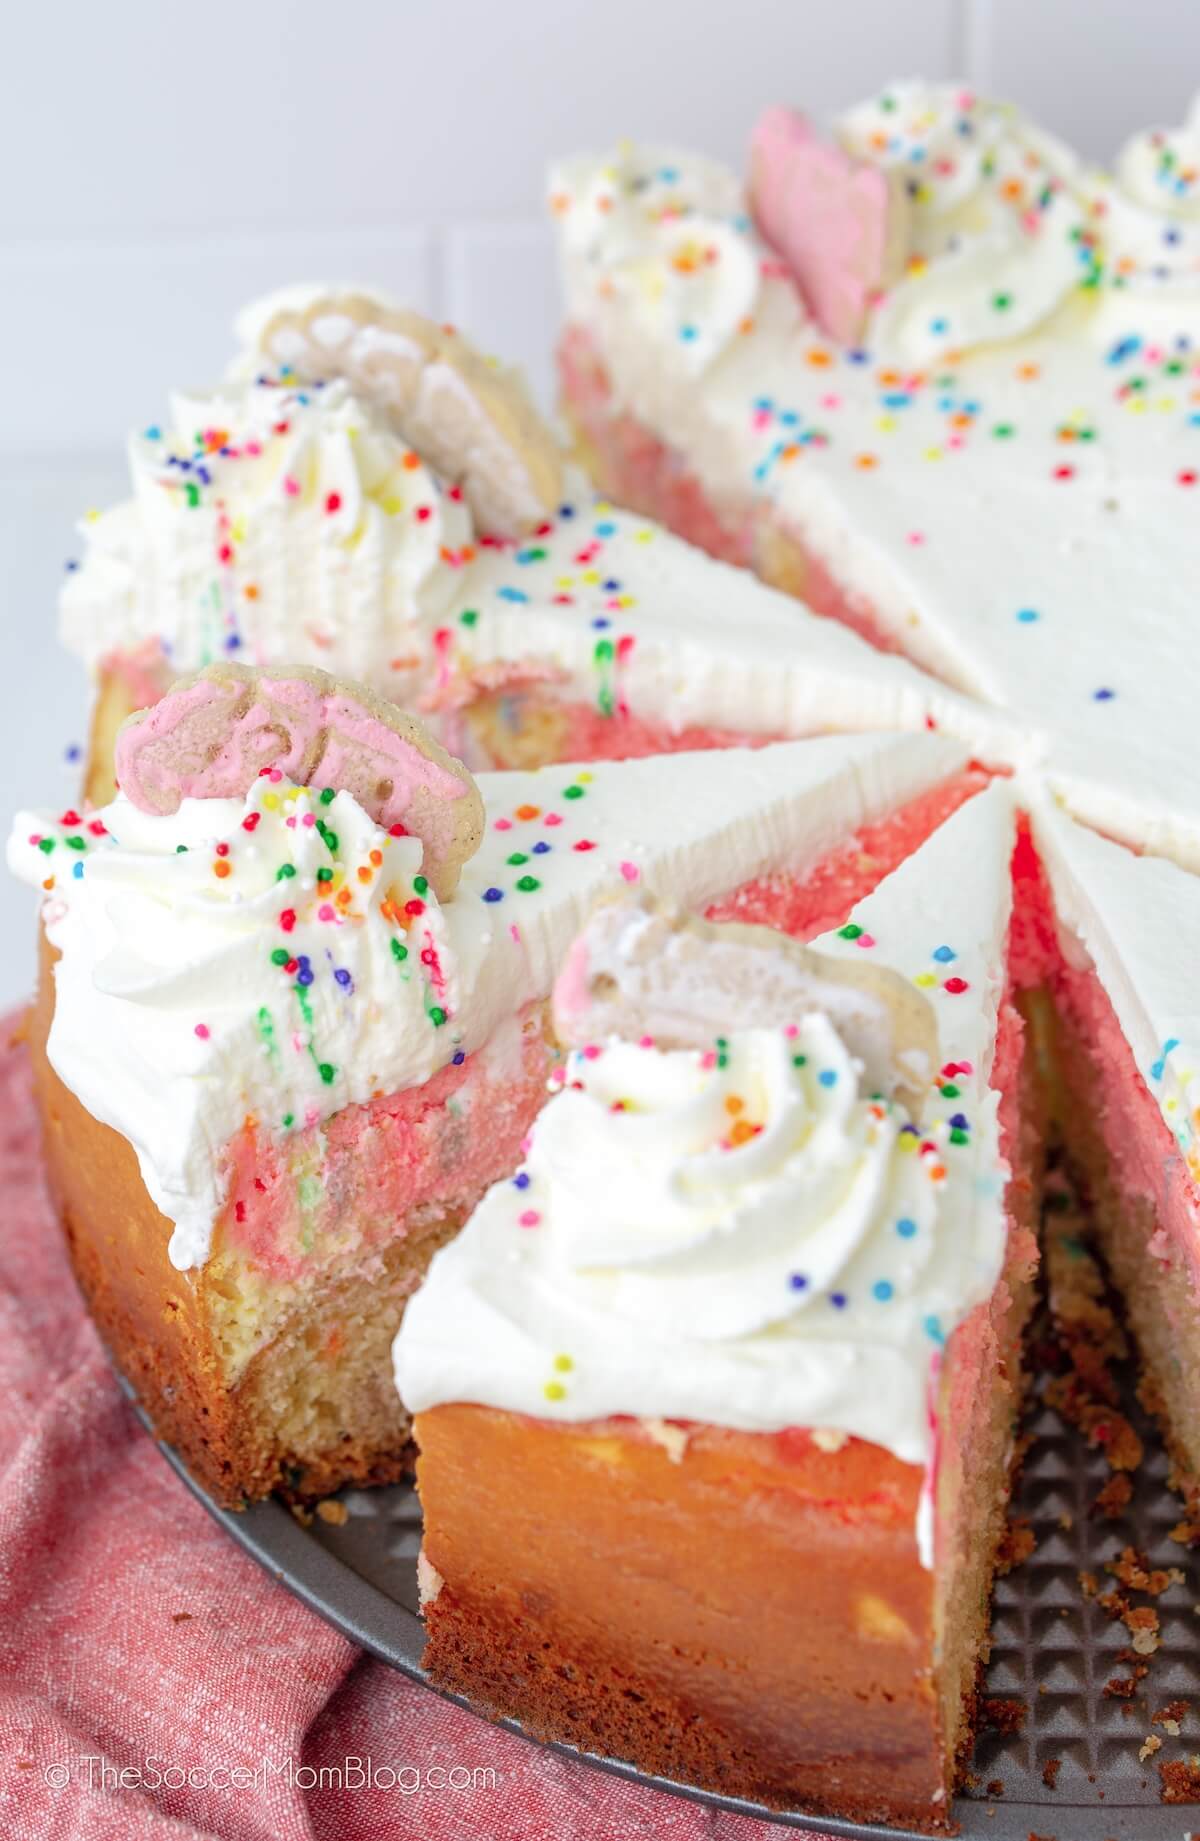
Finally, we finished this dessert masterpiece with homemade whipped cream, rainbow sprinkles, and frosted circus animal crackers.
Y’all it’s almost too much…
But I love it!! Talk about the perfect celebration treat!
What is Funfetti Cake?
Funfetti is essentially a confetti cake — soft vanilla cake filled with multi-color sprinkles. It’s about as festive a dessert as it gets!
Trust me, if you serve a funfetti cheesecake like this at your next party, you’ll wow’ em for sure!
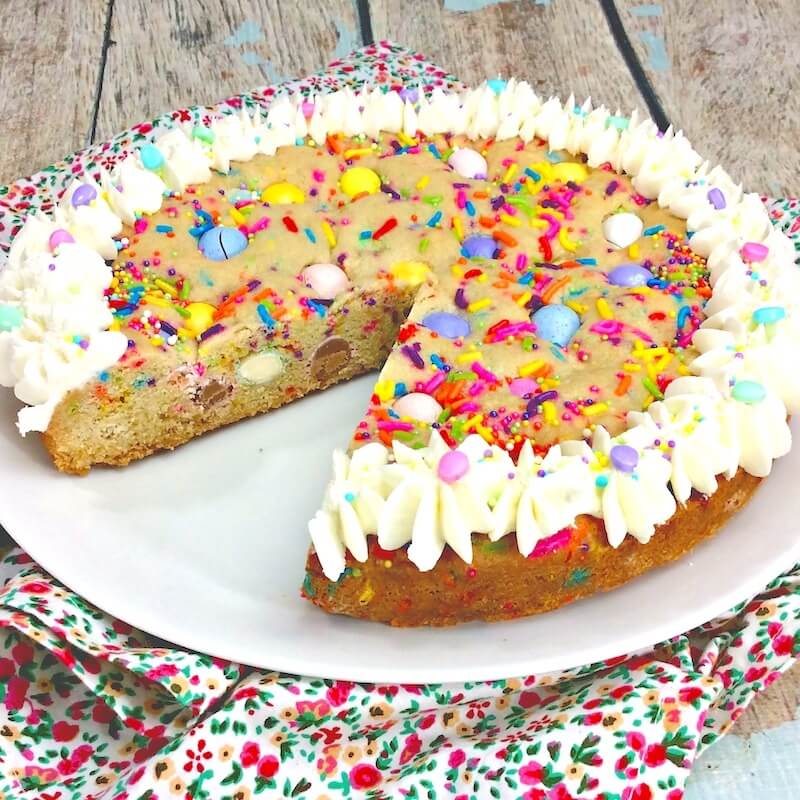
Related: Try our Giant Funfetti Cookies too!
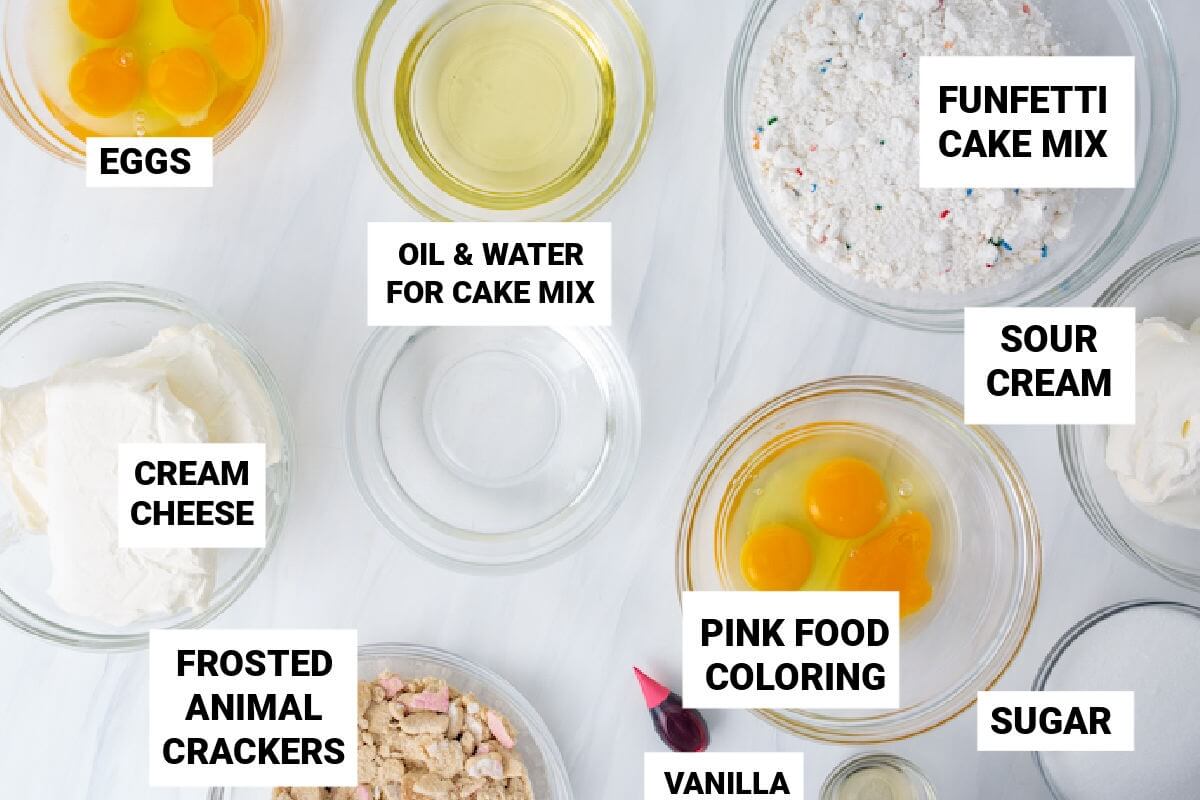
Cake-bottom Funfetti Cheesecake Ingredients
For your convenience, I’ve provided affiliate links to some of the ingredients used in this recipe; disclosure policy available here.
- 1 box of funfetti cake mix (plus ingredients listed on box)
- 3 bars (8 oz each) cream cheese — at room temperature for easier mixing
- 4 eggs
- 1 tsp vanilla extract
- 1 cup granulated sugar
- 1 cup low fat sour cream
- 1 cup crushed frosted circus animal crackers
- pink food coloring
Homemade Whipped Cream
- 1 cup heavy whipping cream
- 1/4 cup powder sugar
- 1 teaspoon vanilla
Toppings
- Rainbow sprinkles
- Frosted animal crackers
Kitchen Tools Used
- Springform pan
- Stand mixer or electric hand mixer
- Piping bag
- Large Mixing Bowl
Full printable recipe available at bottom of post.
Instructions
To Prep: Preheat the oven to 350°F and coat a springform pan with non-stick cooking spray.
Cook Time: 1 hour 35 minutes
Chill Time: Overnight
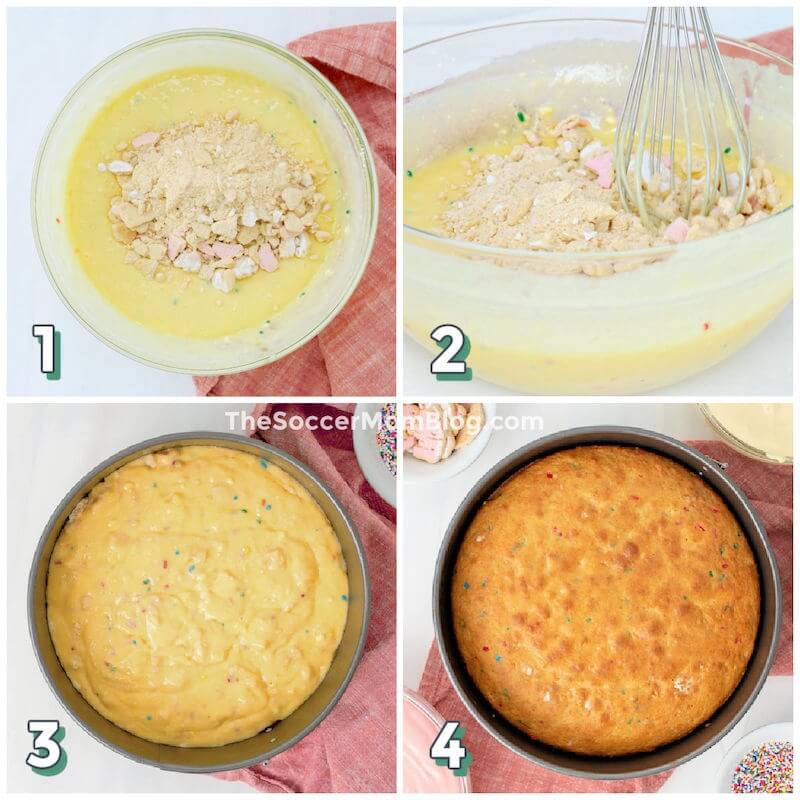
To Make the Cake Bottom Crust
Prepare the funfetti cake batter according to directions on the box, in a large bowl.
Place the animal crackers in a large zip-top plastic bag, seal the top, and crush the crackers using a rolling pin. (You can also use a food processor, but stop before you end up with fine crumbs — you just want to rough chop the cookies).
Fold the cookie crumbs into your cake batter and stir so that they are evenly distributed.
Scoop the cake batter into your prepared springform pan and bake for 35 minutes. When the cake is done baking, remove from oven and allow to cool.
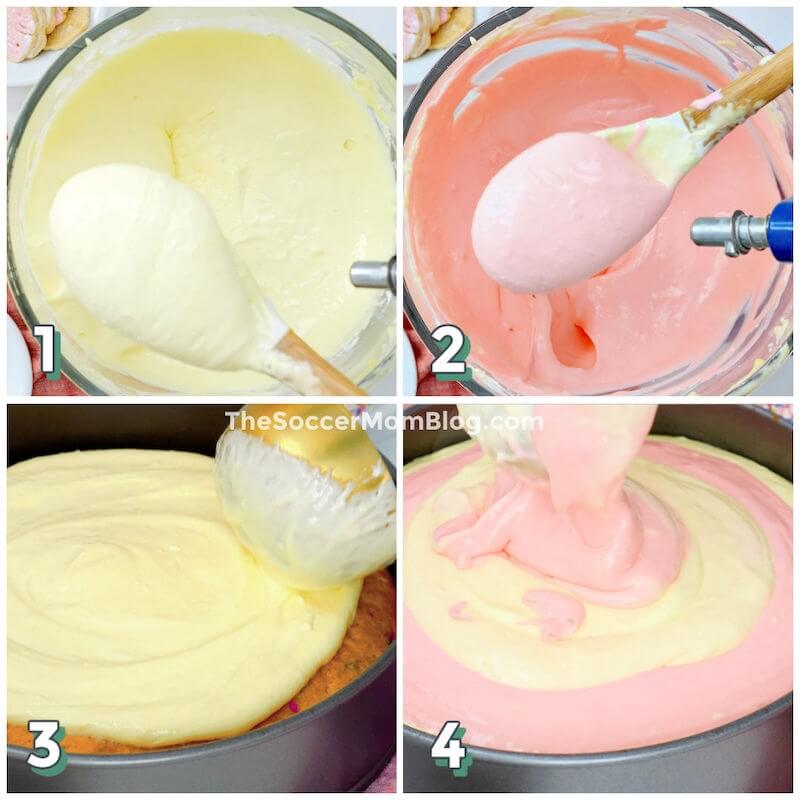
To Make the Cheesecake Layer
Using an electric mixer, combine softened cream cheese and sugar; mix on medium speed until smooth.
Scrape the sides of the bowl and begin mixing again, adding in one egg at a time. Finally, add vanilla and sour cream and mix until well combined.
Split the cheesecake batter into two bowls. Add pink food coloring drop by drop until you’ve achieved your desired shade. Keep the other bowl of cheesecake batter white.
Using a 1 cup measuring cup, scoop some of the white cheesecake batter into the springform pan on top of your funfetti cake. After white batter spreads itself out, pour 1 cup of pink cheesecake batter in the middle of the white cheesecake.
Repeat, alternating colors until all cheesecake batter is used.
Return springform pan to oven and bake for 1 hour until cheesecake is set. Place on wire rack to cool.
Refrigerate overnight (or a minimum of 4 hours, until cheesecake is fully set).
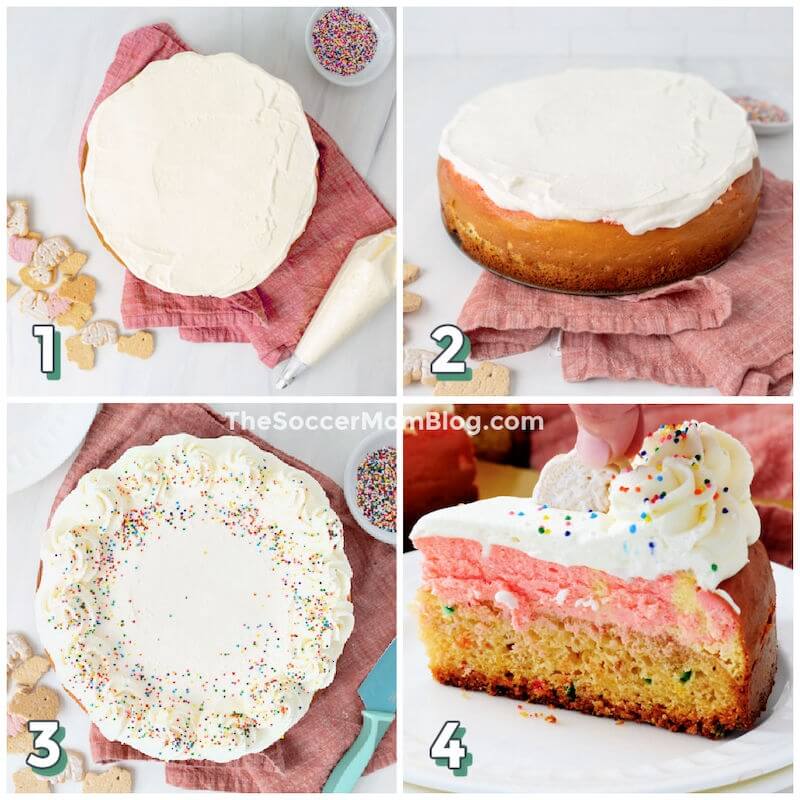
To Decorate:
After the cheesecake has fully set, it’s time to decorate!
Start by making your whipped cream: In a stand mixer, combine the heavy whipping cream, powder sugar and vanilla. Mix until stiff peaks form.
Scoop half of the whipped cream into a piping bag. Spread the other half of the whipped cream on top of the funfetti cheesecake.
Pipe whipped cream around the edges of the cheesecake and top with confetti sprinkles and circus animal cookies.
For more animal cracker fun, check out these Dumbo’s Circus Cupcakes from my friend Jennifer at Sugar Spice & Glitter! There’s a reason we’re BFFs – because we love the same over-the-top desserts!
Frequently Asked Questions
Does Cheesecake Need to Set Overnight?
When you take your cheesecake out of the oven, the center will still be slightly jiggly. That’s because the cheesecake will firm up as it cools on the counter and in the fridge.
Note: If your cheesecake looks watery in the middle, it isn’t quite done yet and needs to bake longer.
For best results and a cheesecake that slices perfectly, I recommend chilling overnight in the refrigerator. If you’re in a time crunch, you may be able to take it out sooner, but it really does need a minimum of 4 hours.
What Should I Do if My Cheesecake Cracks?
One of the ways to prevent a cheesecake from cracking is to let it cool in the oven with the door open slightly. However, this isn’t a traditional cheesecake, and additional oven time (even with the heat off) could over-bake the cake bottom. That’s why we go ahead and take the cheesecake out of the oven to cool on the counter at room temperature.
This quicker cooling may mean that there are some small cracks on the surface. But here’s the thing…it doesn’t matter if your cheesecake cracks! One more time..it is OK if your cheesecake cracks!!
We will be frosting the entire top of the cheesecake with homemade whipped cream, so you can easily hide any imperfections.
That’s what makes this recipe a great way for beginners to try their hand at cheesecake baking. It’s nearly impossible to mess up if you follow the directions!
Can You Freeze a Cheesecake To Make It Chill Faster?
Unfortunately, there is no good way to speed up the setting process for cheesecakes. Putting a cheesecake in the freezer can create ice crystals that may effect the creamy texture.
But trust me, this dessert is worth the wait!
More of our Favorite Cheesecake Recipes
- Pumpkin Swirl Cheesecake with Chocolate Gingersnap Crust
- Pink Lemonade Mini Cheesecakes
- Chocolate Peanut Butter Cheesecake
- Instant Pot Chocolate Cheesecake
- The Best Dairy Free Cheesecake
- Sopapilla Cheesecake Bars
Grab a free printable copy of this Funfetti Cheesecake recipe here:
Want to Save This Recipe?
Enter your email & I'll send it to your inbox. Plus, get great new recipes from me every week!
By submitting this form, you consent to receive emails from The Soccer Mom Blog
Cake Bottom Funfetti Cheesecake
Equipment
- 1 Electric mixer
- Mixing bowl
- Springform Pan
Ingredients
- 1 box funfetti cake mix plus ingredients listed on box
- 3 bars cream cheese 8 oz each, softened
- 4 eggs
- 1 tsp vanilla
- 1 cup sugar
- 1 cup low fat sour cream
- 1 cup crushed animal circus cookies
- pink food coloring as needed
Instructions
To Prep
- Preheat oven to 350°F. Coat a springform pan with cooking spray and set aside.
To Make the Cake Bottom Crust
- Prepare the funfetti cake batter according to directions on the box in a large bowl.
- Crush circus animal crackers (an easy way to do this is with a rolling pin) so that you have chunks, not crumbs. Stir circus cookies into cake batter so they are evenly distributed.
- Pour funfetti cake batter into springform pan and bake for 35 minutes at 350°F.
- When cake is done baking, remove from oven and allow to cool.
To Make the Cheesecake Layer
- Using a stand mixer (or hand mixer), combine cream cheese and sugar; mix on medium speed until smooth. (Tip: Make sure cream cheese is at room temperature so it is soft enough to mix smoothly.)
- Scrape the sides of bowl and begin mixing again, adding in one egg at a time.
- Finally, add vanilla and sour cream and mix until well combined.
- Split the cheesecake batter into two bowls. Add pink food coloring drop by drop until you've achieved your desired shade. Keep the other bowl of cheesecake batter white.
- Using a 1 cup measuring cup, scoop some of the white cheesecake batter into the springform pan on top of your funfetti cake. After white batter spreads itself out, pour 1 cup of pink cheesecake batter in the middle of the white cheesecake.
- Repeat, alternating colors until all cheesecake batter is used.
- Return springform pan to oven and bake for 1 hour until cheesecake is set. Place on wire rack to cool.
- Refrigerate overnight.
- Top with whipped cream, confetti sprinkles, and frosted animal crackers.
Video
Notes
Nutrition
Pin this Animal Cracker Cheesecake on Pinterest:
You might also like:

- Beach Day Rice Krispie Treats - June 23, 2026
- Pickled Jalapeños Recipe - June 15, 2026
- Homemade Nesquick Mix - June 11, 2026