
Heart Shaped Danishes
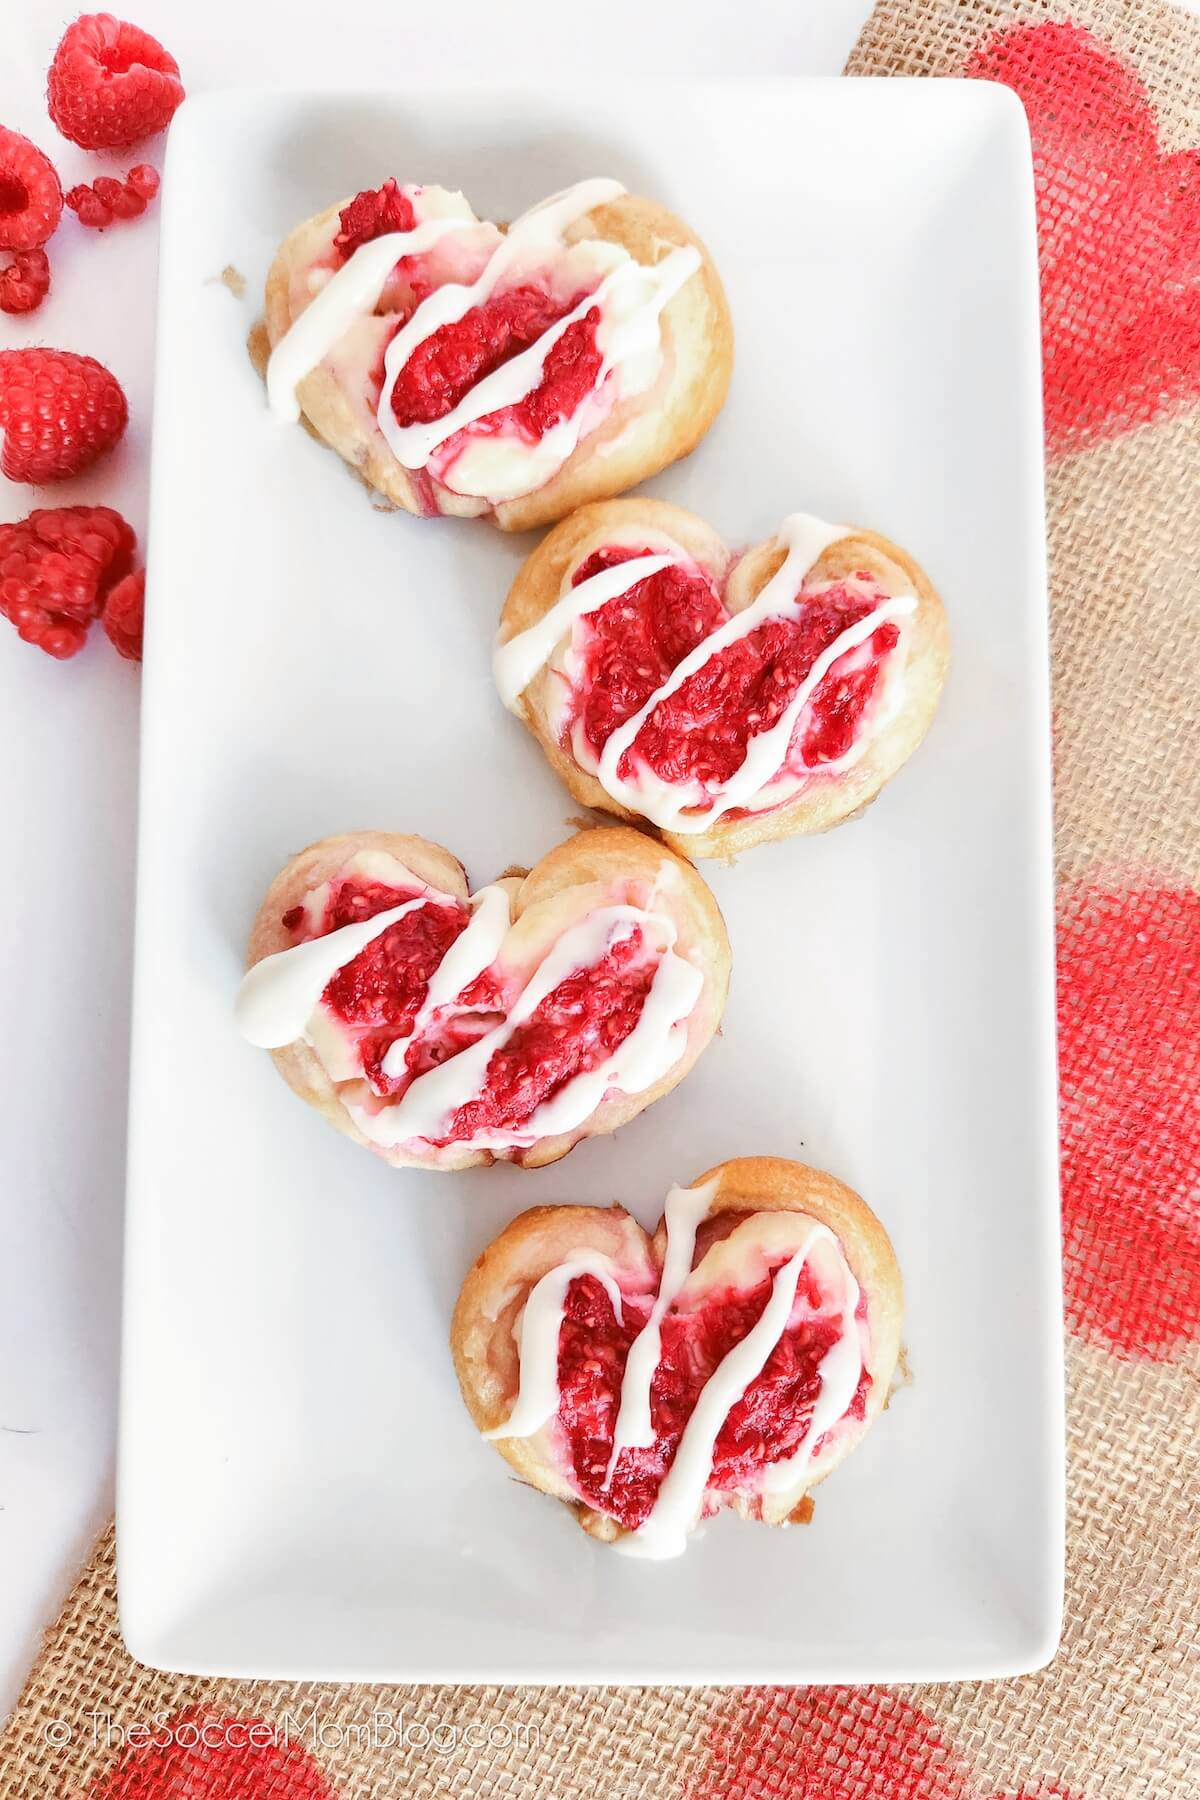
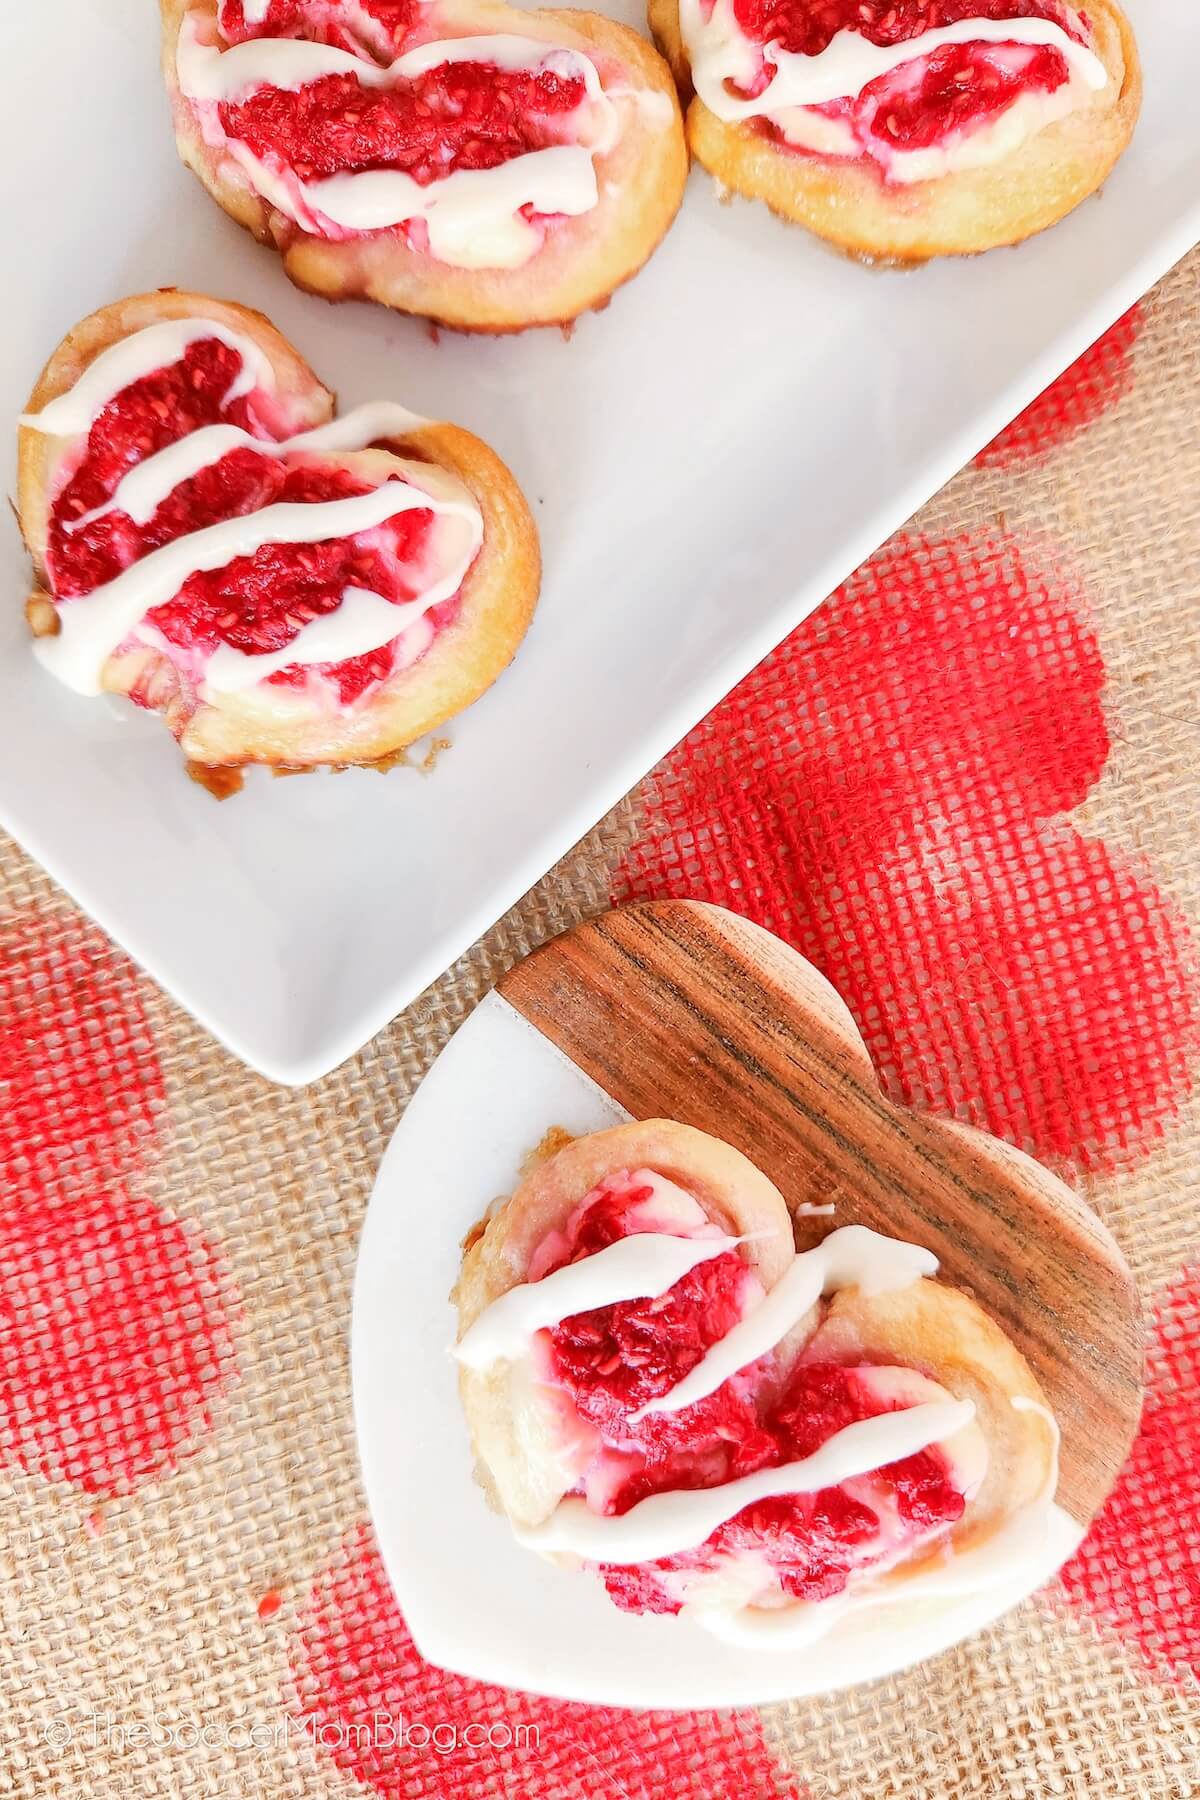
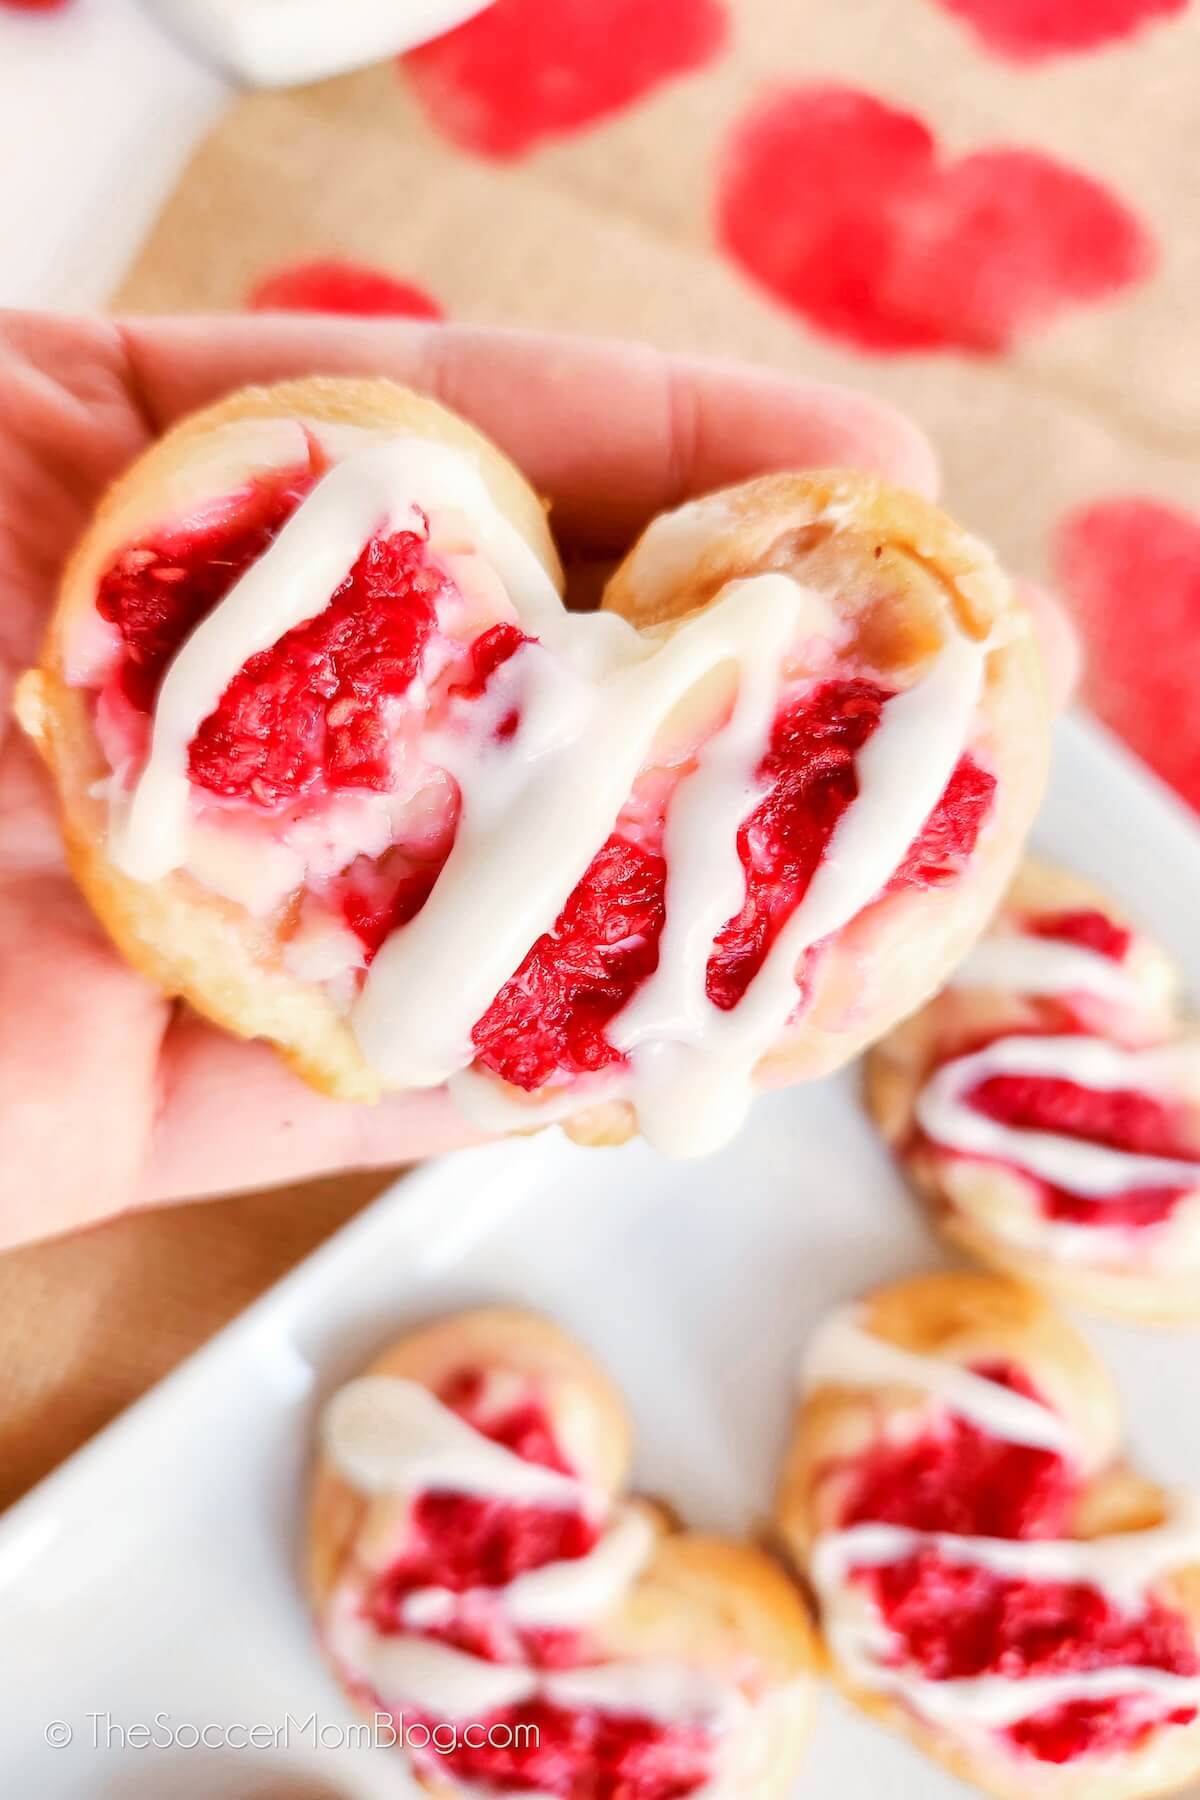
Make Valentine’s Day special with these adorable Crescent Dough Heart Danishes. Filled with fruit and cream cheese, they’re a sweet and easy treat!
Crescent Heart Danishes
I don’t know about you, but my kids LOVE crescent rolls — the kind that you get in the cardboard can in the refrigerator section and pop open and bake. They’re super easy to use, as well as versatile, and that’s why we used them to make these adorable Valentine heart danishes.
Using crescent dough, we can shape our pastries into hearts with just a pinch of the fingers! No cookie cutter needed!
Then we whipped up a luscious cream cheese filling and topped everything with a sweet fruit preserve. These danishes taste just like what you’d get at the bakery, but you can make them in less than 30 minutes in your own kitchen.
The kids are going to love these sweet treats and you’re going to love how easy they are to prepare! You’re going to look like a total “Pinterest Mom” with this one!
Easy Valentines Day dessert, breakfast pastry, sweet snack, party treat… these adorable crescent dough hearts can do it all!
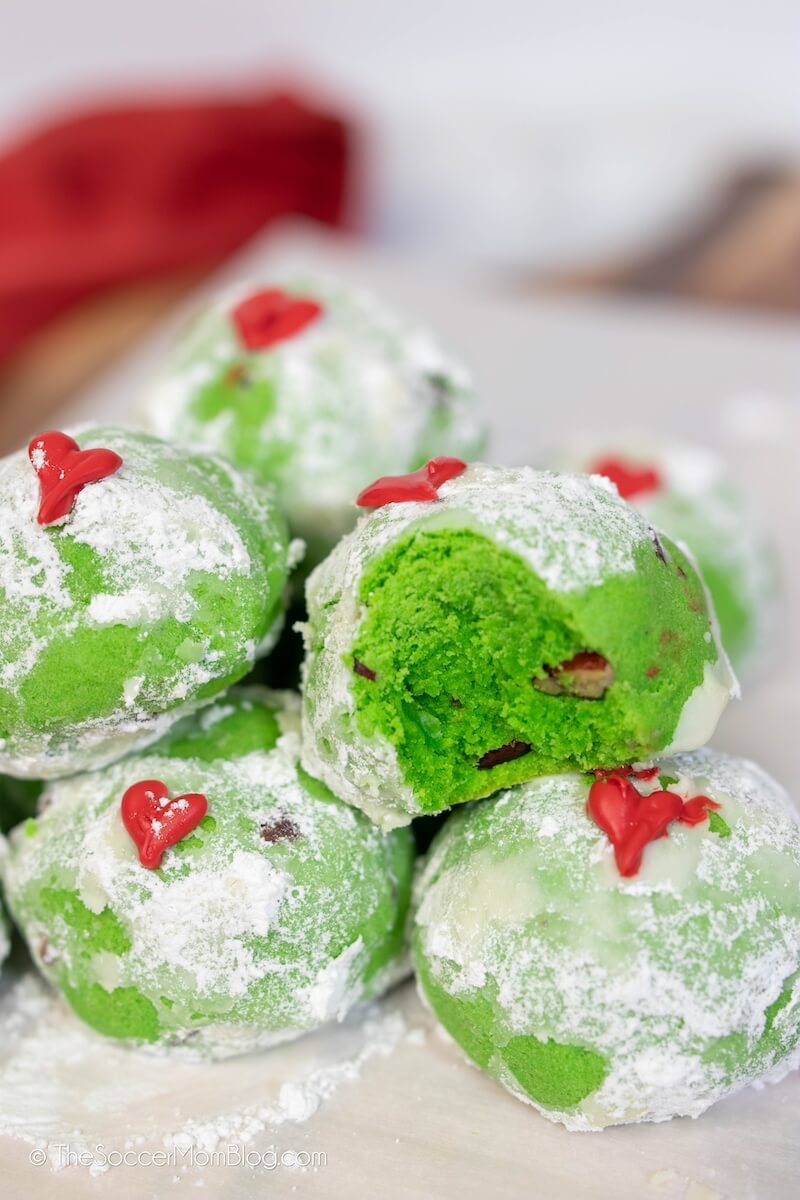
Related: Try our heart-shaped Valentine cheesecake brownies too!

Ingredients
For your convenience in re-creating this recipe, I’ve included shop-able ad links to some of the products we used. Disclosure policy available here.
- 1 roll of crescent dough sheets
- 4 oz cream cheese, room temperature
- 1/3 cup confectioner’s sugar
- 1/2 cup raspberry jam or strawberry jam
- 2 TB brown sugar
- 2 TB butter
Icing Ingredients
- 1/3 cup powdered sugar
- 2 TB heavy cream or milk
Kitchen Tools Used
- Large Baking Sheet
- Mixing Bowls
- Parchment Paper or Non-Stick Silicone Baking Mat
Instructions
To Prep: Preheat oven to 350 degrees F and line a baking sheet with parchment paper or a non-stick silicone baking mat.
To Form the Crescent Dough Hearts:
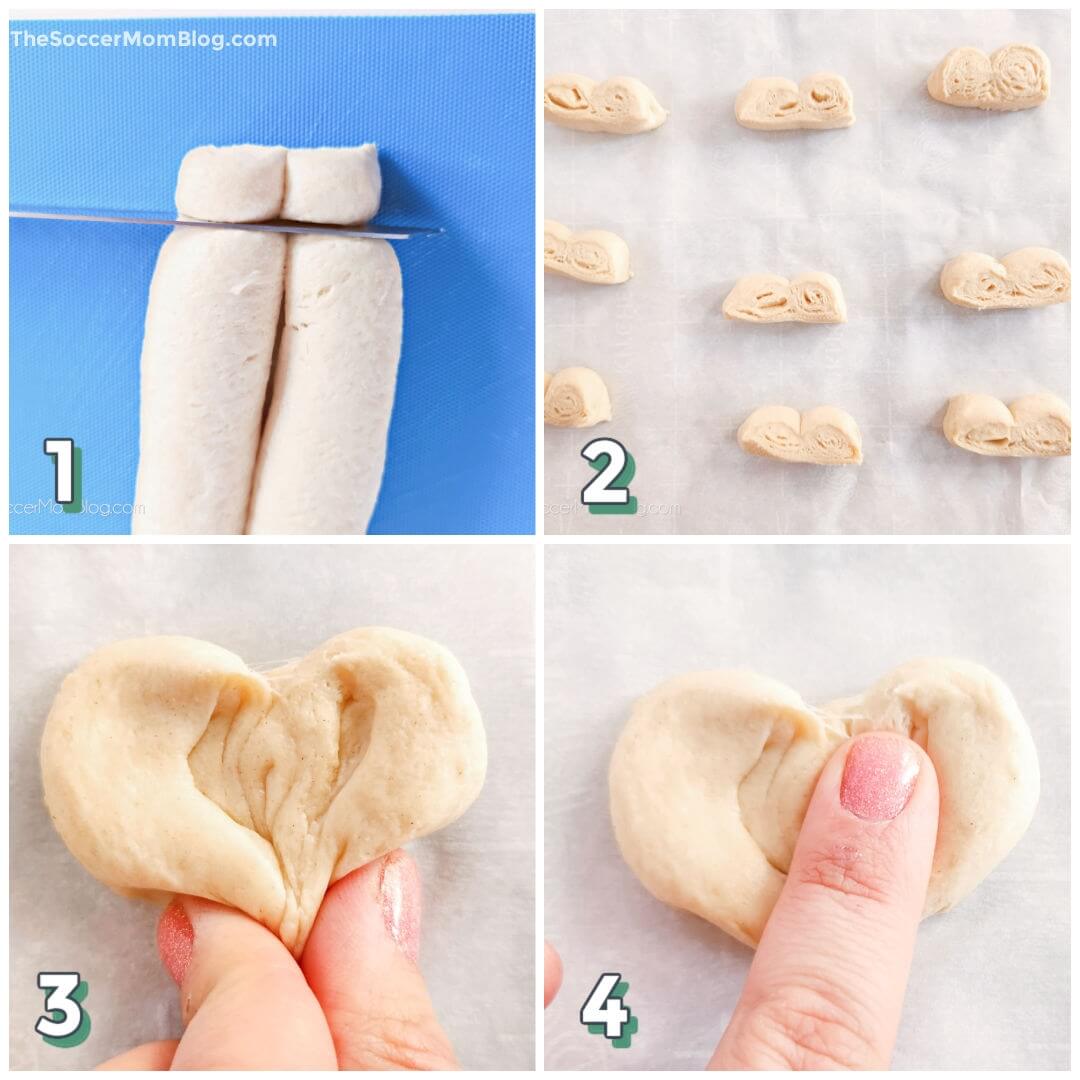
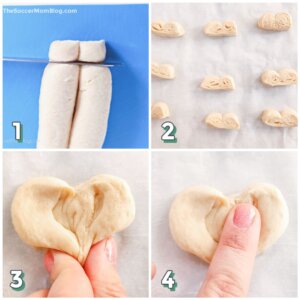
- Open the can and roll out the dough sheet. Roll each side in towards the middle, so the edges of the dough meet in the middle.
- Use a sharp knife to cut the dough into slices, about 1/2 inch thick, and place them on prepared pan.
- Pinch the bottom of each slice of dough into a point.
- Press down on the dough to form a heart shape.
To Bake and Decorate:
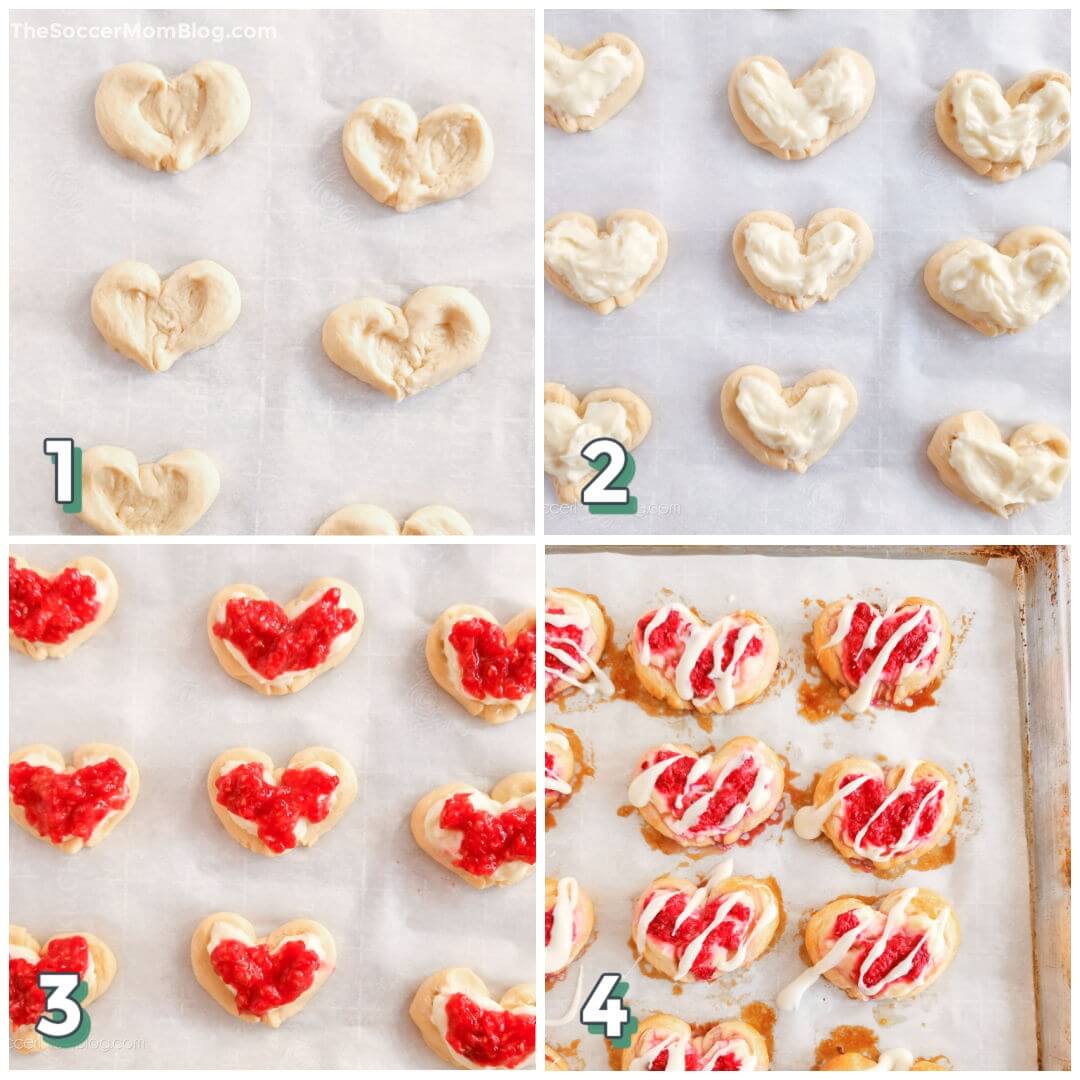
- In a medium bowl mix together the softened cream cheese and powdered sugar until well combined.
- Scoop a heaping spoonful of the cream cheese mixture on top of each dough heart and spread so that the center is filled.
- Spoon fruit preserves on top of the cream cheese filling. Whisk together melted butter and brown sugar and brush the edges of the dough, then bake for 15-20 minutes, or until the crust just starts to turn golden brown.
- Remove pan from oven and transfer danishes to a wire cooling rack and allow to cool to room temperature. In a small bowl, whisk together powdered sugar and heavy cream to form a glaze, then drizzle over cooled danishes.
Prep Tips
- We used raspberry jam for our original recipe, but you can use any type of fruit jam that you like. Strawberry jam, blackberry jam, apple pie filling, cherry pie filling. So many flavors to try!
- If you don’t want to make a glaze, you can instead sprinkle a dusting of powdered sugar on top.
Frequently Asked Questions
Do Cream Cheese Danishes Need To Be Refrigerated?
Yes, desserts made with cream cheese need to be kept in the refrigerator. Place any leftovers in an airtight container and store in the fridge for 4-5 days.
To reheat, I recommend using a toaster oven if you have one, to keep the crispy crust. You can also reheat in a conventional oven by placing the danishes on a baking sheet and putting them in the oven while it preheats. When it reaches temperature, the danishes should be warmed through.
Can You Use Jelly For The Filling?
I recommend using fruit jam or preserves for the recipe because they are a little thicker, with real fruit pieces. This helps the filling stay in place better than jelly, which can become runny. You can also use fruit pie filling.
More Fun Recipes To Make With Crescent Dough
- Instant Pot Apple Dumplings
- Pumpkin Pie Bread Pudding
- Hot Dog Mummies
- Cheesy Pull-Apart Bread Wreath
- Churro Pumpkin Cheesecake Bars
- Sopapilla Cheesecake Bars
Crescent Dough Hearts Recipe (Printable Recipe Card)
If you love this recipe, please rate it!
Want to Save This Recipe?
Enter your email & I'll send it to your inbox. Plus, get great new recipes from me every week!
By submitting this form, you consent to receive emails from The Soccer Mom Blog

Crescent Heart Danish Recipe
Equipment
- Baking sheet
- Mixing bowls
- Parchment paper
Ingredients
- 1 roll crescent dough sheets
- 4 oz cream cheese room temperature
- 1/3 cup powdered sugar
- 1/2 cup raspberries jam or preserves or your favorite fruit
- 2 TB brown sugar
- 2 TB butter melted
For the Icing:
- 1/3 cup powdered sugar
- 2 TB heavy cream or milk
Instructions
- Preheat oven to 350°F and line a baking sheet with parchment paper.
- Roll out crescent dough on flat surface, then fold the two sides in towards the middle, so the edges meet.
- Cut into half inch slices and place them on prepared baking sheet.

- Pinch the bottom of the slices into a point and then press down on top of the dough to form a heart shape.
- In a medium bowl, mix together the softened cream cheese and powdered sugar until smooth.
- Scoop cream cheese mixture on top of each dough heart and spread almost to the edges.
- Spoon fruit filling on top of the cream cheese layer.
- Whisk together melted butter and brown sugar in a small bowl, then brush edges of hearts danishes with the butter mixture.
- Bake for 15-20 minutes, until the crust just starts to turn golden brown.
- Whisk powdered sugar together with milk or cream and drizzle over the cooled danishes.

Video
Notes
Nutrition
Pin our Valentine’s Day Heart Danishes on Pinterest:

You might also like:


- Beach Day Rice Krispie Treats - June 23, 2026
- Pickled Jalapeños Recipe - June 15, 2026
- Homemade Nesquick Mix - June 11, 2026


These were a huge hit, both with my kids and in my office. Thanks for this recipe, and for the video tutorial. I used strawberry preserves, and YUM.
Tried these today. Allow enough time for shaping and filling!! Also bake for only 11-12 minutes for golden, soft danish. The 15-20 minutes is too long after 15 they were hard and dark brown.