
Homemade Fruit Leather Recipe
Skip the sugar and embrace fruit goodness with these healthy homemade fruit roll-ups – just 2 ingredients & easy to make!

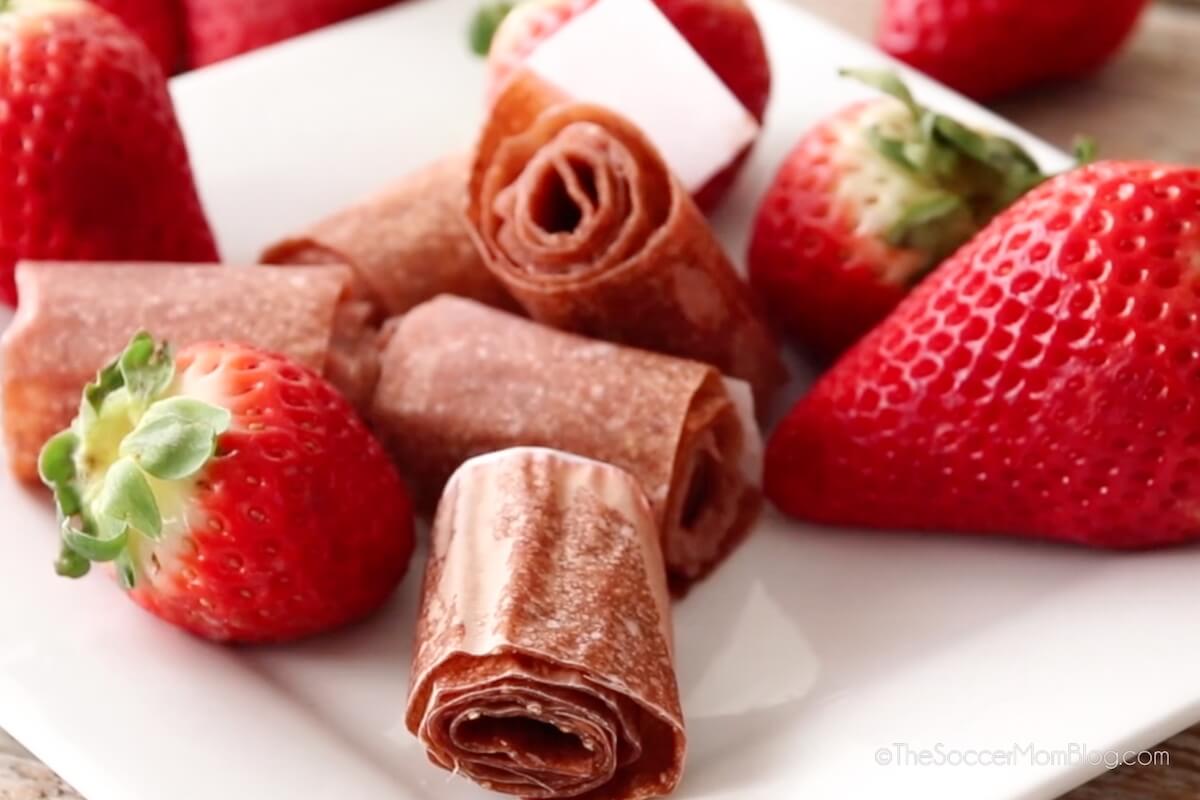
Strawberry Fruit Leather
Mom confession: my kids LOVE fruit roll-ups and we have occasionally bought them in the past. I loved them as a kid too and I turned out fine…wink, wink.
However, I’m not crazy about the amount of sugar and dyes in the store-bought fruit roll-ups. So I started looking into making our own at home.
Why didn’t I do this sooner??
I had no idea how easy it is to make your own fruit leather! You only need TWO ingredients! Plus, you don’t need a dehydrator or any fancy equipment — just a blender and your oven!
Why I love this recipe:
- 20% Daily Value of Vitamin C per serving
- Easy to make a batch for the whole week
- No added sugar!
- No dyes, no preservatives, no high fructose corn syrup like store-bought fruit snacks
Not only will your kids love to eat these healthy fruit roll ups, but it’s a fun recipe for them to help make too! They’ll love to roll up a batch for the week ahead.
And they’ll especially love unwrapping this tasty treat in their lunchbox!
Ingredients
Only 2 simple, wholesome ingredients:
- Strawberries — We used fresh, but you could also use frozen (thawed first).
- Applesauce — We used no sugar added applesauce.
Kitchen Supplies Used
For your convenience in re-creating this recipe, I’ve included shop-able ad links to some of the products we used. Disclosure policy available here.
Instructions
To Prep:
- Preheat oven to 175°F (this might just mean that you turn it on to the “Keep Warm” setting).
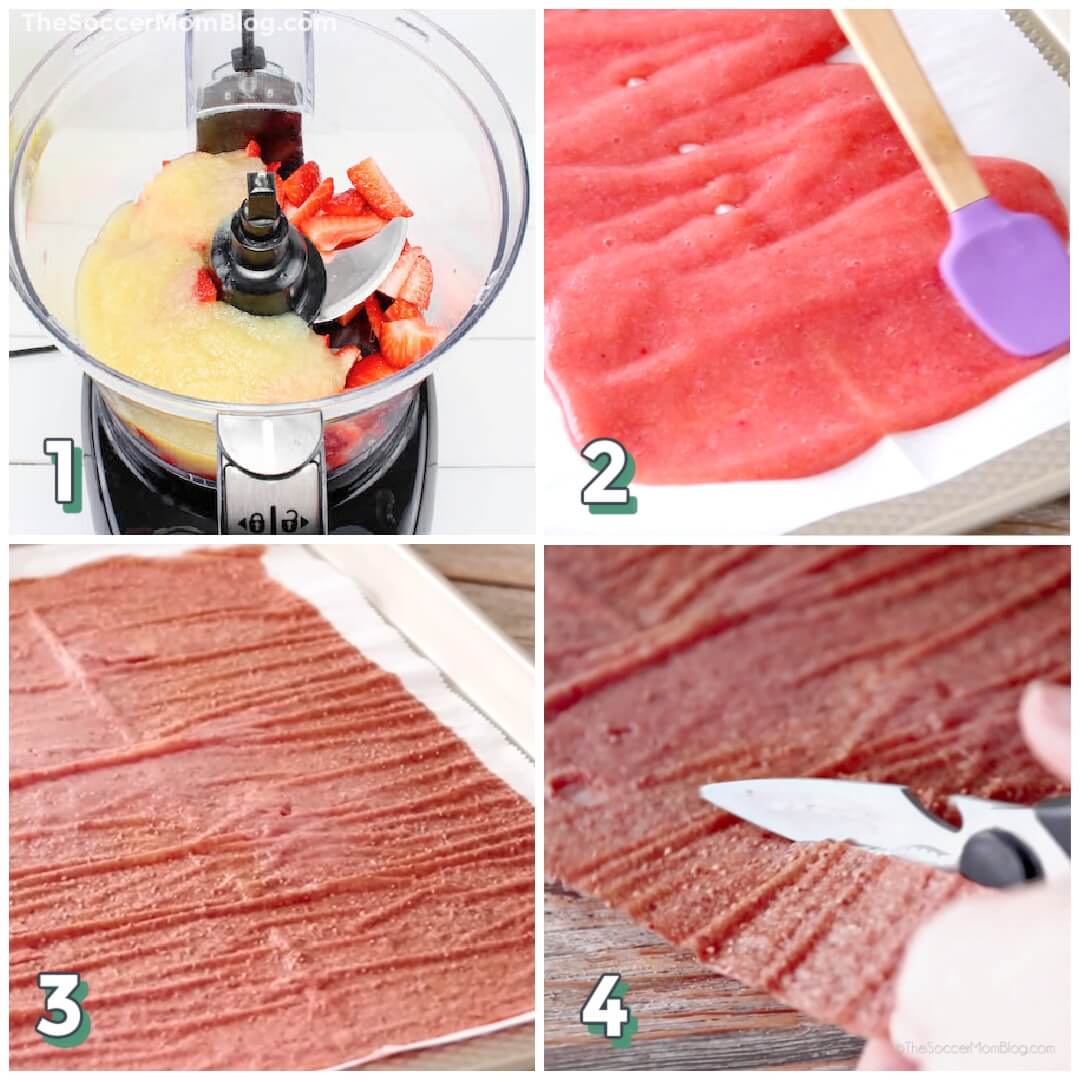
- Start by chopping your fruit so it will process faster. You’ll add the applesauce next to smooth it all out.
How to Make Homemade Fruit Roll-Ups
- Combine strawberries and applesauce in food processor or blender and process until you have a smooth puree.
- Line two baking sheets with parchment paper. Pour the apple strawberry mixture onto the pans and spread into a thin, even layer. An offset spatula can be helpful here.
- When spreading your fruit puree on the parchment paper-lined cookie sheets, try to get it as even as possible. This will prevent uneven cooking.
- Bake for at least 4 hours. After removing your fruit leather from the oven, allow it to cool to room temperature before handling.
Prep Tips
- Cooking Time – It may take longer depending on the thickness of your puree and actual oven temperature. Humidity can also make drying take a little longer. You’ll know your fruit leather is done when it is no longer sticky.
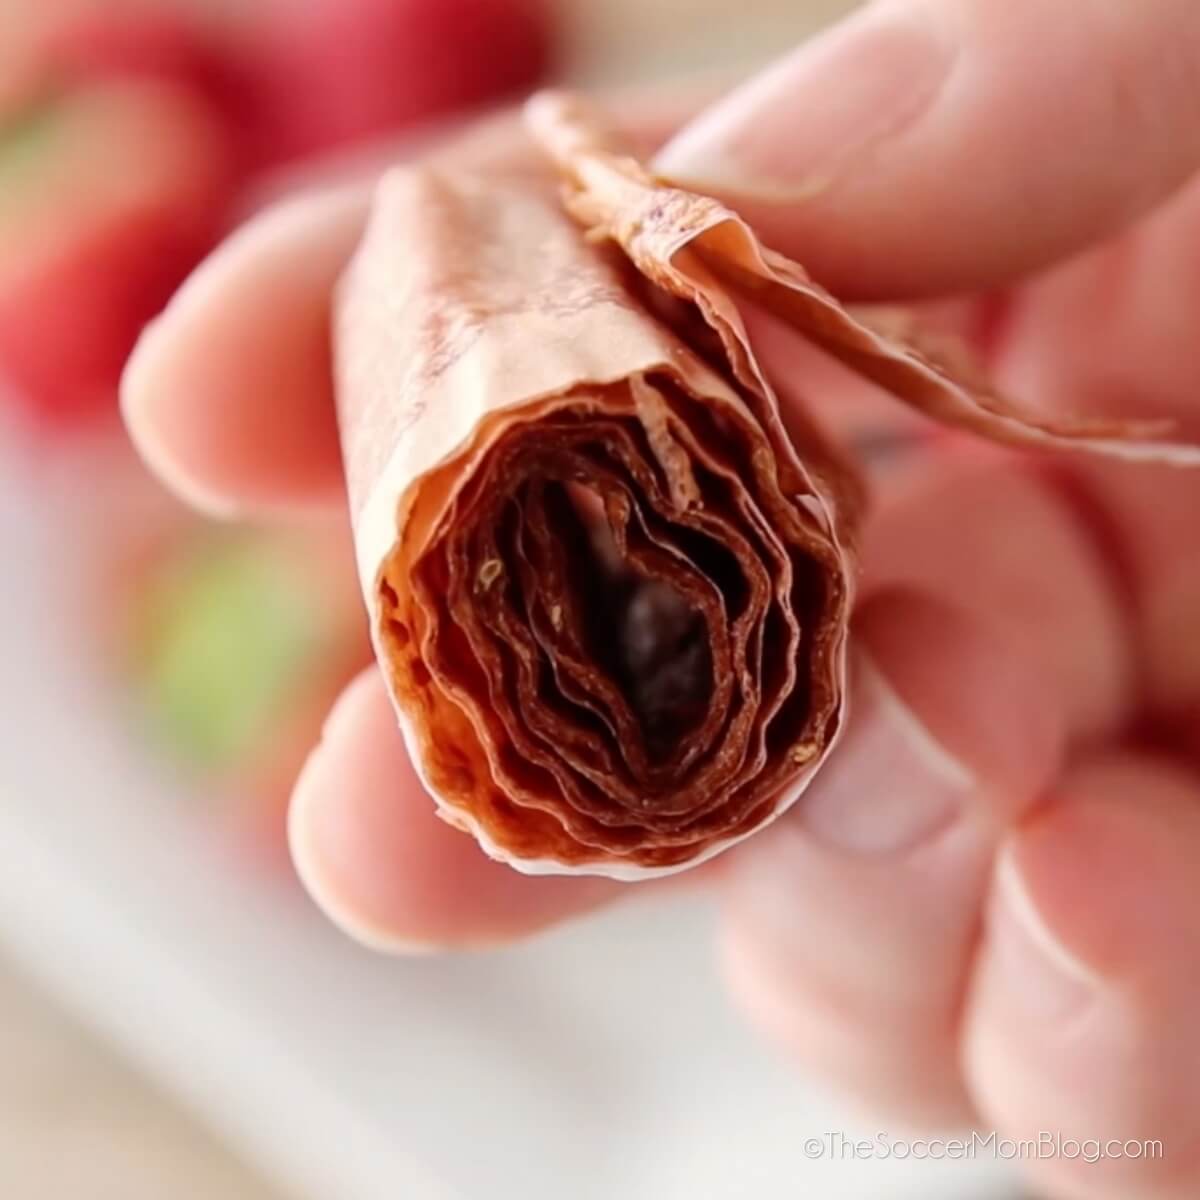
- Serving – We like using parchment paper because you can cut the leather, paper and all, into strips and roll it up. The parchment paper keeps the fruit leather from sticking to itself, and you can unroll it just like a real fruit roll up! If you don’t have parchment paper on hand, you can also cook your fruit roll ups on a non-stick silicone mat and simply peel the fruit leather off the mat to enjoy.
- Storage – For best results, you want to make sure that there is as little moisture as possible in your fruit leather, to prevent molding. To store your homemade fruit rollups, place them in a sealed airtight container, or a zip-top plastic bag. Keep in a cool, dry place, away from any heat or light sources (so don’t keep it on top of the fridge, near a window, etc.) At room temperature, it should keep for up to a month. You can also freeze your fruit leather in a freezer bag, for up to a year.
Frequently Asked Questions
Can You Use a Different Type of Fruit?
Strawberries are naturally sweet, so they work well for creating fruit leather with no added sugar. However, you can use almost any type of fruit you like to try new flavors!
Blueberries, blackberries, and raspberries are all fabulous options to swap out for the strawberries. You may want to taste test your berries first, and if they are on the tart side, you can blend a spoonful of honey into your puree before baking, for a little sweetness.
Another of our favorite variations is to swap out the apples with fresh pears. They have a similar consistency and mild, sweet flavor.
Can You Use Frozen Fruit?
If you don’t have any fresh fruit handy, don’t worry! You can use frozen fruit to make this easy snack. Simply allow the fruit to defrost in the fridge or on the countertop before blending. Drain any excess water that may come from the fruit during the thawing process.
Can You Use Wax Paper Instead of Parchment Paper?
Unfortunately, wax paper will not work as a substitute here. Wax paper will melt into the fruit, so you won’t be able to peel your fruit leather off the paper.
If you don’t have parchment paper handy, you can use a silicone mat. You could also try aluminum foil misted with non-stick spray. I have not personally tried this, but have heard from other readers that it works.
If using a silicone mat or foil, you’ll have to peel the sheet of fruit leather off the surface (when it’s done baking) and roll up in plastic wrap to store.
More of Our Favorite Healthy Snacks for Kids
- Homemade Green Gummy Snacks
- Under the Sea Themed Fruit Snacks
- Watermelon Fries
- Healthy Chocolate Chip Peanut Butter Granola Bars
- Instant Pot Popcorn
- Non-Dairy, Gluten-Free Chocolate Covered Pretzels
- Chocolate Hummus
- Healthy Homemade Granola
- Celery Bug Snacks
Strawberry Fruit Leather Recipe (Printable Recipe Card)
If you like this recipe, rate it! We’d also love to hear what you think in the comments below.
Want to Save This Recipe?
Enter your email & I'll send it to your inbox. Plus, get great new recipes from me every week!
By submitting this form, you consent to receive emails from The Soccer Mom Blog

Homemade Fruit Leather Recipe
Equipment
- Food Processor
- 2 Baking Sheets
- Parchment paper
- Spatula
Ingredients
- 2 cups strawberries chopped
- 1 cup applesauce
Instructions
- Preheat oven to 175 degrees F.
- Remove tops from strawberries and cut into chunks. Add to food processor and rough chop. Add applesauce and puree until very smooth.
- Line two cookie sheets with parchment paper and spread your fruit mixture evenly onto both of the sheets.
- Bake for about 4 hours or until fruit leather is no longer sticky.
- Remove from oven and let cool to room temperature.
- Cut the parchment paper in strips and roll up the fruit leather. Store in airtight container.
Video
Notes
Nutrition
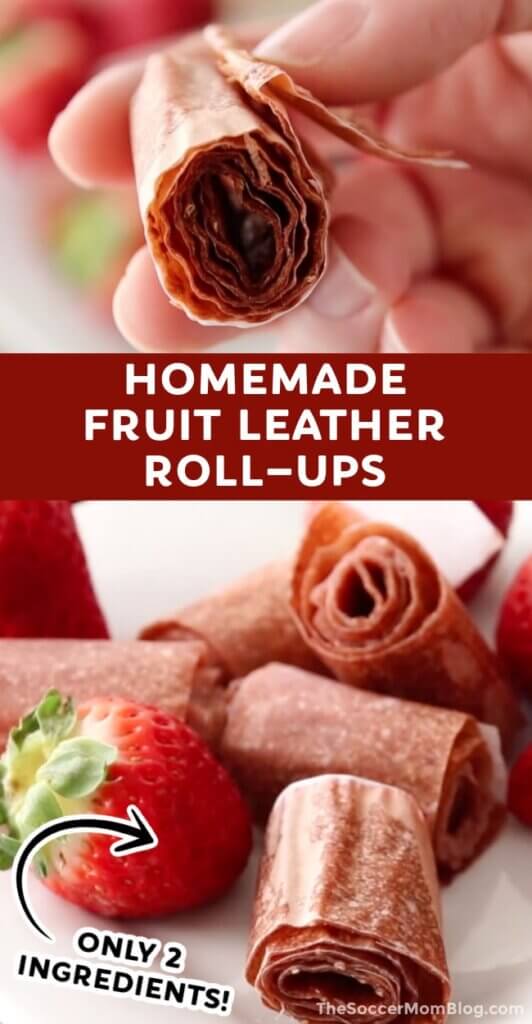
Pin our Homemade Fruit Roll-Ups Recipe on Pinterest:
More of our favorite strawberry recipes:

Gluten Free Strawberry Cupcakes

- Beach Day Rice Krispie Treats - June 23, 2026
- Pickled Jalapeños Recipe - June 15, 2026
- Homemade Nesquick Mix - June 11, 2026


Is it possible to do this with any fruit? Just curious. Healthy is the way to go.
You could swap out the strawberries for another type of berry, but I would keep the applesauce as the base. Hope this helps!
I’m VERY Disappointed.
I wanted to make homemade fruit leather, and I found this very easy recipe. I had it in the oven for the correct amount of time, WAITED and was very excited. when they came out, cooled and tried to take it off the parchment, IT WOULDN’T COME OFF, AT ALL (had to throw it out).
I was very sad 🙁
Sincerrely, Disappointed.
I’m making it now I hope it doesn’t stick to the parchment paper. I’ll be disappointed to.
Have you ever tried this using frozen strawberries? Just curious as they lose a lot of liquid once their thawed, would I include that or not? Thank you for the recipe!
I haven’t tried it with frozen strawberries, but I think it would probably be best to drain any excess liquid first. If you do try it, let me know how it goes!
Did you ever try it with frozen fruit?
How long can this be stored in an airtight container? Have you ever froze it?
I haven’t tried this, so while I think it would work, I can’t say for sure. If you do try, let me know!