
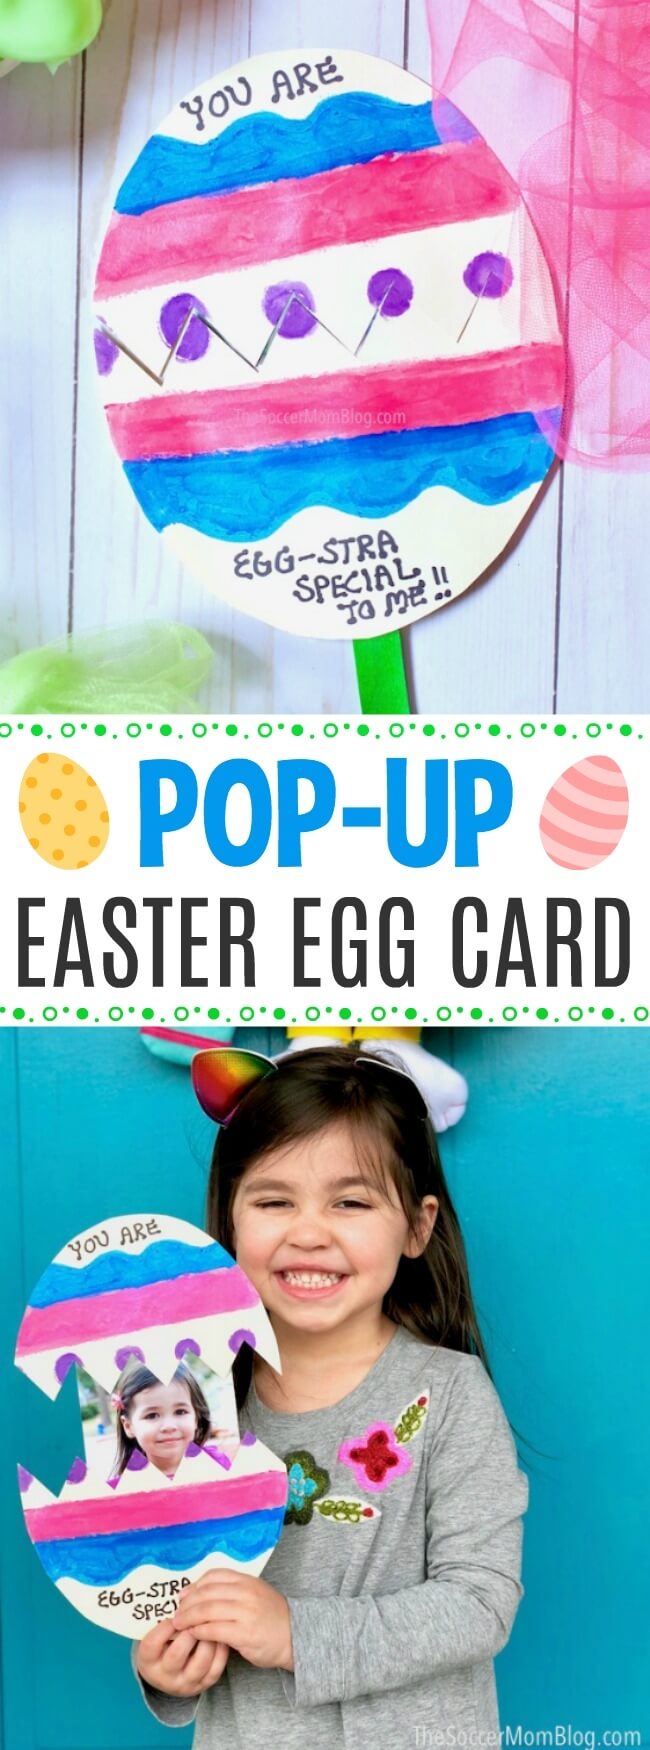
Kids Easter Egg Craft with Photo
Open this card and share the love — this pop-up Easter egg card hides a sweet photo for a personalized touch! Grab the free printable template and get crafting!
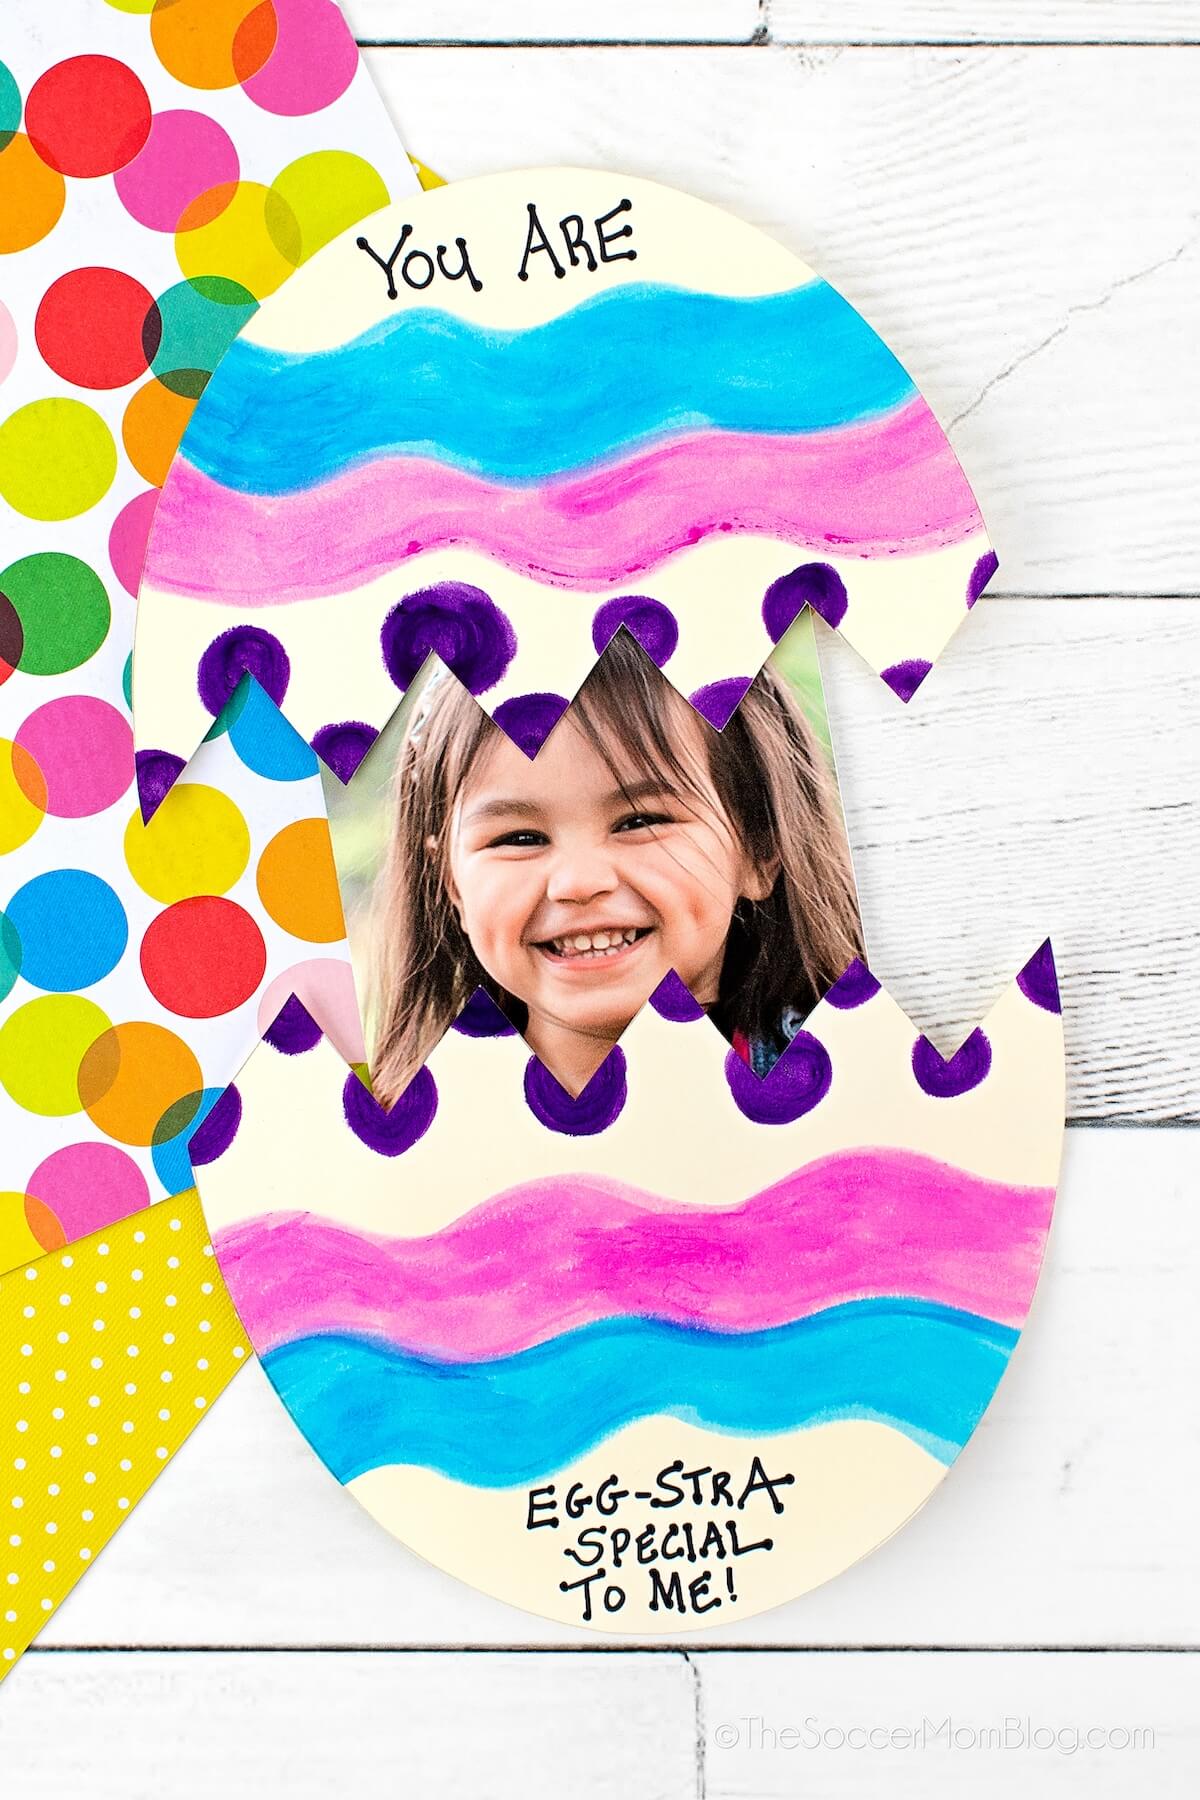
Pop-Up Easter Egg Card with Child’s Photo
Over the past couple years, we’ve become known for making photo pop-up cards for each of the holidays – like these Christmas present pop-up cards for Christmas and pumpkin pop-up card for Halloween.
With Easter on the way, you know we had to make a pop-up Easter egg card too!
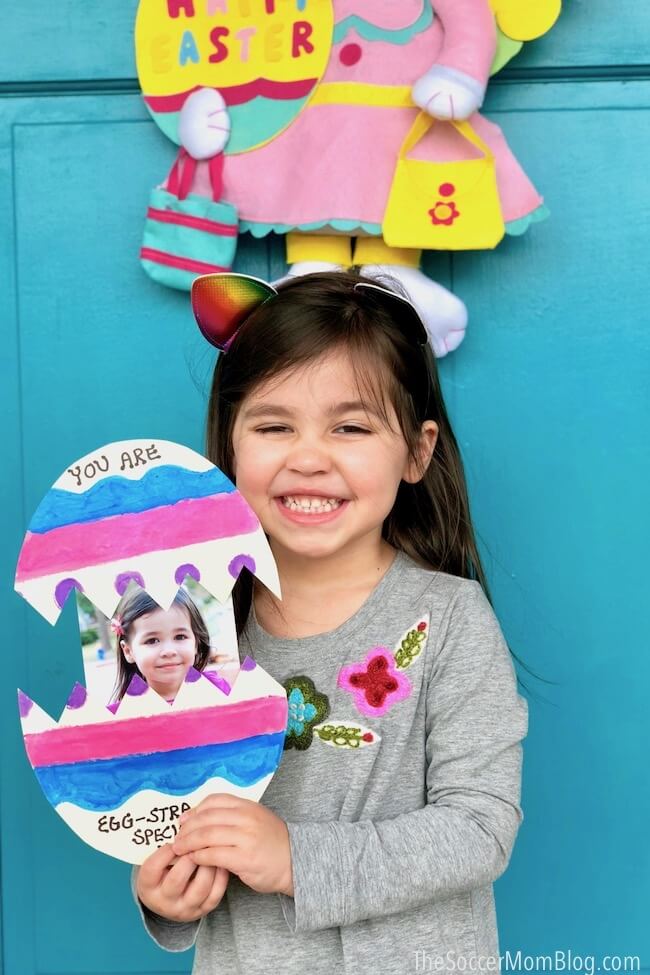
I love these simple paper crafts because they are easy enough for little kids to make (with a little adult assistance) and older kids can make them on their own. My youngest daughter is 3 and she had a blast making this pop-up card craft with me! (We actually made two today!)
There’s no better way to spend a rainy Saturday afternoon then giggling with your little one(s) as you create an adorable keepsake for family and friends. This would also be a fun spring-themed classroom craft for kids to take home to their parents.
Related: Check out more simple Easter crafts for kids here!
Supply List
I’ve provided shop-able ad links for your convenience in re-creating this craft; read our full disclosure policy.
- Free printable egg pattern
- Colorful card stock
- Child’s photo
- 2 jumbo wooden craft sticks
- Glue sticks or Hot Glue
- Scissors
- Pencil
- Paint Markers (or other decorating items)
How to Make a Photo Pop-Up Easter Egg Card
Watch the quick video demo below, then keep reading for full photo step-by-step instructions:
To Prep: Start by printing our free 2-piece Easter egg pattern – click here for the free printable craft template. (We also use this pattern to make our pop-up Dinsosaur discovery eggs!)
Cut out the Easter egg pattern and trace onto a sheet of colorful card stock. Cut out card stock egg pieces.
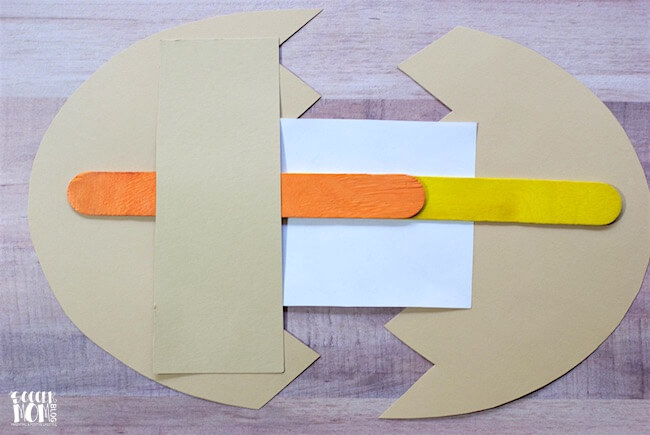
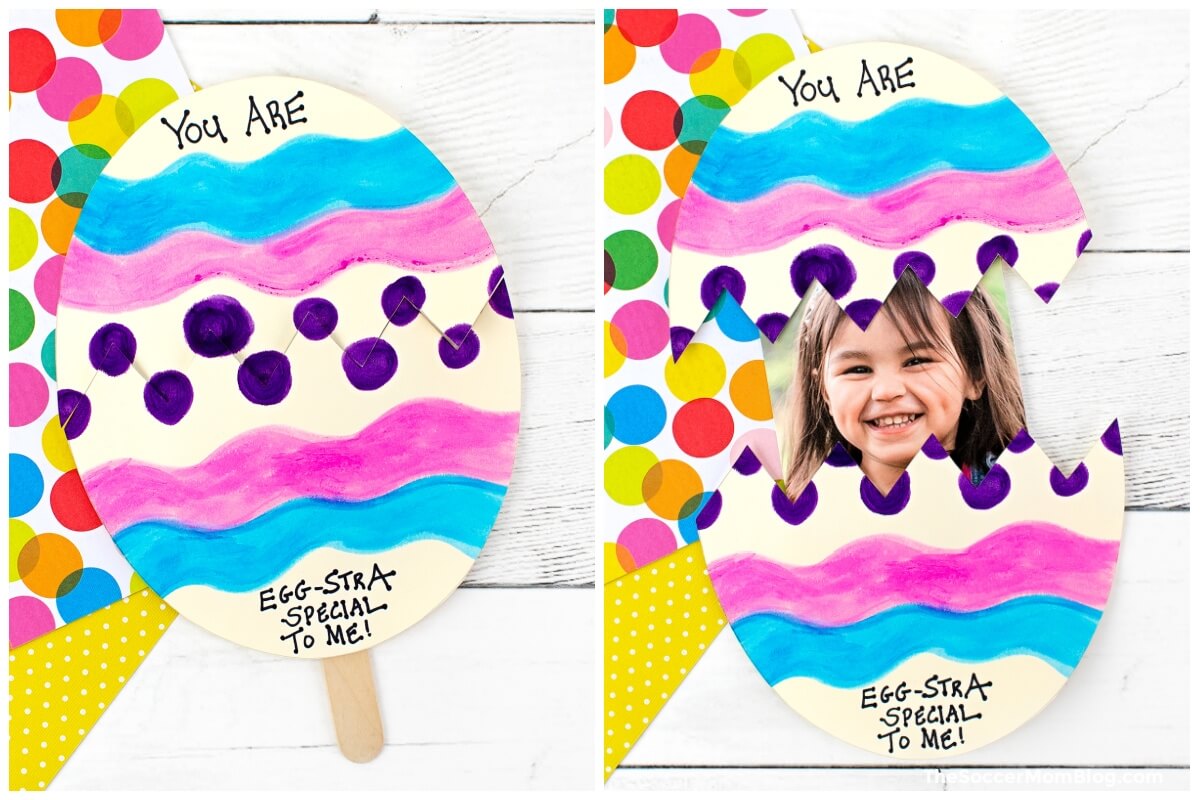
Trim about 1 inch from child’s photo, so it won’t stick out from beneath the egg. Keep in mind that the top 1/2″ and bottom 1/2″ of the photo are covered by the egg, so be sure to space accordingly when trimming photo.
Glue the top of photo to the “cracked” end of the top piece of your egg. Glue one wooden craft stick to secure the photo to the top piece of the egg. Glue a second wooden craft stick, overlapping the first craft stick by about 1-2 inches. It should look like this:
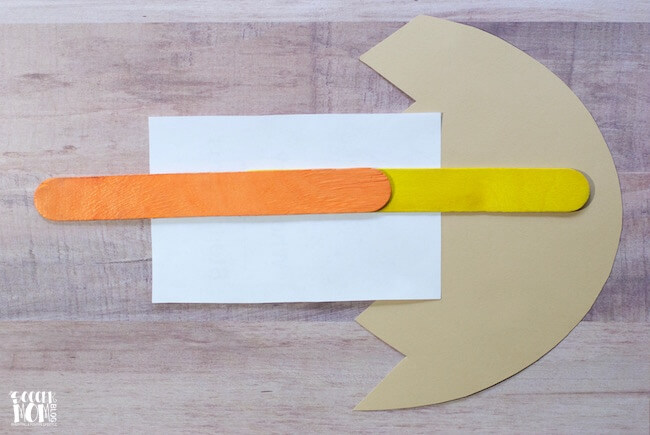
Tip: We also use a strip of packing tape over the craft sticks to secure them in place.
Cut a strip of card stock from your scraps to the same width as your egg, about 1″ thick. Glue the ends of this strip to the back of the bottom piece of your egg, just below the cracked edge.
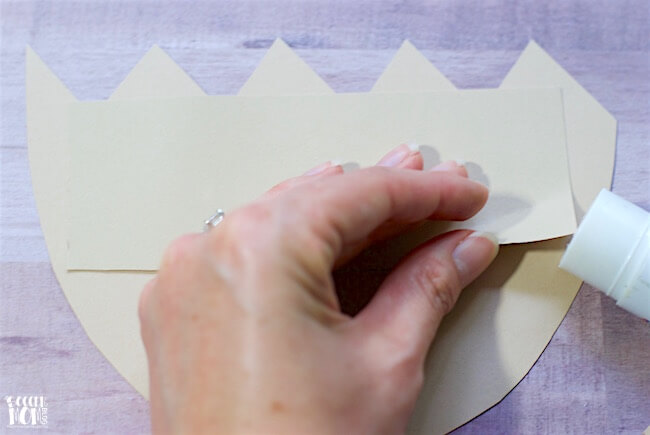
Slip your photo/craft stick between this strip and the back of the bottom of the egg. It will look like this:
The photo should slide freely up and down, along with the top piece of the egg. Now let your creativity run wild — decorate your pop-up Easter egg card!
Tips
- Process – You can decorate the egg craft after you assemble it. OR you can decorate the cardstock first and then cut it out and assemble everything (this is what is shown in our demo video). You can also print out the egg pattern directly onto cardstock to save time.
- Paint – We love these Kwik Stix paint markers for paper crafts because they are easy for little kids to handle AND they’re practically mess-free (they dry in 90 seconds!)
- Glue – The first time we made this craft, I used glue sticks to attach all the pieces. However if the glue is not holding everything together well (the pieces can be heavy) you can secure with strong tape or hot glue.
- Decorating Ideas – You could also stamp your cards with our homemade Easter Egg Potato Stamps (on our sister site, In The Kids Kitchen). Stickers, glitter, etc. Have fun!
More Easy Easter Crafts
Printable Instructions:
Want to Save This Recipe?
Enter your email & I'll send it to your inbox. Plus, get great new recipes from me every week!
By submitting this form, you consent to receive emails from The Soccer Mom Blog

Kids Easter Egg Craft with Photo
Equipment
- Free printable egg pattern
- Glue sticks
- Scissors
- Pencil
- Decorating supplies We used paint markers
Ingredients
- 1 piece Card Stock
- Child's Photo
- 2 Jumbo Wooden Craft Sticks
Instructions
- Cut out the Easter egg pattern and trace onto a sheet of colorful card stock. Cut out card stock egg pieces.
- Trim about 1 inch from child's photo, so it won't stick out from beneath the egg. Keep in mind that the top 1/2" and bottom 1/2" of the photo are covered by the egg, so be sure to space accordingly when trimming photo.
- Glue the top of photo to the “cracked” end of the top piece of your egg. Glue one wooden craft stick to secure the photo to the top piece of the egg. Glue a second wooden craft stick, overlapping the first craft stick by about 1-2 inches.
- Cut a strip of card stock from your scraps to the same width as your egg, about 1″ thick. Glue the ends of this strip to the back of the bottom piece of your egg, just below the cracked edge.
- Slip your photo/craft stick between this strip and the back of the bottom of the egg.
- The photo should slide freely up and down, along with the top piece of the egg. Now you can decorate the front of the Easter egg!
Video
Pin this Easter Egg Craft on Pinterest:
More Easter fun for kids:

More of our favorite paper card crafts for kids:
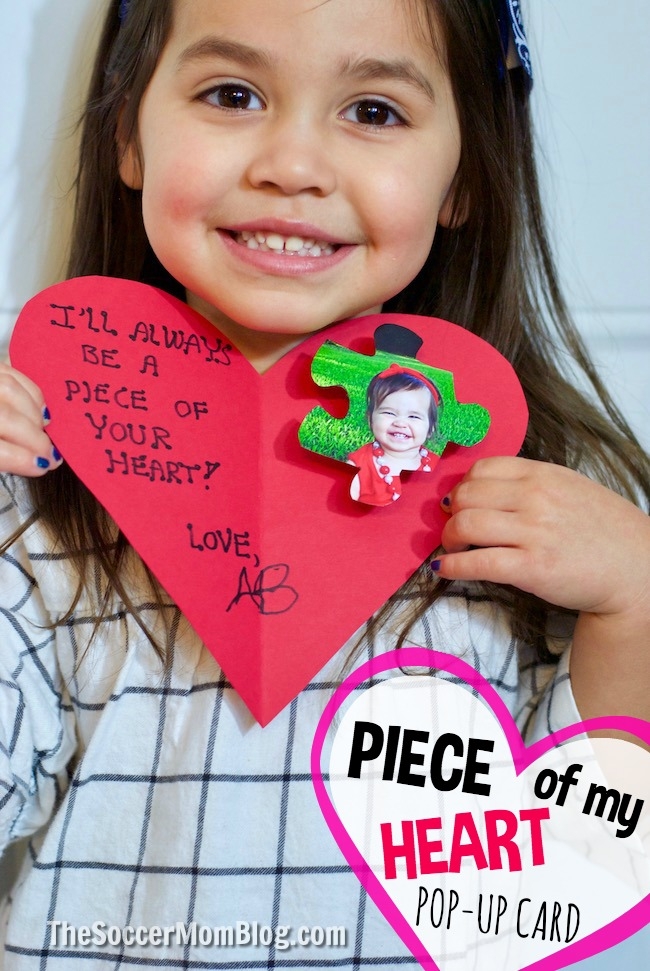
“Piece of my Heart” Valentine’s Day Photo Card
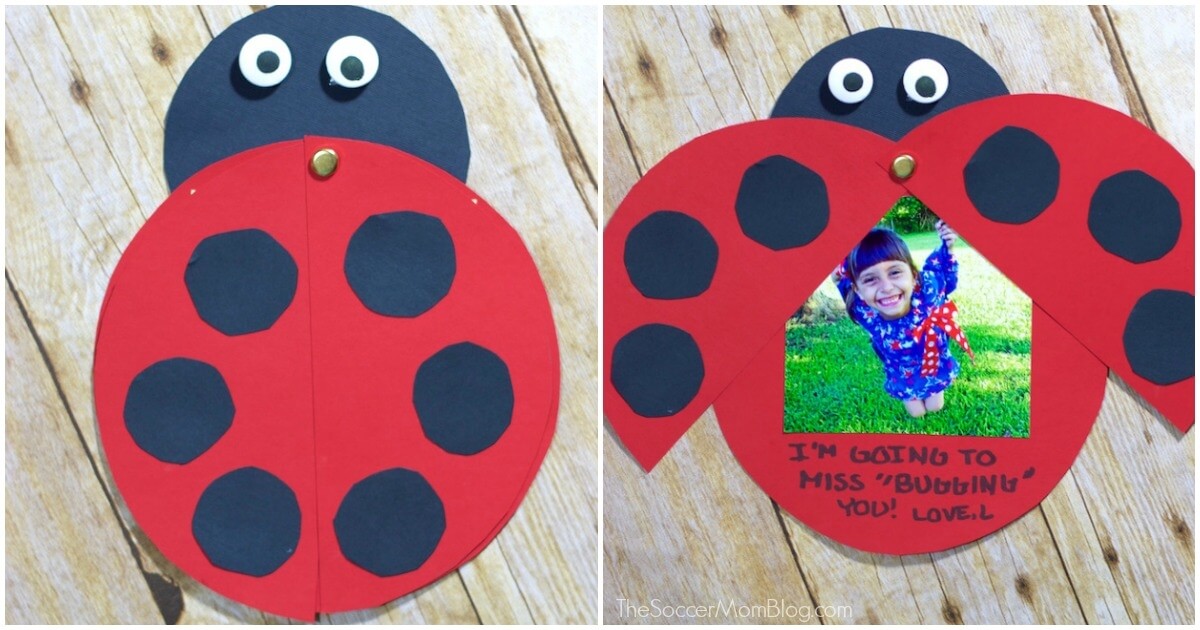
Ladybug Teacher “Thank You” Card

- Beach Day Rice Krispie Treats - June 23, 2026
- Pickled Jalapeños Recipe - June 15, 2026
- Homemade Nesquick Mix - June 11, 2026

Im making this Easter egg picture for my son snd his gf and their baby. Im going to let her color the egg. This is too adorable. Thank you for this simple but cute Easter craft. They gonna love it! I was gonna try to send a pic but i dont see how to attach it to here.
I’m so glad you like our pop-up Easter egg craft! I’d love to see a photo of your finished card – you can email it to me at StaceyGarska @gmail.com or you can share on our Facebook page (the card is our pinned video on the page and you can comment on it). http://www.Facebook.com/Thesoccermomblog