Personalize Your Homeschool Room for Back to School with Cricut
This is a sponsored post written by me on behalf of Cricut. All opinions are 100% mine.
How to set up a homeschool room for virtual school and online learning. Learn how to make polka dot wall decals, pencil-shaped clipboards, and personalized back to school t-shirts!
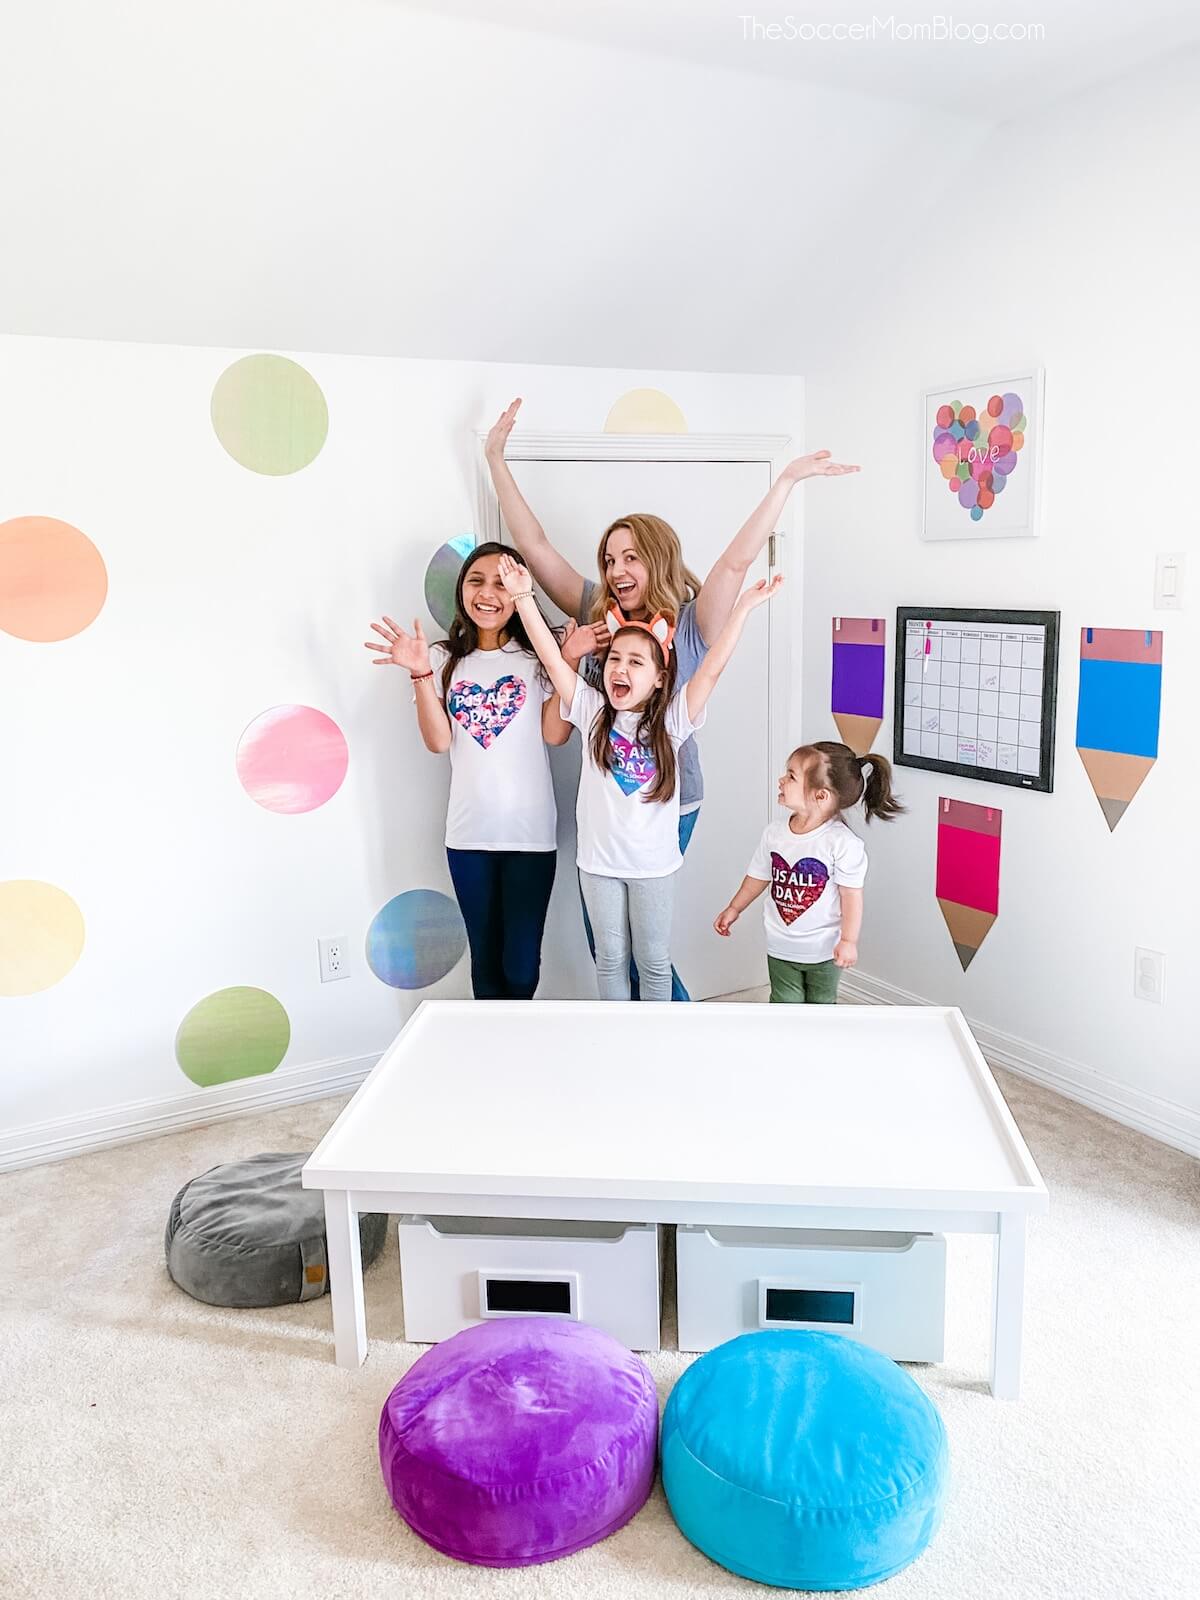
Our New Homeschool Room
We are starting this school year with online learning, so over the summer we converted part of my office into a homeschool room for the girls.
Last spring we all worked at the kitchen table, but since we time to prepare before the fall semester, our family wanted to create a space that would be bright and cheerful and have more room for us all to work.
Here’s what we did:
- Created polka dot wall decals for an accent wall on one side of the room.
- Made clipboards shaped like pencils to display school assignments and art projects.
- Designed personalized back to school t-shirts for the girls and myself.
- Bought a large activity table that is low to the ground so all the girls can sit comfortably (even our 2-year old).
- Bought round floor cushions to match our polka dot theme.
- Set up a reading corner and made custom pillows.
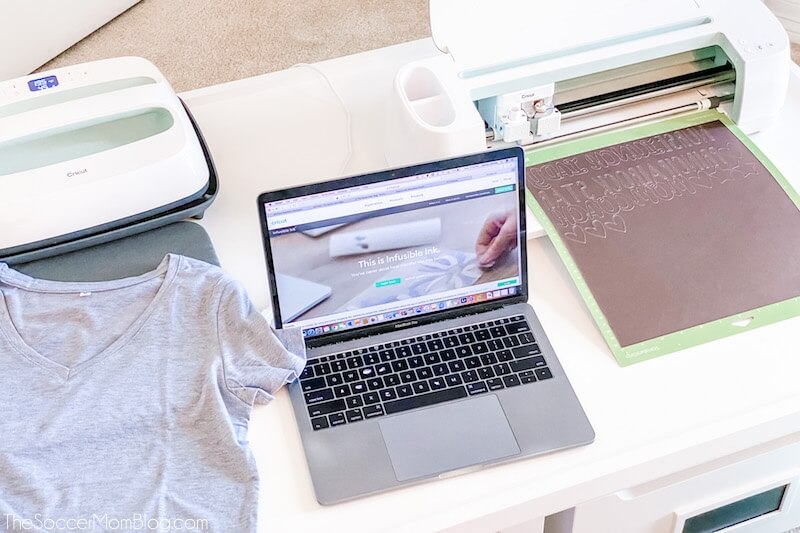
Yea, I know…that’s a LOT of projects! Fortunately, aside from the table purchase, we were able to do all of them with our Cricut Maker, Joy, and EasyPress2. It saved a lot of time, helped keep our budget lower (than if we bought ALL the decor), and everything looked professional!
In this post I’ll show you how we made the wall decals, clipboards, and personalized t-shirts.
I’m SO excited to finally be able to share all of this with you! Our homeschool room is now our favorite room in the house!
Related: Learn more about how to homeschool in Texas here!
Here is the full supply list for all of our back to school Cricut projects:
For your convenience in re-creating our back to school Cricut projects, we’ve included shop-able ad links to some of the products we used. Our disclosure policy is available here.
I’ll also make break-out supply lists for each specific craft when I show the full tutorials.
- Cricut Maker (Everything Bundle)
- Cricut EasyPress 2 (12″ x 10″)
- Cricut EasyPress mat 12×12″
- Cricut Joy Essentials Bundle (special price for subscribers!)
- Cricut Joy Fine Point Pen
- Cricut Joy Smart Label Writable Vinyl
- Cricut Poster Board, Metallics
- Poster Board, Brights
- Kraft Board Foil Holographic Sampler, Neon
- Gray Women’s Fitted T-Shirt Blank, V-Neck
- Toddler T-Shirt Blank, Crew Neck
- Youth T-Shirt Blank, Crew Neck
- Infusible Ink Transfer Sheet Patterns, Cabbage Rose
- Infusible Ink Transfer Sheet Patterns, Galaxy
- Infusible Ink Transfer Sheet Patterns, Bright Bow Fairy Tale
- Machine Mat Variety Pack
- Glue Gun
- Mini Clothespins
- Lint Roller
- Double-Sided Tape

Polka Dot Wall Decals
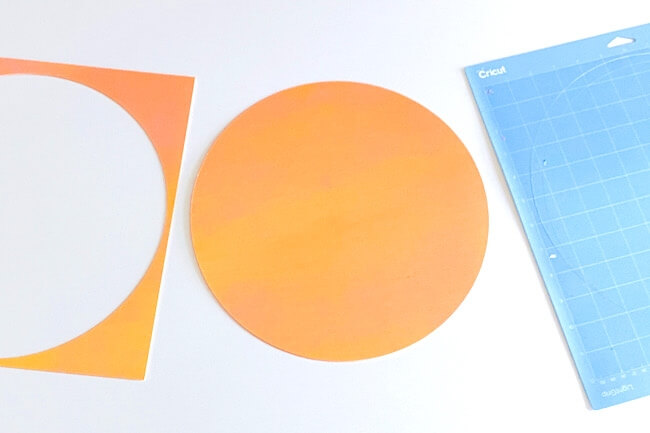
Fellow blogger Grace at Hello,Wonderful has a craft room with gorgeous watercolor-ish polka dots on the wall. When I asked her how she got that look, she explained that they were wall decals she’d purchased.
I re-created this look for less using my Cricut Maker and Holographic Kraft Board. All I did was create a circle template in Design Space that was about 11.25″ x 11.25″ — I cut out 2-3 in each color board.
Next, I used double-sided tape to attach the circles to the wall. Easy-peasy!
I just LOVE how this accent wall turned out! My polka dot wall decals change color when the light hits them, so they really do have a watercolor effect. And they look gorgeous in photos!
The best part is this project takes just minutes and the Cricut cuts out perfect circles every single time!
Here’s what you need to make watercolor polka dot wall decals like ours:
- Cricut Maker (Everything Bundle)
- Machine Mat Variety Pack
- Kraft Board Foil Holographic Sampler, Neon

TIP: To keep your kraft board or poster board from curving when you separate it from the machine mat, try peeling back the mat instead of the material.
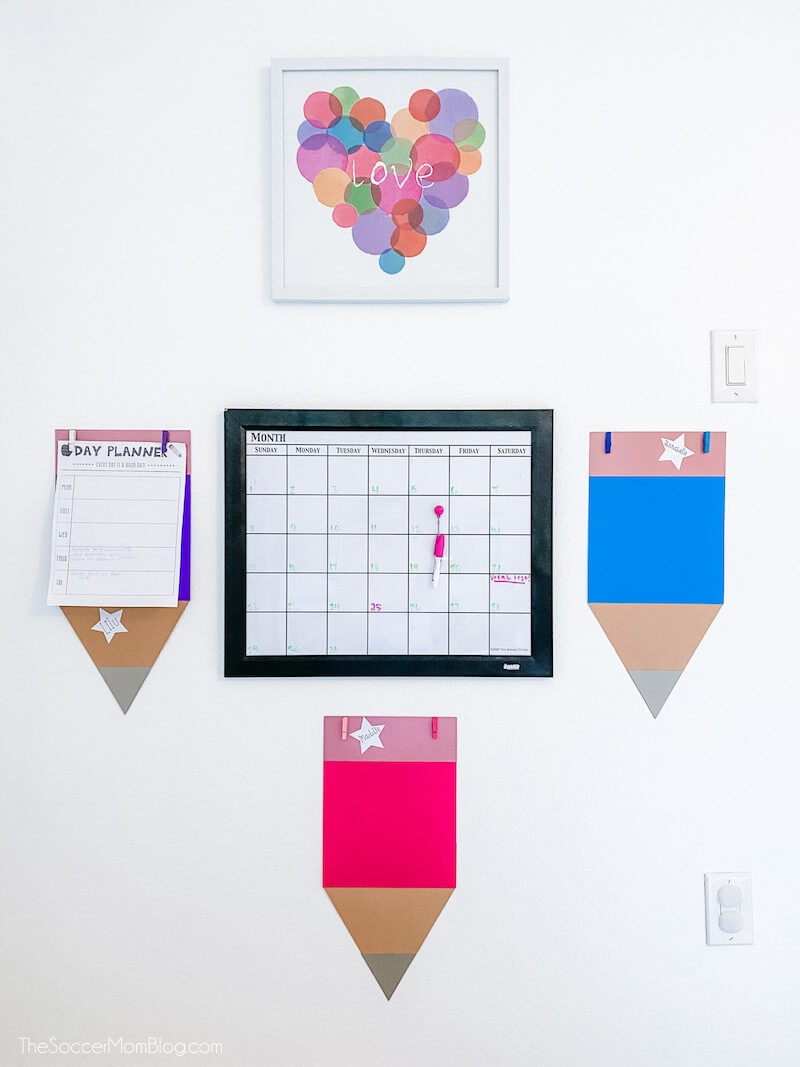
Pencil Shaped Clipboards
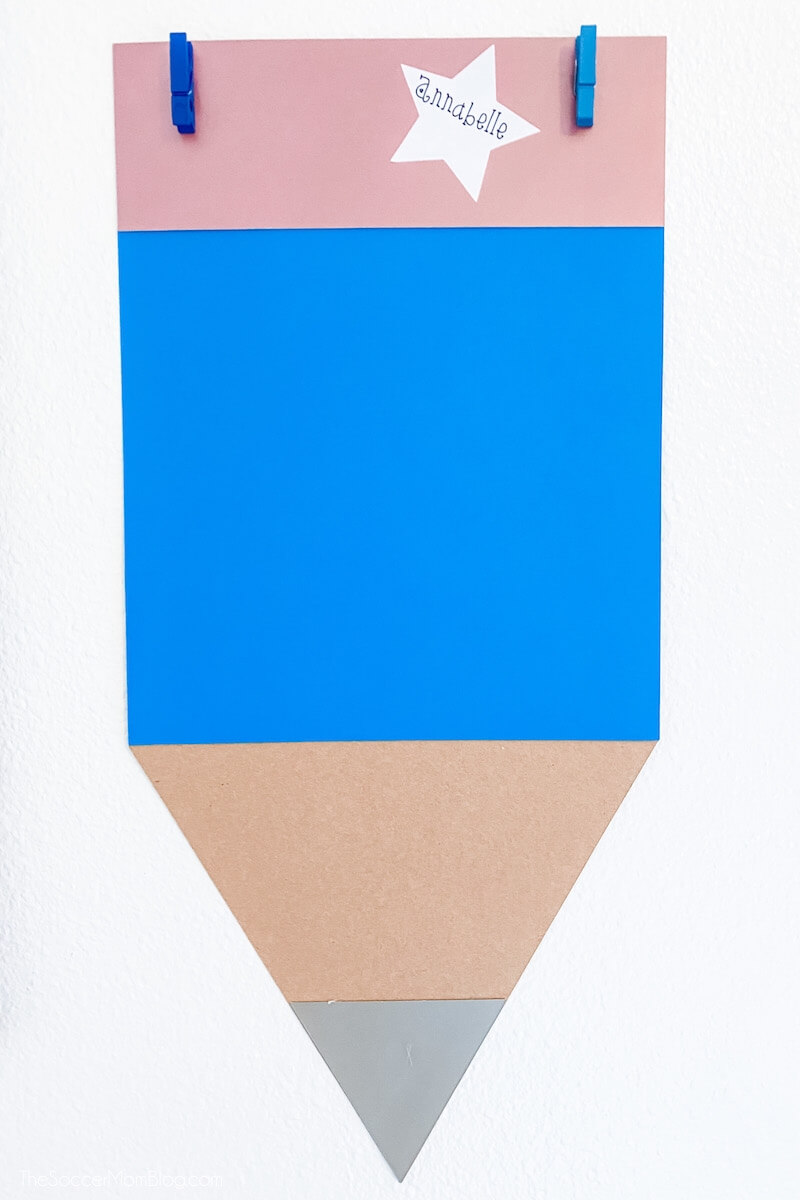
These pencil shaped clipboards are made of poster board. We hung them on the wall and use them to display completed work and weekly schedules.
Here’s what you need to make them:
- Cricut Maker (Everything Bundle)
- Machine Mat Variety Pack
- Poster Board, Brights
- Cricut Poster Board, Metallics
- Kraft Board, Natural
- Glue Gun
- Mini Clothespins
Click here to view the project in Cricut Design Space. Photo step-by-step directions follow:
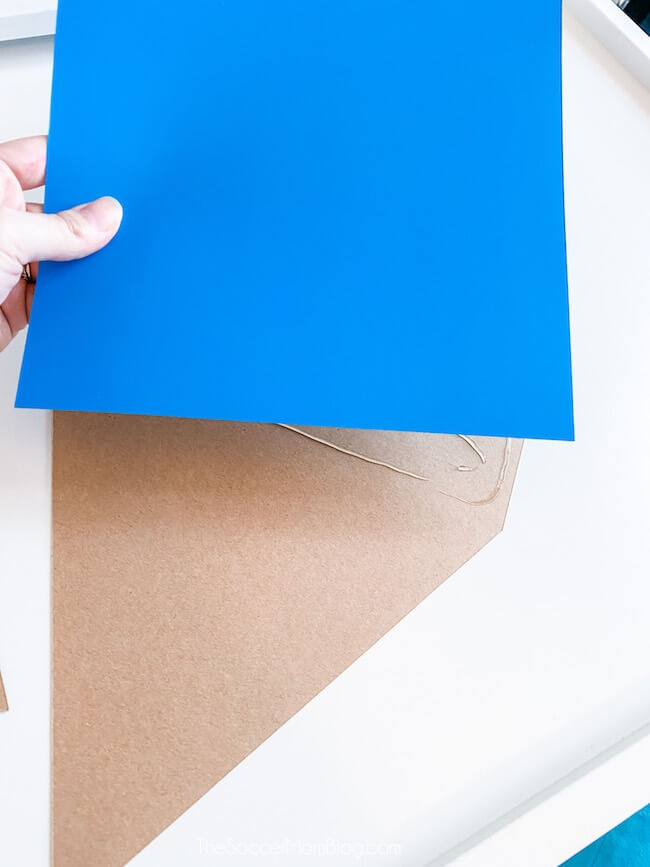
We used natural colored Kraft Board as the pencil wood and glued that to the underside of the brightly colored rectangle.
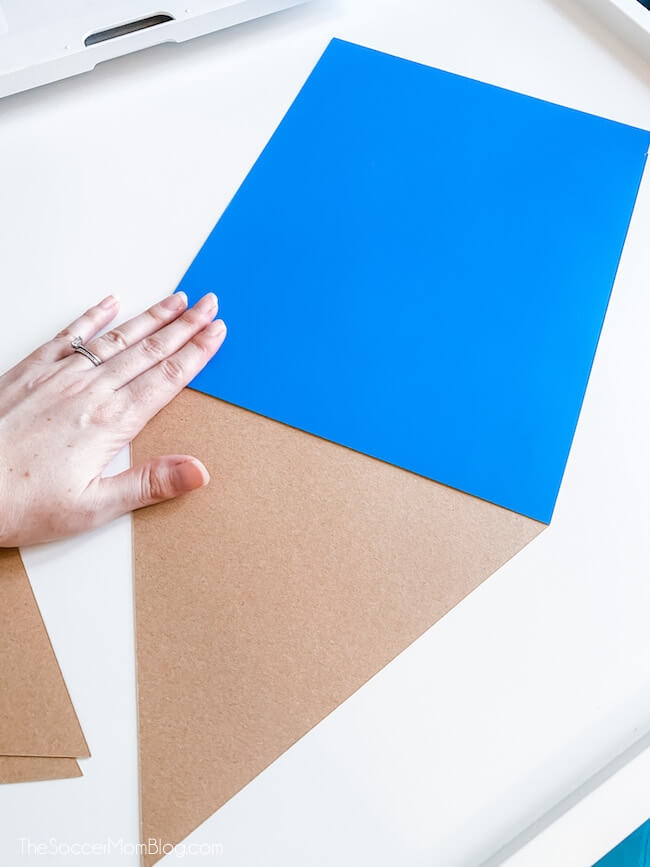
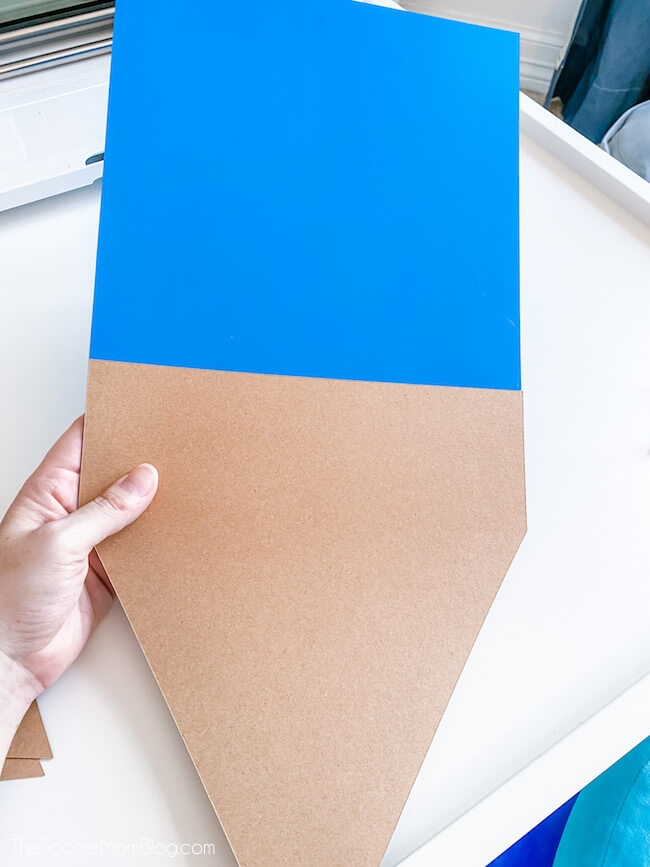
Metallic poster board cut into the shape of a triangle makes the pencil lead.

At this point I thought I was done, but my 6 year old reminded me that pencils have erasers! So I used pink metallic poster board for that.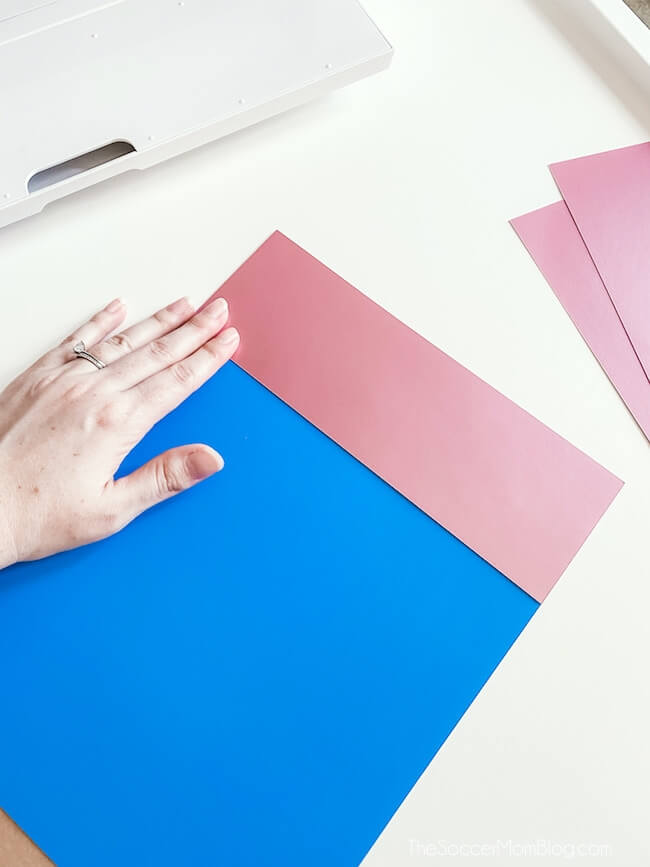
Finally we glued mini clothespins to the top of our clipboards and personalized them with labels made on my Cricut Joy. It writes AND cuts!
Here’s the supplies we used to make labels:
- Cricut Joy Essentials Bundle (special price for subscribers!)
- Cricut Joy Fine Point Pen
- Cricut Joy Smart Label Writable Vinyl
I prefer my Cricut Joy for labels and small projects because it is easy to setup and use anywhere — you don’t need a lot of space to work! These labels only took 5 minutes to make!
Click here to see our full tutorial to make labels with Cricut Joy!
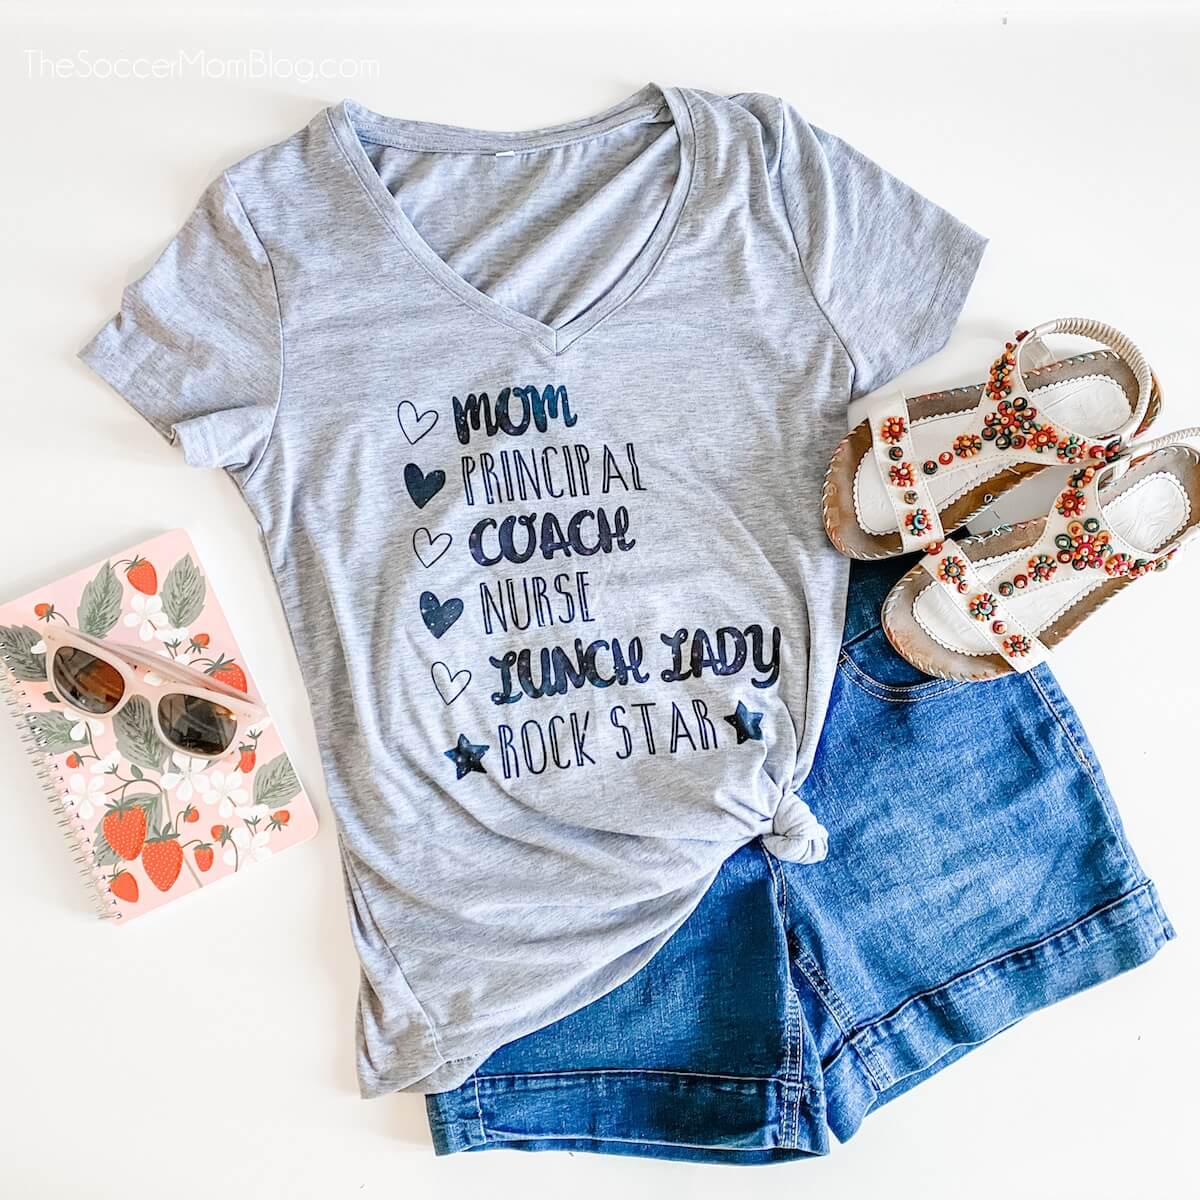
Rockstar Homeschool Mom T-Shirt
Moms already wear many hats so to speak, and when the kids are home doing online learning, we have even more job titles to add to the list!
I made this shirt as a light-hearted way to celebrate this new role. Yep, it’s definitely a challenge at times, but I am truly grateful for having my girls home and close to me. I know I will miss these days a little when things go back to normal!
This is a simple heat transfer t-shirt project that uses Cricut Infusible Ink transfer sheets and blanks. It should take 30 minutes or less, because I’ve already saved the design for you!
Here’s what you need for this project:
- Cricut Maker (Everything Bundle)
- Machine Mat Variety Pack
- Cricut EasyPress 2 (12″ x 10″)
- Cricut EasyPress mat 12×12″
- Gray Women’s Fitted T-Shirt Blank, V-Neck
- Infusible Ink Transfer Sheet Patterns, Galaxy
Click here to view the project in Cricut Design Space!
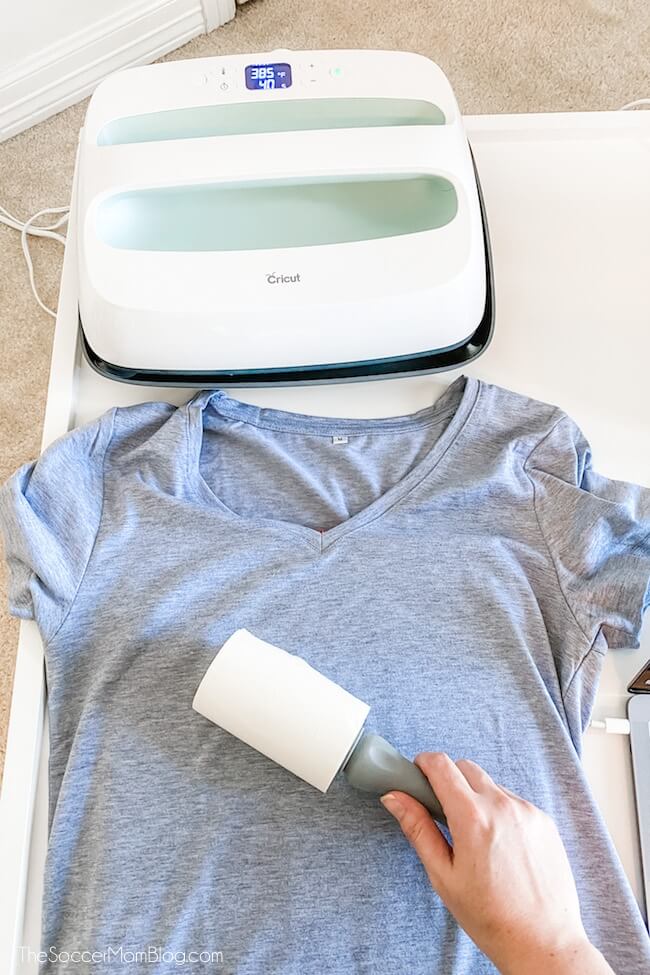
TIP: Always use a lint roller on your t-shirts before doing any heat transfers. Otherwise lint, fuzz, etc. could make parts of your design less crisp.
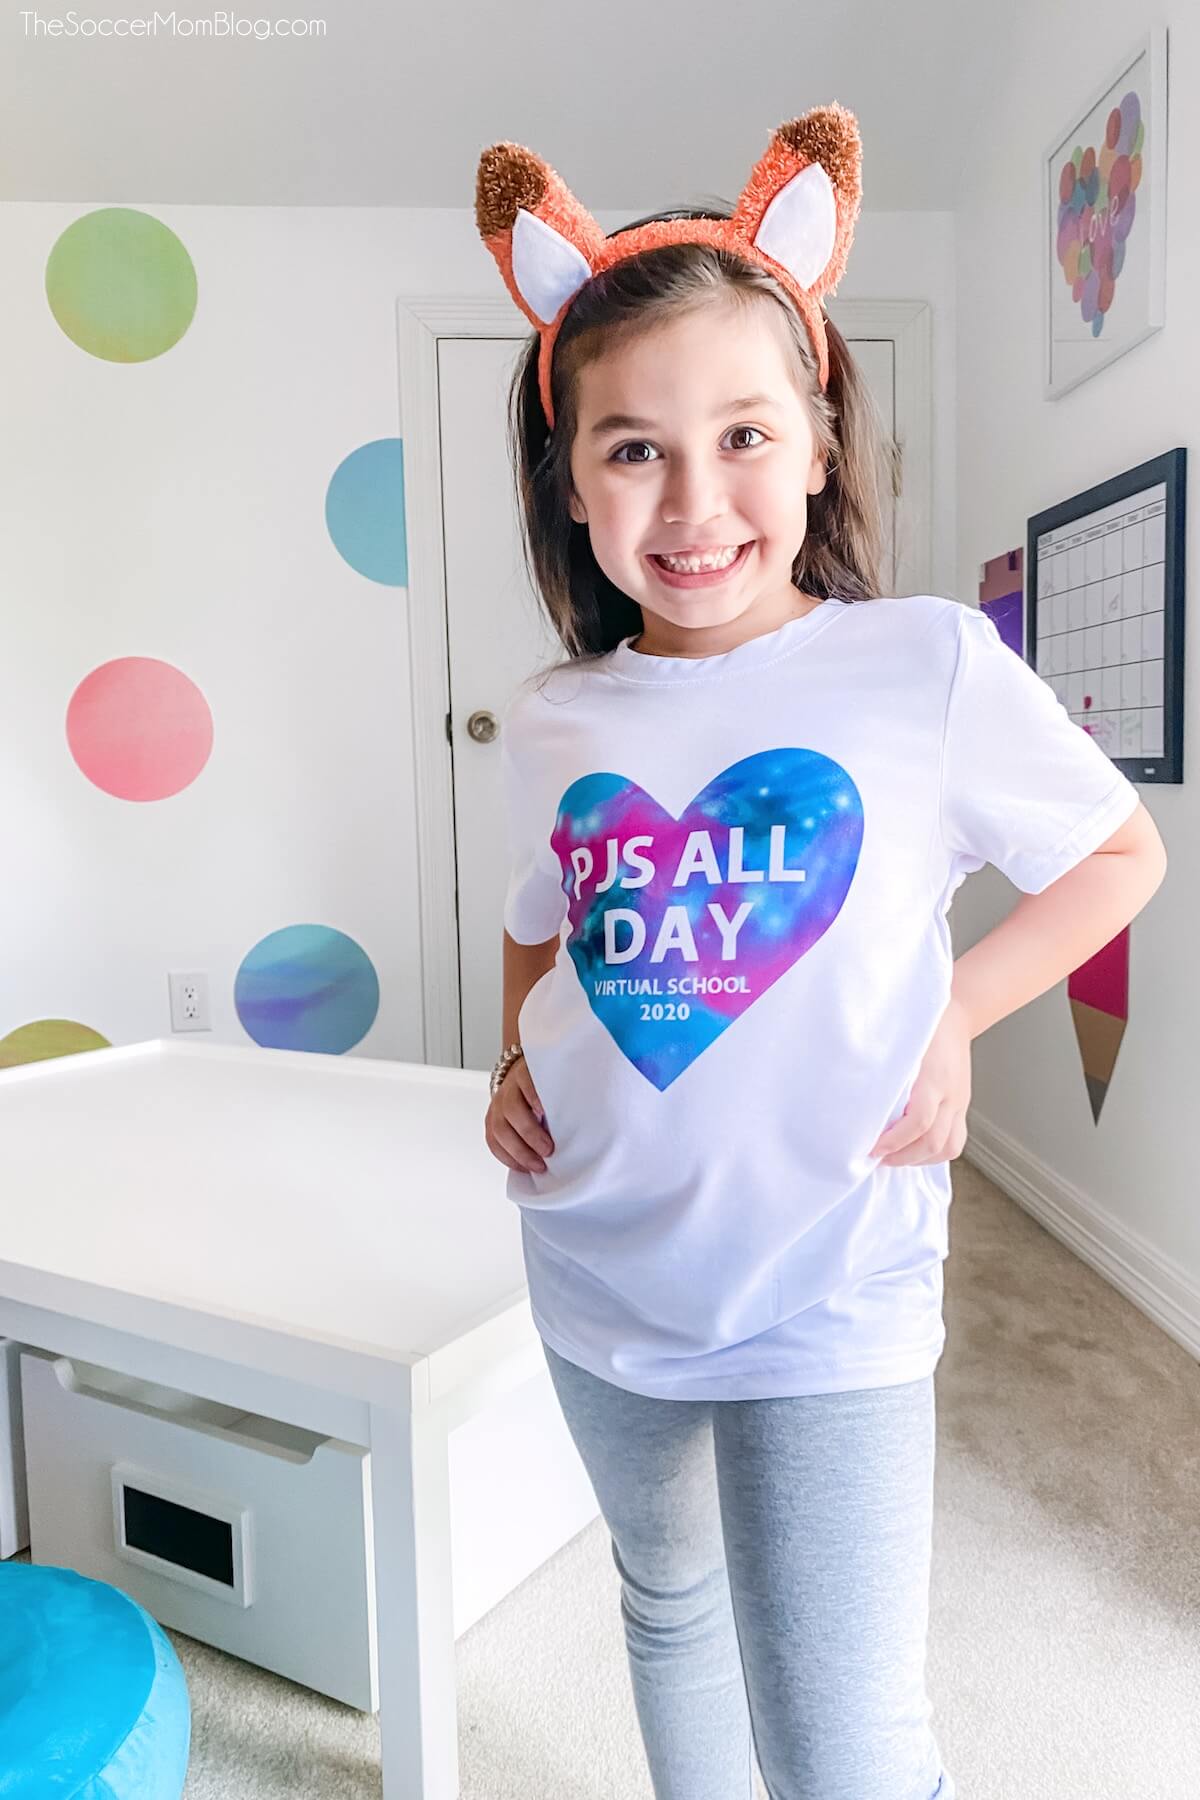
First Day of School T-Shirts — Virtual Learning Edition
To make our first day of virtual school special, we made personalized t-shirts for all the girls.
Here are the supplies we used to make one shirt for each of our girls:
- Cricut Maker (Everything Bundle)
- Cricut EasyPress 2 (12″ x 10″)
- Cricut EasyPress mat 12×12″
- Toddler T-Shirt Blank, Crew Neck
- Youth T-Shirt Blank, Crew Neck
- Infusible Ink Transfer Sheet Patterns, Cabbage Rose
- Infusible Ink Transfer Sheet Patterns, Galaxy
- Infusible Ink Transfer Sheet Patterns, Bright Bow Fairy Tale
- Machine Mat Variety Pack
Each girl picked their own Infusible Ink pattern and Cricut makes a variety of youth and toddler sized t-shirts. They fit perfectly!

Click here to view the project and make it in Cricut Design Space!
Are your kids doing virtual learning too? I’d love to hear what your workspace is like and how you prepared — let me know in the comments!
New to Cricut?
Check out this step-by-step post I designed for beginners: How to Use a Cricut Maker. I wrote this post when I had just got my Maker and I wrote it for other beginners like me!
Want to Know More About Cricut?
- What is a Cricut Maker & 5 Reasons I Love Mine
- How to Use a Cricut Maker
- Is a Cricut Worth the Price?
- 34 Easy Cricut Christmas Crafts
- What is Cricut Access and Do I Need It?
- Everything You Need to Know About Cricut Joy

- Beach Day Rice Krispie Treats - June 23, 2026
- Pickled Jalapeños Recipe - June 15, 2026
- Homemade Nesquick Mix - June 11, 2026