Christmas Fudge
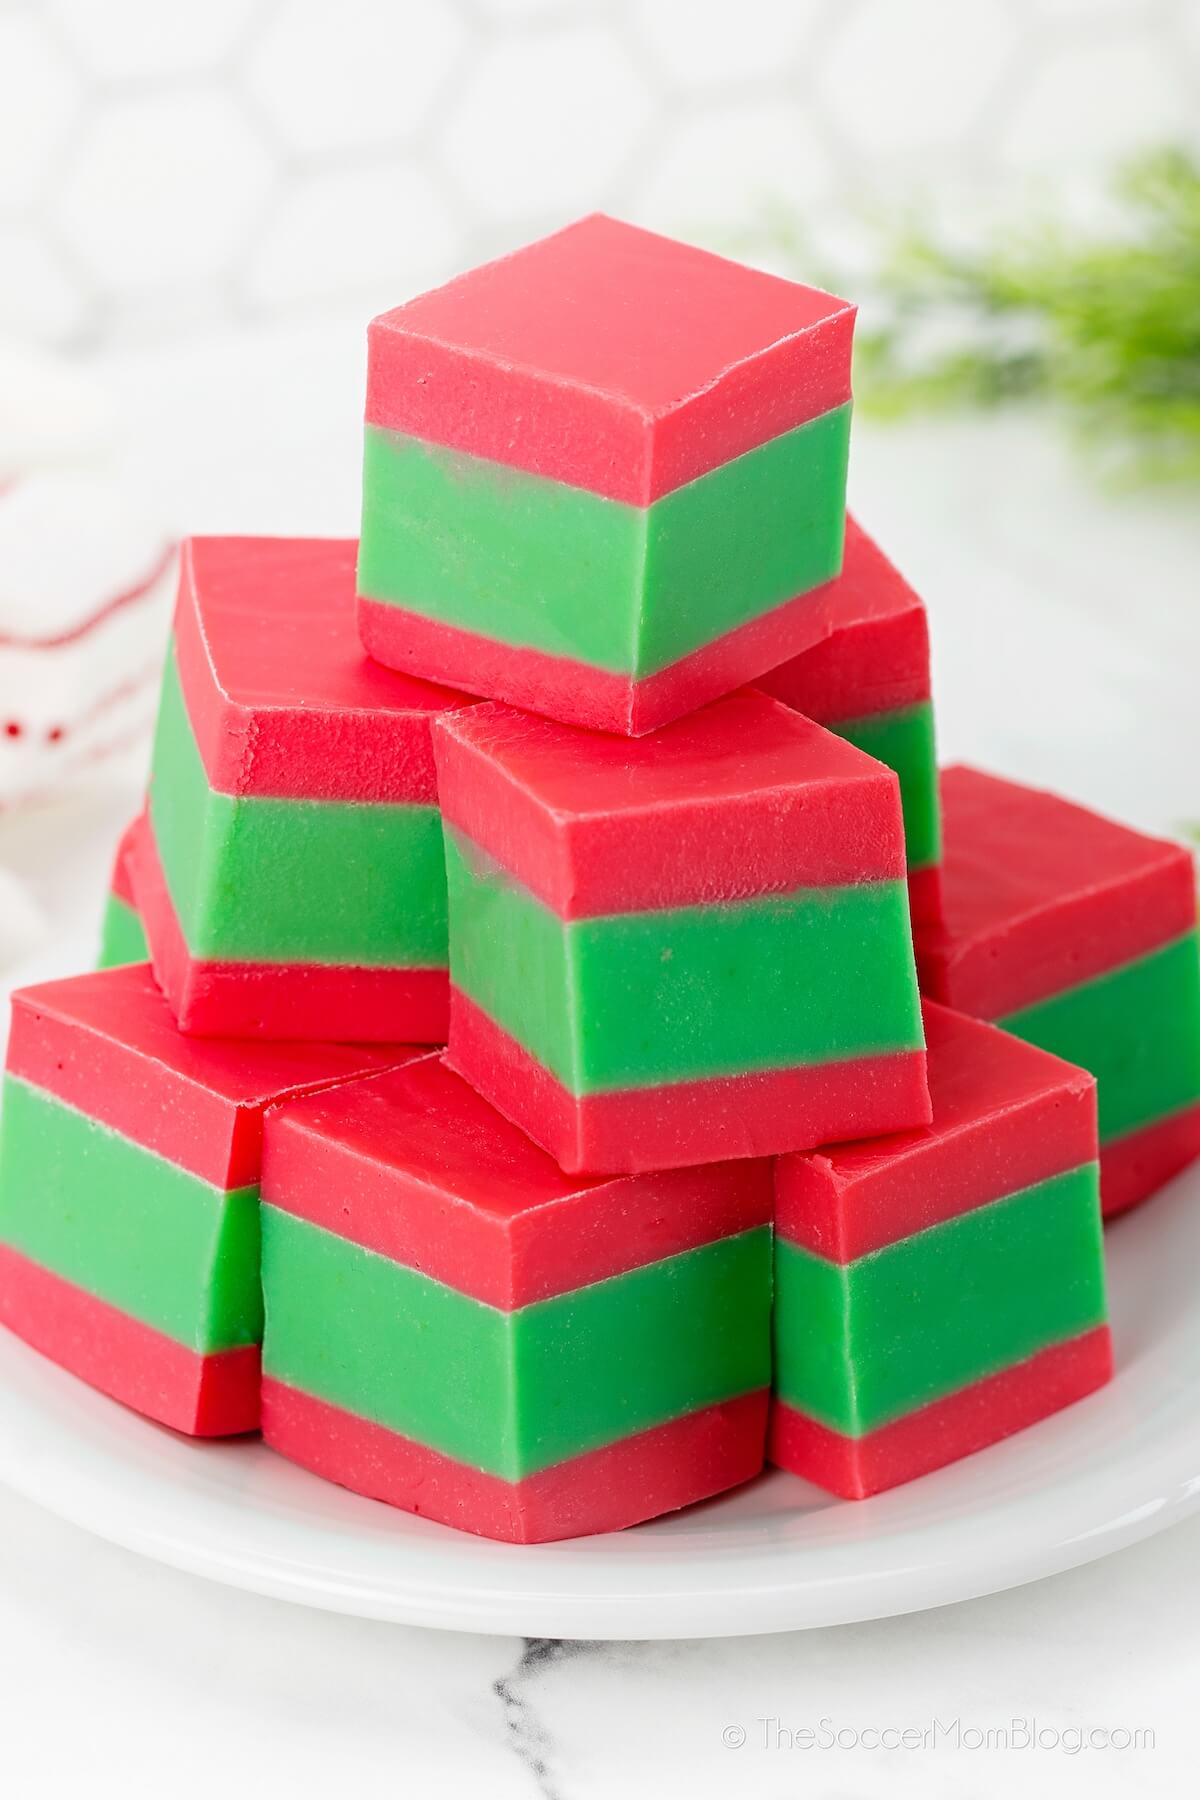
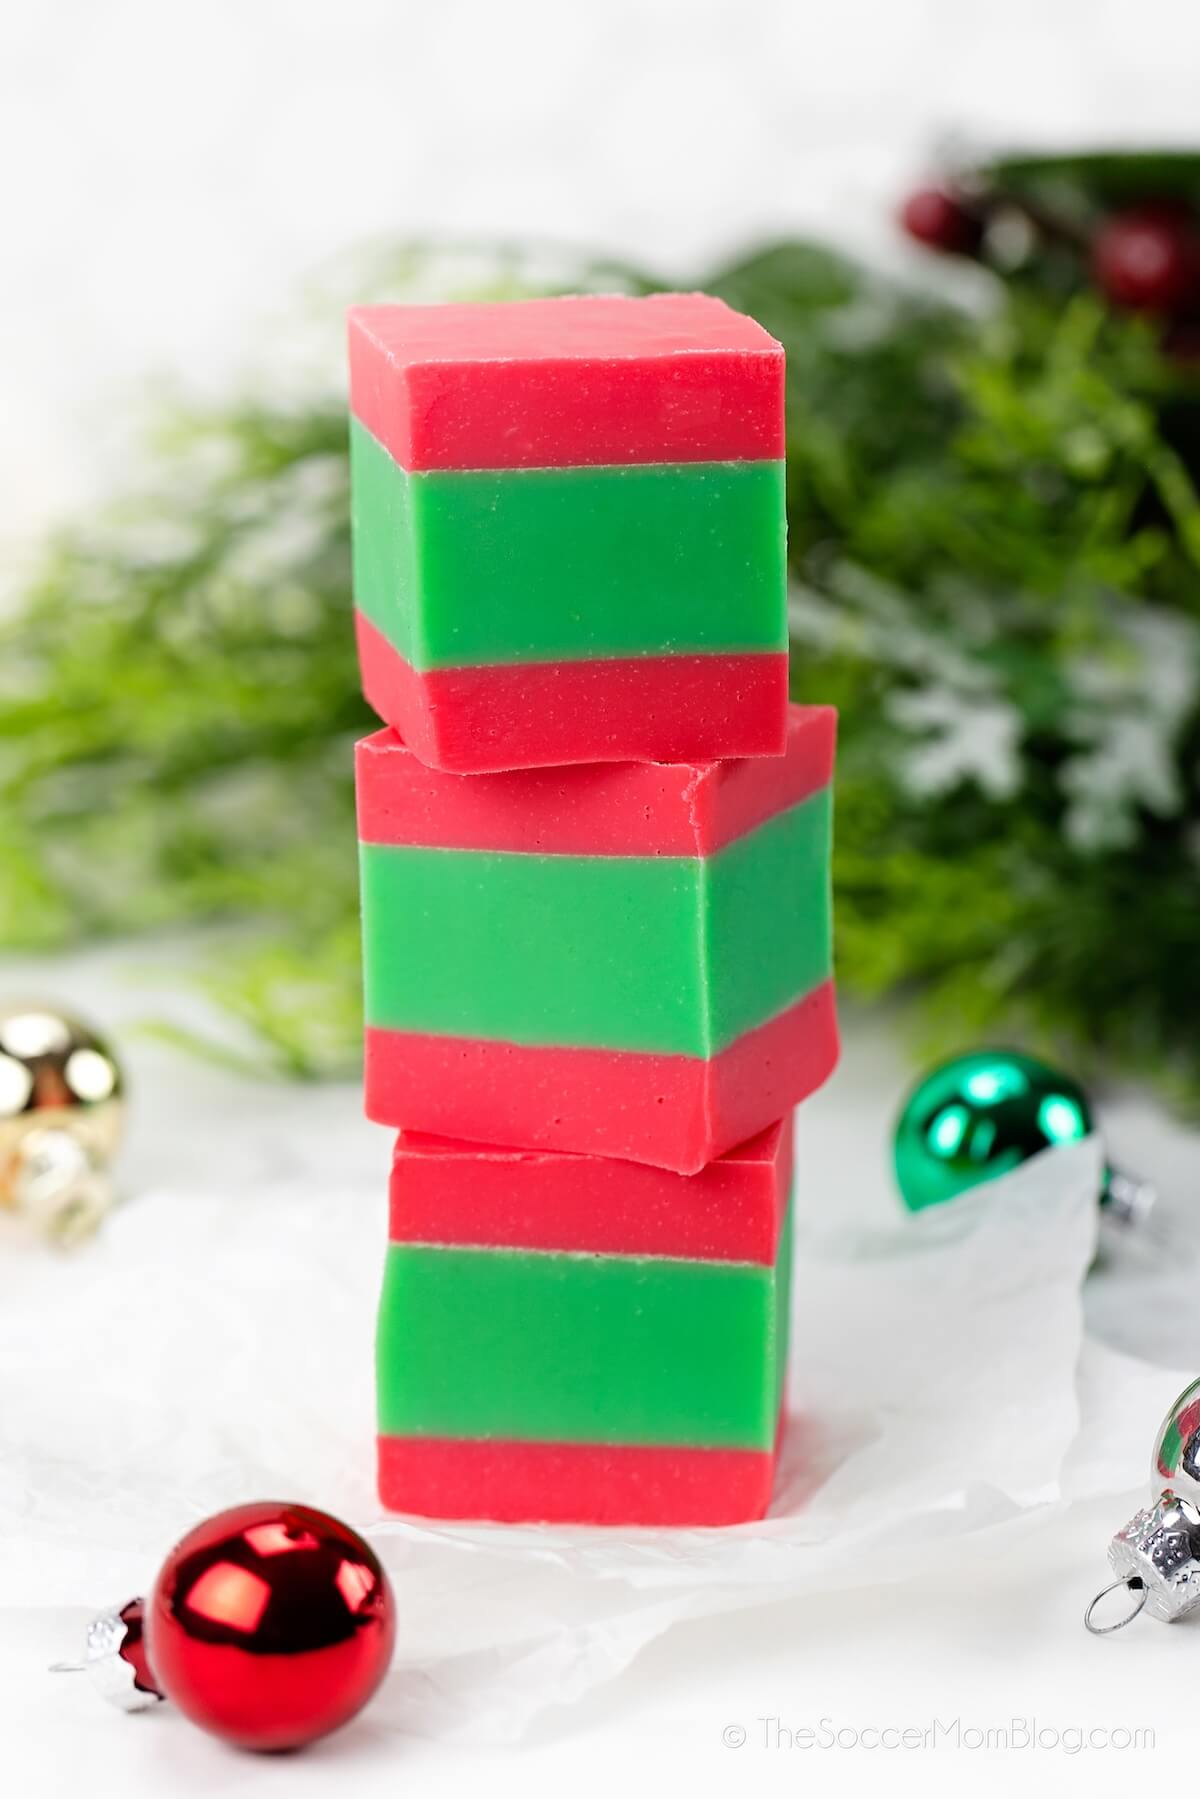
This festive red and green Christmas fudge recipe is easy, tasty, and looks beautiful on any holiday party table! Makes a great gift idea too!
Red & Green Christmas Fudge
This fall I shared a layered green and black Halloween fudge recipe. I loved the way it looked and though that the recipe could easily be modified to make a similar sweet treat for the holiday season.
Y’all I couldn’t believe how pretty this new dessert turned out!! This might just be the best fudge recipe I’ve come up with so far!
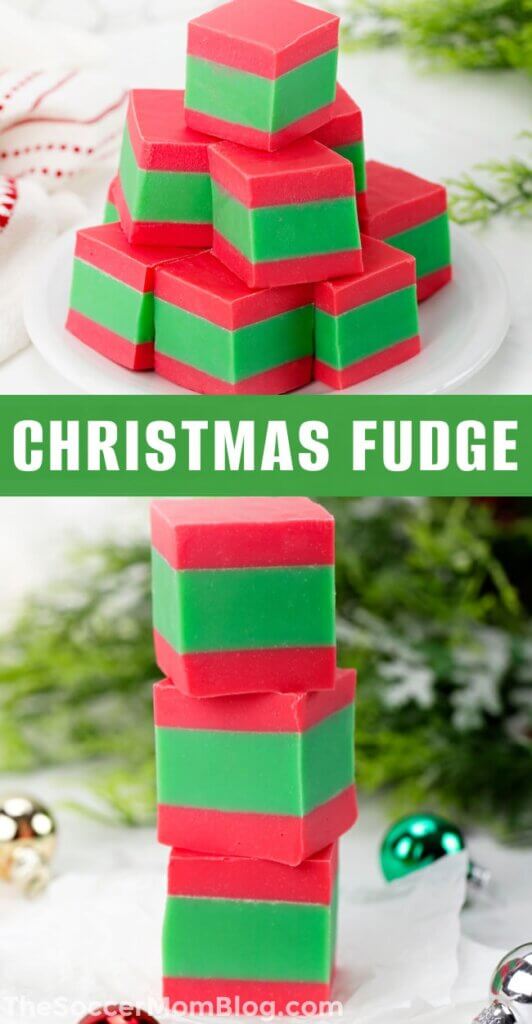
This is a simple white chocolate fudge that we made in two batches: a red colored fudge and a green colored fudge. Then we “stacked” the layers to created this gorgeous striped effect.
The end result is a delicious treat that’s unique and eye-catching. It is sure to stand out amongst the usual Christmas cookie selection and it also makes a wonderful homemade gift idea for friends, family, neighbors, etc.
All you need are 3 simple ingredients, plus food coloring! You won’t believe how easy this recipe is!
Related: Check out 10 more homemade fudge recipes here!
Ingredients
Affiliate links provided for your convenience in re-creating this recipe; read disclosure policy here.
For the Green Layer:
- 3 cups white chocolate chips
- 1 – 14oz can sweetened condensed milk
- 4 Tablespoons butter, softened
- 4 drops green food coloring
For the Red Layers:
- 3 cups white chocolate chips
- 1 – 14oz can sweetened condensed milk
- 4 Tablespoons butter
- 4 drops red gel food coloring
Helpful Kitchen Tools:
Instructions
This recipe is made in two steps: the green fudge layer is prepared first, then we make a batch of red fudge to create the top and bottom layers.
It’s surprisingly simple to make, but you’ll just want to make sure you have plenty of time to allow the fudge to chill and set. You’ll need a couple hours for each layer to harden. But it’s ok if you take a break between each layer, such as making the green layer in the morning and finishing the red layers later in the day.
To Make The Green Layer
- Line a 8-inch square pan with parchment paper.
- Remove the top from the can of sweetened condensed milk and stir in the green food coloring until the milk is bright green.
- Add the green condensed milk to a saucepan, along with the white chocolate chips and butter. Warm over medium heat, stirring frequently, until melted and smooth.
- Pour the fudge mixture into the prepared pan and spread as needed to cover the bottom evenly. Allow to harden completely.

To Make The Red Layers
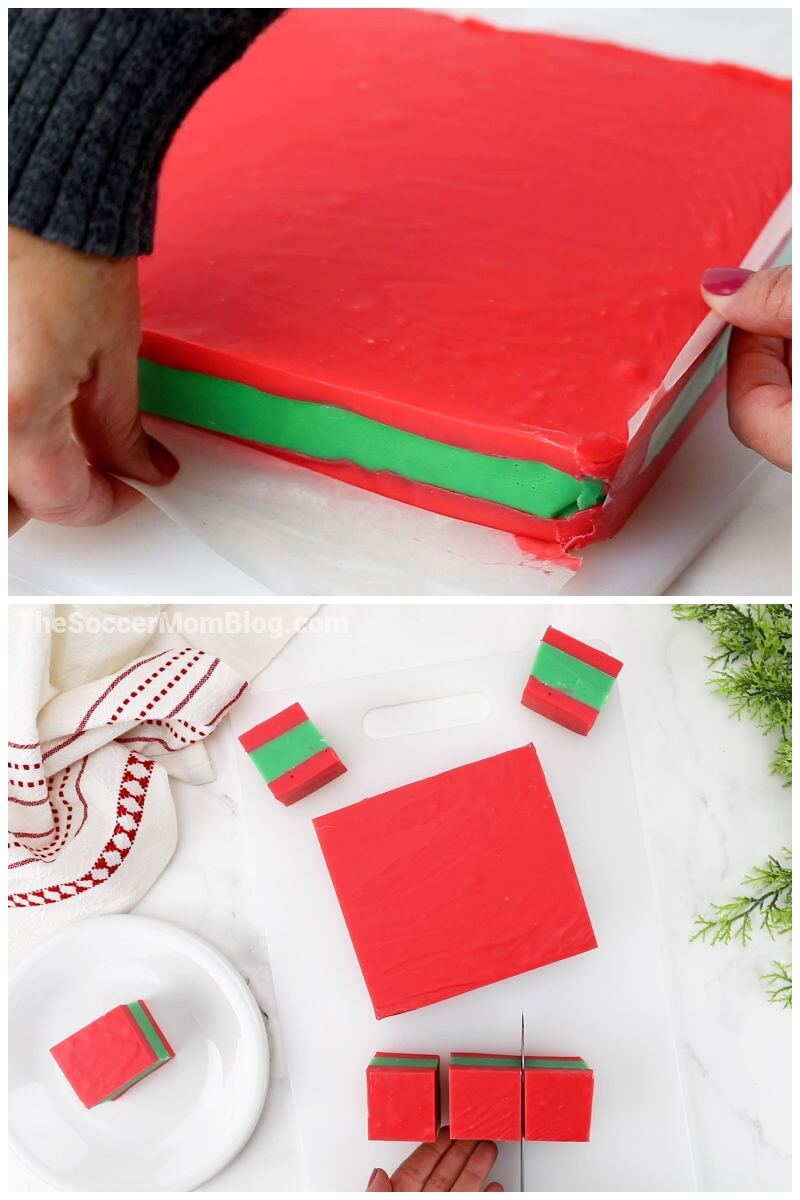
- Remove the green fudge from the pan and peel off the parchment paper. Place a new layer of parchment paper in the bottom of the pan.
- Remove the top from the sweetened condensed can and stir in the red food coloring, until the milk is a bright red color.
- Pour the red colored condensed milk into a clean saucepan along with white chocolate chips and butter. Heat over medium or medium low until melted and smooth. Stir frequently.
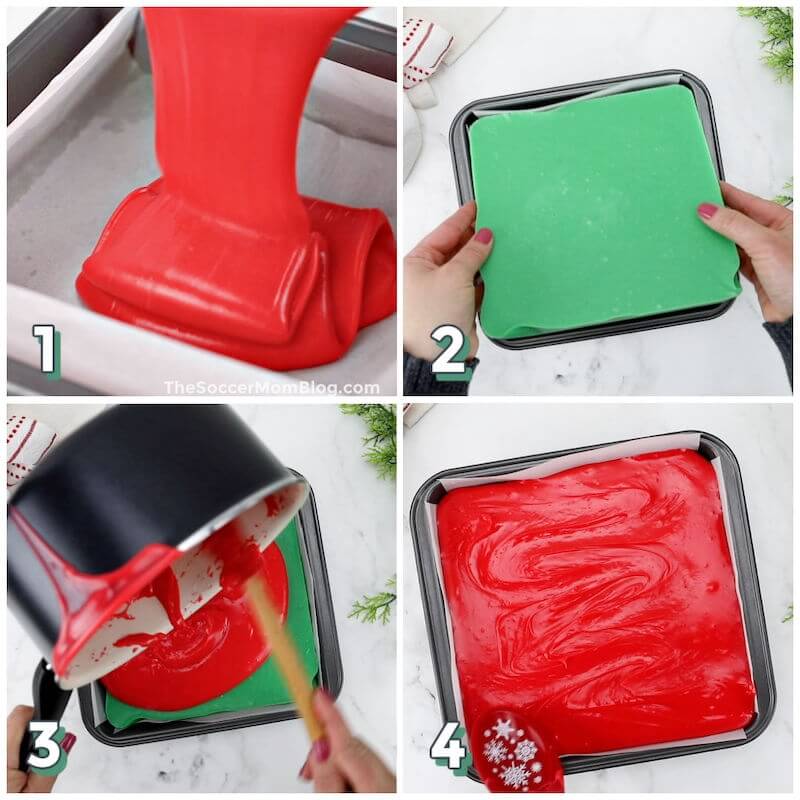
- Pour half of the red fudge into the bottom of the prepared baking dish.
- Take the block of green fudge and place on top of the red layer. Gently press down to get rid of air pockets, but not so much that the red fudge squirts out the sides.
- Pour the remaining red fudge on top and spread with a spatula as needed to cover the entire green layer.
- Cover with foil or lid and place the pan in the fridge until it’s completely hardened.
When you’re ready to serve or store, use the parchment paper to pop the fudge out of the pan and then a sharp knife to cut into squares.
Prep Tips
- This fudge has a creamy, white chocolate flavor. However, you can add flavors too! Try adding a teaspoon of vanilla extract to one of the layers for a richer taste. You can also add a teaspoon of peppermint extract to one of the layers for a creamy peppermint fudge.
- I recommend using a high-quality white chocolate for this recipe, as you can taste the difference! We love Ghirardelli, but feel free to use your favorite kind. I linked to another brand of white chocolate chips in our ingredients list because it can be tricky to find Ghirardelli at a good price online, but you should be able to find it readily in stores.
- Add a festive touch to your fudge by adding sprinkles or crushed candy canes on top, before the fudge has completely set.

Frequently Asked Questions
How Many Pieces Of Fudge Does This Recipe Yield?
We cut the fudge into blocks that were about 1 1/2 inch in size, which yields 32 bite-size servings. You can always slice into larger pieces if desired.
How Do You Store Homemade Fudge?
Homemade fudge does not require refrigeration, but it does last longer when kept in the refrigerator.
- Fudge stored at room temperature will last 1-2 weeks.
- Fudge stored in the fridge will last up to a month.
Place your fudge in an airtight container or a gallon size freezer bag. I recommend placing parchment paper between layers to prevent the fudge squares from sticking to each other.
Can You Use The Microwave Instead Of Stovetop?
Yes, you can microwave to melt the white chocolate chips, but the order of things will be slightly different. You’ll also want to make sure to use a microwave-safe bowl and handle with care, as they may become hot during preparation.
If microwaving, place the white chocolate chips into a heat-safe bowl. Microwave in 20-second intervals, until melted and smooth. Stir in the butter and the colored condensed milk. Then finish preparing the fudge as described in the instructions above.
More Holiday Treats To Try:
- Red & Green Christmas Puppy Chow
- Christmas Lights Cookies
- Christmas Cheesecake Dip
- Oreo Gingerbread Truffles
- Rudolph Cupcakes
- Christmas Tree Oreos
More Homemade Candies To Make:
- Reese’s Cup Reindeer Treats
- Christmas Candy Sleigh
- Christmas Tree Pretzels
- Candy Cane Hot Chocolate Bombs
- Old Fashioned Nut & Honey Candy
Christmas Fudge Recipe (Printable Recipe Card)
If you tried this recipe and loved it too, please rate it!
Want to Save This Recipe?
Enter your email & I'll send it to your inbox. Plus, get great new recipes from me every week!
By submitting this form, you consent to receive emails from The Soccer Mom Blog

Christmas Fudge Recipe
Equipment
- 8-inch square pan
- Medium Saucepan
- Parchment paper
Ingredients
For the Green Layer:
- 3 cups white chocolate chips
- 14 oz sweetened condensed milk 1 typical can
- 4 Tablespoons butter softened
- 4 drops green food coloring or more as needed
For the Red Layers:
- 3 cups white chocolate chips
- 14 oz sweetened condensed milk 1 typical can
- 4 Tablespoons butter softened
- 4 drops red gel food coloring or more as needed
Instructions
To Make The Green Layer
- Line a 8-inch square baking pan with parchment paper.
- Remove the top from the can of sweetened condensed milk and stir in the green food coloring until the milk is bright green. Start with a few drops and add more if needed.
- Pour the green condensed milk into a saucepan, along with the white chocolate chips and butter. Warm over medium heat, stirring frequently, until melted and smooth.
- Pour the fudge mixture into the prepared pan and spread as needed to cover the bottom evenly. Allow to harden completely.
To Make The Red Layers
- Remove the green fudge from the pan and peel off the parchment paper. Place a new layer of parchment paper in the bottom of the pan.
- Remove the top from the sweetened condensed can and stir in the red food coloring, until the milk is a bright red color.
- Pour the red colored condensed milk into a clean saucepan along with white chocolate chips and butter. Heat over medium or medium low until melted and smooth. Stir frequently.
- Pour half of the red fudge into the bottom of the prepared baking dish.
- Take the block of green fudge and place on top of the red layer. Gently press down to get rid of air pockets, but not so much that the red fudge squirts out the sides.
- Pour the remaining red fudge on top and spread with a spatula as needed to cover the entire green layer.
- Cover with foil or lid and place the pan in the fridge to chill and harden. Use the parchment paper to pop out the completed fudge and cut into squares 1 1/2 in size.
Video
Notes
Nutrition
Pin our Holiday Fudge Recipe on Pinterest:
You might also like:


- Beach Day Rice Krispie Treats - June 23, 2026
- Pickled Jalapeños Recipe - June 15, 2026
- Homemade Nesquick Mix - June 11, 2026