
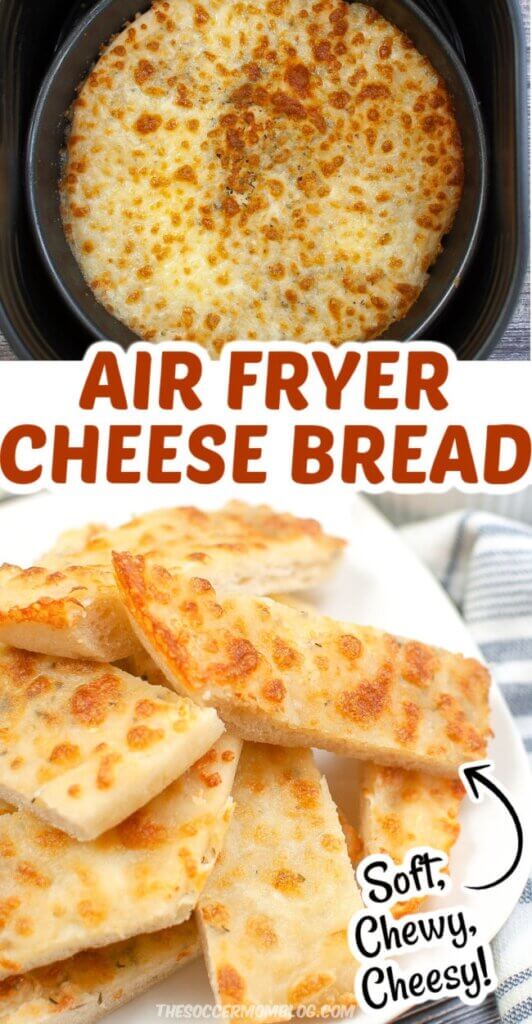
Air Fryer Cheese Breadsticks
With this easy Air Fryer Cheese Bread recipe, you can make warm, cheesy bread sticks that taste like they came from the local pizzeria!
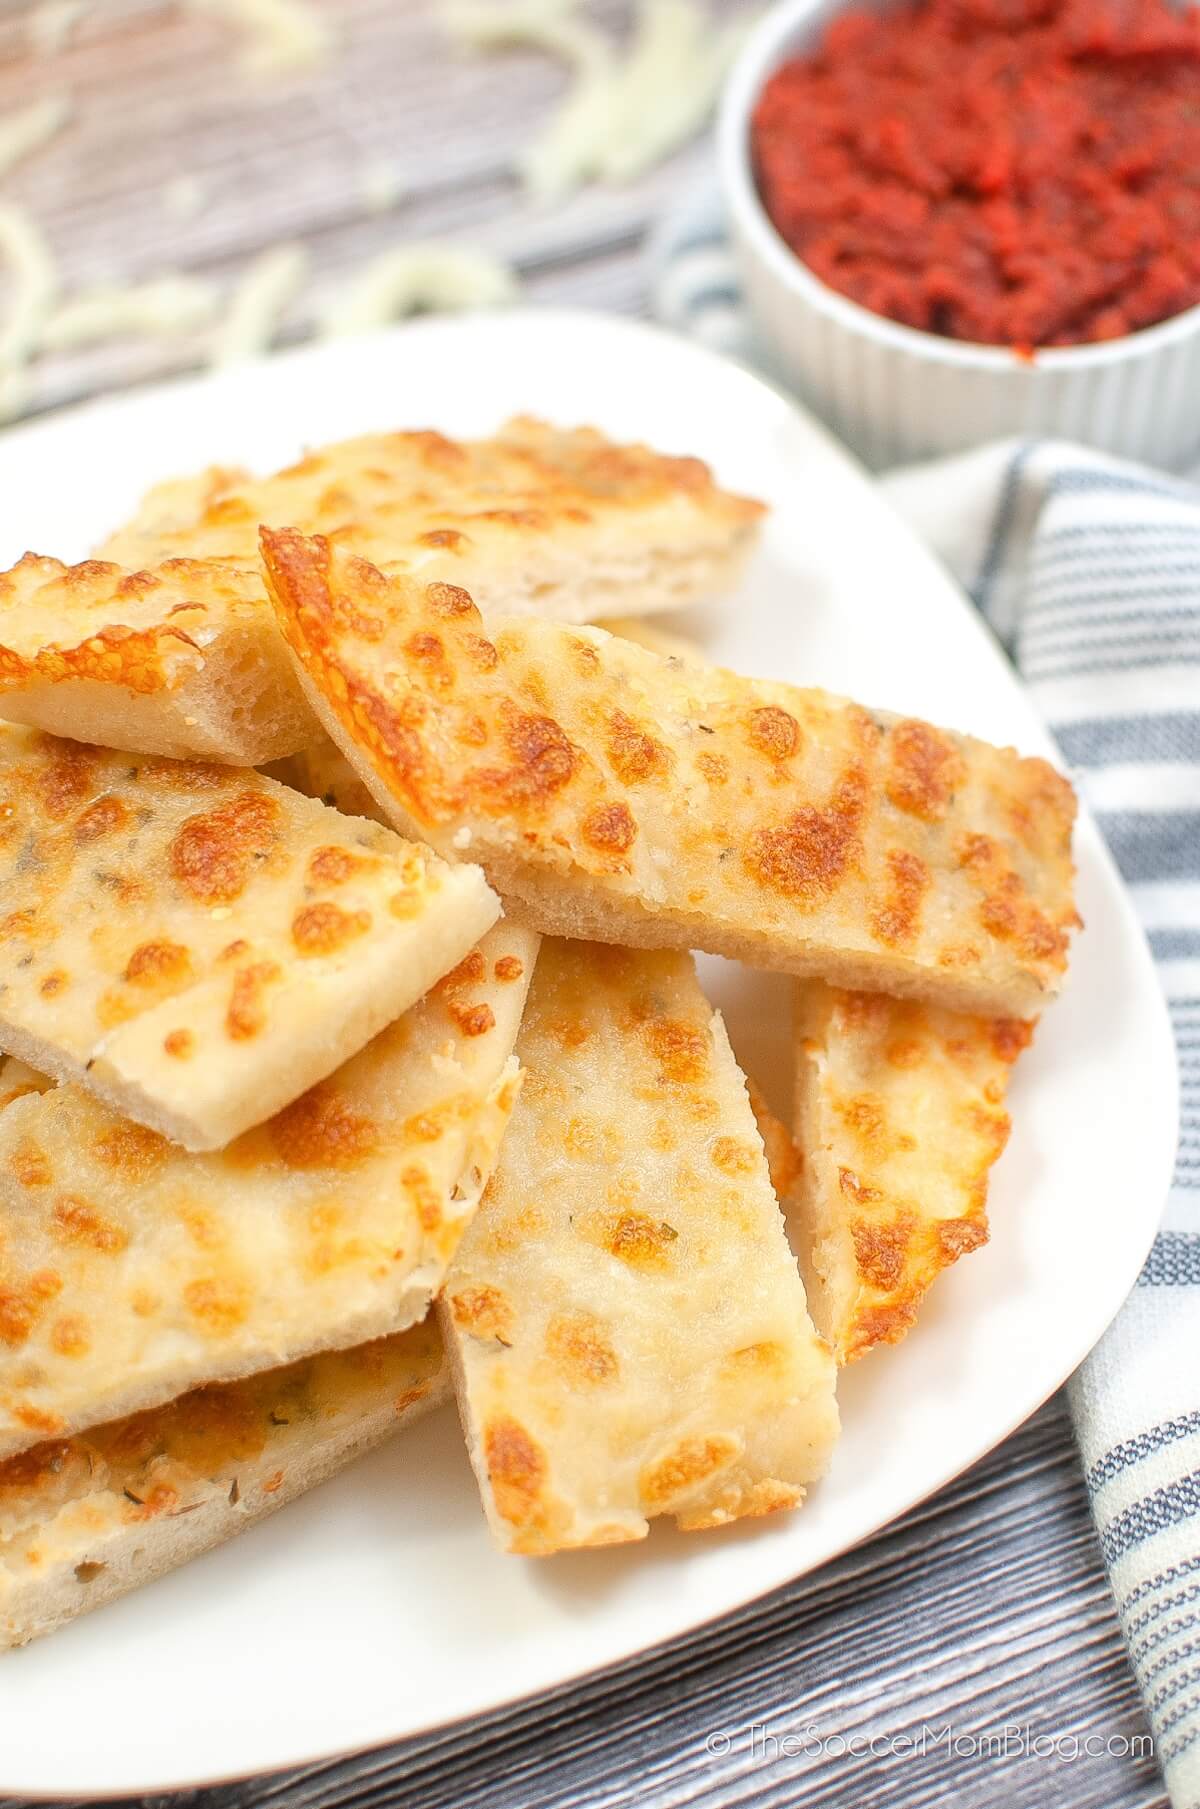
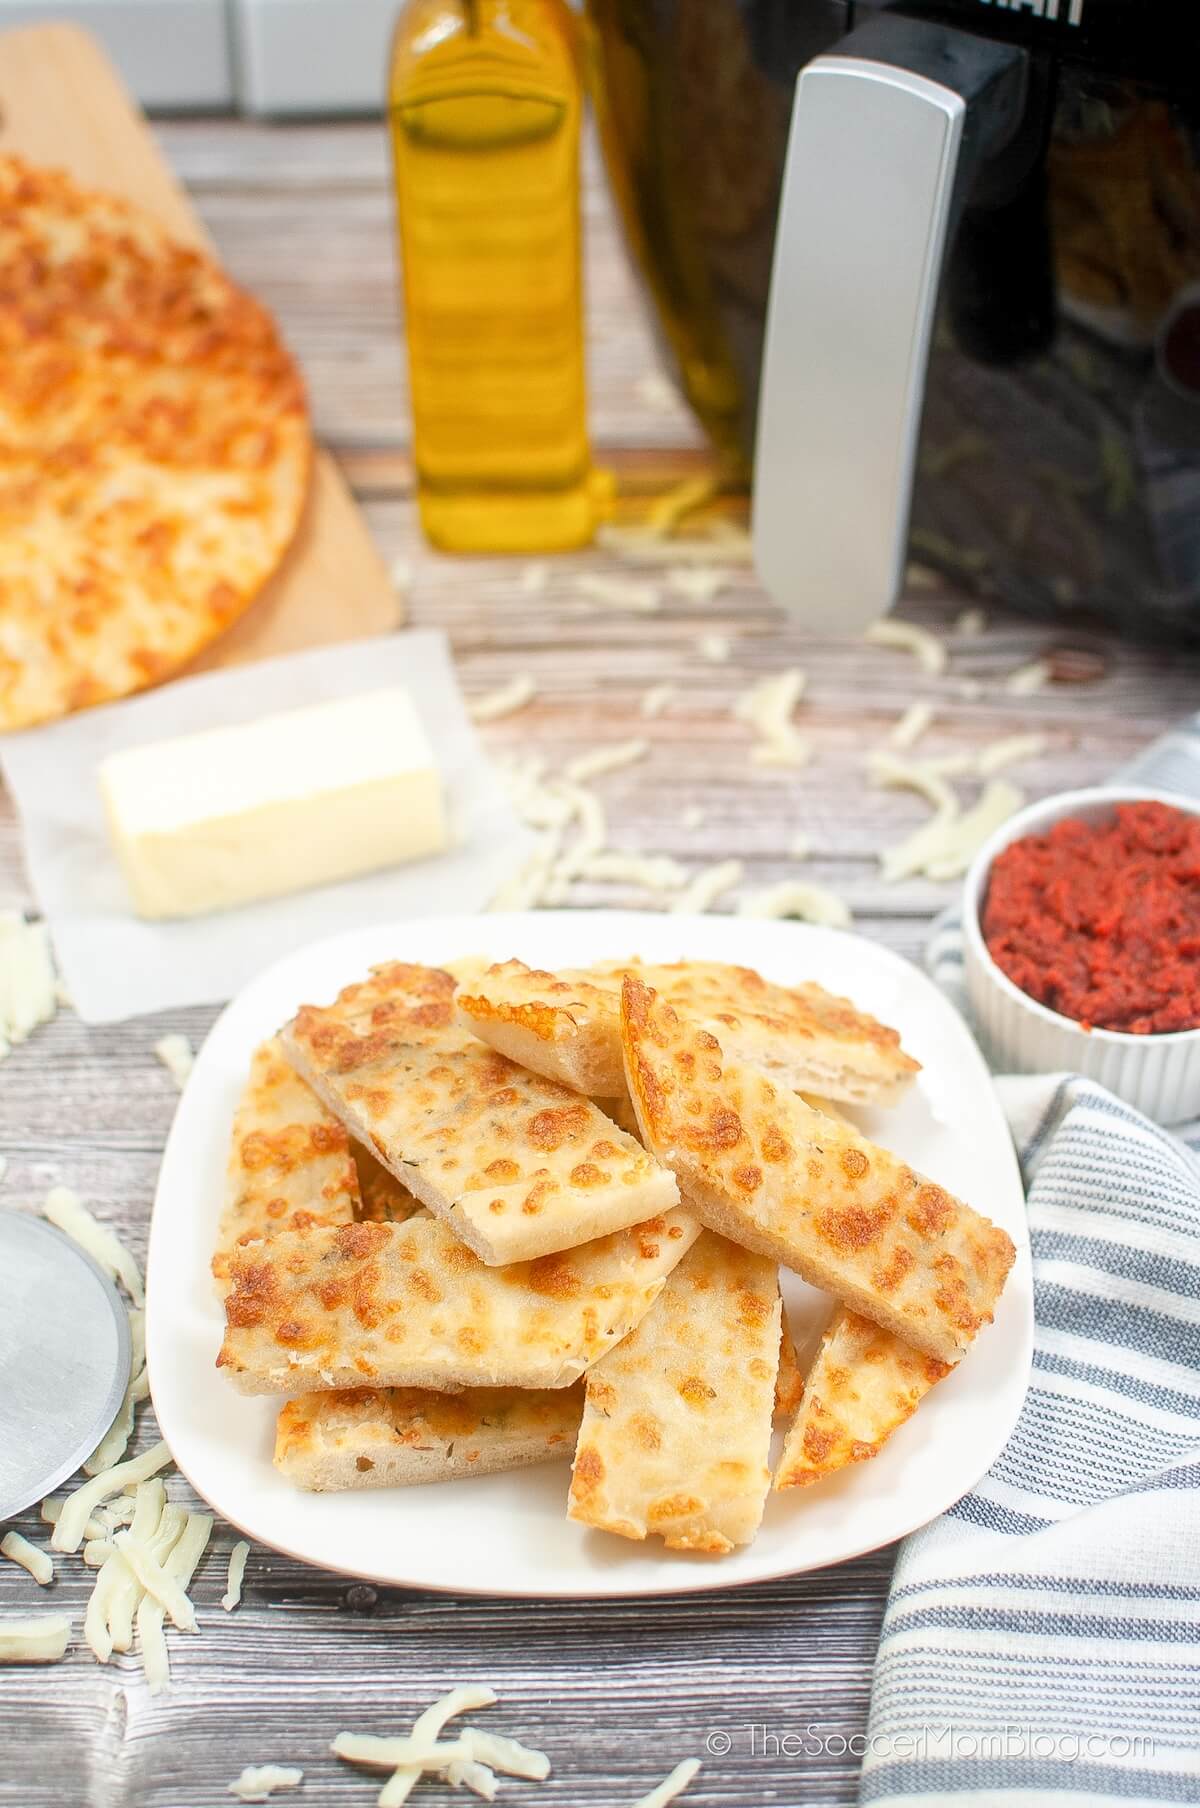
Air Fryer Cheesy Breadsticks
You know those cheese sticks you get from the pizza place? That same soft and chewy dough they use to make pizzas, but topping with cheese and cut into strips that are perfect for dipping in tangy marinara sauce? Yes, those cheese sticks.
Turns out, you can make those same delicious, restaurant-style cheese breadsticks at home in your air fryer! No need to heat up the big oven!
This soft and cheesy bread makes the perfect accompaniment for spaghetti night (try our Pizza Pasta Bake or our TikTok Feta Pasta!) It’s also a fabulous appetizer, served with your favorite dipping sauces. You can even turn it into cheesy garlic bread and dip it in soup! I mean, I don’t think I have to explain how to use cheese bread…you get it!
Trust me, this will quickly become one of your favorite side dishes! It’s surprisingly easy, even though it’s made with yeast dough, and wow is it tasty!
Ingredients
I’ve included shop-able ad links for your convenience in re-creating this recipe; disclosure policy available here.
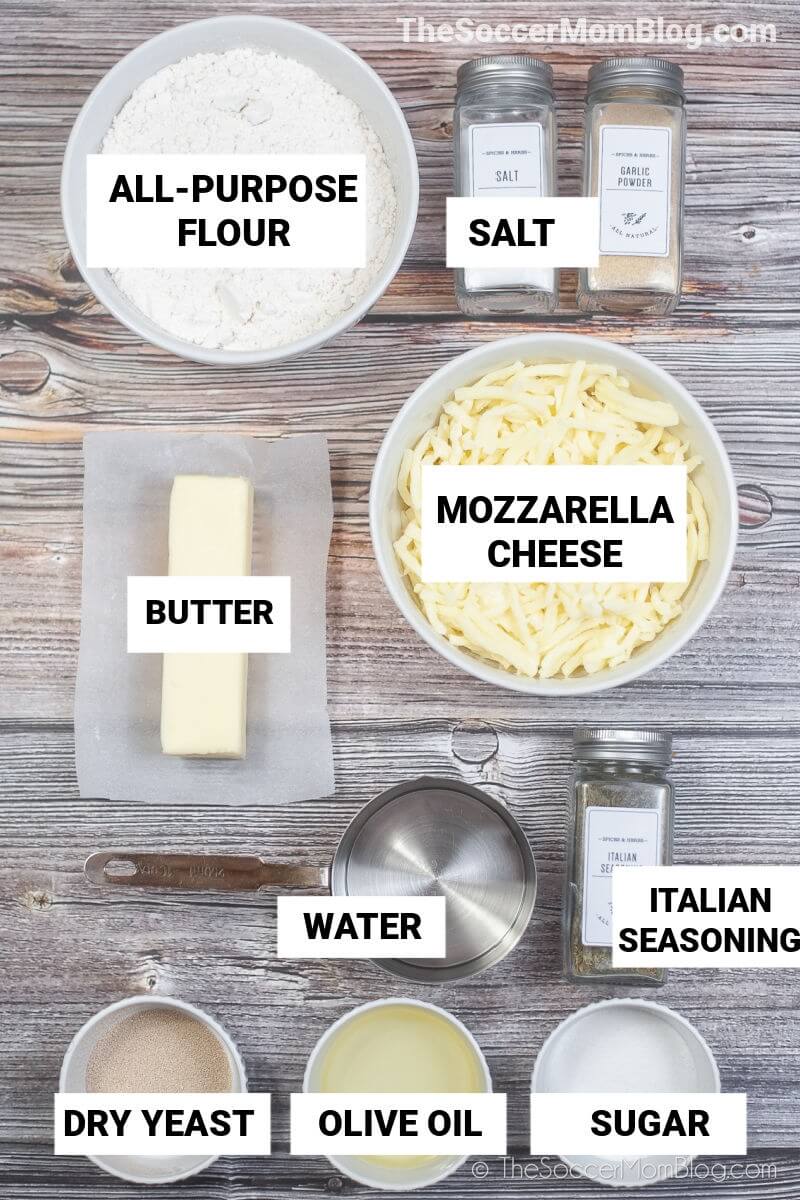
For the Dough
- 3/4 cups warm water (110°F)
- 1 teaspoon sugar
- 1 1/8 teaspoon dry yeast
- 1 3/4 cups all-purpose flour (plus more for dusting)
- 1 tablespoon olive oil
- 1 teaspoon salt
Toppings
- 1 1/2 cups shredded mozzarella cheese
- 1 tablespoon Italian seasoning
- 4 tablespoons butter (either salted or unsalted butter is fine)
Kitchen Tools Used
- 8 quart Air Fryer
- 8″ metal pie pan (or whatever size fits inside your air fryer)
- Rolling Pin
- Large Mixing Bowl
Instructions
Makes 2 batches of bread sticks.
This recipe cooks quickly, but you will need to plan ahead to allow the dough time to rise. You’ll want about 2 hours for this.
To Make the Dough
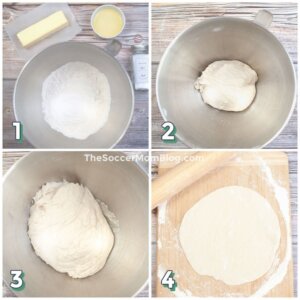
- Stir together warm water and yeast in a large bowl. Allow the yeast to proof for about five minutes.
- After the five minutes, mix in the sugar, flour, olive oil, and salt until fully incorporated.
- If using a stand mixer, knead with the dough hook attachment for about five minutes on medium speed. If using your hands, knead the dough on a floured surface for 5-10 minutes.
- Place the dough ball in a lightly oiled bowl. Cover with a clean towel for 2 hours, or until the dough has doubled in size.

To Cook the Bread
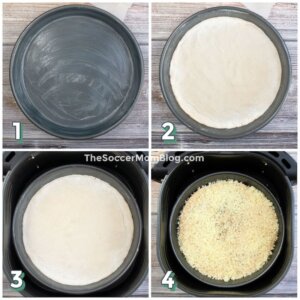
- When dough is fully risen, divide it into two equal portions. Roll each dough ball until it is a flat disc, about 8 inches in diameter.
- Grease your pie pan with about a Tablespoon of butter. Preheat your air fryer to 380°F.
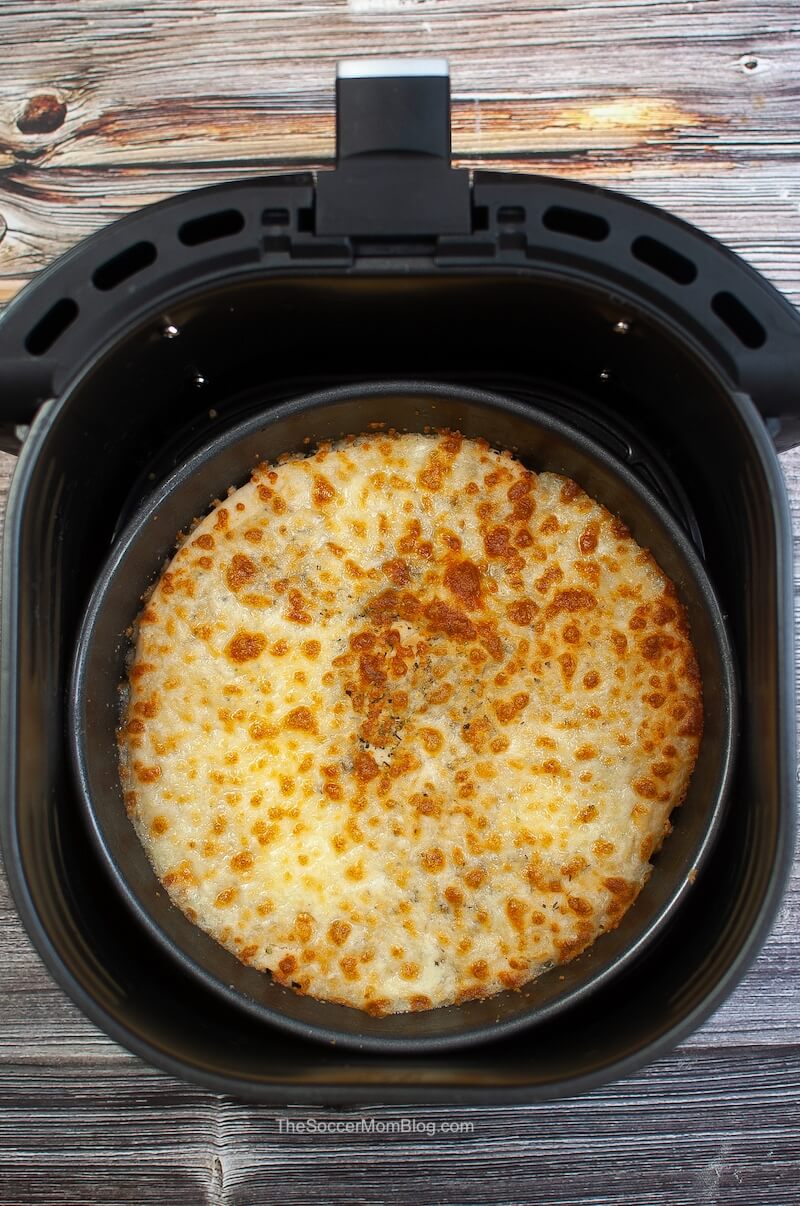
- Place one of the pizza dough discs to the pan and press down to even out and fill the pan. Cook for 5 minutes.
- Remove the dough from the pan, flip, and top with 1 tablespoon butter, 3/4 cup cheese, and 1/2 tablespoon Italian seasoning. An easy way to do this is to soften the butter and mix in the cheese and seasoning, then spread the butter mixture on top of the bread. Return the dough to the pan and cook for another 2-5 minutes.

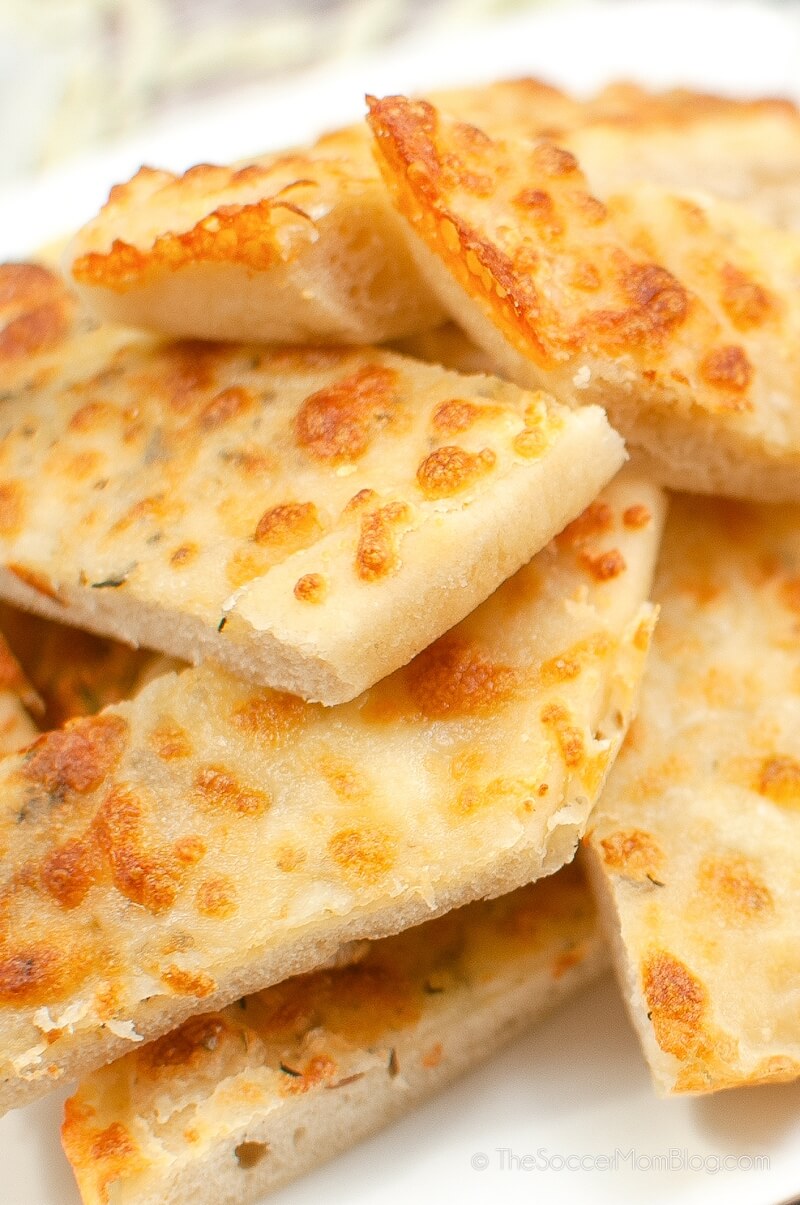
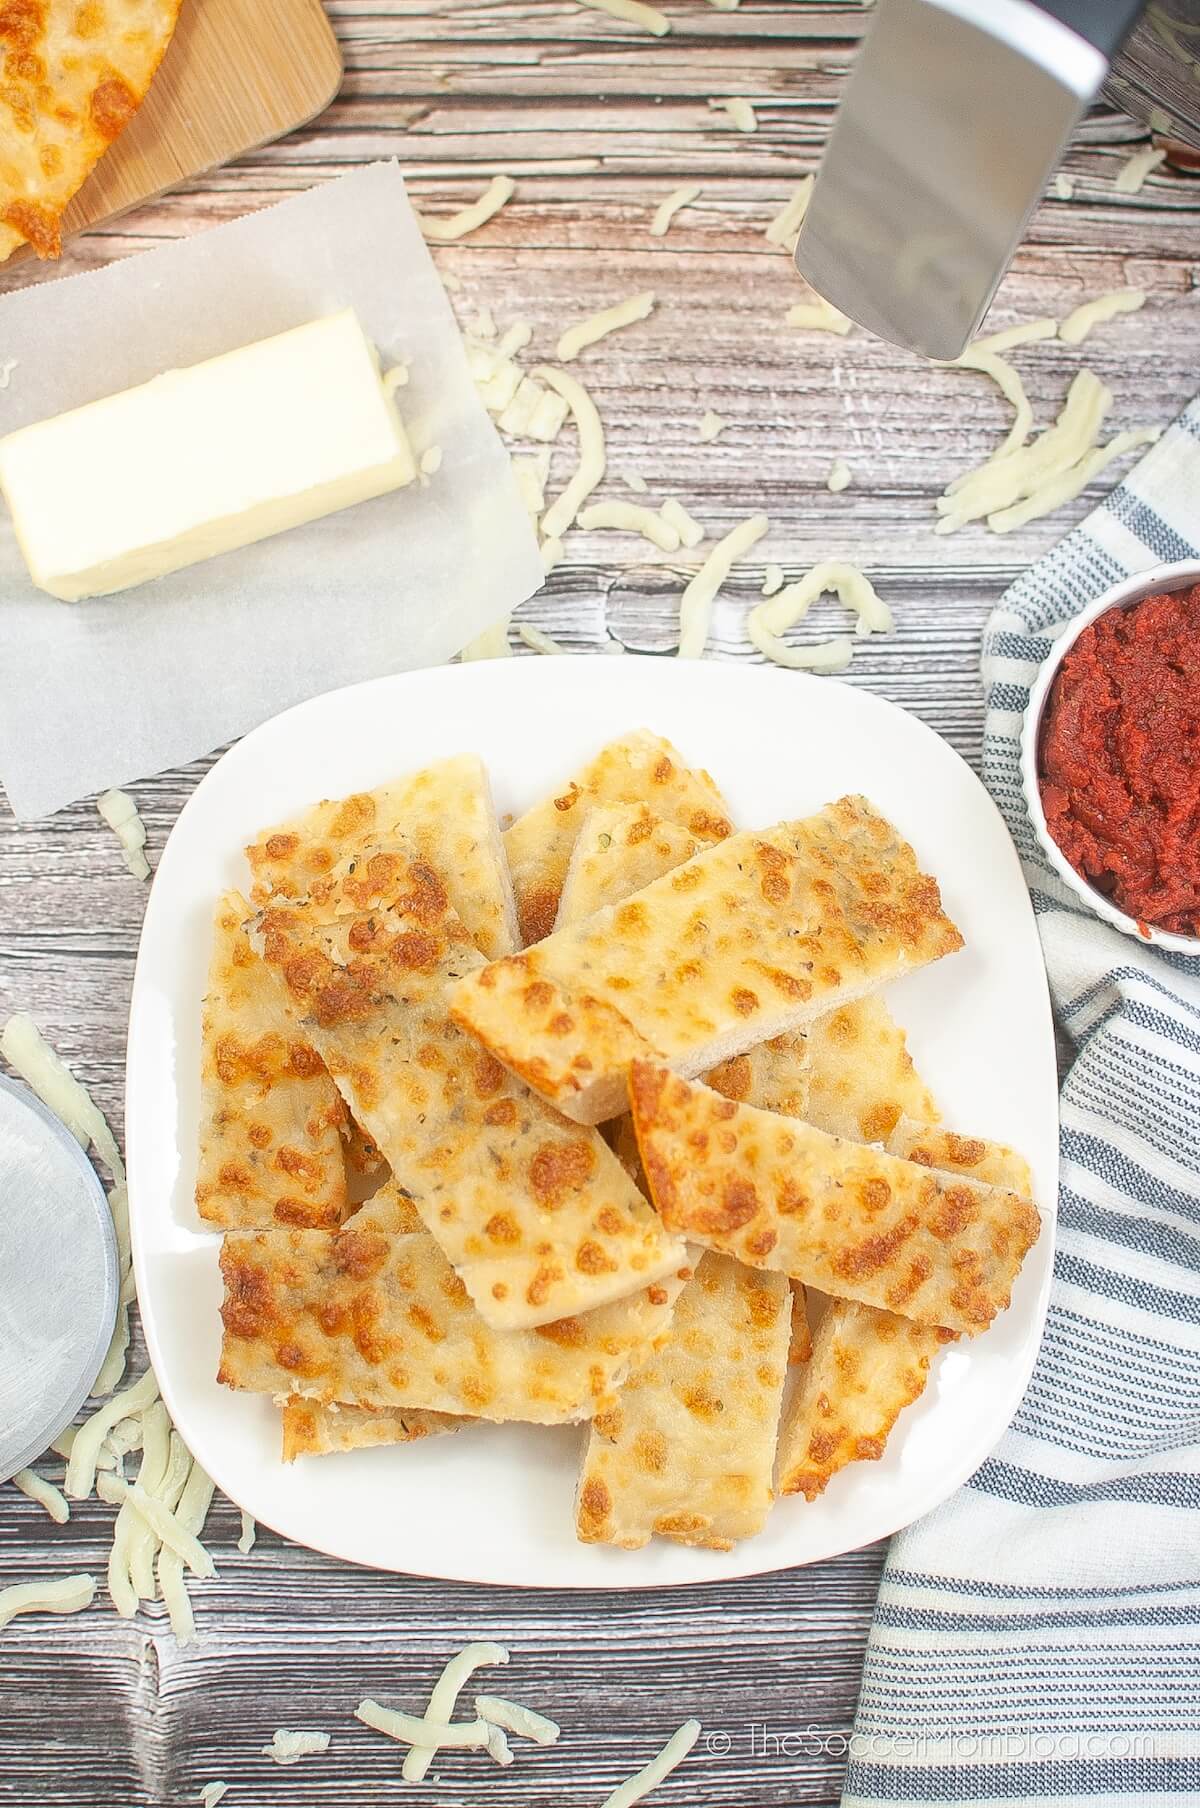
Remove bread from the air fryer and cut into slices. A pizza cutter works perfectly here!
We also love to top with grated parmesan cheese (for extra cheesy bread) and/or fresh parsley or dried parsley, depending on what is on hand.
Repeat the cooking steps with the second batch of dough.
Frequently Asked Questions
Can You Add More Toppings?
If you’re seeing this recipe and thinking…pizza…
You CAN make pizza with this dough as the base!
After cooking the dough for the first 5 minutes, flip, add your favorite toppings, and cook for 5 more minutes. Simple as that!
What If I Have a Different Size Air Fryer?
The air fryer pictured here is an 8-quart size. But you can adjust this recipe to fit whatever size air fryer you have.
Use our photos as a guide when portioning out the dough — you’ll want it to be about the same thickness.
The air fry time may be different as well, if you are cooking a different sized portion of dough. Keep an eye on it as it cooks — you’ll know it’s done when the edges are golden brown and the dough is cooked through in the middle.
How Do You Make Garlic Bread?
Making this cheese bread into garlic bread is a snap!
Simply add a sprinkle of garlic powder, or you can use fresh garlic cloves and mince them. I love fresh garlic because it is so flavorful!
How Do You Store Cheesy Bread?
Normally, you would store homemade bread at room temperature. However, the addition of cheese means these cheese bread sticks need to be kept refrigerated.
I recommend placing the bread slices in an airtight container, or a zip-top bag (squeezing as much air out as possible), before putting them in the fridge.
Cheesy bread will stay good for 2-3 days when kept refrigerated. You can actually reheat the bread in the air fryer — place the breadsticks in the air fryer basket and cook at 320°F for about 2 minutes.
Adding a drizzle of butter or olive oil can help rejuvenate day-old bread. If you have one, the toaster oven also works great for reheating!
More of Our Favorite Air Fryer Recipes
- Bacon Wrapped Pickles
- Air Fryer Fried Ice Cream
- Air Fryer Soft Pretzels
- Air Fried Lasagna Roll-Ups
- Air Fryer Double Chocolate Muffins
- Air Fried Strawberry Cheesecake Chimichangas
- Air Fryer Chicken Pot Pies
- Crispy Air Fryer Zucchini Fries
Air Fryer Cheese Bread Recipe (Printable Copy)
If you love this recipe too, please rate it!
Want to Save This Recipe?
Enter your email & I'll send it to your inbox. Plus, get great new recipes from me every week!
By submitting this form, you consent to receive emails from The Soccer Mom Blog
Air Fryer Cheese Bread
Equipment
- 1 Air Fryer
- 1 Large Mixing Bowl
Ingredients
For the Dough
- 3/4 cups warm water 110 degrees F
- 1 teaspoon sugar
- 1 1/8 teaspoon dry yeast
- 1 3/4 cups all-purpose flour plus more for dusting
- 1 Tablespoon olive oil
- 1 teaspoon salt
Toppings
- 1 1/2 cups mozzarella cheese shredded
- 1 Tablespoon Italian seasoning
- 4 Tablespoons butter
Instructions
To Make the Dough
- Stir together warm water and yeast in a large bowl. Allow the yeast to proof for about five minutes.
- After the five minutes, mix in the sugar, flour, olive oil, and salt until fully incorporated.
- If using a stand mixer, knead with the dough hook attachment for about five minutes on medium speed. If using your hands, knead the dough on a floured surface for 5-10 minutes.
- Place the dough ball in a lightly oiled bowl. Cover with a clean towel for 2 hours, or until the dough has doubled in size.

To Cook the Bread
- When dough is fully risen, divide it into two equal portions. Roll each dough ball until it is a flat disc, about 8 inches in diameter.
- Grease your pie pan with about a Tablespoon of butter. Preheat your air fryer to 380°F.
- Place one of the pizza dough discs to the pan and press down to even out and fill the pan. Cook for 5 minutes.
- Remove the dough from the pan, flip, and top with 1 tablespoon butter, 3/4 cup cheese, and 1/2 tablespoon Italian seasoning. Return the dough to the pan and cook for another 5 minutes.
- Repeat cooking instructions for the second batch of dough. Slice and enjoy.
Notes
Nutrition
Pin this Air Fryer Garlic Bread recipe on Pinterest:
You might also like:

- Beach Day Rice Krispie Treats - June 23, 2026
- Pickled Jalapeños Recipe - June 15, 2026
- Homemade Nesquick Mix - June 11, 2026


I just want to start this off by saying thank you for being precise about homemade or scratch I’ve seen people call scratch putting butter and garlic on somebody else’s bread from the store but it looks like a good recipe I haven’t had a chance to try it I will try it because it is scratch made but it looks like it should work well for what I needed to do and thank you